This site is supported by our readers. We may earn a commission, at no cost to you, if you purchase through links.

Wool’s protein structure creates chemical bonds with dyes that hold fast through countless washes. You can transform a thrift store sweater, refresh a faded coat, or customize yarn for your next project using methods that range from professional acid dyes to pantry staples like food coloring.
The process requires attention to temperature and technique, but it’s more forgiving than most people expect.
Table Of Contents
- Key Takeaways
- Can You Dye Wool? Is It Easy?
- What’s The Best Dye and Dyeing Method for Wool?
- Can You Dye Wool Using Food Coloring?
- Can You Dye Wool Using Kool Aid?
- Tips for Dyeing Wool Sweaters and Coats at Home
- How to Dye Wool Without Shrinkage
- How to Dye Wool Fabric Using Acid Dyes (recommended Method)
- How to Dye Wool Using Box Dyes Like Rit, Dylon & IDye
- How to Dye Wool Naturally
- Will The Dye Be Permanent?
- Frequently Asked Questions (FAQs)
- Conclusion
Key Takeaways
- Wool’s protein structure forms strong chemical bonds with dyes, achieving up to 99% dye absorption when you control temperature and pH correctly—making it one of the easiest natural fibers to dye at home.
- Acid dyes deliver the most permanent results on wool with over 90% fade resistance after multiple washes, while alternatives like food coloring and Kool-Aid create vibrant but semi-permanent colors that fade 15-30% after just five washes.
- You can prevent felting and shrinkage by heating the dye bath gradually (no more than 10°C changes at a time), minimizing agitation, and letting the wool cool naturally in the bath—sudden temperature shifts cause up to 30% shrinkage.
- Natural dyes from plants like madder root and turmeric work on wool but require mordants like alum for decent color fastness, and they still fade faster than synthetic acid dyes under UV light and washing.
Can You Dye Wool? Is It Easy?
You can dye wool at home, and the dyeing wool process is more manageable than you might think. Wool’s protein structure contains about 17–18% amide, amino, and carboxyl groups, which create strong bonds with dyes. This means wool accepts color exceptionally well—acid dyes can achieve roughly 99% dye exhaustion when you follow the right steps.
The dyeing wool difficulty depends on what you’re working with. If you’re dyeing wool for beginners, simple items like skeins or fabric squares are easier to handle than finished garments. Wool dyeing factors include keeping temperatures steady, avoiding rough agitation, and using the right dye-to-fiber ratio. Sudden heat changes or too much stirring can cause felting and shrinkage up to 30%. One of the most reliable methods involves using permanent acid dyes.
Dyeing wool at home requires attention to detail, but it’s not complicated. Once you understand how dyeing wool methods work—especially controlling temperature and pH—you’ll find the dyeing wool ease increases quickly. With practice, you can create vibrant, permanent colors that last for years.
What’s The Best Dye and Dyeing Method for Wool?
Now that you know wool takes dye easily, choosing the best dye for wool makes all the difference in your results. Acid dyes for wool deliver the strongest bond and most reliable color. They interact with wool’s protein structure to create ionic bonds that won’t wash out—properly controlled acid dye baths can exceed 95% dye uptake at simmering temperatures. That’s why acid dyes remain the best option for dyeing wool methods in both home and industrial settings.
Your dyeing method options include:
- Immersion dyeing – submerge wool in a dye bath for even, solid color
- Kettle dyeing (low immersion) – use less water for variegated, artistic effects
- Hand painting – apply dye directly for maximum creative control
- Natural dyes – eco-friendly plant-based colors with softer hues
Fiber-reactive dyes don’t work well on wool because they’re designed for cellulose fibers, not protein. Box dyes like Rit offer convenience but show lower dye permanence—only about 60% fade resistance after ten washes compared to over 90% for acid dyes. For example, adding vinegar can improve color results when using Rit dye on wool.
Industrial trends now favor metal-free acid dyes to reduce environmental impact while maintaining excellent color fastness.
Can You Dye Wool Using Food Coloring?
Yes, you can dye wool using food coloring—it works because food dyes function as mild acid dyes that bond with wool’s protein structure. When you add vinegar or citric acid to the dye bath, you create the pH 3–5 range that lets the dye molecules attach to wool fibers through ionic bonding. Heat between 60–80 °C helps drive dye absorption into the fiber.
The process is simple and safe for dyeing at home. You don’t need special equipment or ventilation. Cost effectiveness makes food coloring attractive for small projects and experimentation.
However, color fastness falls short of professional acid dyes. You’ll see about 15–30% dye loss after five warm washes. Light exposure fades colors even faster—reds and yellows lose up to 60% brightness within a month outdoors. Adding a mordant like alum improves color retention by roughly 20%.
Food coloring creates semi-permanent color rather than permanent bonds. It suits decorative items you won’t wash frequently, and it’s perfect for learning dyeing wool techniques while avoiding wool shrinkage through careful temperature control. Fiber safety remains excellent throughout the process.
Can You Dye Wool Using Kool Aid?
Kool-Aid works well for dyeing wool at home because it contains both food dyes and citric acid—the mordant that fixes color to protein fibers. This Kool-Aid chemistry creates the acidic environment wool needs, eliminating separate mordanting steps you’d use with other natural dyes.
Fiber compatibility matters here. Kool-Aid only dyes protein-based materials like wool, alpaca, mohair, and silk. It won’t work on cotton or most synthetics because they lack the amino groups that bond with acid dyes. Wool blends with plant fibers dye unevenly since only the protein component accepts color.
For best concentrations, use one to two packets per 25 grams of yarn for deep shades. You can simmer wool in the dye bath for 30–45 minutes until the water clears, or microwave it in a sealed container for faster results.
Safety concerns are minimal—Kool-Aid contains no heavy metals or toxic compounds. You can dispose of leftover dye baths down your drain safely.
Dye durability is moderate. Colors hold through cool-water washing but fade 25% after twenty washes. UV light causes noticeable fading within two months outdoors.
Tips for Dyeing Wool Sweaters and Coats at Home
With existing wool sweaters and coats, the dyeing journey demands careful attention to detail—especially around temperature management and garment structure. You’re not just adding color; you’re protecting fibers that can shrink or felt if handled incorrectly. Understanding these risks transforms dyeing wool sweaters and coats from guesswork into a reliable craft.
Essential tips for dyeing wool sweaters and coats:
- Coat Structure: Remove linings, shoulder pads, and interfacing before dyeing—internal layers resist dye penetration and distort color uniformity
- Temperature transitions: Change water temperature by no more than 10 °C between stages to prevent sweater felting and fiber shock
- Pre-soak thoroughly: Saturate dry garments in lukewarm water for 15 minutes so dye penetration occurs evenly throughout
- Minimal agitation: Gently lift and lower fabric rather than stirring—excess movement increases felting risk by 25%
- Maintain 80–95 °C: Hold this range for 45 minutes to achieve over 95% dye absorption without damaging protein fibers
- Cool gradually: Let garments rest in the dye bath as it cools completely—rapid cooling causes wool shrinkage
- Color Uniformity: Turn garments inside-out halfway through dyeing to eliminate streaking on thick seams
- Mesh protection: Use laundry bags for delicate knits to reduce handling damage during rinsing
- Drying Methods: Lay flat on towels away from sunlight—hanging wet wool stretches fibers and fades color intensity by 10–12%
How to Dye Wool Without Shrinkage
Shrinkage happens when temperature shock, agitation, or pH imbalance disrupts wool’s protein structure—but you can prevent it with precise control at every stage. Dyeing wool without shrinking demands attention to fiber behavior, not luck.
Three critical principles protect your wool:
- Temperature control: Raise heat gradually from room temperature to 80–90 °C, never exceeding 10 °C changes between stages—sudden shifts above 60 °C trigger up to 12% shrinkage through fiber compaction.
- Agitation reduction: Stir gently below 10 rpm and avoid boiling or vigorous movement, which causes scales to interlock and felt irreversibly.
- Cooling process: Let dyed wool rest in the bath as it cools naturally to room temperature—shock rinsing in cold water adds 3–5% dimensional loss.
Fiber preparation matters too. Pre-soak dry wool for 30–60 minutes in lukewarm water to equalize moisture before dyeing. Maintain pH balance between 4.5–6.0 using vinegar or citric acid—this stabilizes cuticles and prevents the 6–9% shrinkage seen in alkaline conditions.
Temperature changes, not dye chemistry, cause most wool shrinkage during home dyeing.
Temperature shifts, not dye type, cause most wool shrinkage when dyeing at home
How to Dye Wool Fabric Using Acid Dyes (recommended Method)
Acid dyes give you the most reliable, vibrant results when dyeing wool. The process requires a few basic supplies and careful attention to temperature, but the steps are straightforward.
Here’s what you need to gather and how to prepare your wool for dyeing.
You Will Need
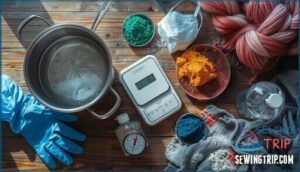
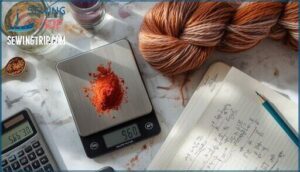
Before you start dyeing wool, gather your essential dyeing supplies and safety gear. You’ll need a large stainless steel or enamel pot designated for non-food use, nitrile gloves, and a dust mask for handling dye powders. Digital scales accurate to 0.1 grams help measure dye-to-fiber ratios precisely. A dedicated stirring spoon and thermometer complete your dyeing equipment setup.
| Category | Item | Purpose |
|---|---|---|
| Dyeing Equipment | Stainless steel pot (large) | Heat dye bath without contamination |
| Safety Gear | Nitrile gloves & dust mask | Protect from dye particles and acids |
| Measuring Tools | Digital scale (±0.1g) | Calculate accurate dye amounts |
| Dye Powders | Acid dye (Jacquard, Procion) | Create vibrant, permanent colors |
| Dye Activators | White vinegar or citric acid | Lower pH for dye bonding |
Step 1: Pre-wash & Dry Wool Item
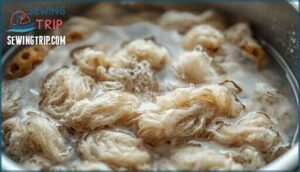
Prewashing and soaking wool strips away lanolin, oils, and dirt that block dye absorption. Without proper scouring, your fiber might show uneven color or reduced saturation—up to 30% less vibrant results.
Preparing wool for dyeing this way improves color fastness by 15–20% compared to unwashed material.
- Use warm water between 50°C and 60°C with a textile detergent like Synthrapol at 5.5% of fiber weight
- Soak for two hours minimum to dissolve oils without causing fiber damage
- Avoid sudden temperature shifts greater than 10°C to prevent fabric shrinkage and felting
- Handle wetness carefully—lift wet wool with both hands to distribute weight and minimize agitation
- Air-dry on a towel or mesh surface; temperature control during drying methods reduces shrinkage by 12%
Step 2: Record The Weight of The Dry Item
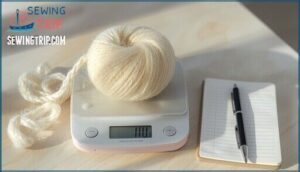
Weight accuracy isn’t optional—it’s the foundation of reproducible dyeing results. Before you soak your clean, dry wool, weigh it on a digital scale calibrated to 0.1 grams.
This measurement determines your dye ratios using the Weight of Goods method, where your fiber weight becomes 100%. For example, 150 grams of wool dyed at 2% needs exactly 3 grams of dye powder.
Recording this number prevents waste reduction issues and ensures consistent color depth every time you return to the dyeing process.
Step 3: Pre-soak Your Item
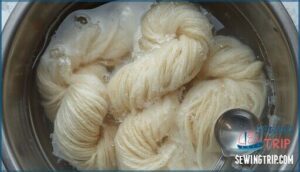
Pre-soaking saturated wool fibers is like opening a door for dye—it removes oils and air pockets that block even color uptake. Submerge your weighed wool yarn or wool fabric in lukewarm water (35–40 °C) for at least 30 minutes; dense weaving or tight-twist yarn may need up to two hours for complete fiber saturation.
Add one tablespoon of white vinegar per 450 grams to prep for acid dyes while maintaining ideal pH for felting prevention. Avoid agitation—gentle handling keeps your wool shrinking and felting at bay throughout predyeing wool preparation.
Step 4: Calculate How Much Dye You Need
Your dye amount depends on fiber weight and the depth of shade you want. Depth of Shade (DOS) measures dye concentration as a percentage—1% DOS means 1 gram of dye powder per 100 grams of dry wool. Most dye recipes range from 0.5% for pale pastels to 4% for rich, dark tones.
Calculate your dye mixture using this dye formula:
- Fiber Weight × DOS = Dye Powder Needed (e.g., 250 g wool × 2% = 5 g dye)
- Solution Volume: Use 1:40 water ratio (40 mL per gram of fiber)
- Additive Adjustment: Add citric acid at 15% of fiber weight to maintain pH 4–5 for even uptake
Stock solutions at 1% concentration simplify precise adjustments when you’re mixing multiple colors.
How to Dye Wool Using Box Dyes Like Rit, Dylon & IDye
Box dyes like Rit, Dylon, and iDye work well for wool, though they may not produce colors as vibrant or permanent as acid dyes. They’re easier to find in stores and don’t require specialized equipment.
Here’s how to use them step by step.
Step 1: Pre-wash & Dry Your Wool Item
Before you start, wash your wool item to strip away lanolin and oils that block fiber saturation. Use a pH-balanced, wool-safe detergent in lukewarm water to protect the fibers. Handle the wool gently—no twisting or rough agitation—to avoid felting.
After washing, press out excess water with a towel and air-dry completely. This prep step ensures even dye absorption across every strand.
Step 2: Calculate How Much Dye You Need
Once your wool is clean and dry, measure the exact amount of box dye to use. Most box dyes like Rit, Dylon, and iDye package instructions recommend using one full dye powder packet per pound of fabric. For lighter shades, you can cut that amount in half. For deeper, richer color intensity, use the full packet or even double it.
Here’s what affects your dye recipe:
- Your wool’s dry weight — weigh it on a kitchen scale before you start the dye mixture
- Desired shade intensity levels — pale tones need less dye powder than saturated hues
- Dye package instructions — always check the manufacturer’s recommended dye weight formula
- Water volume — box dyes generally call for enough water to cover the wool completely
- Vinegar or salt addition — these help the dye bond to protein fibers like wool
Box dyes don’t use the formal DOS explanation or WOF importance calculations that professional dyers rely on, but the principle is the same: match dye amount to fiber weight for predictable results.
Step 3: Add Your Item & Water to The Dye Pot
With your dye amount calculated, fill your dye pot with enough water to submerge the wool completely—about two-thirds full. Heat the water to 160–180°F before gently lowering in your pre-soaked wool. Keep the fabric below the waterline without crowding the pot.
Press the wool down gently to avoid agitation that causes felting. The dyeing process depends on full wool submersion for dye evenness across every fiber.
| Pot Size | Fabric Amount | Water Volume | Dyeing Temperature | Purpose |
|---|---|---|---|---|
| 20-quart pot | 1–1.5 yards | Fill ⅔ capacity | 160–180°F | Standard immersion dyeing for even color |
| 12-quart pot | ½–1 yard | Fill ⅔ capacity | 160–180°F | Smaller projects like scarves or swatches |
| 30-quart pot | 2–3 yards | Fill ⅔ capacity | 160–180°F | Larger items like blankets or multiple pieces |
| 8-quart pot | Small skeins | Fill ⅔ capacity | 160–180°F | Yarn or small wool samples |
| 16-quart pot | 1 yard | Fill ⅔ capacity | 160–180°F | Medium sweaters or single garments |
Step 4: Add The Dye Activator (salt or Vinegar) and Dye Packet
Once your wool sits in hot water, add the activator chemical mechanisms that let dye bind permanently. For different box dyes, the best activator ratios vary:
- Rit dye: Pour 200 mL white vinegar per packet to create an acidic solution at pH 3–4, which promotes pH dye fixation by bonding dye molecules to wool’s protein structure.
- Dylon: Add 10 tablespoons salt per packet to strengthen dye exhaustion and color depth.
- iDye: Follow packet instructions for the specific dye activator included.
Stir the vinegar or salt into the hot water before adding your dye packet. This order ensures activator safety and quality considerations—uniform ionic conditions prevent streaking and felting.
Step 5: Stir Frequently Until The Dye is Absorbed
Once your dye bath temperature reaches 160–180°F, begin stirring gently every 5 minutes. This agitation benefits dye absorption by reducing surface boundary layers, ensuring even color uniformity across all fibers.
Kinetic models show stirred wool reaches equilibrium 10–15 minutes faster than static baths. Maintain a slow stirring rate—around 60 rpm—to prevent felting while the dyeing process temperature control promotes best dye-to-protein bonding throughout the dye bath.
How to Dye Wool Naturally
Natural dyeing methods transform wool using plant-based dyes extracted from roots, bark, leaves, and flowers. Madder root, turmeric, and clove produce vibrant colors with dye exhaustion rates reaching 78–94% on wool. Before dyeing wool with fruits and vegetables, you’ll need eco mordants like alum to boost color fastness and help the dye bond with fibers.
Here’s what works well for dyeing wool naturally:
- Madder and gardenia create extended color ranges with strength values of 15–18
- Turmeric and clove produce yellows and browns under gentle heat
- Avocado pits dye without mordants since they contain natural tannins
Natural dyes offer waste reduction and eliminate toxic chemicals, cutting water demand by 30–50% through dye bath recycling. Microwave-assisted dye extraction reduces energy use by 40–60% compared to traditional boiling methods.
Will The Dye Be Permanent?
You can achieve permanent dye for wool if you match the right dye type to wool’s protein structure. Acid dyes bond ionically with amino groups in wool fibers, creating colorfast results that score 6–8 on the Blue Wool Scale for dye lightfastness. Reactive dyes form covalent bonds under controlled pH, delivering outstanding wash resistance—grades 4–5 on the ISO Gray Scale with minimal fading after laundering.
Natural permanence falls short. Turmeric and plant-based dyes rate 2–4 for lightfastness and retain only 70–80% color intensity after washing, compared to 95% for acid dyes. Chemical stability matters too. High humidity above 70% and air pollutants degrade dyes on wool by up to 25%. For lasting color when dyeing wool naturally, use mordants like alum and store finished pieces away from direct sunlight. Synthetic acid dyes retain over 85% color after 100 hours of UV exposure, making them your best bet for washfastness and long-term permanence when dyeing wool.
Frequently Asked Questions (FAQs)
Can wool be dyed?
Imagine dyeing a vintage cream sweater into deep navy—it’s entirely possible. Wool fabric accepts dye beautifully because its protein-based fiber composition creates natural binding sites for color molecules.
The keratin structure, rich in cystine and sulfur, attracts dyes through ionic bonding, achieving excellent dye penetration and color fastness when you use proper dye types.
How do I dye wool?
Dyeing wool fabric or yarn starts with pre-washing, weighing the dry fiber, and pre-soaking in an acid-water solution.
The dye bath pH should remain slightly acidic for proper dye penetration and colorfastness. Heat the dye bath gradually, maintain temperature for even dyeing, and rinse thoroughly afterward.
Can you use natural dye on wool?
Wool drinks up plant-based color like a thirsty sponge, especially when mordants like alum, iron, or tannin help lock in the hue.
Natural dye sources such as madder, indigo, and turmeric create vibrant reds, blues, and yellows with excellent color fastness and eco-friendliness.
What precautions should be taken when handling wool during the dyeing process?
To protect wool fibers during dyeing, control temperature carefully. Heat gradually from room temperature to around 85°C, avoiding sudden shifts that trigger felting.
Minimize agitation and maintain pH between 4- Gentle handling prevents the irreversible shrinkage and matting that ruins your project.
Are there any particular dyes or methods that are not suitable for dyeing wool?
Certain dyes and dyeing methods for wool can lead to uneven dyeing, poor color fastness, and dye bleeding. Direct dyes and some natural options like henna, indigo, or woad often fade or streak without proper mordant techniques—a process that risks fiber damage if done incorrectly.
Stick with acid dyes for reliable results when dyeing wool.
What types of wool can be dyed at home?
You can dye virtually any wool at home—Merino wool, Shetland wool, Corriedale wool, alpaca fibers, mohair fibers, and even Superwash wool.
Whether you’re working with wool fabric or wool yarn, the key is matching your dye method to the fiber’s protein structure.
Can you dye wool without using heat?
Yes, you can dye wool without heat using cold dyeing methods with natural dyes, fruits, vegetables, or KoolAid. However, color fading risks are much higher. Cold dyeing results show poor dye fastness issues—colors wash out faster and fade under light.
Mordant alternatives help but don’t match heat fixation for durability, though eco-friendly options appeal to sustainable crafters.
How do you dispose of leftover dye bath safely?
Dilute small amounts with water before pouring down the drain. For natural dyes, you can safely dispose of rinse water outdoors on soil.
Synthetic dyes require neutralization with baking soda, then disposal using absorbents like kitty litter to minimize environmental impact.
Can you dye wool yarn differently than fabric?
You’ll notice absorption differences between yarn and fabric. Yarn soaks up dye faster and deeper due to its twisted structure, while fabric needs gentler handling and longer dyeing times to prevent uneven coloring or felting risks.
What colors are hardest to achieve on wool?
True black, vibrant neons, and consistent pastels are notoriously tricky on wool. Lightfastness issues plague many dye colors, causing fading and dye bleeding over time.
Fiber damage from aggressive dyeing effects can compromise your wool’s texture, affecting both color shades and the overall dyeing outcome.
Conclusion
That grandmother’s cardigan wasn’t beyond saving—and neither is yours. Once you understand wool’s natural affinity for dye, the process stops feeling like a gamble and starts feeling like a tool you can rely on. Whether you reach for acid dyes, food coloring, or natural plant extracts, the key is controlling heat and pH.
Can you dye wool successfully at home? Absolutely. With the right method and a little patience, you’ll turn worn-out pieces into something you’re proud to wear again.
- https://www.woolwise.com/wp-content/uploads/2017/05/01.1-Basic-Principles-of-Dying-Wool-Presentation.pdf
- https://onlinelibrary.wiley.com/doi/abs/10.1002/9781118625118.ch2
- https://en.wikipedia.org/wiki/Acid_dye
- https://journals.sagepub.com/doi/full/10.14504/ajr.7.6.3
- https://armsofandes.com/blogs/news/wool-sustainable-livestock-based-textiles-for-a-greener-future


