This site is supported by our readers. We may earn a commission, at no cost to you, if you purchase through links.
 You can transform your wardrobe with simple clothing alteration project ideas that breathe new life into old garments. Start with basic hemming using fabric glue or iron-on tape for quick fixes. Take in loose clothing by pinning new seam lines and using zigzag stitches for stretch materials. Replace worn buttons with standard needle-and-thread techniques, or try snap installation with pliers.
Adjust straps by folding excess material, and taper baggy pants by marking desired fit with chalk before stitching. These projects require just measuring tape, sharp scissors, and thread – but the real magic happens when you master advanced techniques. You can use these skills to create a variety of new looks, including altering garments to fit better, and the process can be very rewarding, especially when you see the results of using simple clothing alteration project ideas.
Table Of Contents
Key Takeaways
- You’ll save money and reduce waste by transforming your existing clothes instead of buying new – Americans throw away 81 pounds of clothing annually when most garments just need simple fixes.
- You can start with basic alterations using supplies you already have at home, like fabric glue, iron-on tape, and basic sewing tools – no expensive equipment or years of experience required.
- You’ll master essential techniques like hemming, taking in loose seams, replacing buttons, and adjusting straps that work across different fabric types and garment styles.
- You can turn damaged or outdated pieces into unique statement items through creative upcycling, like adding patches to denim jackets or transforming stained clothes into galaxy designs.
Easy DIY Clothing Alteration Ideas
You don’t need expensive tools or years of experience to give your wardrobe a fresh update.
These simple alteration techniques work with basic supplies you probably already have at home, turning ill-fitting pieces into perfectly customized favorites.
Hemming and Repairing Hems
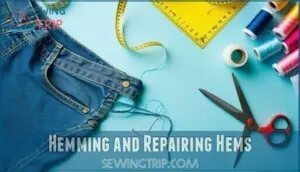
Hemming repairs breathe new life into your favorite pieces. Use fabric glue for quick fixes on delicate materials, or try iron-on tape for sturdy, wash-resistant results.
Master basic hemming tools like measuring tape and sharp scissors for professional-looking seams.
Hand-sewing techniques work perfectly for hemmed pants and skirts when your machine isn’t available. For a strong bond, consider using hemming tape products to reinforce your seams.
Pinching in Loose Clothing
Baggy clothes don’t have to stay shapeless. Tightening techniques and garment fitting through seam adjustment transforms oversized pieces into customized looks. Strategic DIY alterations using proper stitch patterns help you take control of clothing fit.
- Pin and mark new seam lines before cutting excess fabric
- Use zigzag stitches for stretch materials to prevent puckering
- Take in side seams gradually for natural waist tighteners
- Double-stitch heavy fabrics like denim for durability
- Test alterations on similar fabric scraps first
These tailoring tips work best with careful fabric selection and sewing techniques.
Replacing Buttons and Fasteners
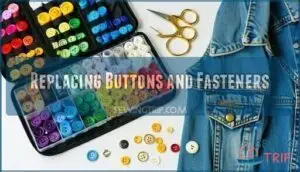
Breaking free from wardrobe malfunctions starts with mastering Button Replacement basics. You’ll conquer loose buttons, broken Zippers, and faulty snaps using simple Sewing Techniques. Keep spare Fastener Types like instabuttons and jeans button pins handy for quick fixes.
| Fastener Type | Best Tool |
|---|---|
| Standard Buttons | Needle & thread |
| Snap Installation | Pliers or setter |
| Rivet Repair | Hammer & anvil |
Gold pins work perfectly for denim repairs.
Adjusting Straps and Sleeves
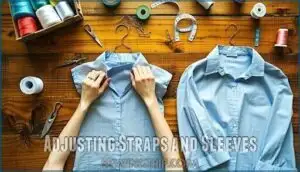
Strap shortening transforms oversized garments instantly. Fold excess material and sew new seams, or use safety pins for temporary fixes. Sleeve rolling creates effortless style—gather loose fabric at wrists or push sleeves up strategically.
For armhole adjustments, pinch excess material and stitch along natural seam lines. Cuff alterations work well with button-down shirts and blazers, creating perfect proportions through simple sewing techniques. Strap shortening can be applied to various garments, and when combined with other alterations, it enhances the overall fit and appearance.
Tapering and Reshaping Pants
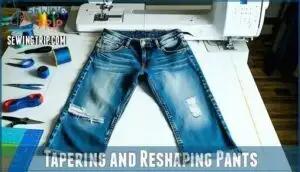
Pants that pool at your ankles or hang like parachutes can kill your whole look. Mark your desired fit with chalk, then stitch new side seams to create that sleek silhouette. For jean reshaping and denim rebuilding, use a double-stitch technique to handle the thick material.
Trouser tapering transforms baggy legs into customized perfection, while waistline adjustments using darts can rescue loose waists without professional alterations. Mastering sewing skills is essential for achieving a flawless fit in your clothing alteration projects.
Upcycling and Repurposing Old Clothes
Upcycling breathes new life into forgotten garments, turning wardrobe mistakes into statement pieces.
With basic supplies and creative vision, you can transform everything from stained shirts into galaxy masterpieces to old denim jackets into personalized works of art, which is essentially upcycling.
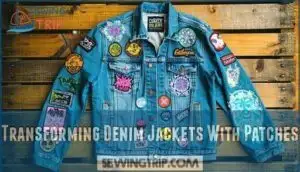
Transforming Denim Jackets With Patches
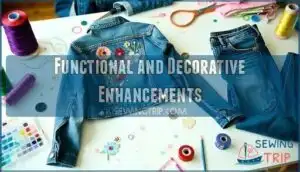
Your old denim jacket transforms into a statement piece with strategic patch placement. Denim patchwork breathes new life into faded fabric while custom embroidery adds personal flair. This jacket revamp combines fabric painting with upcycled materials for maximum impact.
- Iron-on patches require 15-20 seconds of heat for secure adhesion on clean denim surfaces
- Embellishment ideas range from vintage band logos to cultural motifs like mandalas and yin-yang symbols
- Patch pocket additions provide both style and function while supporting fabric repair needs
Using patch application techniques can help create a unique and personalized design for your denim jacket.
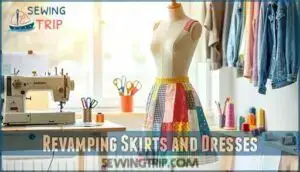
Revamping Skirts and Dresses
Your closet’s hidden gems await transformation through strategic skirt reconstruction and dress revival techniques. Convert maxi skirts into trendy two-piece outfits by adding elastic waistbands or fabric ties. Transform outdated dresses through hemline adjustments and strategic fabric upcycling.
Master garment reimagining by adding contemporary details like side slits or asymmetrical cuts. These wardrobe rejuvenating methods breathe new life into forgotten pieces through simple clothing alterations. Understanding sewing machine basics is essential for successful alterations, which can lead to trendy two-piece outfits and improve overall wardrobe rejuvenating methods.
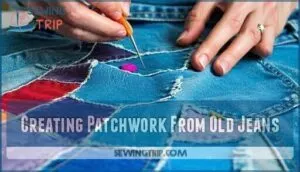
Creating Patchwork From Old Jeans
Breathing new life into worn denim through patchwork designs transforms discarded jeans into stunning textile reuse masterpieces. Cut squares, rectangles, or geometric shapes from various denim shades. Arrange your fabric mosaic before stitching patches together using zigzag seams.
This jean reconstruction technique creates unique upcycled denim jackets or patchwork jeans. Denim recycling through clothing alterations produces sustainable clothing that’s distinctly yours.
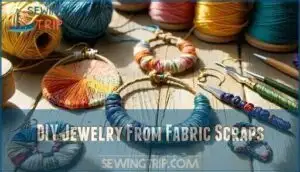
DIY Jewelry From Fabric Scraps
Fabric scraps become stunning Textile Earrings through simple Fiber Wrapping Techniques. Cut colorful remnants into strips for Fabric Bead Making or wrap wooden shapes for Embellished Pendants. Scrap Yarn Jewelry transforms leftover materials into trendy accessories.
This DIY approach reduces textile waste while creating unique pieces. Basic Sewing skills and Fabrics from old clothes support Sustainable Fashion through creative Upcycling projects. Using fabric scraps can help create beautiful and unique jewelry pieces.
Turning Stained Clothes Into Galaxy Designs
Transform bleach spots into celestial masterpieces using Galaxy Print Techniques and Cosmic Dye Effects. Start with damaged garments and create stunning space-themed pieces through strategic Fabric Dyeing and creative Fabric Painting Tips.
- Mix purple, blue, and black fabric paint to create depth and dimension for your Galaxy Shirt design
- Use bleach pens to create star clusters before applying TieDye TShirts methods for authentic cosmic swirls
- Add glitter or metallic paint as Space Theme Embellishments to mimic distant galaxies and enhance Upcycling Techniques
Functional and Decorative Enhancements
You can transform basic clothing into unique pieces with strategic functional and decorative additions that serve both style and purpose.
These enhancements increase your garment’s utility while creating personalized looks that reflect your individual taste, using strategic functional and decorative additions.
Adding Hidden or Patch Pockets
Adding pockets transforms any garment into a functional powerhouse. Hidden side pockets work best with garments that have existing side seams—simply open the seam, insert your pocket fabric, and stitch securely.
For patch pockets, choose fabric that complements your garment’s weight. Position them strategically on tunics or dresses for maximum utility. Consider pocket sizes based on intended use: phone-sized for essentials, larger for everyday items.
Sewing Leather or Elbow Patches
Elbow patches aren’t just repairs—they’re style statements. These leather reinforcements transform worn jackets into distinguished pieces while preventing future damage.
Choose genuine leather for durability or faux options for budget-friendly projects. Pre-punch holes before sewing to avoid puckering. Use heavy-duty needles and waxed thread for professional results that last years.
Illustrating Tights and Customizing Shoes
Beyond basic alterations, you can transform plain tights into wearable art through hand illustration and fabric painting. Use fabric markers to create intricate lace designs or bold patterns that complement your style.
For customized Converse and other canvas shoes, experiment with fabric paint, custom laces, and shoe embellishments like studs or patches. These DIY clothing projects let you express creativity while breathing new life into worn items, making each piece uniquely yours through DIY clothing projects and wearable art.
Adding Hoods or Lace-Up Collars
Why not breathe new life into basic garments with hood designs and lace-up collar styles? Add a hood to plain shirts using soft fabric choices like cotton or fleece. Create a lace-up sweatshirt collar by cutting a V-neck opening and threading lace options through reinforced eyelets. These garment modification techniques offer closure types that let you adjust fit perfectly.
This clothing alteration transforms boring basics into DIY fashion statements with functional flair. A similar approach can be used to modify formal wear, allowing for raising the neckline on a wedding dress, which can also be considered as garment modification techniques.
Practical Cuffing and Rolling Techniques
Cuffing and rolling transforms hem lengths without permanent alterations. These DIY clothing modification techniques work across various fabric types and offer instant styling solutions for different occasions.
Essential Cuffing Styles and Rolling Methods:
- Single Roll – Fold hem once for subtle length adjustment on jeans and chinos
- Double Cuff – Create structured look by folding twice, perfect for dress pants
- Pin Roll – Taper ankles by pinching fabric before rolling for skinny jean effect
- French Seam Roll – Hide raw edges inside fold for polished finish on delicate fabrics
- Contrast Cuff – Expose lining or inner fabric for pop of color on sleeves
Tips for Successful Alterations at Home
Success in home alterations starts with the right foundation—quality tools and fabric knowledge prevent costly mistakes before they happen.
Master these essential tips to transform your wardrobe confidently while avoiding the pitfalls that turn simple projects into expensive disasters, using the right foundation.
Choosing The Right Tools and Materials
Success in DIY clothing modifications starts with the right arsenal. Your toolkit makes the difference between professional results and frustrating mishaps that leave you wanting to throw your project in the trash.
| Basic Tools | Quality Markers | Best Uses |
|---|---|---|
| Needle Types | Sharp points, varied sizes | Universal needles for cotton, ballpoint for knits, leather needles for heavy fabrics |
| Thread Quality | Polyester or cotton blend | Strong seams in alterations, color-matched for invisible repairs |
| Fabric Scissors | Sharp, dedicated cutting blades | Clean cuts prevent fraying, separate from paper scissors |
Measuring tools and marking implements complete your foundation. A flexible tape measure beats rigid rulers for curved seams. Fabric chalk disappears after washing, while removable markers work on dark materials.
Invest in quality basics rather than buying everything at once. Good fabric scissors last decades with proper care. Thread quality affects durability more than technique in clothing modification projects. Your needle collection should match your fabric types – using the wrong needle damages delicate materials and creates visible holes. To guarantee clean and precise cuts, consider investing in specialized cutting tools.
Professional tailoring shops use specialized equipment, but these fundamentals handle most DIY clothing alterations successfully.
Understanding Fabric Types and Structure
Before starting any alteration project, you’ll need to decode your fabric’s DNA. Different materials behave uniquely under scissors and needle, making fabric knowledge your secret weapon for successful transformations.
Understanding these key Fabric Properties guarantees your DIY Clothing projects succeed:
- Fiber Composition – Cotton stretches minimally while spandex blends offer flexibility for Tailoring
- Weave Structures – Tightly woven fabrics resist fraying better than loose constructions
- Knit Structures – Jersey knits stretch more than woven materials, affecting alteration techniques
- Drape Characteristics – Stiff Fabrics hold shape while flowing materials need different Sewing Projects approaches
Avoiding Common DIY Mistakes
Pattern matching trips up more DIYers than you’d think. Measure twice, cut once isn’t just grandma’s wisdom—it prevents costly fabric waste. Poor seam ripping damages threads, while incorrect tool usage creates uneven edges. Monitor stitch tension to avoid puckering delicate materials.
| Common Mistake | Quick Fix |
|---|---|
| Skipping fabric choice research | Test scraps first |
| Rushing seam ripping | Use proper seam ripper technique |
| Wrong needle size | Match needle to fabric weight |
Fashion DIY and clothing upcycling demand patience. Clothing repair becomes second nature when you avoid these pitfalls.
Simple Sewing Alternatives (Glue, Tape, Iron-On)
Not every Fashion DIY project requires threading a needle. When you’re racing against the clock or lack sewing skills, these Clothing Repair shortcuts deliver impressive results with minimal effort and maximum convenience.
- Fabric Glue Strength – Choose permanent adhesive for hems and temporary versions for adjustable fixes
- Iron-On Durability – Apply steady heat for 15-20 seconds, ensuring complete bond activation
- Tape Application Tips – Clean surfaces first, press firmly from center outward to prevent bubbles
- Hemming Speed Comparison – Double-sided tape works instantly while glue requires 24-hour cure time
These Sewing Alternatives offer Temporary Fix Pros for quick wardrobe emergencies and permanent solutions for busy lifestyles. Many crafters rely on adhesive bonding options for quick fixes.
When to Seek Professional Help
You’ll know when to step back from DIY clothing projects when dealing with complex tailoring or structured garments. Professional help becomes essential for formal wear alterations, leather modifications, and delicate fabrics like silk or chiffon.
These fashion customization projects require specialized tools and expertise that typical DIY clothing projects can’t handle safely, preventing costly mistakes.
Sustainable Fashion and Environmental Impact
Your DIY clothing alterations aren’t just saving money—they’re helping save the planet by keeping textiles out of landfills and reducing demand for new production.
Every garment you transform instead of toss contributes to a circular fashion economy that values creativity over consumption.
Benefits of Upcycling and Repurposing
Upcycling transforms old clothes into fresh pieces while cutting your environmental impact by up to 70 times compared to buying new. You’ll save money, conserve resources, and express your unique style through creative repurposing.
Transform thrift store finds into high-fashion treasures while slashing your carbon footprint by 70%
This sustainable fashion approach reduces textile waste heading to landfills while giving you complete control over your wardrobe’s eco-friendly transformation.
Reducing Textile Waste With DIY Projects
Creative waste reduction through DIY textile recycling transforms clothing mountains into fashion gold. Your sustainable fashion habits slash environmental impact while building unique wardrobes.
Resourceful repurposing ideas turn worn garments into statement pieces – that upcycled denim jacket or patchwork jeans becomes conversation starters. Upcycled fabric projects also help to minimize waste.
Each upcycling project diverts textile waste from landfills, proving sustainable fashion doesn’t sacrifice style.
Extending Garment Life for a Greener Wardrobe
Keeping your clothes in rotation longer substantially cuts your environmental footprint. Studies show extending use by just nine months reduces carbon, water, and waste impact by 20-30%.
Simple repairing and upcycling techniques prevent approximately 35 pounds of textile waste per person annually.
These sustainable fashion practices reduce wardrobe expenses by 45% while supporting conscious consumption and eco-friendly materials usage.
How Fashion DIY Supports Circular Economy
When you embrace DIY alterations, you’re actively participating in the circular economy by keeping garments in continuous use rather than sending them to landfills. This sustainable approach transforms waste into opportunity through creative upcycling.
Every DIY stitch keeps textiles alive, turning fashion waste into creative wins for the planet
Your DIY waste reduction efforts support the circular economy through:
- Resource conservation – Extending fabric life reduces demand for new textile production
- Upcycling economy participation – Converting old pieces into trendy, functional items
- Sustainable alterations that eliminate disposal while creating personalized style
- Ethical fashion practices that prioritize environmental responsibility over fast consumption
Frequently Asked Questions (FAQs)
What alteration mistakes permanently damage expensive clothing?
Cutting into structured garments like blazers destroys shoulder balance permanently. Wrong zipper installation tears fabric irreparably. Shortening lined jackets incorrectly ruins proportions. Sewing delicate silk creates permanent snags and pulls.
How much should basic alteration supplies cost?
Like a sewing kit foundation, you’ll need basic supplies totaling $15- Thread, needles, seam ripper, fabric scissors, measuring tape, and pins cover most alterations without breaking your budget.
Which fabrics shrink most after home alterations?
Natural fibers like cotton, wool, and linen shrink most dramatically after home alterations. Heat from irons and washing activates their fibers, causing unexpected tightening that’ll ruin your careful measurements.
Can alterations affect clothing warranty or returns?
Most clothing alterations void manufacturer warranties and return policies. Once you’ve modified a garment, retailers typically won’t accept returns since the item’s original condition has been permanently changed.
Whats the average time for beginner alteration?
Simple hems take 15-30 minutes, while basic adjustments like shortening sleeves need 45 minutes. Expect 1-2 hours for your first attempts at seams or darts as you’ll work slowly and carefully.
Conclusion
Statistics reveal that Americans discard 81 pounds of clothing annually, yet most garments need only minor adjustments. These clothing alteration project ideas transform your wardrobe while reducing waste.
You’ve learned hemming, taking in seams, replacing fasteners, and creative upcycling techniques. Whether you’re pinching loose shirts or adding decorative patches, these skills save money and express personal style.
Start with simple projects like button replacement, then progress to complex alterations. Your sewing kit becomes a powerful tool for sustainable fashion transformation.
- https://www.custompatchfactory.com/guides/how-to-put-patches-on-denim-jacket
- https://www.patchesmania.com/fashion-trends-custom-patches-on-denim-jackets/
- https://kudrokids.com/blogs/journal/recycled-denim-environment-benefits
- https://avartanavenue.com/blogs/news/upcycled-denim-jackets-wardrobe-essential
- https://masterscustompatches.com/environmental-impact-eco-friendly-patches/

