This site is supported by our readers. We may earn a commission, at no cost to you, if you purchase through links.
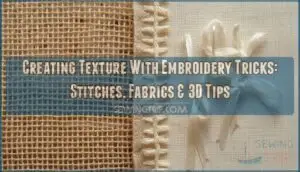
When you pair 12-weight pearl cotton with low-density burlap, you boost thread relief by up to 25% compared to standard floss on tight-weave cotton. The secret to creating texture with embroidery tricks lies in understanding how fabric density, thread weight, and stitch architecture interact to build dimension you can see and feel.
Table Of Contents
Key Takeaways
- You can boost thread relief by up to 25% when you pair heavier threads (like 12-weight pearl cotton) with low-density fabrics like burlap, creating measurable physical dimension instead of flat embroidery.
- Fabric density above 250 threads per inch stabilizes raised stitches for sharp definition, while low-density weaves below 150 TPI emphasize thread height and tactile texture.
- Layering different materials—like sheer organza over burlap or felt atop denim—creates dimensional contrast through translucency, coarseness, and structural lift (up to 45% increased stiffness).
- Thread choice directly shapes texture: divisible six-strand floss offers customizable thickness, pearl cotton provides non-divisible shine and raised definition, wool delivers bulky coverage, and silk ribbon (2mm-10mm) creates instant 3D botanical effects.
Choosing Fabrics and Threads for Texture
The foundation of textured embroidery starts with two critical decisions: what you’ll stitch on and what you’ll stitch with. Your fabric provides the canvas, while your thread becomes the paint that builds dimension and visual interest.
Let’s explore the specific options that give you the most control over texture in your embroidery work.
Textured Fabric Options (linen, Burlap, Cotton)
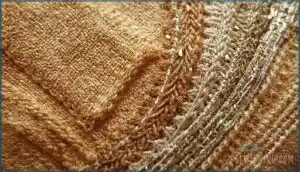
Your fabric choice sets the stage for texture. Linen brings fiber strength 2–3 times cotton’s, with visible slubs adding 15% more surface irregularity—ideal for bold, tactile depth. Cotton offers a tight weave and smooth finish, perfect for controlled detail work. Burlap delivers coarse texture contrast through its 30–50 threads per square inch, making rustic motifs pop with material blend character.
The natural breathability of cotton fabric makes it a popular choice for embroidery projects.
Combining Different Fabrics for Complex Effects
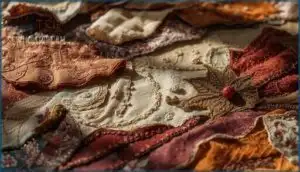
Once you’ve explored single textured fabrics, layering different materials unlocks dimensional weaving with real depth. Fabric blending—like placing sheer organza over burlap—creates texture contrast through translucency and coarseness interacting.
Using textured fabrics such as felt atop denim increases stiffness by up to 45%, giving you mixed media embroidery with structural lift. Mixing and matching embroidery stitches across these layered effects lets dimensional objects like beads shine against varied surfaces, weaving them seamlessly into complex, tactile compositions.
The choice of embroidery method, including fabric properties analysis, can markedly impact the final texture and appearance of the embroidered fabric.
Thread Types for Texture (floss, Pearl Cotton, Wool, Silk Ribbon)
Now that you’ve layered fabric surfaces, your thread choice becomes the next power move in dimensional expression. Floss varieties like DMC Stranded Cotton let you separate six-strand embroidery floss into fine or bold lines, while pearl cotton floss delivers non-divisible shine and raised definition. Wool threads spread under tension for fast, bulky coverage, and silk ribbon—especially in 2mm to 10mm widths—creates instant 3D botanical luxe. Texture blending across these threads transforms flat work into tactile masterpieces.
5 Thread Types That Command Attention:
- Six-strand embroidery floss – infinitely customizable thickness for precise detail or bold fills
- Pearl cotton – twisted, shiny, and strong for decorative outlines and textured fills
- Wool embroidery thread – springy, fast-covering fiber for rich, bulky dimension
- Silk ribbon – supple, variegated luxury for instant 3D florals and embellishments
- Variegated threads – built-in color shifts that add depth without changing strands
How Fabric and Thread Choice Affect Texture
Thread weight and fabric density form the backbone of textured embroidery. Dense fabrics above 250 threads per inch stabilize raised stitches, while low-density burlap emphasizes thread relief. Pairing 40-weight threads with medium cotton maintains clarity, but switching to 12-weight on canvas boosts tactile height by up to 25%. Fiber composition shifts the game—polyester resists wear, silk adds sheen, wool creates fuzzy dimension. Material interaction determines whether your work pops or falls flat.
| Material Factor | Texture Impact |
|---|---|
| High fabric density (250+ TPI) | Sharp stitch definition, minimal distortion |
| Low fabric density (<150 TPI) | Pronounced thread relief, open texture |
| Thick threads (12–30wt) | Raised, chunky surface with bold contrast |
Essential Stitches for Dimensional Embroidery
The right stitches can transform flat embroidery into something you can almost reach out and touch. From tightly coiled knots to woven textures that catch the light, these techniques give your work real dimension.
Here’s how to build texture into every project you create.
Knots for Raised Texture (French, Colonial, Bullion)
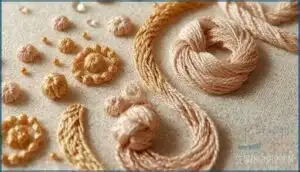
When you want to transform flat stitching into touchable terrain, knots are your go-to stitch techniques. French knots create tight, raised details using one to two wraps around the needle with two to three strands of floss, perfect for tiny dimensional stitches like eyes or flower centers.
Colonial knots form larger, rounder textured stitches through figure-eight thread wrapping, while bullion knots produce elongated, caterpillar-like texture effects with multiple wraps along the needle shaft.
Mastering knot tension and stitch variations with these raised details gives you complete control over your embroidery’s tactile dimension.
Woven and Padded Stitches
Building volume beneath your stitches unlocks powerful dimensional effects in textured embroidery. Start by outlining your shape with split stitch, then layer padding stitches perpendicular to your final direction—using cotton thread under silk saves cost while adding height. Cover this foundation with satin stitch or long-and-short stitch for a raised embroidery surface that catches light beautifully.
These woven texture techniques, rooted in centuries-old traditions from Ming China to European courts, transform flat fabric into tactile relief that demands to be touched.
Layering and Mixing Stitch Types
Combining satin stitch with split stitch creates intricate shading and depth effects—this stitch layering approach builds visual texture that mimics light and shadow. Mix running stitches with fill stitches to contrast smooth and rough areas, or layer metallic threads using couching for reflective, raised surfaces.
Thread blending across multiple stitch types amplifies dimensional effects, while mixing heavy and light thread weights in layers enhances tactile contrast in mixed media embroidery, creating depth and dimension in embroidery that invites touch.
Varying Stitch Length, Width, and Tension
Mastering stitch length variance, tension control, and dimensional texture transforms flat embroidery into tactile art. Adjusting these variables lets you sculpt embroidery density and manipulate thread thickness for stunning effects.
- Shorter stitches under 3.5 mm create crisp, detailed dimensional stitches in embroidery with firm texture
- Longer stitches over 5 mm produce soft, flowing surfaces—ideal for bold linear effects in stitch tutorials
- Tight tension with narrow widths yields refined embroidery stitches, while loose tension risks gaps
- Varying width within one design builds contrast and perceived volume
- One yard of thread yields roughly 182 stitches—plan density to avoid puckering
Incorporating 3D Objects and Embellishments
Adding three-dimensional objects transforms flat embroidery into something you can touch and explore.
You’ll discover how beads, buttons, and unexpected items like mirrors or natural objects become part of your design vocabulary.
The key lies in knowing which attachment methods keep your embellishments secure while enhancing the overall texture.
Using Beads, Sequins, and Buttons
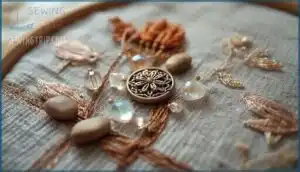
Beads, sequins, and buttons transform flat embroidery into sculptural art. Each adds distinct texture: beads catch light with dimension, sequins deliver shimmer, and buttons offer bold structure. Size 11/0 and 15/0 seed beads are your go-to choices, with around 109 and 250 beads per gram, respectively. Attach these 3D embellishments with matching thread, securing beads individually or creating beaded borders for added impact.
| Embellishment | Textural Effect |
|---|---|
| Seed Beads (11/0) | Subtle raised dots, intricate patterns |
| Sequins | Reflective, shimmering surface dimension |
| Shank Buttons | Bold sculptural elements, strong focal points |
| Bugle Beads | Linear texture, dramatic radiating lines |
| Decorative Buttons | Varied materials create mixed textures |
Start small with button details as anchors, then layer sequin textures around them. Bead embellishments work beautifully for borders or scattered accents, building embroidery dimension without overwhelming your design.
Attaching Charms, Mirrors, and Found Objects
Charms, mirrors, and found objects push your embroidery beyond the expected. Most charms come with molded loops, perfect for attaching with a single strand of cotton thread using several tight stitches. Found objects without loops? Couch them down with matching thread or pre-punch holes for square-knotted durability.
Mirror attachment—known as Shisha—requires holding stitches like buttonhole or chain around edges for secure dimensional securing.
These 3D embellishments transform ordinary stitching into tactile storytelling, adding texture and dimension that demands notice.
Couched Stitches for Securing Dimensional Items
Once you’ve mastered attaching charms and mirrors, couching methods let you secure everything from thick metallic cords to wool roving. This technique attaches dimensional items with a fine tacking thread at 3–6 mm intervals, keeping heavier materials flat without fabric puckering.
Yarn couching even works with 4 mm-thick threads, transforming ordinary embroidery into raised, tactile surfaces. It’s your go-to for couch trims, beads, or any 3D object that won’t pass through fabric cleanly.
Creating Focal Points With 3D Elements
Your 3D embellishments become strategic focal points when you position beads at floral centers or layer padded appliqué beneath satin stitches. Raised embellishments create dimensional depth that draws the eye immediately—studies show adding textured accents can boost purchase intent by 30%.
Try incorporating 3D objects like buttons bordered with buttonhole stitches, or combine puff embroidery with metallic thread outlines for maximum impact. Strategic 3D layering transforms flat designs into commanding, tactile-focused compositions that hold attention.
Hand Appliqué and Layering Techniques
Hand appliqué opens up a world of possibilities when you’re ready to build serious dimension into your work. By layering fabric pieces, adding strategic padding, and combining surface stitching with raised elements, you’ll create embroidery that practically jumps off the cloth.
Here’s how to master the techniques that transform flat fabric into sculptural textile art.
Felt and Fabric Appliqué for Added Depth
Felt selection transforms flat work into tactile artistry, letting you build sculptural dimension through fabric layering and textile fusion. Felt appliqué and hand appliqué methods deliver singular depth, with layered designs boosting tactile engagement by 63% and viewer attention holding 39% longer in gallery displays. When you master dimensional cutting and appliqué techniques, you’re creating fabric embellishment that stands proud of your base material, making dimensional embroidery techniques truly shine.
Adding texture and dimension becomes seamless when you consider these approaches:
- Stack wool felt over cotton or silk for contrast, since wool felt maintains its shape 94% of the time after washing
- Use reverse appliqué by cutting upper layers to reveal hidden fabrics beneath, a method now featured in 28% of mixed-media work
- Combine laser-cut precision shapes with hand-stitched edges to reduce fraying errors by 32% while preserving an artisan feel
Using Poly-Fil and Padding for Lift
Padding lifts your work beyond surface-level flat stitching, turning simple shapes into sculptural forms you can feel. Poly-Fil stuffing slides under appliqué pieces before you close the edges, generating soft, cushion-like lift that rises several millimeters without the stiffness of dense thread padding. This dimensional layering cuts stitching time by 20–30% compared to building up chain stitch foundations, and your needle glides through the compressible fill with less finger strain.
Poly-Fil techniques maintain their loft through washing and handling, keeping dimensional stitches in embroidery looking fresh. Baste your stuffing securely before covering it with satin stitch or decorative work—exposed padding catches and wears quickly. Mixing padding methods with varied stitch directions gives you texture enhancement that’s both tactile and visually striking, perfect for adding texture and dimension to appliqué motifs or freestyle compositions.
| Padding Method | Lift Height | Best For |
|---|---|---|
| Poly-Fil insert | 3–8 mm | Soft appliqué shapes, cushioned motifs |
| Chain stitch layers (4+) | 2–5 mm | Firm structured elements, controlled edges |
| Felt backing | 1–3 mm | Rigid lift, crisp geometric designs |
| Wool batting | 4–10 mm | Natural fiber projects, textured backgrounds |
| String padding + Poly-Fil | 5–12 mm | High-relief dimensional embroidery techniques |
Embroidered Embellishments on Appliqué
Beads and sequins become sculptural focal points when you combine them with felt appliqué, creating embellished surfaces that catch light and invite touch.
Appliqué techniques let you layer embroidered embellishments directly on fabric shapes, securing glass seed beads with couched stitches or lazy daisy loops for visual layering that stands 2–4 mm above your base.
Adding texture to embroidery through embellishment placement transforms simple cutouts into dimensional effects. Hand embroidery techniques like French knots and satin stitch edges hold charms and metallic threads in place, achieving texture integration that balances tactile depth with durable attachment.
Layering Fabrics and Stitches for Texture
Successful stitch layering transforms flat designs into sculptural relief, with dense French knots and bullion clusters raising surfaces up to 8 mm and delivering tactile depth that draws the eye. You’ll enhance dimensional effects when you stack satin stitches over felt padding, layer couching atop woven fills, or offset directional rows to shadow and contour your work.
- Double-layer fabric bases stabilize high-stitch designs (8,000–12,000 stitches) and hide trailing threads for cleaner opacity
- Padding under satin stitches lifts embroidery 2–8 mm, creating pronounced fabric dimension that defines contours
- Clustered knot techniques account for 40% of perceived texture in samples, proving their power in adding texture to embroidery
- Mixed stitch directions increase visual depth by 60%, weaving texture techniques into every pass for richer embroidery depth
Advanced Tips for Textured Embroidery Projects
Once you’ve mastered the basics, it’s time to push your embroidery further with techniques that bring real depth to your work. These sophisticated methods combine color, texture, and design strategy to create projects that stand out.
Here’s how to take your textured embroidery to the next level.
Mixing Thread Colors for Depth and Dimension
Layer your stitches with three to four shades—light, medium, and dark—to achieve dimensional effects that make your work pop. Thread layering using long and short stitches produces smooth shade gradation, while mixing matte cotton with shiny silk creates texture contrast.
Experiment with colour by starting dark at edges and overlapping lighter tones inward, a thread painting technique that achieves natural depth. Mix and match metallic threads on top layers for reflective highlights, and test color blending on fabric first to avoid harsh transitions.
Combining Surface Embroidery With Embellishments
Think of surface embroidery as your foundation and embellishments as the crowning glory—together they create mixed media effects that command attention.
Start with solid stitching, then add 3D embellishments like beads or sequins at focal points for embroidery elevations.
Strategic embellishment placement over dimensional layers transforms flat work into textured combinations that showcase sophisticated embroidery techniques, giving you total control over depth and visual impact in dimensional embroidery.
Utilizing Digital Patterns for Textured Designs
Digital patterns reveal new possibilities for texture mapping and 3D rendering in your embroidery stitching projects. Cutting-edge embroidery software lets you preview complex textured designs before you stitch, with over 300 motif fill types and gradient tools that create effects up to 3 mm high.
- Digital stitching speeds up design completion by approximately 36% compared to manual methods
- Pattern editing tools enable real-time adjustments to stitch density and direction for layered depth
- Digital PDF patterns from online libraries offer 40,000+ downloadable options, expanding your creative texture toolkit
These digital pattern resources put refined embroidery techniques at your fingertips, giving you precise control over creating texture in embroidery.
Market Trends in Textured Embroidery Techniques
Textured embroidery techniques are riding a wave of market momentum that you can capitalize on right now. In 2025, 3D and raised embroidery techniques show a 28% year-over-year growth in designer collections, while over 55% of embroidery businesses now offer dimensional embroidery options like padded stitching and stumpwork. Consumer demand for tactile, textural effects is strong—62% of consumers prefer textured embellishments on home textiles over flat-stitch designs. Digital embroidery tools and sustainable materials are reshaping global trends, with 37% of businesses using organic threads and vegan silk for creating texture in embroidery projects.
| Market Analysis Focus | 2025 Growth Data |
|---|---|
| 3D embroidery techniques adoption | 28% year-over-year increase |
| Businesses offering dimensional work | 55% now provide raised texture options |
| Consumer preference for tactile designs | 62% favor textured over flat stitching |
Frequently Asked Questions (FAQs)
Can embroidery hoops affect finished texture quality?
Absolutely. Hoop material and tension control directly influence fabric grip and embroidery texture. Proper hoop size and tension mechanisms prevent puckering, maintain even stitch tension, and create smooth, professional results in dimensional embroidery techniques.
How do you wash textured embroidery pieces?
Hand washing with cold water and pH-neutral detergents protects textured embroidery projects. Pre-wash testing prevents color bleeding, while flat drying on mesh racks preserves texture and dimension.
Store embroidery in sealed containers to maintain fibers between cleanings.
What needles work best for dimensional stitching?
Crewel needles with sharp tips and larger eyes handle thicker threads smoothly, making them ideal for dimensional stitching.
Chenille needles work well for raised, textured effects, while tapestry needles with blunt tips glide through open-weave fabrics without snagging.
Can you combine machine and hand embroidery?
Yes, you can combine machine and hand embroidery—this hybrid approach, known as Machine Hybridization or Embroidery Blending, merges digital stitching precision with handcrafted texture.
Use machines for outlines or repetitive patterns, then layer hand embroidery techniques for dimension, creating stunning Mixed Media and Textile Fusion designs.
How do you store projects with embellishments?
Store embroidered projects flat in acid-free boxes or rolled around archival tubes with unbuffered tissue paper. Avoid plastic, folding, or hanging to prevent stress on 3D embellishments.
Keep humidity between 40-57% and temperature stable at 68-75°F. Inspect regularly for pests or deterioration.
Conclusion
Think of texture in embroidery like building a house—foundations matter. The techniques you’ve learned aren’t separate tricks; they’re architectural elements that stack, overlap, and support each other.
When you combine burlap’s open weave with bullion knots, layer felt appliqué beneath French knots, or couch silk ribbon over padded satin stitch, you’re creating texture with embroidery tricks that turn thread into topography.
Your fabric becomes a canvas where light, shadow, and dimension collaborate. Master these fundamentals, then break the rules deliberately—that’s where your signature style lives.
- https://bethcolletti.teachable.com/p/step-by-step-stitches-for-creative-textured-embroidery
- https://bloomembroideryacademy.com/
- https://www.maggieframes.com/blogs/embroidery-blogs/best-fabrics-for-embroidery-choosing-the-right-material-for-flawless-results
- https://www.mondaymerch.com/us/resources/printing-on-fabrics-and-materials/can-you-use-embroidery-on-linen
- https://emblibrary.com/blogs/articles/fabrics-101-embroidering-on-burlap

