This site is supported by our readers. We may earn a commission, at no cost to you, if you purchase through links.
Start with simple techniques like single crochet or a classic picot border, then try more intricate patterns like rolling fans or a delicate lace trim.
Even spacing your stitches and matching your yarn weight are small details that make a big difference. With endless patterns to explore, each customizable to your style, edging offers a creative twist for every project.
Table Of Contents
Key Takeaways
- You can add charm and polish to your crochet projects with edging techniques like scallops, rolling fans, and crab stitches.
- Always match your yarn weight and maintain consistent tension to avoid curling or uneven edges.
- Use increases in corners to keep borders flat and experiment with patterns like puff stitches or lacy picots for unique designs.
- Borders can transform projects with functionality and style, from playful pom-poms to elegant lace trims.
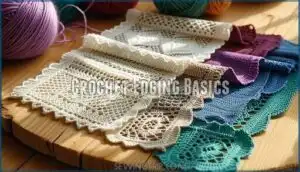
Crochet Edging Basics
Mastering crochet edging basics is easier than you think, and it adds a polished, creative touch to your projects.
Adding crochet edging transforms your work with effortless charm, turning simple stitches into polished, eye-catching masterpieces.
With just a few simple techniques, like scalloped edges or rolling fan borders, you’ll elevate any piece from plain to eye-catching in no time.
Scalloped Edge Technique
The scalloped edge adds charm to any project and is a favorite among crochet edging patterns.
To master it:
- Adjust scallop height based on your design for balance and elegance.
- Use stitch density to avoid puckering or sagging—tight stitches work best.
- Experiment with color combinations and yarn choice to complement your project.
This easy crochet edging suits blankets, towels, and garments!
Rolling Fans Border Method
Creating a rolling fans border is like adding waves to your crochet project.
It uses overlapping techniques and fan stitch counts for a wavy, elegant finish.
Customize border width options and play with color combination ideas to match your theme.
This method suits various crochet edging patterns and enhances project suitability with its easy-to-follow steps.
Petal Cone Flower Edging Pattern
If you loved the elegance of Rolling Fans, you’ll adore petal cone flower edging.
Its flower-like design and cone shaping tips bring charm to your projects.
Experiment with petal color options or customize patterns to suit your style.
The right yarn choice impacts the final look, making this one of the most enchanting crochet edging patterns you’ll master.
Alpine Stitch Border Tutorial
The Alpine Stitch Border adds a textured, cozy finish to your crochet projects.
It’s perfect for stripes or solids, and it creates subtle depth. Start with a single crochet base for stability.
- Border Color Choices: Pick contrasting or matching colors.
- Stitch Height Variation: Adjust height for visual interest.
- Pattern Repeat Options: Customize for size.
- Corner Stitching Tips: Add increases to prevent curling.
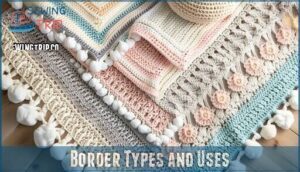
Border Types and Uses
You’ve got plenty of options in regard to crochet borders, each with its own flair and function.
From adding a playful pom pom edge to creating a polished finish with the crab stitch, the right border can truly bring your project to life.
Pom Pom Border Application
Adding a pom pom border brings texture and whimsy to any crochet project.
Experiment with pom pom density and size to suit your piece. Using yarn types that wash well guarantees durability.
Match playful color combinations with your design. Secure attachment methods keep pom poms intact through wear and washing.
These crochet edging techniques elevate your project with fun and flair!
Crab Stitch Border Benefits
The crab stitch, with its rope-like design, is beginner-friendly and perfect for securing edges in your crochet projects.
This durable crochet edging adds texture while reinforcing borders, making it a practical choice for blankets or dishcloths.
Its clean, polished look enhances any crochet border pattern, and it’s a quick and satisfying technique ideal for boosting your crochet edging skills!
Picot Border Technique
Think the crab stitch was fun? The picot border adds charm with its delicate loops.
- Perfect Picots: Create a neat chain-3 slip stitch for a clean crochet edging.
- Triple Picot Ease: Add playful, clustered loops that elevate the look.
- Lacy Picot Magic: For a softer, elegant finish, these picot variations are a joy to crochet edging patterns.
Puff Stitch Border Pattern
The Puff Stitch Border pattern combines charm and texture, perfect for adding flair to any crochet project.
Perfect for flair and texture, the Puff Stitch Border is the cozy, charming touch your crochet project deserves.
Its softness and versatility shine with adjustable spacing, height, and density.
Here’s a quick guide:
| Feature | Benefit | Tip |
|---|---|---|
| Puff Stitch Height | Adds visual dimension | Keep stitches uniform |
| Puff Stitch Spacing | Offers design flexibility | Space evenly to avoid gaps |
| Puff Stitch Texture | Creates plush, cozy finish | Ideal for blankets or scarves |
Try experimenting with puff stitch variations—it’s like sprinkling magic on your crochet border!
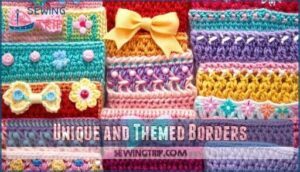
Unique and Themed Borders
You can add personality to your crochet projects with unique and themed borders that stand out.
From playful polka dots to charming bows and 3D flowers, these designs bring a creative twist to your edges.
Bow Edging Tutorial
Bow edging brings a charming twist to crochet borders.
Start by mastering bow construction, choosing soft yet durable ribbon for that polished look.
Secure bows tightly to prevent sagging, and try sizing variations for different projects.
This crochet edging tutorial makes advanced bows feel simple, adding a delightful, handmade touch to blankets or garments, and with it, your creativity will shine!
3D Flower Border Technique
Adding flair like Bow Edging is fun, but a 3D Flower Border really blooms! This crochet edging flower isn’t just decorative—it’s dimensional and artistic.
- Petal shaping: Chain 4, close 3 double crochets tightly at the base.
- Layering techniques: Stack petals for stunning flower dimension.
- Color combinations: Play with shades for vibrant 3D effects.
Experiment, and watch your projects blossom!
Polka Dot Border Pattern
Polka dot borders are a playful way to elevate crochet edging patterns.
Focus on polka dot spacing for balance, experimenting with dot size options and bold color combinations.
Texture variations, like puff stitches or tighter circles, keep things fun.
These crochet border patterns are perfect for baby blankets, scarves, or even pot holders.
Let your creativity shine with these delightful accents!
Rib Border Application
If you enjoyed the playful look of polka dots, you’ll appreciate the clean, stretchy Rib Border. It’s perfect for adding Rib Stitch Stability to blankets or Garment Ribbing for sweaters.
This Knit-Look Border feels modern yet timeless.
- Great for Blanket Flexibility.
- Offers adjustable Edging Thickness.
- Matches crochet edging patterns easily.
- Works with any yarn weight.
- Adds polish to crochet border patterns.
Crochet Edging Techniques
Mastering crochet edging techniques starts with simple yet essential steps like single crochet and evenly spacing stitches.
With a solid foundation, you’ll prevent curling, match yarn perfectly, and achieve a polished, professional finish every time.
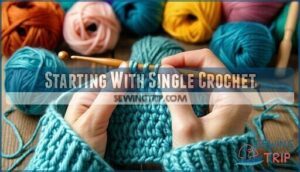
Starting With Single Crochet
Every crochet border starts with a solid Foundation Row, and single crochet is your trusty first step.
Keep your Stitch Count steady to maintain straight Edge Straightness. Pay attention to Tension Control—too tight or loose, and things may wobble!
Your Yarn Choice sets the tone, so pick carefully. Mastering this sets the stage for brilliant crochet edging patterns!
Evenly Spacing Border Stitches
Starting your border after a foundation row? Even spacing keeps things smooth and polished.
Eyeballing isn’t enough—grab a ruler or use these tricks:
- Stitch Count: Plan uniform gaps for consistent crochet edging.
- Pattern Repeats: Match spacing to the border stitch design.
- Visual Assessment: Check for balance as you go—blocking effects help too!
Precision guarantees a pro look.
Adding Increases in Corners
When working on crochet edging, adding increases in corners is key for smooth results.
Proper corner stitch count guarantees a flat border, preventing curling. Plan your increase placement carefully—usually three stitches share one corner space.
Maintain tension evenly to keep things tidy. Experiment with corner design options like shells or scallops for a creative touch to your crochet border, considering smooth results.
Matching Yarn Weight and Gauge
Matching yarn weight and gauge is the secret sauce for seamless crochet edging.
A quick gauge swatch prevents border size issues and helps maintain fabric compatibility. Follow yarn substitution rules to avoid mismatched tension.
Understanding the yarn weight system is vital for selecting appropriate materials.
Tension consistency tips? Keep a light hand—too tight, and your border may curl!
These crochet techniques guarantee edging blends perfectly with your stitches, like icing on a cake!
Advanced Edging Patterns
Take your crochet projects to the next level with advanced edging patterns that add unique texture and detail to any design.
From elegant lacy accents to playful bobbles, these techniques will inspire you to create borders that truly stand out.
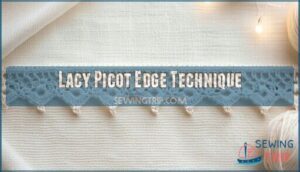
Lacy Picot Edge Technique
Let’s face it, the Lacy Picot Edge adds an elegant touch to any project.
Whether it’s a blanket or shawl, this crochet edging lace shines with its delicate loops.
The Picot Stitch Variations create an airy, graceful vibe.
Choose lightweight yarn for the best results, as the Yarn Choice Impact guarantees that your lacy border stays neat and stunning.
You can find inspiration for your next project using a lacy picot product.
Princess Tiara Edging Tutorial
The Princess Tiara Edging feels like the royal crown your projects deserve.
This crochet edging lace combines elegance and practicality for standout crochet border patterns.
Whether adorning daughter projects or gifts, the tiara variations add charm to blankets or scarves.
Follow this crochet edging tutorial to create crochet crowns that elevate everyday designs into treasures fit for a queen!
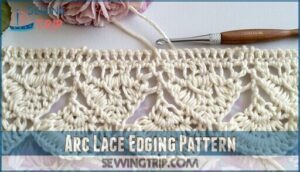
Arc Lace Edging Pattern
After creating Princess Tiara edging, explore Arc Lace Variations to add a sweet, timeless charm to any project.
This crochet edging shines with its shell and mesh design, blending picots and ruffles beautifully.
Use it on blankets, dresses, or curtains for elegant finishing touches.
- Perfect for vintage-style crochet edging designs.
- Adapts easily to any crochet border size.
- Beginner-friendly with versatile Project Suitability.
Bobble Edging Application
Bobble edging adds playful details to baby blankets and simple projects alike.
Its bobble texture creates a fun, 3D effect that makes crochet edging pop.
By using the classic bobble stitch, this crochet border offers endless edging variations.
It’s one of those crochet edging designs that’s easy to master, yet instantly transforms your piece into something unique and extra cozy.
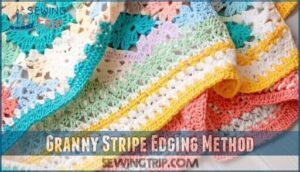
Granny Stripe Edging Method
Granny stripe edging brings a timeless touch to any crochet blanket.
Play with stripe color choices for a lively border or match solids for subtle sophistication.
Use stitch height variation for dimension, and focus on corner stitching to maintain flow.
Joining methods guarantee seamless connections between granny squares, while tension control and steady crochet edging create a polished finish.
Frequently Asked Questions (FAQs)
What is a crochet border & edging?
Think of crochet borders and edgings as the frame for your masterpiece.
They neaten edges, hide flaws, and add style.
From cozy scallops to playful bobbles, they’re the finishing touch your project deserves.
How to identify problems with crochet edges?
Uneven edges happen when stitch tension varies or corner increases are missed.
Watch for puckering, curling, or gaps between stitches.
Fix it by adjusting tension, counting stitches carefully, and ensuring proper increases at corners to prevent uneven edges.
What is a simple crochet edging?
A simple crochet edging starts with a single crochet row to create a clean base.
Add basic stitches like scallops or shells for a polished look.
It’s easy, quick, and gives your project a finished touch!
What crochet edgings can be used on a Afghan?
It’s funny how afghans feel naked without borders, isn’t it?
Add elegance with Shell, Wave, or Scalloped Edging.
For texture, try Bobble or Puff Stitch.
Even Crab Stitch adds charm and secures edges beautifully!
How long does it take to crochet a border?
Crocheting a border can take anywhere from a couple of hours to a few days, depending on the pattern’s complexity and your speed.
A simple edge finishes faster, but intricate designs need extra patience.
What types of stitches are used for crochet borders?
Imagine this: you’ve finished your crochet project, but it needs that perfect finishing touch.
For borders, you’ll often use single crochet, double crochet, picot, shell, crab stitch, puff stitch, or even post stitches, which can be considered a perfect finishing touch.
Can I use a different yarn for the border?
Absolutely, you can use a different yarn for the border.
Just make sure it’s the same weight as the project yarn.
Mixing textures or colors adds flair, but test for matching tension and durability.
What is the best way to finish a crochet border?
Finishing a border is like tying a bow on a gift—use an invisible join for a seamless result.
Weave in loose ends carefully, and block your piece to guarantee crisp edges and a polished look.
Can I adjust the size of the crochet border?
You can adjust the size of a crochet border.
Just tweak the number of stitches in the initial foundation or add extra rows.
Be mindful of your pattern’s symmetry to maintain balance.
How do you fix uneven crochet edges?
Uneven edges can feel like a bumpy road, but don’t fret.
Use a single crochet foundation row, fill gaps with extra stitches, or block your project with water to smooth things out, it’s a way to smooth things out.
Conclusion
Truth be told, crochet edging isn’t just a finishing touch—it’s a game changer.
The right border elevates your project, whether you go for delicate lace or bold bobbles.
Don’t sweat perfection; practice makes progress!
Experiment with yarn weights, try those tricky corners, and explore patterns that fit your vibe.
With so many crochet edging options, you’ll never run out of ways to make your creations stand out, and you can let your creativity shine with every stitch!
- https://craftinghappiness.com/easy-crochet-rolling-fans-border-pattern/
- https://www.windingroadcrochet.com/alpine-stitch-crochet-blanket-border/
- https://daisyfarmcrafts.com/crochet-pom-pom-border/
- https://joyofmotioncrochet.com/crochet-crab-stitch-crochet-edging-free-crochet-stitch-tutorial/
- https://www.woolandthegang.com/how-to/crochet/single-crochet-edge-trim

