This site is supported by our readers. We may earn a commission, at no cost to you, if you purchase through links.
 Starting with easy pattern adjustments for beginners doesn’t have to feel like rocket science. You’ll need basic tools: a clear ruler, measuring tape, and mechanical pencil.
Begin by taking accurate body measurements, then compare them to your pattern’s finished measurements. The golden rule? Always trace your original pattern first – think of it as your safety net.
Simple length adjustments happen at designated lines, while width changes work best through side seams. Create a test muslin before cutting your good fabric, because nobody wants expensive mistakes.
Master these fundamentals, and you’ll discover the secrets to transforming any pattern into your perfect fit.
Table Of Contents
Key Takeaways
- You’ll master pattern adjustments by starting with the right tools—clear ruler, measuring tape, mechanical pencil, and French curves—then always trace your original pattern first to preserve it for future use.
- You can’t rely on clothing sizes when choosing patterns since pattern sizes typically run two sizes larger than ready-to-wear garments, so you’ll need to compare your body measurements to the pattern’s size chart instead.
- You’ll prevent costly mistakes by creating a test muslin before cutting your good fabric, allowing you to identify and fix fitting issues like horizontal wrinkles, gaping necklines, or tight sleeves without wasting expensive materials.
- You’ll achieve professional results by making adjustments systematically—length first, then width through side seams—and always blending seam allowances smoothly to maintain the garment’s proportional balance.
Essential Pattern Tools
You’ll need specific tools to make accurate pattern adjustments that transform an ill-fitting garment into one that flatters your body perfectly.
Having the right equipment, including a clear ruler, measuring tape, mechanical pencils, and French curves, guarantees your modifications maintain professional-quality results while preventing costly mistakes on your final fabric.
**Having the right tools transforms amateur alterations into professional-quality results that fit like they were custom-made.
Clear Ruler and Measuring Tape
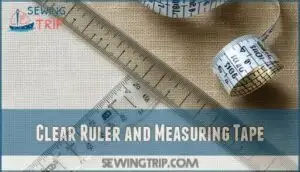
When starting your pattern alteration journey, you’ll need two measuring champions: a clear 18-inch ruler with grid markings and a flexible measuring tape.
The ruler guarantees accurate measurements for straight lines and consistent seam allowance, while your measuring tape handles curve measurement perfectly.
These beginner sewing essentials make pattern adjustments manageable—just remember regular tool maintenance keeps your sewing alterations precise and professional-looking.
For accurate fabric cuts, consider using a rotary cutter and mat, which is a crucial part of sewing alterations and helps in achieving professional-looking results with precise measurements.
Mechanical Pencils and Erasers
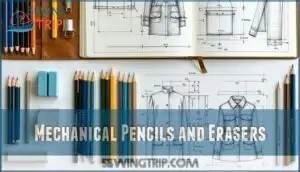
When making pattern adjustments, you’ll need mechanical pencils with 0.5mm lead for precision marking on delicate pattern paper.
Different pencil lead grades offer varying line darkness, while quality erasers prevent paper damage during pattern preservation.
Master proper erasing techniques to maintain clean alterations without tearing.
These tools guarantee your sewing alterations and pattern making remain accurate throughout multiple adjustments.
Many prefer 0.5mm lead products for fine detail work.
French Curves and Hip Curve
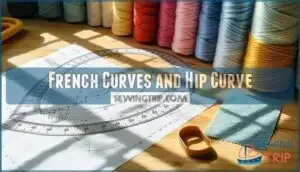
French curves and hip curves transform your pattern adjustments from amateur to professional.
These specialized rulers create smooth, accurate curves for necklines, armholes, and hip contours that straight rulers can’t achieve. A French curve ruler helps achieve these precise shapes.
Master these curve applications for perfect fitting adjustments:
- Armhole shaping – Use French curves to redraw armholes after shoulder adjustments
- Neckline refinement – Create smooth neckline curves when altering depth or width
- Hip contouring – Hip curves perfect waist-to-hip shifts in pattern alteration
- Blending curves – Connect adjustment points seamlessly for professional results
Fabric Markers and Tracing Paper
Precision becomes your ally when you choose the right fabric markers and tracing paper for pattern adjustments.
Water-soluble markers offer temporary marking without permanent damage, while air-erasable options disappear over time.
Quality tracing paper preserves your original patterns during alterations.
Many sewers find it useful to buy fabric markers for their projects.
Consider ink permanence and color visibility against your fabric, as these factors are crucial for successful pattern alteration projects, which guarantee clean, accurate transfers.
Pattern Sizing Basics
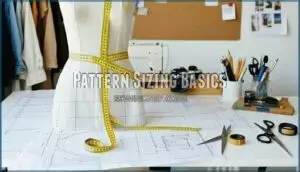
Understanding pattern sizing differs substantially from choosing your regular clothing size, since commercial patterns add extra ease for movement and comfort.
You’ll need to compare your body measurements to the pattern’s size chart rather than relying on the size you typically buy in stores.
Patterns often run larger to accommodate the additional fabric needed for proper fit, as they include extra ease for movement and comfort to ensure a good wearing experience, which is why comparing your measurements to the pattern’s size chart is crucial.
Body Measurements and Ease
Now that you’ve gathered your tools, let’s talk about the foundation of perfect fit: body measurements and ease.
Taking measurements accurately determines your true size, not what’s hanging in your closet.
Understanding ease means knowing that patterns add 2-3 inches beyond your actual measurements for comfort and movement.
Your body shape and fit preferences guide these vital sizing decisions for successful pattern adjustments.
Finished Garment Measurements
Pattern envelopes show finished garment measurements alongside body measurements, revealing the total ease allowance built into each design.
These numbers tell you exactly how roomy or fitted your garment will be. Understanding measurement accuracy helps determine your fit preferences and design impact.
Smart sewers compare these finished measurements to favorite garments, creating an effective alteration strategy for perfect pattern adjustments. Accurate results depend on essential body measurement rules, which is a critical factor in achieving the desired fit.
Choosing Correct Pattern Size
Selecting your pattern size isn’t guesswork when you follow body measurements instead of clothing size.
Compare your bust, waist, and hip measurements to the pattern’s size charts, then add ease allowance for comfort.
Different pattern types may require adjustments based on your fit preference. Upper bust measurements work better for tops than full bust sizing.
Store-Bought Vs Pattern Sizes
Here’s the thing most beginners don’t realize: your size 8 jeans won’t match a size 8 pattern. Pattern sizes typically run two sizes larger than ready-to-wear clothing, creating major size discrepancies that catch new sewers off guard.
Here’s the reality check every sewer needs: pattern sizes live in their own universe, completely divorced from your closet favorites.
Size Discrepancies That’ll Make Your Head Spin:
- Your favorite size 10 dress translates to a size 14 pattern – it’s not you, it’s the industry
- Pattern companies stick to 1950s sizing standards while stores keep shrinking their labels
- Body measurements trump everything – that tape measure is your new best friend
- Men’s patterns play fair with consistent sizing, unlike women’s vanity-sized chaos
Understanding measurement importance prevents pattern selection disasters. Body changes happen, so remeasure regularly. Focus on body measurements rather than clothing measurements when choosing patterns.
It’s also important to note the common issue of pattern sizing discrepancies compared to store-bought clothes. This knowledge transforms pattern alteration from guesswork into precision, giving you sizing confidence that actually fits your real measurements.
Basic Adjustment Techniques
You’ll master pattern adjustments by following a systematic approach that starts with tracing your original pattern onto new paper, which preserves the original while allowing multiple modification attempts.
These fundamental techniques include identifying key adjustment points through body measurements, creating test muslins to evaluate fit, and making precise length and width modifications that maintain the garment’s proportional balance.
By applying these methods, you will be able to make adjustments with confidence, using systematic approach to ensure that your modifications achieve the desired outcome.
Tracing Original Pattern
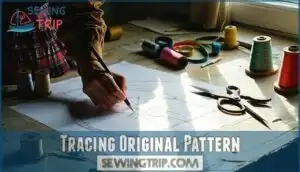
Smart sewers always trace their original pattern onto fresh paper before making any changes.
This simple step keeps your master copy intact for future projects.
Use lightweight tracing paper or pattern paper with your favorite tracing tools—a mechanical pencil works perfectly.
Multiple alterations become possible when you’re not working directly on the original pattern pieces, avoiding costly mistakes in pattern drafting, which helps keep your master copy intact.
Identifying Adjustment Points
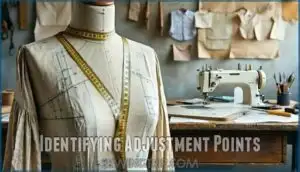
Precision becomes your best friend when mapping out where your body differs from the pattern’s assumptions.
Take measurements at your Bust Point, Waist Placement, Hip Level, Shoulder Slope, and Sleeve Length, then compare them to the pattern pieces to identify specific fit issues requiring pattern alteration.
Key measurements that reveal fitting truths:
- Your bust point location determines dart placement accuracy
- Shoulder slope affects how sleeves hang and armholes fit
- Hip level variations change where seams should sit naturally
Creating Test Muslin
Making a muslin test garment is your fitting insurance policy. Choose inexpensive cotton that behaves like your final fabric for accurate results.
Baste seams together rather than fully stitching—you’ll thank yourself later when adjustments come. Document every fit issue with photos and notes.
This iterative process saves expensive fabric from becoming costly mistakes while perfecting your pattern’s proportions and ensuring a good fit.
Lengthening and Shortening
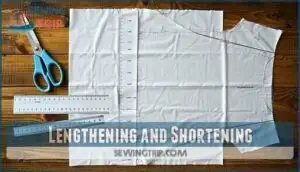
Lengthening and shortening patterns becomes second nature once you understand the basics. Cut along designated lengthen/shorten lines, then add or remove paper strips for simple length adjustments.
Always make even adjustments by measuring carefully and blending seams smoothly afterward. Remember that proportion changes affect grainline impact, so check your hemline adjustments against your body’s natural proportions before finalizing any pattern alteration.
Accurate alterations require comparing body measurements to patterns and considering the overall impact on your garment, ensuring a well-fitted outcome that aligns with your natural proportions.
Width Adjustments and Dart Manipulation
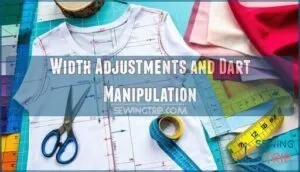
Width adjustments using slash and spread techniques preserve your pattern’s proportions while adding room where you need it.
Dart manipulation lets you move fullness around your garment by closing one dart and opening another elsewhere. Dart repositioning allows for design flexibility without altering fit.
Here’s your width adjustment toolkit:
- Mark your slash lines parallel to grainlines for even distribution
- Spread pattern pieces equally to maintain symmetry adjustments
- Blend seam allowances smoothly after making balance changes
- Test dart placement with pins before cutting
- Check fullness control across all connecting pattern pieces
Common Fitting Issues
You’ll encounter several fitting challenges when working with patterns, from horizontal wrinkles that signal the need for more length to diagonal lines that indicate fabric tightness.
Understanding these common issues, such as gaping necklines, tight sleeves, and excess fabric pooling, helps you identify where adjustments are needed before cutting your final fabric, which involves recognizing diagonal lines that indicate fabric tightness.
Horizontal Wrinkles and Diagonal Lines
After your muslin testing reveals fit issues, look for telltale signs on your garment.
Horizontal wrinkles indicate you need length correction – the fabric’s pulling because there isn’t enough room.
Diagonal lines show stress points where the pattern alteration is needed for better fabric drape.
These contour issues are common sewing for beginners problems that signal specific adjustments required, often related to fabric drape.
Gaping Necklines and Armholes
Gaping necklines and armholes signal misalignment between your body and the pattern. When your neckline pulls away or armholes feel loose, you’re dealing with fit issues that need correcting gaping through pattern alteration.
Check your shoulder slope against the pattern’s design – many commercial patterns assume a standard shoulder angle that doesn’t match everyone’s body. A common cause is narrow shoulders, which contributes to this problem.
- Test armhole depth by pinching excess fabric during muslin fitting to determine reduction needed
- Adjust neckline shape by redrawing the curve smaller, maintaining the original proportions throughout
- Modify shoulder slope by raising or lowering shoulder seam placement for better alignment
- Create darts at the neckline or armhole to remove excess fabric and improve fit
- Check pattern size against your measurements – oversized patterns often cause gaping issues
Tight Sleeves and Shoulder Misalignment
Tight sleeves and shoulder misalignment often signal different fitting challenges that require targeted solutions.
When sleeves feel restrictive, you’ll need a bicep adjustment to add width through the upper arm area.
Shoulder slope corrections address how the garment sits across your shoulders, while armhole depth modifications guarantee proper sleeve cap placement.
Always conduct thorough muslin testing before making final adjustments to achieve perfect sleeve fit and shoulder fit.
Waist and Hip Ease Problems
Beyond sleeve and shoulder fixes, your pattern alteration journey continues with waist and hip challenges. These areas demand precision since they affect your garment’s overall silhouette and comfort.
Poor ease placement around these curves creates uncomfortable binding or unflattering excess fabric that compromises your finished project’s success.
Here’s your roadmap for conquering waist and hip fitting:
- Create a fitting muslin to identify problem areas before cutting your good fabric
- Measure ease placement by comparing your body measurements to the pattern’s finished measurements
- Practice adjusting curves using the slash-and-spread method for hip modifications
- Focus on blending seams smoothly when making waist modifications for professional results
Drag Lines and Excess Fabric
Drag lines reveal where your garment pulls and strains, creating those telltale wrinkles that scream "poor fit." These stress points show exactly where you need more room or better shaping solutions.
Meanwhile, excess fabric pooling creates unflattering bulges that require contour correction through careful pattern alterations and proper ease allowance adjustments.
| Issue Type | Visual Clue | Fix Method |
|---|---|---|
| Horizontal Drag Lines | Wrinkles across chest/back | Add width through side seams |
| Diagonal Stress Lines | Pulling from armpit to bust | Full bust adjustment needed |
| Fabric Pooling | Loose, bunched material | Remove excess through darts |
| Vertical Excess | Fabric hanging straight down | Shorten pattern at adjustment lines |
The table provides a clear guide to identifying and fixing common issues, including Horizontal Drag Lines, Diagonal Stress Lines, Fabric Pooling, and Vertical Excess, to achieve a better fit.
Advanced Pattern Alterations
Once you’ve mastered basic adjustments, you’re ready to tackle more complex alterations that address specific body variations and achieve professional-quality fit.
These advanced techniques, including full bust adjustments, pattern grading, and custom sloper creation, will transform your sewing skills and guarantee every garment fits like it was made specifically for you, using techniques such as full bust adjustments.
Pattern Grading and Seam Method
Pattern grading transforms your favorite design into multiple sizes using systematic size increments.
This seam method involves adding or subtracting consistent measurements at key points while maintaining proper seam allowances.
Multi-size patterns demonstrate these grading principles perfectly.
Though grading challenges exist, mastering pattern resizing methods gives you flexibility.
Start with simple pattern alterations before tackling complex adjustments.
Full Bust Adjustment and Small Bust Adjustment
When your measurements don’t match the pattern’s bust size, you’ll need specific adjustments.
Full bust adjustment (FBA) expands the bust area by adding width and length, while small bust adjustment (SBA) removes excess fabric.
Both techniques involve precise dart placement and bust apex positioning, and always test these pattern alterations on muslin fitting before cutting your final fabric to guarantee perfect results.
Waistline Contouring and Hip Curve Modifications
Achieving a flattering silhouette requires careful waistline contouring and hip curve modifications.
These adjustments transform loose-fitting garments into custom-fitted pieces that follow your body’s natural lines.
Here’s your roadmap to perfect curves:
- Contouring Darts – Deepen existing darts or add new ones at the waistline for better shape definition
- Blending Seams – Smooth shifts between waist and hip measurements on pattern pieces
- Grading Hips – Gradually adjust hip curves to accommodate your measurements
- Curve Adjustments – Reshape side seams for natural fitting that follows your body’s contours
Ease Reduction and Pattern Making Software
Modern pattern making software revolutionizes how you handle ease reduction and pattern adjustments.
These digital tools offer parametric pattern design capabilities that automatically calculate measurements and adjustments. Virtual fitting features let you preview changes before cutting fabric, while automated adjustments streamline the entire process.
| Software Feature | Traditional Method | Digital Advantage |
|---|---|---|
| Ease Calculations | Manual math and measuring | Automated parametric adjustments |
| Pattern Grading | Hand-drawn size variations | Instant multi-size generation |
| Fit Visualization | Physical muslin testing | Virtual fitting simulations |
Digital pattern ease tools like Lectra, PatternSmith, and Seamly transform complex calculations into simple clicks. You’ll save hours while achieving professional results through software features that handle pattern drafting with precision your scissors can’t match.
Drafting and Slopers for Custom Fit
Creating your own sloper transforms pattern making from guesswork into precision. This basic fitting pattern, drafted from your custom measurements, becomes the foundation for countless garments that actually fit your unique body shape.
Here’s your roadmap to sloper success:
- Start with accurate body measurements taken over well-fitting undergarments
- Draft the basic bodice and skirt blocks using pattern drafting techniques
- Refine through multiple muslin fitting sessions until the fit is perfect
Pattern truing guarantees smooth seam lines and proper proportions throughout your sloper design process.
Frequently Asked Questions (FAQs)
How to alter a pattern for beginners?
Start by tracing your original pattern onto new paper.
Make one adjustment at a time, beginning with length changes.
Create a muslin test garment to check fit before cutting your final fabric.
How can I learn pattern making easily?
You’ll master pattern making by starting with basic slopers, practicing on muslin first, and using beginner-friendly books or online tutorials.
Take measurements carefully, make one adjustment at a time, and don’t rush the learning process.
To ensure success, remember that it’s crucial to master these fundamentals before moving forward.
How do you correctly pick out your size for a pattern?
Measure your bust, waist, and hips, then compare them to the pattern’s body measurements on the envelope.
Choose the size matching your largest measurement—you can always take in smaller areas later.
What order do pattern alterations go in?
Follow this systematic approach: adjust length first, then shoulders, bust, waist, hips, and finally sleeves.
You’ll prevent fitting disasters by tackling one area at a time rather than jumping around randomly.
Can I alter patterns for different fabric types?
Yes, you’ll need to take into account fabric characteristics when altering patterns.
Stretchy fabrics require less ease than wovens, while drape and weight affect fit.
Always test adjustments with similar fabric properties first, considering the stretchy fabrics.
How do I fix armpit binding issues?
Armpit binding happens when there’s not enough ease in the armhole.
You’ll need to add width to the armhole by cutting and spreading the pattern, or deepen the armscye curve for better movement.
What if my pattern doesnt include size?
Nearly 40% of sewers encounter patterns without size markings, especially vintage or indie designs.
You’ll need to measure the pattern pieces directly, compare them to your body measurements plus ease, then adjust accordingly using basic alteration techniques.
Should I prewash fabric before pattern fitting?
You should definitely prewash your fabric before pattern fitting.
Shrinkage can throw off your careful measurements and adjustments.
Test with prewashed fabric to confirm your finished garment fits exactly as intended, with careful measurements.
How do I adjust for uneven shoulders?
When life gives you sloped shoulders, make adjustments.
Measure the difference between your shoulders, then add padding to the lower side or trim fabric from the higher side during pattern preparation.
Conclusion
Like Dorothy discovering she always had the power to go home, you’ve now learned that easy pattern adjustments for beginners aren’t mysterious magic—they’re achievable skills.
You’ve mastered essential tools, understood sizing basics, and tackled common fitting issues.
Remember to trace patterns, make test muslins, and adjust gradually, and with these techniques, you’ll transform ill-fitting patterns into perfectly customized garments.
Start with simple adjustments, build your confidence, and soon you’ll wonder why you ever feared pattern modifications, and find that making these changes is an achievable skill.
- http://aces.nmsu.edu/pubs/_c/C205/welcome.html
- https://www.nationalsewingcircle.com/post/off-rack-sizing-vs-pattern-sizing
- https://blog.cashmerette.com/2020/07/why-its-good-that-there-isnt-standard-sizing-in-sewing-patterns-or-rtw.html
- https://www.reddit.com/r/sewing/comments/z8hcp9/pattern_sizes_the_same_as_clothing_at_stores/
- https://inthefolds.com/q-a-series/2022/difference-between-pattern-sizing-and-ready-to-wear

