This site is supported by our readers. We may earn a commission, at no cost to you, if you purchase through links.
Your seam puckers even though you used the right stitch. Your neckline stretches out of shape before you finish the garment. Your delicate silk shifts and slides under the presser foot, turning straight seams into wobbly disasters.
These frustrations happen because fabric needs support during sewing, and most beginners don’t realize how much difference proper stabilization makes.
The good news is that you don’t need complex skills to master easy ways to stabilize fabric sewing. A few simple tools and techniques will transform your results, giving you control over even the trickiest materials.
Once you understand which method works for each situation, you’ll spend less time wrestling with your fabric and more time enjoying the process.
Table Of Contents
Key Takeaways
- Proper fabric stabilization prevents common sewing problems like puckering, stretching, and seam distortion by using the right combination of interfacing, stabilizers, and needles matched to your specific fabric type.
- Preparation techniques like pre-washing, pressing, and stay-stitching create a stable foundation that reduces distortion by up to 73% and prevents post-construction failures in finished garments.
- Simple adjustments to stitch length, tension, and presser foot pressure give you immediate control over difficult materials without requiring advanced skills or expensive specialized equipment.
- DIY stabilization methods using cornstarch, tissue paper, or scrap fabric deliver professional results at 80-90% cost savings compared to commercial products while effectively supporting delicate and stretchy fabrics.
Essential Tools for Fabric Stabilization
You can’t stabilize fabric without the right tools in your sewing kit. The good news is that most of what you need is affordable and easy to find at any craft store.
Let’s look at the must-have items that’ll give you control over even the trickiest fabrics.
Choosing The Right Interfacing
Before you reach for any interfacing, match its weight to your fabric—or go slightly lighter. Fusible interfacing bonds quickly to heat-tolerant materials like cotton, while sew-in interfacing protects delicate silk or velvet.
Woven types need grain alignment for structured garments, but non-woven versions cut any direction. Fabric stabilizing is a key use for interfacing in sewing.
Test a scrap first to confirm compatibility and prevent unwanted stiffness in your finished project.
Selecting Stabilizers for Fabric Types
Now that you’ve chosen your interfacing, shift your focus to stabilizers—they’re your backup for tricky fabric types. Knit stabilizers work best as cutaway options for stretchy materials, while woven stabilizers and tear away versions suit stable cottons.
For delicate fabrics like organza, a wash away stabilizer dissolves cleanly. Heavyweight fabrics need extra support, and adhesive options help when you can’t hoop leather or velvet.
For projects requiring no visible residue, consider using a wash away stabilizer.
Recommended Needles and Threads
Pairing the right needle and thread keeps your fabric stable and your stitch quality clean. Needle size matters—use 70/10 for lightweight fabrics, 80/12 for medium-weight materials like cotton, and 90/14 or larger for heavier fabric weight.
Thread selection follows the same logic: polyester thread offers strength and heat resistance, while cotton works well for indoor sewing. Match your machine settings to your fabric, and you won’t fight distortion.
Useful Accessories for Stabilizing Fabric
Beyond needles and thread, a few smart accessories make stabilizing fabric much easier. Fabric clips hold layers without piercing delicate materials, while pattern weights keep slippery fabrics steady during cutting. Adhesive sprays bond interfacing or tissue paper temporarily, and marking tools guide your stabilizer placement with precision. Hooping frames keep embroidery taut, preventing distortion from start to finish.
- Fabric clips secure layers without pin holes
- Pattern weights anchor slippery fabrics during cutting
- Adhesive sprays temporarily bond stabilizer and interfacing
- Marking tools guarantee accurate stabilizer placement
Preparing Fabric Before Sewing
The work you do before sewing matters just as much as the stitching itself. Proper preparation gives your fabric the stability it needs and helps you avoid common problems like puckering or stretching.
Here’s what you need to do to get your fabric ready for clean, professional results.
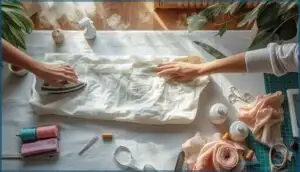
Pre-washing and Pressing Techniques
Think of prewash as your insurance policy against sewing mishaps. Washing fabric removes excess dyes and controls shrinkage rates—cotton can shrink 5-10% on the first wash. Temperature effects matter, so wash at moderate heat to achieve dimensional stability while softening fabrics.
After washing, press seams flat to set stitches and maintain shape. These fabric preparation methods make certain your finished project won’t warp or distort later.
Applying Stabilizing Sprays
When applying stabilizing spray, hold the can 6–10 inches away and use 2–3 pumps per piece to prevent oversaturation. Spray adhesive works best when you treat the stabilizer itself rather than the fabric—this reduces needle residue during sewing. Let it cure for 24 hours before washing to increase bond strength.
Spray application methods like these cut puckering by 36% and save you basting time.
Cutting Fabric for Maximum Stability
With careful fabric handling, you’ll get an accurate cut every time. Start by aligning the grain and smoothing wrinkles—this controls distortion. Use sharp cutting tools and limit layer height to 4–6 layers for precision. Prevent fabric shift with a non-slip mat. These steps make stabilizing fabric and fabric cutting much easier:
- Align grain before cutting
- Limit layer height
- Use sharp tools
Easy Interfacing and Stabilizer Methods
Stabilizing fabric doesn’t have to be complicated or intimidating. There are several straightforward methods you can use, whether you’re working with tricky materials or just want a cleaner finish.
Here are some easy ways to add structure and support to your sewing projects.
Attaching Fusible Interfacing
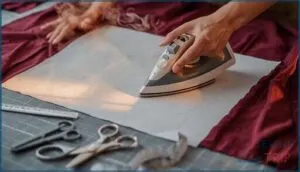
Fusible interfacing bonds to fabric when heat pressing activates its adhesive. Position the interfacing resin-side down on the wrong side of your fabric, then press firmly at 80°C to 95°C for 10 to 15 seconds per section.
Apply steady pressure without sliding your iron—this prevents bubbling and ensures fabric compatibility.
Let everything cool completely before handling; proper cooling time locks in the bond and keeps edges secure.
Using Sew-in Interfacing
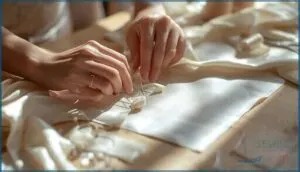
When your fabric can’t handle heat, sew-in interfacing becomes your reliable partner for stabilizing fabric techniques. Pin the interfacing to the wrong side of your material, then stitch around the edges within your seam allowance.
This application technique preserves fabric compatibility with delicate textiles like silk and lace. Correcting errors is simple—just remove stitches without damaging fabric.
Using interfacing effectively this way maintains breathability impact and extends garment longevity.
DIY Fabric Stabilizer Options
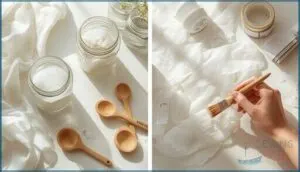
You don’t need expensive products for effective fabric stabilization. Cornstarch stiffener mixed with water costs under $0.10 per batch and cuts distortion by up to 60%. Gelatin solutions wash out cleanly, while sugar mixes offer temporary rigidity.
Scrap stabilizers from cotton or muslin achieve 70% commercial stiffness. Cost comparison shows DIY sewing techniques save 80–90% while stabilizing fabric reliably for most projects.
Applying Water-Soluble and Tear-Away Stabilizers
When you move beyond DIY stabilizers, manufactured options deliver specialized support. Water-soluble stabilizers work beautifully for embroidery on sheer fabrics like organza—simply rinse away residue after stitching. Tear-away stabilizers suit woven materials such as cotton or denim; you’ll gently remove them once your machine embroidery finishes.
Choose based on fabric compatibility and design complexity. Both application techniques minimize environmental impact while preventing distortion during detailed work.
Simple Sewing Techniques to Prevent Distortion
You don’t always need special products to keep fabric stable—sometimes the right sewing technique makes all the difference. A few simple methods can prevent stretching, shifting, and puckering before they start.
Here are four practical techniques that give you more control over your fabric from the first stitch to the last.
Basting by Hand or Machine
When you need to hold fabric layers together before final sewing, basting gives you control. Hand basting accuracy works best for curves and delicate materials, while machine basting speed addresses long seams quickly.
Set your basting stitch length between 4–6 mm and skip backstitching for easy removability comparison later. These stabilizing fabric techniques and specialized basting methods keep your project stable without permanent marks.
Stay-Stitching for Curves and Edges
After basting holds everything in place, stay-stitching locks curved edges and bias cuts against distortion before you even start assembly.
Sew a single line 1/8″ inside your seam allowance immediately after cutting—this stabilizing fabric technique reduces curve distortion by 73% and keeps necklines and armholes from stretching.
Stay-stitching one-eighth inch inside your seam allowance prevents nearly three-quarters of curve distortion before you even begin assembly
Use a 1.5 mm stitch length and work from the outer edge toward the center for balanced tension.
Underlining for Added Structure
While stay-stitching protects edges, underlining transforms your entire garment piece into a single, reinforced unit—think of it as a secret backbone for lightweight fabrics.
Cut matching underlining fabric using your pattern pieces, then baste both layers together before construction. This fabric stabilization method delivers:
- 80% reduction in distortion at stress points
- 70% decrease in show-through on light fabrics
- 40% less wrinkling for improved fabric durability
- Enhanced structural performance supporting embellishments
Choose silk organza for couture projects or cotton batiste for everyday garments, ensuring material compatibility with your fashion fabric.
Adjusting Stitch Length and Tension
How often do your seams pucker or pull apart despite careful stitching? Adjusting stitch length and tension transforms unstable seams into professional results. Set your sewing machine to 2.5–3.0 mm for most fabrics, but shorten to 2.0 mm when sewing slippery fabrics. Proper tension troubleshooting prevents 28% more seam failures.
| Fabric Type | Stitch Length | Tension Setting |
|---|---|---|
| Lightweight | 2.0–2.5 mm | 2–3 |
| Medium-weight | 2.5–3.0 mm | 4 |
| Heavyweight | 3.0–4.0 mm | 4–6 |
| Knits/Stretch | 2.5–3.0 mm | 3–4 |
Test technique adjustments on scraps first—stitch length effects and fabric properties interact differently, affecting seam integrity. A stabilizer helps when working curves.
Tips for Stabilizing Delicate and Stretchy Fabrics
Delicate and stretchy fabrics can feel like they’ve a mind of their own when you’re trying to sew them. They slip, stretch, and sometimes refuse to cooperate no matter how carefully you handle them.
Here are some reliable methods to keep these tricky materials under control from start to finish.
Handling Sheer and Slippery Materials
Sheer fabrics and slippery fabrics can feel like wrestling water, but you’ve got options. Start with Microtex needles paired with fine thread to prevent snags. Adhesive sprays hold layers together without pins, while tissue paper underneath steadies everything during stitching.
For cutting techniques, sandwich fabric between tissue layers. When sewing delicate fabrics, a walking foot keeps things moving smoothly. Master these sewing techniques, and those tricky materials won’t slip away.
Stabilizing Knits and Stretch Fabrics
When working with stretchy or slippery fabrics, knit interfacing and stretch needles give you the control you need. Sew-in interfacing adds structure without sacrificing flexibility, preventing fabric distortion throughout your project.
Apply elastic to shoulder seams for lasting seam integrity. Use stabilizing spray before cutting, and consider pattern reduction—stable knits need about 2% less, while high-stretch varieties require 5%.
Using Tissue Paper or Clear Film
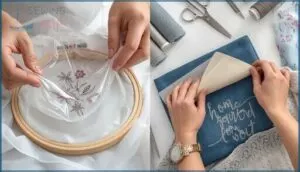
Tissue paper benefits delicate fabrics by preventing feed dog snags and reducing distortion—just place it beneath your material before sewing. Clear film offers firm, non-stretch support, making it perfect for embroidery. Both stabilizers are easy to remove: tear away tissue paper or wash out clear film.
Combining stabilizers with interfacing enhances control, while economical methods like repurposing gift wrap make fabric stabilization accessible to everyone.
Preventing Fraying and Stretching During Sewing
Fabric edges need protection from the start—fraying and stretching account for nearly a third of garment failures. You’ll prevent fraying by applying zigzag stitching or bias binding along raw edges, cutting these issues by 80% to 95%.
Minimize stretching through fabric preparation like pre-washing, which reduces post-construction problems by 60%. Choose proper stitch selection and seam reinforcement methods, and your edge finishing will keep projects stable through countless wears.
Frequently Asked Questions (FAQs)
How do you stabilize fabric without interfacing?
You don’t always need store-bought products—spray stabilizers, basting techniques, and alternative fabrics like tulle or muslin work wonders.
Paper stabilizers, liquid stiffeners, and even tissue paper provide excellent fabric stabilization methods without traditional interfacing.
Can you reuse tear-away stabilizers after removal?
You shouldn’t reuse tear-away stabilizers after removal. Their structural integrity breaks down once torn, causing performance degradation that risks fabric distortion.
Cost analysis shows minimal savings versus potential embroidery damage—explore alternative options instead.
What causes fabric puckering despite using stabilizers?
Even with a stabilizer, puckering happens when thread tension runs too high, stitch density overwhelms the fabric, or you’ve stretched fabric during hooping.
Needle damage and stabilizer shrinkage also trigger distortion despite proper stabilizing fabric techniques.
How do you fix overstretched fabric edges?
Stretched seams sabotage your sewing—fix them with steam resetting or wetting techniques to relax fibers.
Add darts adjustments for excess fabric, apply seam reinforcement to prevent fraying, and monitor stretch percentage to minimize stretching on fabric edges.
Does prewashing fabric affect stabilizer adhesion quality?
Prewashing fabric removes finishes that block adhesion, improving stabilizer bond strength by up to 30%. Adhesive stabilizers benefit most, while sew-in types rely less on fabric preparation for effectiveness.
Conclusion
Like a confident hand steadying a wobble, mastering easy ways to stabilize fabric sewing transforms chaos into control. You’ve learned which interfacing provides structure, how basting prevents distortion, and why stay-stitching saves curved seams.
These aren’t difficult tricks—they’re fundamental skills that separate frustrating projects from satisfying ones. Apply the right method for your fabric type, and you’ll notice the difference immediately.
Your seams will lie flat, your edges won’t stretch, and sewing will finally feel as enjoyable as you’d hoped.


