This site is supported by our readers. We may earn a commission, at no cost to you, if you purchase through links.
These unsung foundations determine whether your stitches sit flat and crisp or pull your fabric into a wrinkled disaster, yet most stitchers grab whatever’s on hand without understanding how composition, weight, and application method transform results.
Once you match the right stabilizer to your fabric and design density, you’ll prevent distortion before it starts, remove support cleanly when you’re done, and finally achieve professional-quality work that stays beautiful through years of wear and washing.
Table Of Contents
Key Takeaways
- Choosing the right stabilizer—cut-away for knits and stretch fabrics, tear-away for wovens, or water-soluble for delicate work—prevents puckering, distortion, and design failure by matching material composition and weight to your fabric type and stitch density.
- Stabilizer weight must align with design density, with lightweight options (1.5–2.0 oz) supporting patterns under 10,000 stitches, medium weights (2.0–2.5 oz) handling 10,000–20,000 stitches, and heavyweight backings (2.5–3.5 oz) necessary for dense designs exceeding 20,000 stitches.
- Proper application techniques—achieving drum-tight hoop tension without stretching, aligning fabric grain with stabilizer, and extending backing 0.5–1 inch beyond the hoop—reduce fabric shift by up to 40% and prevent up to 90% of common embroidery problems.
- Material composition matters for both performance and sustainability, with cellulose offering biodegradability, polyester providing durability and minimal stretch, and PVA dissolving completely for invisible support, while eco-friendly alternatives like recycled polyester reduce environmental impact without sacrificing quality.
What is Embroidery Stabilizer Material?
If you’ve ever wondered why some embroidered projects turn out crisp and professional while others look puckered or distorted, the answer often lies in one essential material you mightn’t even see in the finished piece.
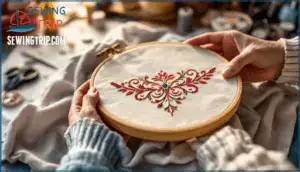
Embroidery stabilizer is the unsung hero that sits beneath or behind your fabric, providing the support your stitches need to form cleanly and maintain their shape.
Let’s break down what stabilizer material actually is, why it matters so much for your embroidery work, and how it transforms the quality of every stitch you create.
Definition and Core Purpose
At its heart, embroidery stabilizer material is a textile backing that provides structural support during stitching, keeping your fabric taut and true. This fabric reinforcement prevents distortion and puckering by balancing tension between thread and base material, distributing stitch density evenly across the surface. Without proper stabilization, even the most precise embroidery backings can’t compensate for fabric movement, compromising your design’s integrity.
Different stabilizer types—from cut-away to wash-away options—serve the core stabilizer function of maintaining shape throughout the embroidery process, making sure every stitch lands exactly where you intend. Choosing the correct stabilizer is essential, as this impacts embroidery results.
Importance in Machine and Hand Embroidery
Embroidery stabilizer material proves indispensable in both machine and hand embroidery, though each method demands different levels of stitch support. In machine embroidery, where speeds can hit 500–1000 stitches per minute, stabilizers distribute mechanical stress and reduce fabric distortion by up to 90%, protecting your base material while maintaining design accuracy.
Hand embroidery benefits from fabric stabilization too, especially with water-soluble options that prevent stitch sinking into textured surfaces like velvet, assuring production efficiency and enhanced durability across various embroidery techniques—regardless of whether you’re working by hand or relying on machine embroidery precision.
Selecting the correct stabilizer depends on fabric and design.
How Stabilizers Enhance Stitch Quality
When you understand tension control and fabric stabilization, you’ll notice stitch density reaching ideal levels without puckering—stabilizers reduce fabric distortion by 60–75% while supporting needle penetration across varied textiles. This leads to design durability that withstands 100+ laundering cycles, maintaining sharp embroidery definition.
- Minimized puckering through matched fabric stabilizers that prevent tension-induced wrinkling by 35%
- Enhanced needle penetration with uniform surfaces, cutting skipped stitches by 20–25%
- Superior tension control using cut-away backing that increases stitch density tolerance by 30%
- Long-lasting designs thanks to proper stabilizer selection and application, extending embroidery lifespan through repeated washing
Choosing the right stabilizer types makes your embroidery stabilizer selection bolsters both immediate stitch quality and long-term wearability.
Main Types of Embroidery Stabilizers
When you’re standing at the embroidery machine, ready to bring your design to life, the stabilizer you choose becomes the foundation that makes or breaks your project.
Think of stabilizers as the invisible support crew working behind every perfectly stitched logo, monogram, or decorative pattern, keeping your fabric steady while needles dance across the surface at lightning speed.
Stabilizers are the invisible support crew behind every perfect stitch, keeping fabric steady while needles dance across the surface at lightning speed
Let’s walk through the four main categories of stabilizers you’ll encounter, each designed to solve specific challenges and reveal different creative possibilities.
Cut-Away Stabilizer
When your project demands permanent support, cut-away stabilizer becomes your embroidery backbone. This polyester-based backing stays attached beneath your stitches, making it essential for fabric compatibility with knits, jerseys, and stretch materials that shift under needle pressure. With design density support up to 30,000 stitches and washing durability exceeding 50 cycles, cut-away backings deliver peerless stability.
Proper embroidery stabilizer selection means matching weight to fabric—2.5 oz for everyday apparel, 3.0+ oz for heavyweight projects—guaranteeing embroidery backing types support your creative vision without puckering or distortion. Your application techniques matter: hoop the stabilizer with your fabric, stitch your design, then trim the excess for a professional finish.
| Weight | Best For | Fabric Compatibility |
|---|---|---|
| 2.0 oz | Lightweight knits, fine fabrics | Jersey, thin fleece |
| 2.5 oz | General apparel, polo shirts | Cotton-poly blends, standard knits |
| 3.0 oz | Heavy designs, outerwear | Sweatshirts, dense weaves |
| 3.3 oz | High-density patterns | Thick fleece, canvas |
| Fusible | Delicate or sheer textiles | Organza, silk, batiste |
Tear-Away Stabilizer
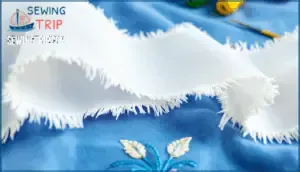
When precision matters most for non-stretch textiles, tearaway stabilizer delivers temporary support that vanishes with a simple tug. This fiber composition—primarily cellulose and rayon bonded into nonwoven sheets—offers tear strength calibrated for woven fabrics like cotton, linen, and denim, where design density stays under 10,000 stitches per four-inch frame. Your removal technique shapes the outcome: secure the fabric, tear gently along stitch lines, and you’ll preserve crisp edges without thread lift.
Why tear-away backings excel for everyday embroidery:
- Clean removal leaves no residue on fabrics where both sides show, perfect for monograms and logos that need professional polish
- Biodegradable composition means 60% of tear away stabilizers break down naturally, reducing your environmental impact without sacrificing performance
- Weight adaptability from 1.0 to 2.5 oz per square yard lets you match stabilizer types to stitch count—double-layer light grades when you need extra stability
- Cost-effective choice for high-volume projects, with embroidery backing types that dominate 45% of commercial applications worldwide
Wash-Away (Water-Soluble) Stabilizer
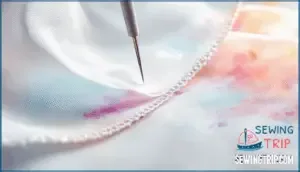
For delicate projects where even the hint of backing would ruin the magic, watersoluble stabilizer gives you invisible support that vanishes entirely when rinsed. This PVA composition—polyvinyl alcohol film or soluble paper between 30 and 120 microns thick—dissolves in lukewarm water within five to twenty minutes, leaving less than 0.5% polymer trace according to residue analysis.
Film thickness determines your application: thinner grades suit organza toppers, while heavier washaway stabilizer layers manage freestanding lace with dissolving temperatures optimized between 25 and 30°C.
Environmental impact stays minimal when you rinse in ten liters per ten grams, and starch-blended stabilizer types now biodegrade 30% faster than standard embroidery stabilizer formulations.
Adhesive and Iron-on Stabilizers
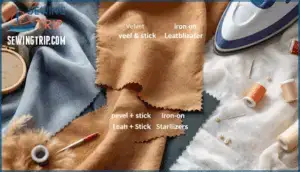
When you can’t hoop your fabric—think velvet, leather, or whisper-thin organza—adhesive stabilizer and iron-on stabilizer become your go-to fabric stabilization allies.
Peel-and-stick varieties bond at 2 to 5 N/cm through pressure-sensitive polymers, accommodating repositioning up to fifteen cycles and supporting medium-density embroidery techniques without slippage.
Iron-on stabilizers fuse at 130°C heat settings, reducing fabric shift by 40% and delivering bond strength that keeps stretchy knits aligned within half a millimeter.
Application techniques matter: press for ten seconds, extend coverage 2.5 cm beyond your design, and pair these stabilizer types with the right fabric pairings to prevent residue removal headaches later.
Key Properties of Stabilizer Materials
Not all stabilizers are created equal, and understanding what they’re made of can make or break your embroidery project. The material itself, along with its thickness and environmental impact, plays a huge role in how well your design turns out and how easy the stabilizer is to work with.
Let’s break down the key properties you should know before choosing your next stabilizer.
Material Composition (Cellulose, Polyester, PVA)
When you’re choosing fabric stabilizers, understanding what’s actually inside them makes all the difference in your embroidery results. Cellulose advantages include breathability and biodegradability, perfect for lighter textile stabilization needs, while polyester durability provides the strength and minimal stretch you need for dense stitch designs on performance fabrics.
PVA solubility shines in wash-away stabilizers, dissolving completely within seconds for delicate work on lace or sheer materials.
Fiber blends combine these stabilizing materials to balance flexibility with support, and eco-alternatives like recycled polyester or plant-based options are reshaping stabilizer types for sustainable makers who care about their environmental footprint.
Thickness and Weight Options
Think of stabilizer weight like choosing the right anchor for different boats—you wouldn’t use the same weight for a kayak and a yacht. Embroidery backings range from lightweight (1.5–2.0 oz) for delicate fabrics under 3 oz per square yard, to heavyweight (2.5–3.5 oz) for denim and canvas exceeding 6 oz.
Fabric weight and stitch density work together: designs under 10,000 stitches need lighter stabilization, while ultra-dense patterns over 25,000 stitches demand stabilizer layers for proper fabric support.
Matching fabric thickness to stabilizer weight prevents puckering and preserves drape considerations, so testing protocols on scrap swatches help you nail the perfect combination before committing to your final piece.
Environmental and Biodegradable Choices
Sustainable embroidery backings now offer real alternatives to petroleum-based materials, though you’ll need to navigate some trade-offs. Cellulose options decompose within 3–6 months in composting environments, while rPET benefits include 50–60% energy savings by repurposing plastic bottles into fabric stabilizers.
PVA concerns persist since up to 75% may linger in water systems despite biodegradable labeling. Adhesive alternatives using starch-based binders biodegrade within 180 days, and circular practices like reusing stabilization scraps extend material lifespan by 25%, making eco-conscious embroidery backings increasingly practical for environmentally-focused creators.
Choosing The Right Stabilizer for Fabric
Picking the right stabilizer isn’t about guesswork—it’s about matching material to fabric, design, and finish. Your fabric’s weave, stretch, and weight all play a role in which backing will endure best, while your design’s density and stitch count determine how much support you’ll need.
Let’s break down how to choose stabilizers that work with your fabric, not against it.
Stabilizer Selection by Fabric Type (Knit, Woven, Stretch, Sheer)
Your fabric selection determines which embroidery stabilizer performs best, since fabric stretch, weaving, and composition influence how stitches grip.
Matching Stabilizer to Embroidery Design Density
Beyond fabric choice, stitch density plays a major role in how you select embroidery stabilizer weights and application methods. High-density designs exceeding 20,000 stitches demand heavyweight stabilizers around 2.5–3.0 oz, while medium-density patterns between 10,000–20,000 stitches work best with 2.0–2.5 oz embroidery backings to balance support without sacrificing drape.
Here’s how design complexity shapes your stabilizer decisions:
- Low-density patterns under 10,000 stitches pair well with lightweight tear-away options at 1.5–2.0 oz
- Dense fill stitches generate up to 40% more tension, requiring cut-away stabilizers for lasting fabric interaction
- Layering stabilizers becomes necessary when designs exceed 30,000 stitches, adding roughly one layer per 10,000 stitches
- Maintaining a ratio of approximately 0.1 oz stabilizer per 1,000 stitches guarantees proper weaving support and minimizes puckering by up to 30%
Needle and Thread Considerations for Stabilizer Use
Once you’ve matched stabilizer weight to design density, embroidery needles and thread weight become your next precision tools. Using the 75/11 needle size standard works beautifully with 40-weight polyester embroidery thread for medium fabrics backed with tear-away or cut-away stabilizers. However, shifting to thicker 30-weight threads requires stepping up to 90/14 needles to prevent thread shredding.
Point types also play a crucial role—ballpoint needles gently separate knit fibers when paired with cut-away backings, while sharp needles ensure crisp penetration through woven fabric weaves and tear-away layers. Thread tension adjustments in small 0.2–0.3 N increments help maintain stitch stability across different stabilizer thicknesses. Keeping tension between 25–35 grams guarantees balanced upper and lower thread interaction.
Since improper needle-thread pairing causes over 60% of breakage issues, and dull needles degrade stabilizer integrity by 15% after 5,000 stitches, regularly swapping needles ensures uniform stitch density and professional results.
| Thread Weight | Recommended Needle Size |
|---|---|
| 50-weight (thin) | 70/10–75/11 |
| 40-weight (standard) | 75/11–80/12 |
| 30-weight (thick) | 90/14–100/16 |
Application and Best Practices for Stabilizers
Knowing your stabilizer type is just the beginning—the real magic happens when you apply it correctly and manage the fabric with care. Proper hooping, alignment, and removal techniques can mean the difference between a crisp, professional finish and a puckered mess that makes you want to start over.
Let’s walk through the practical steps that’ll help you get clean, distortion-free embroidery every single time.
Proper Hooping and Alignment Techniques
Getting your hoop tension and fabric grain alignment just right can feel like tuning an instrument—when everything’s balanced, your embroidery sings. Proper hooping techniques, combined with the right embroidery stabilizer selection, guarantee your cutaway stabilizer or tearaway stabilizer backs every stitch without distortion.
Here’s how to master fabric stabilization techniques and boost embroidery placement accuracy:
- Hoop Tension Control: Aim for drum-tight fabric—taut but not stretched—to prevent puckering in 90% of projects while avoiding hoop burn from over-tightening.
- Fabric Grain Alignment: Align your fabric’s grain parallel to the stabilizer grid, reducing horizontal shifting by roughly 25% during multi-directional stitching.
- Laser Guided Systems: These tools cut setup time by 40–60% compared to manual marking, delivering consistent placement within 1–2 mm tolerance.
- Use the Smallest Hoop: Matching your hoop size to your design reduces material shift risk by 30–40% during high-speed stitching runs.
- Extend Stabilizer Beyond the Hoop: Leave 0.5–1 inch of stabilizer past the hoop frame perimeter for uniform edge support, improving stability by 25%.
Tips to Prevent Puckering and Distortion
Precision matters when you’re chasing impeccable designs—because over 60% of puckering traces back to under-stabilization, incorrect Stabilizer Weight, or mismatched Thread Tension Management. Pairing proper Fabric Tension Control with smart Needle Optimization and refined Hooping Techniques will transform your embroidery stabilizer game, whether you reach for a cutaway stabilizer or tearaway stabilizer.
Here’s your troubleshooting toolkit for fabric stabilization techniques:
| Issue | Cause | Solution |
|---|---|---|
| Puckering on knits | Under-stabilization, excess stretch | Use cutaway stabilizer; float fabric with fusible poly mesh |
| Wrinkling on wovens | High stitch density (>6,000/sq in) | Reduce density or add second layer of stabilizer |
| Thread breaks | Bobbin tension >35 cN, wrong needle size | Lower tension to ~25 cN; match needle to fabric (60/8–65/9 for delicates) |
| Hoop marks | Over-tightening, prolonged clamping | Achieve drum tension without stretching; consider magnetic hoops |
Balance your thread ratio at roughly 1/3 bobbin to 2/3 top thread, keep stitch density in check, and pre-wash fabrics to eliminate 3–5% residual shrinkage that sneaks in post-embroidery.
Removing or Dissolving Stabilizer After Embroidery
Mastery of Stabilizer Removal transforms your finished piece from acceptable to impeccable, especially when you understand Dissolution Methods for Water Soluble Stabilizers versus the swift tear or trim required for Tear Away Backings and Cut Away Backings. Lukewarm Water Temperature—between 25–35°C—and running Rinsing Techniques dissolve PVA-based embroidery stabilizer within 30–60 seconds, preventing cloudiness and ensuring Residue Prevention, while proper Fabric Stabilization Techniques during post-embroidery care preserve your design’s integrity.
- Trim excess stabilizer before rinsing to reduce water use by 40% and minimize environmental polymer discharge.
- Air-dry flat on absorbent towels to preserve stitch shape and prevent distortion up to 95% better than hanging.
- Inspect damp fabric visually for stiffness or cloudiness, then re-rinse with mild detergent to eliminate any lingering film.
Frequently Asked Questions (FAQs)
How do you store stabilizers to prevent degradation?
Keep your stabilizers flat in a cool, dry spot away from direct sunlight and moisture, which can degrade water-soluble stabilizers and weaken adhesives.
Store them in original packaging or airtight bags to maintain shelf life, control humidity, and prevent degradation that compromises fabric stabilization techniques and overall embroidery quality.
Can stabilizers be layered for extra-dense embroidery designs?
Absolutely, you can layer stabilizers when you’re tackling extra-dense embroidery designs, and honestly, it’s sometimes the only way to prevent puckering or distortion on challenging projects.
Combining a CutAWay Stabilizer with a TearAWay Stabilizer, or even adding a WaterSoluble Stabilizer on top for intricate work, gives you the embroidery depth and fabric stabilization methods needed to manage heavy stitch counts without compromising quality or pushing stabilizer limits.
What stabilizer alternatives exist for allergic or sensitive users?
When sensitivity strikes, think of stabilizers as the safety net that shouldn’t cause the fall. Hypoallergenic options like biodegradable materials, natural stabilizers from cellulose-based water-soluble stabilizers, and eco-friendly alternatives, including organic cotton tear-away stabilizers, provide sensitive skin solutions without compromising your embroidery stabilizer performance or quality.
How does stabilizer weight affect final embroidery texture?
Heavier embroidery stabilizer adds firmness beneath your stitches, flattening embroidery loft and reducing texture.
Lighter weights let designs sit higher on the fabric, enhancing stitch visibility and creating a softer, more dimensional finish that moves naturally with fabric grain and weave.
Conclusion
What separated perfect embroidery from frustrating failures wasn’t talent or expensive equipment—it was understanding embroidery stabilizer materials and their purposeful placement beneath every stitch.
Now that you’ve mapped composition to fabric, weight to design density, and removal method to your final use, you grasp the blueprint for consistent, professional results that won’t pucker, shift, or disappoint after the first wash.
Your next project won’t rely on luck; it’ll stand on the right foundation from the very first needle drop.
- https://www.cognitivemarketresearch.com/embroidery-market-report
- https://www.linkedin.com/pulse/equipment-embroidery-market-future-outlook-20252033-growth-4jq1c
- https://www.futuremarketinsights.com/reports/needlecraft-patterns-market
- https://www.accio.com/t-v2/business/top-selling-embroidery-stabilizer
- https://gunold.de/en/blog/2025/03/04/green-line-embroidery-backings-without-microplastics/

