This site is supported by our readers. We may earn a commission, at no cost to you, if you purchase through links.
The most common blunders include skipping the pre-wash step, which leads to shrinkage surprises later. You’ll also want to avoid cutting off-grain, using dull tools, and ignoring pattern markings.
Measuring twice and cutting once isn’t just a cliché—it’s your safety net against costly errors. Don’t rush the squaring process either, as wonky edges create a domino effect of problems.
Sharp rotary cutters and quality rulers are your best friends, while stretchy fabrics need extra care to prevent distortion. These foundational mistakes might seem minor, but they’re the difference between professional-looking results and frustrating do-overs.
Table Of Contents
Key Takeaways
- Pre-wash your fabric – You’ll prevent shrinkage disasters and remove sizing chemicals that interfere with accurate cutting and proper drape
- Invest in sharp cutting tools – Dull blades create jagged edges and fabric distortion, while sharp rotary cutters and scissors deliver clean, professional cuts
- Square your fabric properly – You must align edges with grain lines and remove selvages to prevent twisted seams and uneven hems in your finished project
- Measure twice, cut once – Use quality measuring tools on stable surfaces and double-check all measurements to avoid costly fabric waste and sizing errors
Preparing Fabric Correctly
You’ll set yourself up for success when you properly prepare your fabric before cutting.
Pre-washing removes sizing and chemicals while preventing future shrinkage, ensuring your finished project maintains its intended fit and appearance.
Importance of Pre-Washing Fabric
Pre-washing fabric prevents costly mistakes that can ruin your project.
Cotton fabrics shrink up to 10% after washing, while chemical residues can cause skin irritation. Prewashing eliminates these risks and guarantees your finished garment maintains its intended size and appearance.
Skip the prep work and pay the price—shrinkage can steal a full size from your finished project.
Understanding fabric shrinkage properties is vital for making informed decisions about pre-washing.
Here’s why preshrinking matters:
- Fabric shrinkage prevention – Cotton and natural fibers relax when washed, potentially shrinking your finished project by a full size
- Color bleeding control – Excess dyes wash out during prewashing, preventing staining in future laundering cycles
- Chemical removal – Manufacturing chemicals and formaldehyde treatments are eliminated, making fabric safer for skin contact
- Sizing removal – Starch and sizing treatments wash away, allowing fabric to return to its natural drape
- Fiber relaxation – Stretched fibers from bolt storage realign, providing accurate measurements for precise cutting
Removing Sizing and Chemicals
Fabric Prep starts with chemical removal from manufacturing processes.
You’ll need to prewash fabric to eliminate sizing—those stiff substances that make new fabric crisp but interfere with accurate cutting.
Pre Washing removes these chemicals that can cause uneven shrinkage and poor dye absorption.
Without proper fabric preparation, your finished project won’t behave as expected.
Always prewash fabric using the same method you’ll use for the completed garment’s fabric care routine, to ensure proper fabric preparation and accurate cutting, and to prevent issues like uneven shrinkage.
Identifying Color Bleeding
Testing fabric for color bleeding prevents dye migration disasters that can ruin your entire project.
Before cutting, test fabric swatches in warm water to check color fastness.
Dark fabrics like reds and blues commonly bleed, staining lighter materials.
Proper color testing during fabric preparation identifies problematic dyes early.
This bleed prevention step saves you from heartbreak later.
Understanding fabric identification methods is essential for selecting the right materials and avoiding such issues.
Relaxing Fibers for Accurate Cutting
When you wash fabric before cutting, you’re allowing the fibers to relax into their natural state.
This fiber relaxation prevents fabric distortion after your project is complete.
Preshrinking fabric through pre washing guarantees cutting accuracy by eliminating post-sewing surprises.
Natural fibers like cotton and linen need this fiber preparation to maintain fabric grain integrity.
Without proper fabric relaxation, your cutting techniques won’t matter—the fabric will shift and warp later.
Measuring Fabric Accurately
Accurate measurements form the foundation of successful fabric cutting, yet many sewers rush through this essential step and pay the price later.
You’ll save time, fabric, and frustration by investing in quality measuring tools and developing precise measurement habits from the start.
Using High-Quality Measuring Tools
Your measuring tools are the foundation of precision cutting—think of them as your sewing GPS. Quality matters because worn-out tape measures stretch and damaged cutting mats throw off your accuracy.
Quality tools are your sewing GPS—worn tape measures and damaged mats sabotage precision cutting.
Essential measuring tools for flawless cuts:
- Accurate Rulers – Self-healing cutting mats with grid lines for precise measurements
- Sharp Blades – Rotary cutter with fresh blades for clean, straight cuts
- Measuring Tape – High-quality tape that won’t stretch or distort over time
- Calibration Tips – Seam allowance gauge for consistent, professional results
Investing in accurate rulers is vital for achieving professional-looking sewing projects.
Avoiding Inaccurate Measuring Techniques
Several culprits can sabotage your measuring accuracy. Worn-out measuring tools stretch over time, creating discrepancies up to 0.25" per measurement.
Always measure on flat, stable surfaces—soft or uneven areas cause fabric distortion and measurement errors. Check that your cutting mat’s grid lines align with your ruler accuracy, since mats often have less precise markings.
Position yourself directly above the ruler to avoid parallax errors that throw off your seam allowances and grain line placement.
To achieve precise cuts, for successful quilting projects, you must use proper cutting techniques.
Double-Checking Measurements
Double-checking measurements prevents costly cutting mistakes and fabric waste.
Use the "measure twice, cut once" principle to guarantee sewing accuracy.
Verify measurements from multiple angles using reliable measuring tools.
Check pattern piece placement against grain lines twice before cutting.
These precision techniques eliminate measurement errors that lead to fabric shrinkage miscalculations and inaccurate cuts, saving both time and materials.
Accurate fabric measurement relies on using a measuring tape tool to guarantee precision and ensure that the "measure twice, cut once" principle is effectively applied to prevent errors, and it is also important to consider fabric waste.
Preventing Measurement and Marking Errors
Accuracy starts with using quality measuring tools and checking your work twice.
Measurement Errors and Marking Mistakes can wreck your project before you even start cutting, turning what should be a relaxing hobby into a fabric-wasting headache.
Here’s how to stay on track:
- Use washable fabric markers to avoid permanent stains on your finished pieces
- Double-check seam allowances at multiple points to prevent size variations up to two inches
- Transfer pattern markings immediately after cutting to maintain cutting accuracy and proper grain lines
Smart measuring prevents fabric distortion and keeps your pattern alignment perfect throughout the entire process, ensuring a successful project with proper grain lines.
Squaring and Truing Fabric
Squaring and truing fabric guarantees your pattern pieces align perfectly with the grain lines, preventing twisted seams and uneven hems that can ruin your finished project.
You’ll need to cut away the selvages and pull threads to create straight cutting lines that match the fabric’s natural weave structure, ensuring perfectly aligned pieces.
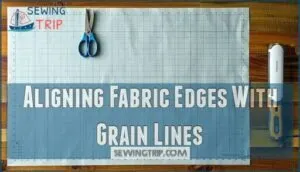
Aligning Fabric Edges With Grain Lines
Fabric alignment with grain lines prevents twisted garments and guarantees proper drape.
Position your fabric with selvage edges parallel to your cutting mat’s grid lines. The lengthwise grain runs parallel to the selvage, while crosswise grain runs perpendicular.
Use pattern placement guides to align grain arrows with fabric’s straight grain. Check fabric grain integrity by measuring from selvage to pattern piece at multiple points for consistent fabric cutting precision.
Cutting Away Selvages for Straight Edges
Beyond the factory’s finishing touches, selvages often harbor hidden irregularities that’ll sabotage your project’s professional appearance. Remove these tightly woven edges before cutting to guarantee your fabric behaves predictably throughout construction.
Here’s your selvage removal strategy:
- Identify problem areas – Check for puckering, different tension, or color variations along selvage edges
- Trim conservatively – Cut away 1/4 to 1/2 inch of selvage using sharp rotary cutter on cutting mat
- Align selvedges first – Match up both fabric edges before trimming for consistent grain management
- Test fabric behavior – Verify that trimmed edges lie flat without pulling or distortion
- Mark your cutting line – Use fabric alignment tools to maintain straight edges after selvage removal
Understanding fabric grain lines is vital for achieving professional results in sewing projects.
This edge trimming step transforms unpredictable fabric into a cooperative partner for precise straight cutting and professional results.
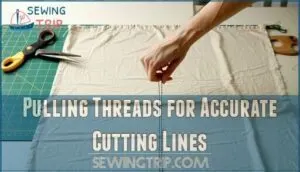
Pulling Threads for Accurate Cutting Lines
Thread pulling creates perfectly straight cutting lines by following your fabric’s natural weave.
Make a small snip at the edge, then gently pull a single thread across the width, bunching fabric as needed.
If the thread breaks, cut along the visible path and resume pulling.
This technique guarantees grain lines stay aligned, preventing fabric cutting mistakes and improving cutting accuracy. Sharp blades complete the process.
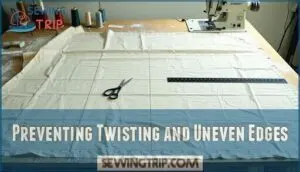
Preventing Twisting and Uneven Edges
Proper squaring and truing prevent the nightmare of twisted garments that never hang right.
When you skip these essential steps, your fabric’s grain management suffers, leading to seams that pull and distort.
Master fabric alignment by ensuring your edges stay perpendicular to the grain line—this foundation guarantees cutting precision and seam stability, preventing costly fabric cutting mistakes.
Cutting Fabric With Precision
Once you’ve properly prepared and squared your fabric, the actual cutting process requires steady hands and the right approach.
Sharp tools and careful technique will make the difference between professional-looking pieces and frustrating mistakes that can derail your entire project.
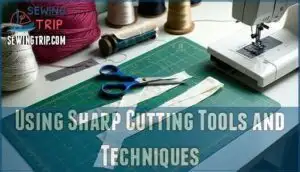
Using Sharp Cutting Tools and Techniques
Sharp cutting tools make all the difference between professional-looking projects and frustrating fabric disasters.
Dull blades create jagged edges, frayed seams, and uneven cuts that compromise your entire project’s quality.
- Sharp fabric scissors slice cleanly through multiple layers without pulling or distorting delicate fibers
- Rotary cutters with fresh blades deliver straighter lines than scissors for long cuts and strips
- Cutting mats protect blade sharpness while providing stable surfaces for precise cuts
- Blade sharpening extends tool life and maintains cutting precision for consistent results
Investing in high quality sharp fabric scissors tools is essential for achieving professional results.
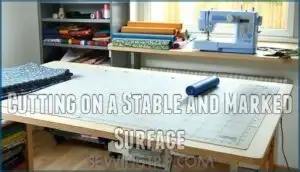
Cutting on a Stable and Marked Surface
A solid foundation sets the stage for flawless cuts.
Your cutting surface matters more than you might think—wobbly tables cause wonky lines, while stable surfaces deliver straight, professional results.
| Surface Type | Pros | Cons |
|---|---|---|
| Self-healing cutting mats | Grid lines for precision, protects rotary cutter blades | Requires flat storage |
| Large flat tables | Ample workspace, stable foundation | May need protection from cuts |
| Cutting boards | Portable, affordable option | Limited size for large projects |
| Kitchen counters | Convenient height, smooth surface | Risk of damage without protection |
Self-healing cutting mats transform your workspace into a precision zone.
These marked surfaces provide ruler guides and protect your rotary cutter blades from dulling on hard surfaces.
The grid lines act as your silent measuring assistant, ensuring fabric cutting precision without constant repositioning.
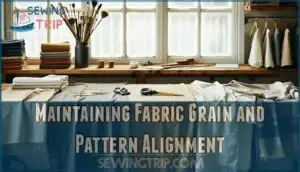
Maintaining Fabric Grain and Pattern Alignment
Fabric grain alignment serves as your roadmap to professional-looking garments.
Always align pattern pieces with the grain line arrows, measuring from selvage to guarantee accuracy.
When fabric stretch runs crosswise, you’ll maintain proper drape and prevent twisted seams.
For bias cutting projects, diagonal grain placement creates beautiful flow but requires extra precision to avoid distortion.
Understanding the importance of fabric grainlines is vital for achieving accurate cuts and professional results.
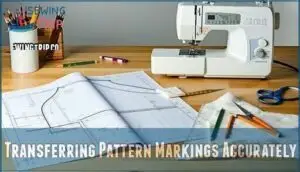
Transferring Pattern Markings Accurately
Transferring pattern markings accurately is where the rubber meets the road for any sewing project.
Use high-quality Marking Tools to guarantee every Seam Allowance, notch, and dart is transferred clearly.
Double-check Pattern Alignment and focus on Notch Accuracy; even a missed mark can lead to Cutting Errors or wonky seam matching.
Prioritize precise pattern transfer and accurate notch placement for seamless results.
Avoiding Common Cutting Mistakes
Even experienced sewers can make cutting errors that compromise their entire project. Understanding these common pitfalls helps you avoid costly mistakes and achieve professional-looking results every time.
Cutting Against The Grain
Beyond the surface of every fabric lies a hidden highway system that determines how your garment will behave.
Cutting against the grain creates fabric distortion that leads to twisted seams, uneven wear, and poor drape.
Your grain alignment matters because lengthwise threads provide strength while crosswise threads offer stretch.
When you ignore the grain line, you’re basically cutting across this textile highway, causing cutting errors that compromise sewing precision and garment longevity.
Ignoring Fabric Grain Placement
When you ignore grain alignment, you’re setting yourself up for a wardrobe disaster.
Fabric grain determines how your garment hangs and moves.
Misaligned pattern placement causes fabric twist, making clothes cling awkwardly or sag.
Always measure from selvage to grain line in multiple spots, ensuring your fabric cutting angle follows the warp direction for professional results.
Using Dull Cutting Tools and Techniques
Sharp blades make all the difference when cutting fabric.
Dull cutting tools create jagged edges, cause fabric snags, and require excessive pressure that shifts your material.
This leads to cutting errors and compromised projects.
Replace rotary cutter blades regularly and invest in proper tool sharpening for your scissors.
Sharp tools give you better edge control and cleaner cuts every time.
Failing to Secure Pattern Pieces and Fabric
Without proper pattern placement and securing, you’ll face pattern slippage and fabric shift that leads to cutting errors.
Use pattern weights or pins to anchor pieces firmly before cutting.
Loose patterns create piece misalignment and seam distortion that ruins your project’s fit.
Take time to check pattern alignment twice—your fabric won’t forgive hasty mistakes that compromise precision.
Frequently Asked Questions (FAQs)
What are the rules in cutting fabric?
Pre-wash fabric to prevent shrinkage, then iron smooth. Square edges with grain lines, use sharp tools on cutting mats, and follow pattern layouts precisely for professional results.
What is the most precise way to cut fabric?
Use sharp fabric scissors or rotary cutters with self-healing mats. Align pattern pieces with grain lines, secure with weights, and cut with long, confident strokes away from your body.
How to prevent frayed edges when cutting fabric?
Testing the theory that frayed edges are inevitable reveals they’re completely preventable.
Sharp cutting tools create clean edges while dull blades tear fibers, causing fraying.
Cut with confidence using properly maintained shears or rotary cutters for professional results, and remember to always use sharp tools.
Why should we soak the fabric before cutting the fabric?
Soaking fabric before cutting prevents shrinkage disasters after you’ve sewn your masterpiece.
It removes sizing chemicals, relaxes fibers, and reveals color bleeding—ensuring your finished project won’t surprise you with unexpected changes, which helps prevent disasters.
How do I cut slippery fabrics safely?
Place fabric on a non-slip mat or pin frequently to prevent shifting.
Use pattern weights instead of pins on delicate materials.
Cut with long, smooth strokes using sharp fabric scissors, keeping one hand firmly anchored on the fabric throughout each cut.
Whats the best way to cut curves?
Sharp scissors work best for curved cuts—take your time and make small, deliberate snips rather than long strokes.
Keep the fabric flat and rotate it as you cut, following the curve smoothly without forcing the blade.
Can I reuse pattern pieces multiple times?
Absolutely, you can reuse pattern pieces as much as you like—just be gentle removing them from fabric to keep edges crisp.
If they start to wear out, trace them onto fresh paper for more precision, which helps maintain complete concepts of your pattern pieces.
How do I cut thick fabrics accurately?
Use extra-sharp fabric scissors and cut slowly through thick fabrics. Support the fabric’s weight with your free hand while cutting. Consider using a rotary cutter for even cleaner edges.
Should I cut single or double layers?
Cut single layers for thick fabrics to maintain accuracy and control.
Double layers can shift, causing uneven cuts and wasted material.
You’ll achieve cleaner edges and better pattern matching with single-layer cutting.
Conclusion
Picture your fabric laid out like a canvas awaiting the artist’s first stroke—this moment determines whether you’ll create a masterpiece or face frustration.
Mastering these fabric cutting mistakes to avoid transforms your sewing from guesswork into precision craftsmanship.
You’ll save time, money, and countless headaches by implementing proper preparation, accurate measuring, and sharp cutting techniques.
Remember, every professional seamstress started with these fundamentals, and your attention to detail during cutting sets the foundation for beautiful, well-fitted garments that you’ll treasure for years.
- https://kokkafabrics.com/blogs/resources/the-ultimate-guide-to-pre-washing-fabric
- https://blog.fabrics-store.com/2024/11/03/how-to-pre-wash-fabric-a-simple-guide/
- https://patternscissorscloth.com/2016/10/25/pre-washing-fabric-is-it-really-necessary/
- https://www.seamwork.com/fabric-guides/do-you-really-have-to-pre-wash-fabric
- https://www.cottoneerfabrics.com/to-prewash-or-not-to-prewash/


