This site is supported by our readers. We may earn a commission, at no cost to you, if you purchase through links.
Fabric handling for quilting is like learning to dance with a new partner – it takes practice, but you’ll soon be gliding across the sewing room floor.
Start with forgiving fabrics like cotton and linen. They’re less likely to give you a headache than those slippery silks!
Pre-wash your fabrics to avoid any surprise shrinkage tantrums later.
Invest in sharp scissors and straight pins – they’re your trusty sidekicks in this fabric-wrangling adventure.
Remember, even the pros started somewhere, so don’t sweat the small stuff.
Stick around, and we’ll share some secret weapons to level up your quilting game!
Table Of Contents
- Key Takeaways
- Choosing Forgiving Fabrics
- Understanding Fabric Properties
- Preparing Fabric for Quilting
- Essential Fabric Handling Tools
- Hand Quilting Techniques and Supplies
- Fabric Grain and Its Impact on Quilting
- Working With Different Fabric Types
- Organizing and Storing Fabric
- Troubleshooting Common Fabric Handling Issues
- Frequently Asked Questions (FAQs)
- Conclusion
Key Takeaways
- Start with forgiving fabrics like cotton and linen to make your quilting journey smooth and enjoyable. Pre-wash these fabrics to prevent shrinkage surprises.
- Use sharp scissors and straight pins as essential tools for precise and hassle-free quilting.
- Master fabric grain by cutting along the straight grain for stability and better quilt block shape. Bias cuts are perfect for smooth curves and stretchy edges.
- Organize your fabric stash by type and color, using clear bins for visibility, to streamline your quilting process and save time.
Choosing Forgiving Fabrics
You’ll love working with forgiving fabrics that make your quilting journey smoother and more enjoyable.
From sturdy cotton to stretchy knits and even beginner-friendly linen, these materials will help you stitch up a storm without the stress.
Stable Fabrics for Beginners
Picture yourself diving into a sea of fabric choices.
It’s easy to get lost, right?
Let’s throw you a lifeline.
For your first quilting adventure, stick with stable fabrics.
They’re like training wheels for your sewing machine.
Consider stable fabrics for beginners like cotton, which is sturdy yet soft, making it a great option for those just starting out.
Linen‘s a great pick – it’s surprisingly forgiving and has a lovely drape.
Just remember to give it some TLC.
Knits are another beginner-friendly option, offering stretch and bounce that’ll make your projects comfy and forgiving.
Cotton for Easy Handling
Cotton’s your best bet for hassle-free quilting.
It’s sturdy yet soft, making it a dream to work with.
From lightweight voiles to chunky quilting cotton, you’ve got options.
Pre-wash to avoid surprises, and press with a hot iron for crisp results.
Cotton’s forgiving nature means fewer oops moments, letting you focus on your craft.
Plus, it’s easy to care for – what’s not to love?
Knits With Stretch Properties
Knits are the yoga pants of quilting fabrics – stretchy and forgiving!
They’re perfect for your quilting journey, offering flexibility and comfort.
Here’s why you’ll love working with knits:
- Knit stability makes handling a breeze
- Stretch control allows for creative designs
- Knit seams are less likely to pucker
- Knit quilting adds a unique texture
- Knit projects drape beautifully
Embrace the stretch differences and watch your quilting skills soar.
Remember, fabric handling is key – treat your knits right, and they’ll treat you to stunning results!
Linens Beginner-Friendly Texture
Linen’s natural drape might surprise you as a beginner-friendly fabric.
It’s like that easygoing friend who’s always up for an adventure.
Sure, it wrinkles easily, but that’s part of its charm.
You can find a wide variety of linen quilt fabrics, like those offered on a linen quilt fabric website, to suit your quilting needs.
With proper care and a few handy tips, you’ll be whipping up linen projects in no time.
| Linen Quirks | Handling Tips |
|---|---|
| Wrinkles easily | Embrace the texture |
| Frays at edges | Use pinking shears |
| Absorbent | Pre-wash before sewing |
Don’t let linen intimidate you.
It’s a fabric that’ll grow on you, just like your quilting skills!
Understanding Fabric Properties
You’ll be a fabric whisperer in no time once you grasp the key properties of quilting materials.
From the stability of wovens to the stretch of knits, understanding fabric behavior will help you choose the right material for your next quilting masterpiece.
Woven Vs. Knit
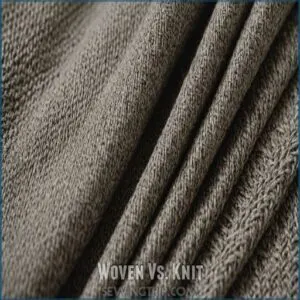
Your quilting journey’s about to get a whole lot smoother! Regarding fabric types, you’ve got two main players: woven and knit.
Woven fabrics, like your trusty cotton, are stable and perfect for precise piecing. They’re the bedrock of most quilting projects.
Knits, on the other hand, are stretchy and can be tricky to quilt. Stick with wovens for easier handling and crisp, clean lines in your patchwork.
Fabric Recovery
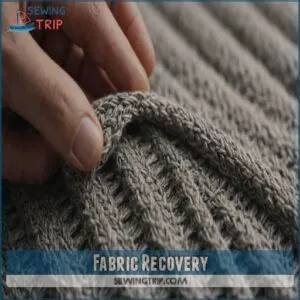
Fabric’s bounce-back ability is like a secret superpower in quilting.
Understanding fabric recovery helps you create long-lasting, beautiful quilts.
Here’s how to test it:
- Stretch a small fabric swatch
- Hold for 30 seconds
- Release and observe
- Check for wrinkles or distortion
Quick recovery means your fabric can handle tension without losing shape.
It’s a game-changer for quilts that’ll stand the test of time.
Master this, and you’re on your way to quilt superhero status!
Fraying and Seam Edge Finishing
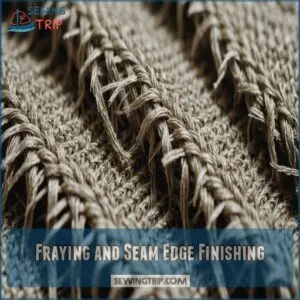
Now that you’ve got a handle on fabric recovery, let’s tackle those pesky frayed edges!
Fraying can turn your quilt into a hot mess faster than you can say "seam ripper."
But don’t sweat it – we’ve got some nifty tricks up our sleeve to keep those edges neat and tidy.
Check out this table of fraying prevention techniques:
| Technique | Difficulty | Best for |
|---|---|---|
| Pinking shears | Easy | Light fabrics |
| Zigzag stitch | Medium | Most fabrics |
| Serging | Advanced | Heavy fabrics |
| Fray Check | Easy | Delicate fabrics |
| French seams | Advanced | Sheer fabrics |
Preparing Fabric for Quilting
You’ve picked your fabrics, and now it’s time to whip them into shape for quilting.
From pre-treating to pressing, we’ll show you how to prep your fabrics like a pro, ensuring your quilt turns out as smooth as butter.
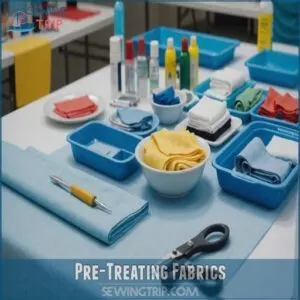
Pre-Treating Fabrics
Pre-treating fabrics is like giving your quilt a head start.
It’s all about prepping those pretty pieces before they hit the sewing machine.
Let’s talk about washing away potential headaches:
- Pre-wash to prevent surprise shrinkage
- Test for color bleeding to avoid a tie-dye disaster
- Use fabric stabilizers for extra oomph and easier handling
Remember, a stitch in time saves nine, and pre-treating saves a whole lot more!
It’s your secret weapon for quilt perfection.
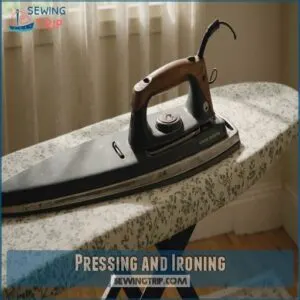
Pressing and Ironing
Pressing and ironing can make or break your quilt’s final look.
Smooth out those wrinkles and set your seams like a pro with these handy tips.
Remember, a well-pressed quilt is a happy quilt!
| Pressing Technique | Best For |
|---|---|
| Dry iron | Delicate fabrics |
| Steam iron | Stubborn wrinkles |
| Press cloth | Heat-sensitive materials |
| Tailor’s clapper | Crisp seams |
| Seam roll | Curved seams |
Don’t skimp on this important step – your quilt will thank you!
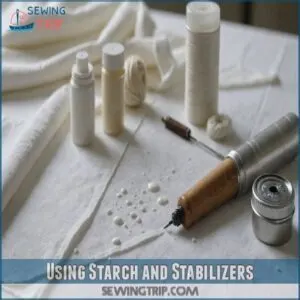
Using Starch and Stabilizers
Want to tame those unruly fabrics? Starch and stabilizers are your secret weapons! They’ll give your quilting superpowers, making fabric handling a breeze. Here’s how to wield them like a pro:
- Spray starch lightly for crisp cotton
- Use fusible stabilizer for stretchy knits
- Apply tear-away stabilizer for delicate fabrics
- Combine starch and stabilizers for extra control
Remember, a little goes a long way. You’ll be amazed at how these fabric prep tricks transform your quilting game!
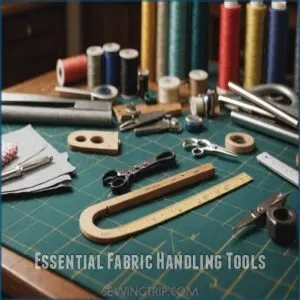
Essential Fabric Handling Tools
You’ll need the right tools to handle fabric like a pro quilter. From sharp scissors to trusty irons, these essentials will make your quilting journey smoother and more enjoyable.
Sewing Machines and Needles
While your trusty sewing machine is the heart of your quilting setup, don’t forget about its sidekick – the humble needle!
Choose the right needle size for your fabric weight to avoid skipped stitches or fabric damage.
Keep your machine humming by cleaning it regularly and oiling as needed.
When threading, make sure the presser foot is up to avoid tension issues.
If you hit a snag, check your bobbin first – it’s often the culprit!
Scissors and Seam Rippers
Every quilter needs a trusty pair of scissors and a seam ripper in their arsenal.
Keep your fabric-cutting scissors sharp and use them only for fabric to maintain their edge.
Invest in various types, like pinking shears for seam finishing.
Your seam ripper is your best friend for those "oops" moments.
Store these tools safely to prevent accidents and maintain their sharpness.
With these by your side, you’ll slice through fabric like butter and undo mistakes in a jiffy!
Irons and Ironing Boards
You’ll never regret investing in a quality iron with adjustable steam settings and an ironing board that suits your space.
Choose a board with a sturdy frame and smooth cover – your fabric will thank you!
For precise pressing, grab some helpful accessories like a tailor’s ham or seam roll.
Remember to test your iron’s temperature on scrap fabric first to avoid any pressing disasters.
Thimbles and Quilting Gloves
Protecting your hands matters just as much as pressing your fabric right.
Start with a well-fitted leather thimble to shield your pushing finger – trust me, those needle pricks aren’t fun!
Quilting gloves with grippy dots help you maintain control while moving fabric through your machine.
Can’t find a comfy thimble? Try adhesive thimble pads or silicone finger guards for better flexibility.
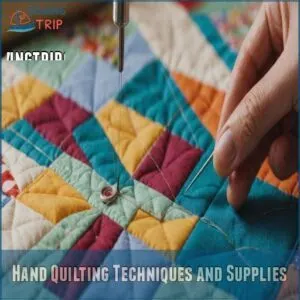
Hand Quilting Techniques and Supplies
You’ll love how hand quilting brings a personal touch to your projects with just a few essential tools and techniques.
From choosing the right needles and threads to mastering the perfect stitch, you’ll discover how these time-tested supplies can transform your quilting journey into something truly special.
Hand Quilting Needles and Threads
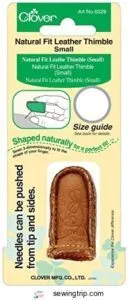 View On Amazon
 Now that you’ve got your quilting tools ready, let’s talk about the dynamic duo of hand quilting: needles and threads.
These small-but-mighty heroes make all the difference in your quilting journey.
- Betweens needles (sizes 8-12) glide through fabric like butter
- Cotton thread (50wt) creates clean, durable stitches
- Silk thread adds elegant, invisible lines
- Polyester thread offers strength and flexibility
- Aurifil 28wt thread gives your quilting extra pop
Scissors and Thimbles
Let’s explore the essential tools that’ll make your quilting journey smooth as silk!
Quality scissors slice through fabric like butter, while the right thimble protects your fingertips during those marathon quilting sessions.
Here’s a handy guide to keep your tools in tip-top shape:
| Tool Type | Daily Care | Maintenance Tips |
|---|---|---|
| Fabric Scissors | Wipe clean | Yearly sharpening |
| Thread Snips | Oil hinges | Replace when dull |
| Thimbles | Store dry | Check for dents |
| Leather Guards | Air out | Replace if worn |
Marking Tools and Quilting Hoops
Your quilting adventure gets even better with the right marking tools and hoops. While your thimble protects your fingers, water-soluble markers and chalk wheels create your quilting roadmap. Choose a hoop that fits your grip – they’re like steering wheels for your fabric journey! You can also consider using magnetic embroidery hoops that offer adjustable strength and eliminate hoop burn for a more enjoyable experience.
- Watch your
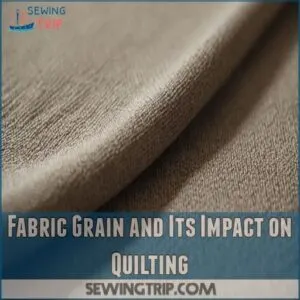
Fabric Grain and Its Impact on Quilting
You’ll notice your quilt blocks keep their shape better when you understand how fabric grain affects your piecing.
Whether you’re working with straight grain or bias cuts, knowing how your fabric naturally wants to stretch will help you avoid those wonky, misshapen blocks that drive quilters crazy.
Fabric Grain Terminology
Fabric grain is like the backbone of your quilt.
Warp threads run lengthwise, while weft threads go crosswise, creating the fabric’s structure.
The straight grain includes both lengthwise and crosswise edges.
Bias cuts, at a 45-degree angle, offer stretch and fluidity.
Don’t forget those tightly woven selvages along the edges – they’re your fabric’s built-in stabilizers.
Understanding these terms will help you master your quilting craft.
Fabric Stretch and Grain
Quilters, get ready to unravel the mystery of fabric stretch and grain.
Understanding how fabric grainlines impact your project is important, as cutting along the grain prevents stretching and distortion, preserving design integrity.
Warp threads run lengthwise, while weft threads run crosswise, creating the fabric’s structure.
Straight grain cuts (parallel to these threads) offer stability, while bias cuts (45-degree angle) give you more
Advantages of Straight Grain Cuts
Let’s talk straight about grain cuts!
They’re the secret sauce for quilt block stability.
When you cut along the straight grain, you’re setting yourself up for success.
Here’s why:
- Minimizes stretch, keeping your fabric in check
- Maintains consistent seam allowances for pro-level precision
- Boosts border construction, giving your quilt a polished look
Straight grain cuts are like a trusty sidekick, helping you wrangle those warp and weft threads into submission.
It’s all about control, folks!
Using Fabrics With Bias Edges
Now, let’s shake things up with bias edges.
These diagonal cuts are the secret sauce for smooth curves and eye-catching appliqué shapes.
They’re stretchy, making them perfect for binding those tricky curved edges.
If you’re looking for high-quality bias cut fabric, consider shopping for pre-cut bias fabric strips.
But watch out – bias edges can cause quilting distortion if you’re not careful.
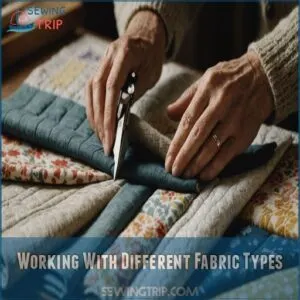
Working With Different Fabric Types
You’ll encounter a variety of fabrics in your quilting journey, each with its own personality.
From the sturdy reliability of cotton to the stretchy nature of knits, understanding how to work with different fabric types will help you create quilts that are both beautiful and durable.
Cotton and Linen Fabrics
The dynamic duo of cotton and linen fabrics can take your quilting game to new heights!
These natural fibers are like old friends – reliable and full of character.
Here’s why they’re a match made in quilting heaven:
- Cotton’s sturdy nature keeps your quilt in shape
- Linen adds a touch of rustic elegance with its subtle sheen
- Blending these fabrics creates interesting texture contrasts
- Both are easy to care for, improving with each wash
Pre-wash to avoid surprises, and you’re set for quilting bliss!
Knit and Woven Fabrics
Knit and woven fabrics are like night and day in the quilting world.
Woven fabrics, your trusty sidekicks, offer stability and crisp lines.
They’re perfect for precise piecing and sharp corners.
Knits, on the other hand, are the rebels of the fabric world.
They stretch and give, making them trickier to wrangle.
But don’t let that scare you!
With the right techniques, you’ll be a fabric-taming pro in no time.
Specialty Fabrics for Quilting
Ready to take your quilting game up a notch? Designer cotton prints and hand-dyed fabrics can add spectacular depth to your projects.
You’ll love working with silk’s luxurious sheen, but remember to handle it gently.
Vintage fabrics bring unique character, though they need extra TLC.
Start with small pieces of specialty quilting fabrics to build confidence – soon you’ll be mixing textures like a pro!
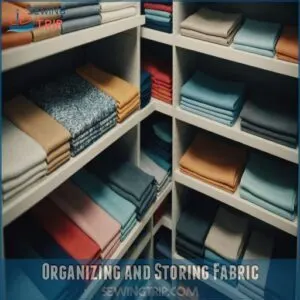
Organizing and Storing Fabric
You can transform your quilting space from chaotic to organized with smart fabric storage that makes sense for your workflow.
When you’ve got your fabrics sorted by type and color, you’ll spend less time hunting for that perfect piece and more time actually quilting.
Fabric Storage Solutions
Drowning in fabric chaos? Transform your quilting space with smart storage solutions that’ll make your stash sing.
Store fabrics in clear bins to spot your favorites instantly, and use comic book boards for neat folding techniques that prevent creases.
Consider allocating separate areas for specific types of fabric, like organizing fabric by type.
Label everything clearly, including yardage and fiber content.
Keep salvaged selvages in zip-top bags.
Organizing Fabric by Type and Color
You’ll feel like a fabric whisperer once you sort your stash by type and color.
Create a rainbow wonderland by grouping cottons, linens, and specialty fabrics into separate sections, then arrange each by color family.
Roll similar fabrics together using acid-free boards, or fold them neatly on shelves.
This system lets you spot the perfect piece at a glance, making project planning a breeze.
Maintaining a Fabric Inventory
Keeping track of your fabric stash doesn’t have to feel like herding cats.
Create a simple spreadsheet or use a quilting app to track yardage, noting the fabric type, color, and location in your storage system.
Snap quick photos of new additions, and rotate your collection regularly to prevent forgotten treasures.
Consider adding notes about washing instructions and potential project ideas.
Troubleshooting Common Fabric Handling Issues
You’ll find that even the most experienced quilters run into tricky fabric situations like fraying edges and stubborn wrinkles.
Don’t worry though – you’re about to learn the tried-and-true fixes that’ll get your quilting project back on track in no time.
Dealing With Fraying and Unraveling
Let those fabric edges run wild no more!
Now that you’ve got your stash beautifully organized, it’s time to tame those fraying threads.
Grab your pinking shears or fire up that zigzag stitch – they’re your best friends for seam finishing.
A quick run along fabric edges before piecing works wonders.
For extra protection, try a dab of fray check or serge those edges like a pro.
Correcting Fabric Distortion and Waviness
Now that you’ve conquered fraying, let’s tackle fabric distortion.
Ever had your quilt top look like a funhouse mirror?
Don’t sweat it!
Start by checking your fabric grain – it’s your north star for smooth sailing.
Use proper pressing techniques to keep things flat, and mind your seam allowances.
Basting methods can make or break your quilt’s shape.
Remember, fabric handling is an art – practice makes perfect!
Removing Wrinkles and Creases
Wrinkles can turn your quilt into a crumpled mess.
Don’t sweat it!
For stubborn creases, grab your iron and a spray bottle. Mist the fabric lightly, then press with medium heat.
When working with delicate fabrics, consider investing in a reliable pressing cloth.
Delicate fabrics? Use a pressing cloth.
For a quick fix, try hanging your quilt in a steamy bathroom.
Frequently Asked Questions (FAQs)
What should I do before cutting a quilt?
Like a chef prepping ingredients, you’ll want to pre-wash and press your fabric.
Check the grain, smooth out wrinkles, and make sure your tools are sharp.
Measure twice, cut once – it’s the quilter’s golden rule!
Is cotton a good fabric for quilting?
Cotton’s a quilter’s best friend!
You’ll love its stability and softness.
It’s forgiving for beginners and comes in various types, from lightweight voiles to sturdy quilting cotton.
Plus, it’s easy to handle and press, making your quilting journey a breeze.
What is quilting cotton?
Imagine a canvas that’s the perfect playground for your quilting dreams.
That’s quilting cotton for you!
It’s a medium-weight fabric with a tight weave, making it stable and easy to work with.
You’ll love its crisp texture!
What makes a good quilt border?
A good quilt border complements your design and stabilizes the edges.
You’ll want to use fabric cut on the lengthwise grain for stability.
Choose colors that enhance your quilt’s palette and consider width proportions for visual balance.
How do you store a fat quarter quilt?
Storing a fat quarter quilt is like tucking a treasure into a special chest.
Roll it gently with acid-free tissue paper to avoid creases.
Then store in a cool, dry place.
Keep it out of sunlight!
What fabrics are used for quilting?
You’ll find cotton and linen are great starting points! They’re forgiving. Knits offer stretch, while linen drapes beautifully. Experiment to find your favorites; it’s all part of the fun!
How do I prepare fabric for quilting?
Start by washing your fabric to prevent shrinkage, then press it flat with an iron.
Consult your favorite playlist to keep things fun!
Finally, use sharp scissors for cutting.
Now you’re ready to quilt like a pro!
How do you organize fabric for quilting?
Think of your fabric stash like a treasure chest—organize by color, size, or even fabric type.
Use clear bins or shelves to keep it visible and inspire your next quilt masterpiece.
Happy quilting and treasure hunting!
How do you keep fabric from moving when quilting?
Worried about fabric slipping all over? Use safety pins or a quilting adhesive spray to secure it.
A walking foot attachment works wonders, too. It grips both fabric layers, stopping any unwanted dance maneuvers.
How do you stiffen fabric for quilting?
To stiffen fabric for quilting, use a fabric stiffener spray.
It’s like giving your cloth a temporary backbone.
Spray evenly, let it dry, and press gently.
Your fabric will be easier to handle and cut.
How do I match fabric patterns for quilting?
Matching quilt fabric patterns is like piecing together a puzzle.
Align your pieces with the grain for stability and try mirror imaging or repeating designs for an eye-catching finish.
Pre-cutting fabric guarantees seamless alignment.
Whats the best way to cut multiple layers?
Start by stacking your fabric layers, securing them with pins or clips.
Use a rotary cutter and a ruler for precision.
Keep firm pressure on the ruler to avoid slipping, ensuring straight, clean cuts for your quilt projects.
How can I prevent fabric fraying while quilting?
Did you know 80% of quilters battle fraying?
Use pinking shears or a zigzag stitch on your fabric edges.
Pre-wash your fabrics to prevent shrinkage; it’s a game-changer!
This prevents those annoying frayed edges.
Happy quilting!
Should I prewash batting before quilting?
Prewashing batting can help you dodge the nasty surprise of shrinkage after quilting.
Prewashing cotton batting is a good idea, ensuring your quilt stays the size you envision.
How do I handle slippery or delicate fabrics?
Think of slippery fabrics like mischievous cats.
You need pins, a sewing machine, and stabilizer to tame them.
Use gentle hands and a confident touch, keeping fabric taut.
Practice patience, and you’ll master these tricky materials easily!
Conclusion
Remember, practice makes perfect.
As you get started with fabric handling for quilting, focus on mastering the basics and experimenting with different materials.
Use this guide like your quilting compass, helping you navigate through cottons, linens, and even those tricky specialty fabrics.
Armed with these tips, you’ll tackle any project with confidence—transforming chaos into cozy quilts.
Don’t shy away from mistakes; they’re part of the journey.
Embrace the process, and watch your quilting skills soar!

