This site is supported by our readers. We may earn a commission, at no cost to you, if you purchase through links.

Re-thread your machine from scratch, making sure you follow every threading point. Your bobbin might be wound unevenly or inserted incorrectly, so give it a fresh start.
Switch to a new needle since dull ones create messy stitches. Test different tension settings on fabric scraps until you find the sweet spot.
Sometimes it’s a simple mismatch between your needle size and thread weight that’s throwing everything off. The good news? Most tension troubles have surprisingly simple fixes once you know where to look.
Table Of Contents
Key Takeaways
- Check your thread tension first – This is the most common culprit behind loose stitches, so adjust your tension dial and test on scrap fabric until you find the sweet spot where threads lock properly between fabric layers.
- Re-thread your machine completely – Follow every threading point from scratch, including proper bobbin insertion and winding, since skipped steps or incorrect threading paths create chaos in your stitches.
- Match your needle to your thread weight – Using the wrong needle size for your thread creates gaps that allow threads to slip, so choose the right combination and replace dull needles every 8 hours of sewing.
- Maintain your machine regularly – Clean lint from tension discs and bobbin areas, oil mechanisms as needed, and service your machine every 6-12 months to prevent persistent stitch problems.
Fix Loose Stitches
You’ve probably pulled a perfect seam only to find loose, messy stitches on the back that make your project look unprofessional.
Loose stitches usually stem from three main culprits: thread tension problems, incorrect threading, or bobbins issues that can be fixed with simple adjustments.
Thread Tension Issues
Thread tension problems cause most loose stitches you’ll encounter. Your tension dial controls upper thread tightness, while the bobbin screw adjusts lower thread tension. When these aren’t balanced, threads won’t lock properly between fabric layers.
Balanced thread tension is the secret to professional-looking seams that hold up beautifully.
Balanced stitches require attention to thread tension to appear even.
To achieve balanced stitches, follow these steps:
- Increase tension dial numbers to tighten loose upper thread tension
- Adjust bobbin tension screw carefully—quarter-turns only
- Test thread locking on scrap fabric before sewing your project
- Watch for fabric puckering, which signals overly tight tension
Balance both tensions to improve seam durability and appearance.
Incorrect Threading Methods
When your machine creates wonky stitches, faulty threading often plays the villain. Your threading sequence matters more than you’d think—skipping steps creates chaos.
Here’s your threading troubleshooting roadmap:
| Threading Step | Common Mistake | Fix | Result |
|---|---|---|---|
| Tension Disks | Thread not seated properly | Raise presser foot, re-thread | Proper thread grip |
| Needle Threading | Thread wrapped around needle | Clean threading path | Smooth thread flow |
| Bobbin Path | Incorrect thread direction | Follow manual’s diagram | Even thread tension |
| Shuttle Alignment | Thread catching or twisting | Check for lint, debris | Balanced stitches |
Thread twisting signals improper routing through your machine’s guides. When tension disks can’t grip correctly, loose stitches appear.
Always raise your presser foot before threading—this opens tension disks completely. Check your bobbin path follows the shuttle alignment your manual shows.
Even experienced sewers benefit from sewing machine troubleshooting basics when thread tension goes haywire.
Improper Bobbin Management
Your bobbin might be the silent culprit behind those frustrating loose stitches.
Your seemingly innocent bobbin could be sabotaging your perfect stitches without warning.
Check your bobbin size first—wrong dimensions prevent smooth bobbin rotation through the shuttle path.
Verify proper bobbin threading and consistent bobbin winding without gaps or lumps.
Uneven bobbin winding creates tension variations that show up as loose stitches.
Clean lint buildup around the bobbin case, as debris disrupts the delicate balance needed for perfect stitches.
Tension Adjustment Tips
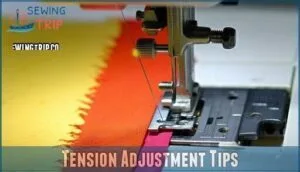
Adjusting your sewing machine’s tension doesn’t have to feel like solving a puzzle. Start with small changes—making quarter-turn adjustments to avoid overcorrecting your settings. Test swatches become your best friend here, letting you see exactly how each adjustment affects your stitches before committing to your actual project.
Fine-tuning tension requires patience and observation. Here’s your step-by-step approach:
- Test on scrap fabric first – Always use the same fabric type and weight as your project
- Make quarter-turn adjustments only – Small changes prevent wild swings in tension
- Check both sides of fabric – Look for balanced stitches without puckering or loops
- Ensure proper fabric stabilization – Hold fabric gently without pulling or pushing
Remember that stitch length also affects how your tension performs. When fabric bunches or threads look uneven, you’re getting warm. Default settings are often between 4 and 4.5 on the tension dial. The goal is threads that lock perfectly in the middle of your fabric layers, creating smooth, professional results every time.
Bobbin Winding Techniques
Proper bobbin winding prevents many loose stitch headaches that frustrate sewers everywhere. You’ll master three key techniques that transform your machine’s performance and create consistently tight, professional seams.
Correct Bobbin Orientation
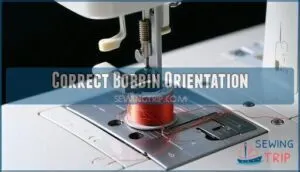
Placing your bobbin correctly prevents most bobbin issues and loose stitches fix problems.
Check your machine’s manual for specific bobbin insertion requirements – some models need the thread falling to the left like a "P" shape.
| Bobbin Case Types | Orientation Check |
|---|---|
| Drop-in bobbins | Thread unwinds counterclockwise |
| Front-loading cases | Follow shuttle path markings |
| Side-loading cases | Match directional arrows |
| Universal cases | Test bobbin rotation direction |
Wrong bobbin orientation creates shuttle path issues, causing thread unwinding problems and tangling.
Your bobbin should rotate smoothly in its designated direction for proper thread flow.
Proper Thread Winding
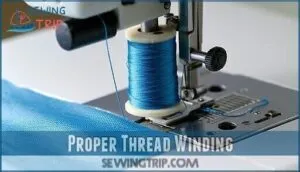
Winding your bobbin correctly sets the foundation for consistent tension and smooth stitching. Poor thread spool handling during the winding process creates uneven layers that lead to bobbin issues and loose stitches.
- Thread flows smoothly through the tension disc, creating Even Threading across each layer
- Maintain steady Winding Speed to prevent stretching and guarantee Consistent Spooling
- Choose quality Thread Type that matches your Bobbin Material for superior performance
- Fill to manufacturer’s line—overfilling jams the case and disrupts thread tension
Start with 3-4 manual wraps around the bobbin before engaging the winder. This creates a secure anchor point that prevents thread slip during sewing. Keep your bobbin winding speed moderate and consistent throughout the process. Using the correct bobbin is vital to avoid potential tension issues.
Avoiding Lint Buildup
Regular cleaning prevents lint buildup around your bobbin case, which can disrupt thread tension and create loose stitches.
Clean your machine after every 8-10 hours of sewing to maintain peak performance and prevent costly repairs.
| Cleaning Frequency | Tools Needed | Prevention Methods |
|---|---|---|
| After every project | Small brush, tweezers | Use quality thread, cover machine |
| Weekly (heavy use) | Compressed air, lint brush | Regular bobbin area inspection |
| Monthly (light use) | Cotton swabs, vacuum | Proper thread storage |
| Deep clean quarterly | Machine oil, manual | Professional maintenance check |
| Before storage | Dust cover, cleaning kit | Remove all threads and debris |
Needle Selection Matters
Your needle choice directly affects how well your threads interlock to form strong, even stitches.
Using the wrong needle type or size for your fabric creates gaps that allow threads to slip, resulting in loose, unreliable seams.
Choosing Right Needle Type
Smart needle selection is your secret weapon against loose stitches.
The right needle creates perfect holes for proper thread interlocking.
- Universal needles work for most woven fabrics and light knits
- Ballpoint needles prevent runs in stretchy knit fabrics
- Sharp needles pierce dense wovens cleanly without fabric damage
Match needle size to fabric weight—fine needles for delicates, heavy needles for denim.
For best results, remember to examine needle size and fabric.
Preventing Needle Damage
Carelessness can turn your trusty needle into a thread-tangling menace.
Handle your machine gently when sewing thick fabrics, and slow your sewing speed to prevent bent needles. Store needles properly to avoid damage, and inspect them regularly for signs of wear.
| Damage Cause | Prevention Method | Warning Signs |
|---|---|---|
| Hitting pins | Remove pins before needle reaches them | Clicking sounds, bent needle tip |
| Wrong fabric thickness | Match needle size to material weight | Skipped stitches, fabric puckering |
| Excessive sewing speed | Reduce machine speed on tough materials | Needle deflection, thread breaks |
| Poor needle storage | Use magnetic holder or case | Dulled points, visible bends |
| Forcing thick seams | Guide fabric gently, don’t pull | Needle snapping, uneven stitches |
Regular Needle Replacement
Think of your needle as a hardworking employee—it deserves a break every eight hours of sewing.
Dull needles create loose stitches and fabric damage, making needle replacement essential for consistent stitches and sewing quality.
Timely needle replacement sewing guarantees quality stitches.
This is crucial for maintaining the integrity of your work, and it is a key aspect of sewing quality.
- Replace needles every 8 hours of active sewing to prevent needle problems
- Switch needle types when changing between different fabric weights for proper fabric matching
- Check for bent tips or burrs that cause skipped stitches and compromise sewing machine stitches
Damage prevention through timely needle replacement guarantees your seams stay strong and professional-looking.
Troubleshooting Loose Stitches
When your sewing machine produces loose stitches, you’re likely dealing with tension imbalances that create frustrating loops and uneven seams.
Don’t worry—most loose stitch problems stem from simple threading mistakes or tension settings that need minor adjustments.
Identifying Tension Problems
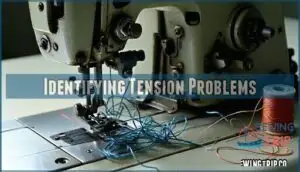
The secret to spotting tension problems lies in reading your machine’s "stitch language" – those telltale signs that whisper what’s wrong.
When upper thread tension runs too tight, you’ll see loose stitches dancing on your fabric’s bottom side. Conversely, loose upper thread tension creates looping stitches that bunch awkwardly.
| Problem Location | Likely Cause | Quick Fix |
|---|---|---|
| Loose stitches on bottom | Upper thread tension too tight | Lower tension dial setting |
| Looping stitches on top | Upper thread tension too loose | Raise tension dial setting |
| Fabric puckering | Both tensions too tight | Reduce both upper/lower tensions |
Checking Thread Quality
Your thread quality directly affects stitch formation. Poor Thread Fiber Type creates weak connections that unravel easily.
Perform a Thread Strength Test by pulling thread between your fingers—it shouldn’t snap with gentle pressure. Heavy Thread Weight Impact requires tension adjustments, while lightweight threads need different settings.
Check Thread Colorfastness to prevent bleeding that weakens fibers. Proper Storage Impact matters too—old thread becomes brittle and breaks during stitching, causing loose connections.
A thread’s tensile strength is a key indicator of thread quality and helps in understanding the importance of proper thread management to achieve strong and durable stitches.
Maintaining Sewing Machine
Your machine’s maintenance schedule directly impacts stitch quality. Regular cleaning removes lint from tension discs and bobbin areas that cause loose stitches.
Oiling mechanisms every 8-10 hours prevents friction affecting tension adjustment. Follow service intervals for professional tune-ups.
Replace worn parts like tension springs before they compromise stitch quality. Ensuring proper threading helps prevent malfunctions.
Preventative care beats costly sewing machine repair bills, emphasizing the importance of regular maintenance and proper care.
Resolving Common Issues
Beyond regular machine maintenance, you’ll need smart troubleshooting strategies.
Start with test swatches using contrasting thread colors to pinpoint tension problems. Check fabric stabilization and adjust stitch length for your material.
Poor thread quality causes many issues, so invest in good spools. When facing skipped stitches or persistent tension problems, systematic sewing machine troubleshooting beats random adjustments every time, ensuring a more efficient approach.
Frequently Asked Questions (FAQs)
Can fabric type affect stitch looseness?
Different fabrics demand different tensions, different needles, different approaches.
Heavy fabrics like denim need stronger tension settings, while delicate silks require gentler handling.
You’ll find lightweight materials often create looser stitches if you don’t adjust accordingly to the specific fabric type, ensuring a proper fit and delicate handling.
Do thread weight mismatches cause problems?
Yes, thread weight mismatches definitely cause stitch problems.
When you’re using heavy thread on top with lightweight thread below, or vice versa, your machine struggles to create balanced stitches.
Resulting in loose, uneven seams that won’t hold properly.
Should I adjust presser foot pressure?
Tweak the pressure setting gently—it’s like finding the sweet spot between holding too tight and letting go. Proper pressure prevents fabric from dancing around, creating consistent, secure stitches.
Can machine speed impact stitch quality?
Machine speed definitely affects stitch quality.
Sewing too fast can create uneven tension, skipped stitches, and poor thread interlocking.
Start slower, then gradually increase speed as you gain control for better results.
When should I service my machine?
Service your machine every 6-12 months or after 40-60 hours of sewing.
If you’re getting persistent tension issues, skipped stitches, or unusual noises despite basic troubleshooting, it’s time for professional maintenance.
Conclusion
Picture yourself smoothly guiding fabric through your machine, creating perfect, even stitches without any frustrating loose loops or gaps.
By now, you’ve got the tools to fix loose stitches sewing machine problems with confidence.
Remember to check your thread tension first, re-thread completely, and match your needle to your thread weight.
Regular maintenance keeps these issues from returning, and with these simple steps, you’ll transform your sewing from frustrating to flawless every time.
- https://www.techsew.com/us/support/loose-stitches-or-knots-on-the-underside-of-the-material/
- https://pubs.nmsu.edu/_c/C202/index.html
- https://www.youtube.com/watch?v=yVplnWqSdNA
- https://www.sewwhatbox.com/stitch-issues
- https://www.sewessential.co.uk/blog/how-to-fix-sewing-machine-stitch-quality-problems/

