This site is supported by our readers. We may earn a commission, at no cost to you, if you purchase through links.

Take your time with a flexible measuring tape, double-check every measurement, and remember that your body isn’t symmetrical. Mark grainlines clearly and maintain them during adjustments.
Add appropriate ease for movement and comfort – fabric shouldn’t strain or gap. Position darts to point toward your fullest areas, ending about an inch before.
Most alteration disasters happen because sewers skip the prep work, but fifteen minutes of careful measuring saves hours of frustration later. The secret lies in understanding how these elements work together to create garments that actually fit your unique shape.
The key to successful alterations is in the details, including careful measurement and maintaining grainlines. By following these steps, you can avoid common mistakes and create well-fitting garments.
Table Of Contents
Key Takeaways
- Take precise measurements using a flexible tape measure and double-check everything—your body isn’t symmetrical, and rushing through measurements creates fitting disasters that waste hours later
- Mark and maintain grainlines clearly during all adjustments since misaligned grainlines cause twisted seams, poor drape, and that obvious "homemade" look you’re trying to avoid
- Add appropriate ease for movement and comfort—fabric shouldn’t strain or gap, and you’ll need 2-4 inches extra for fitted styles to prevent uncomfortable pulling
- Position darts correctly by pointing them toward your fullest areas and ending about an inch before the bust point—wrong dart placement destroys your garment’s shape faster than anything else
Common Alteration Mistakes
Even experienced sewers make pattern alteration mistakes that can turn a promising project into a fitting disaster.
The good news is that most common errors are easily preventable once you know what to watch for.
Incorrect Body Measurements
Most sewers underestimate how measurement accuracy impacts their entire project. Without precise body measurements, you’ll fight fitting issues from start to finish, turning your dream garment into a frustrating puzzle.
Pattern precision beats sewing frustration every time.
- Your tape measure stretches over time – causing 1-2cm errors that ruin fit
- Morning vs. evening measurements differ by 1cm – timing matters more than you think
- Bulky clothing adds phantom inches – creating garments that swim on you
- RTW sizing differs from sewing patterns – commercial patterns run larger
- Weight fluctuations of 5kg shift measurements 2-4cm – your body isn’t static
To guarantee accuracy, it’s essential to consider these factors and take steps to ensure precise measurements.
To guarantee accuracy, it’s important to follow essential rules for measurements.
Create muslin prototypes to catch these common fitting issues before cutting your good fabric.
Pattern verification through careful measurement prevents costly sewing pattern fitting disasters.
Misaligned Grainlines
Even perfect measurements won’t save your garment if grainlines go haywire during pattern layout.
Misaligned grainlines create twisted seams and poor fabric drape, turning your carefully planned project into a wonky mess that screams "homemade disaster."
| Grainline Issue | Visual Clue | Quick Fix |
|---|---|---|
| Twisted Seams | Seams spiral around body | Recut on proper grain |
| Poor Drape | Fabric pulls awkwardly | Check pattern layout alignment |
| Cutting Errors | Uneven hem lengths | Mark grainline before cutting |
| Skewed Pieces | Shoulders sit crooked | Use ruler for straight grain |
| Correcting Skews | Diagonal pull lines | Adjust pattern piece placement |
Insufficient Ease Adjustment
Movement restriction plagues countless sewers who skimp on ease allowance during sewing pattern alterations.
When you don’t add enough fabric for comfort, draglines cause unsightly pulling across shoulders, chest, and armholes.
These fitting problems create comfort issues that ruin your garment’s fabric drape.
Master adjustment techniques by adding proper ease—typically 2-4 inches for fitted styles—to prevent pattern alteration mistakes and guarantee superior garment fit.
Inadequate Dart Placement
Dart placement wreaks havoc on your garments when positioned incorrectly.
Wrong dart placement destroys your garment’s shape faster than you can say "fitting disaster.
You’ll create shaping errors if you place darts too close to the bust point—a mistake affecting 67% of commercial patterns.
Poor dart angle distorts contour, causing draglines and puckering.
Position dart tips 1-2 cm from your bust point for proper fit and avoid common pattern alteration mistakes.
Pattern Adjustment Techniques
Successfully mastering pattern adjustment techniques transforms your sewing from frustrating guesswork into confident craftsmanship.
Start with dart manipulation to redistribute fabric where your body needs it most—moving darts higher or lower creates better shape without adding bulk. Use slash spreading techniques when you need extra width or length, cutting strategic lines in your pattern and spreading them evenly.
Always follow up with blending seams using a French curve to smooth out any harsh angles or bumps in your new seamlines. Truing adjustments guarantees your pattern pieces still match properly after changes.
Create muslin prototypes before cutting expensive fabric—this step catches pattern alteration mistakes early and saves costly do-overs. Remember that pattern adjustments work best when you tackle one area at a time, test-fitting as you go to avoid compounding fitting alteration mistakes.
Accurate results depend on measuring body accurately before any pattern work begins, see measuring body accurately for more information.
Measuring for Accuracy
You’ll need precise measurements to avoid the costly mistakes that plague over 60% of pattern alterations. Accurate body measurements form the foundation for successful adjustments, preventing fit disasters and wasted fabric.
Key Measurement Points
Accurate measurements form the foundation of successful alterations. You’ll eliminate most sewing pattern problems and garment fitting issues by focusing on these Body Landmarks and Circumference Points:
- Bust point – Mark precisely where your fullest part sits
- Natural waist – Find the narrowest spot, not your pants waistline
- Hip curve – Measure at your widest point, usually 7-9 inches below waist
- Shoulder width – Span from bone to bone across your back
- Length Measurements – Check armpit to waist for Vertical Balance
Muslin Fitting reveals pattern alteration errors before you cut expensive fabric. Proper marking requires a reliable bust point marker.
Flexible Measuring Tools
Once you’ve identified the key measurement points, choosing the right measuring tools makes all the difference.
A flexible tape measure bends around body contours better than rigid rulers, ensuring accurate placement for curve tracing.
This flexibility prevents fabric ease miscalculations that cause common sewing pattern problems.
When doing tool comparison, bendable measuring tapes outperform straight rulers for capturing true body dimensions and preventing pattern alteration fails.
Accurate measurements require understanding basic sewing measurements for proper pattern fitting, which is crucial for achieving the desired outcome with sewing pattern problems.
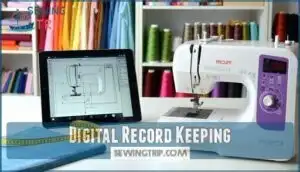
Digital Record Keeping
Often you’ll discover that tracking your pattern changes digitally prevents costly mistakes and saves hours of rework.
Professional makers rely on digital systems to maintain accurate adjustment history and guarantee consistent results across projects. A key element of this process often involves using precise measurement tools for accuracy.
- Measurement Tracking – Record body measurements with timestamps to track changes over time and reference previous fittings
- Version Control – Save each pattern adjustment as a separate file to prevent accidental overwrites and compare alterations
- Cloud Storage – Back up your pattern management files to prevent loss and access records from any device
- Adjustment History – Document specific alteration troubleshooting steps and error correction methods for future reference
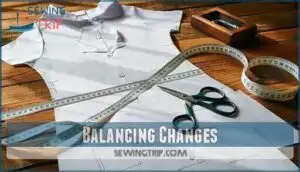
Balancing Changes
Once you’ve tracked your measurements digitally, balancing changes becomes your next priority.
Proportional adjustments guarantee one alteration doesn’t throw off other areas—if you widen the bust, you’ll likely need to adjust the side seams too.
Consistent measuring and sharp measuring techniques help you maintain ease distribution across the garment.
Accurate alterations rely on a quality measuring tool.
When blending seams after alterations, remember that pattern alteration mistakes often happen when changes aren’t balanced properly throughout the entire piece, which can affect the overall ease distribution.
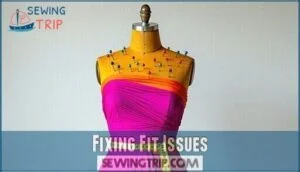
Fixing Fit Issues
You’ll encounter four main fit problems that can make your carefully altered garment look anything but custom-made.
These common issues—tight busts, gaping waists, seam strain, and poorly adjusted armholes—have straightforward fixes once you know what to look for.
Tight Busts and Gaping Waists
When your measurements are spot-on but the bust still pinches while the waist gapes awkwardly, you’re facing a classic pattern fitting problem.
A full bust adjustment (FBA) redistributes fabric from the waist to create proper bust shaping, while strategic waist darts pull in excess fabric.
Pattern grading guarantees proportional changes across sizes, making blouse alterations and dress alterations more successful.
Seam Strain and Draglines
Fabric stress creates telltale draglines that pull across your garment like tiny fault lines.
These wrinkles point directly to areas needing more room. For prevention methods, add ease gradually during pattern adjustments rather than cutting too tight.
When identifying causes through fit analysis, look for diagonal pulls indicating insufficient width or length.
Sewing alterations require releasing strained seams first, then redistributing fabric through strategic adjustment techniques to address areas with insufficient width.
Armhole and Neckline Adjustments
Two quick fixes can transform ill-fitting armholes and necklines into perfect patterns.
When armscye gaping creates unsightly gaps, deepen the armhole shape by adjusting the curve—this eliminates excess fabric that causes bunching.
For neckline depth issues, widen shallow scoops while maintaining corner integrity, ensuring your collar fit doesn’t pull awkwardly across your chest or shoulders, which helps achieve a perfect pattern and prevents gaping.
Shoulder and Sleeve Modifications
Shoulder slope adjustments tackle the most challenging fit puzzles in garment construction.
When sleeves pull or armscye gapes appear, you’ll need to reshape the shoulder line to match your natural slope.
Address shoulder droops with targeted modifications, adjusting the armhole curve while maintaining proper bicep fit.
These sleeve alterations eliminate drag lines and create a custom silhouette.
Mastering Alteration Skills
Building your alteration skills requires mastering both the fundamentals and advanced techniques that turn challenging fitting problems into manageable solutions.
You’ll gain confidence as you learn to use the right tools, develop precision in your measurements, and apply proven methods that create custom-fitted garments every time, which helps in building confidence.
Essential Tools and Supplies
Once you’ve tackled fit issues, gathering the right alteration toolkits becomes your next priority.
Your mobile storage should house marking tools, specialized tools, and muslin fabric for testing.
A quality seam ripper, flexible measuring tools, and pattern paper form your foundation.
Sharp scissors, fine pins, and reliable thread complete your sewing supplies arsenal for professional results.
Basic Sewing Skills
Every successful alteration starts with solid fundamentals like threading needles properly and mastering hand sewing basics.
You’ll need strong seam construction skills, reliable hemming techniques, and smooth machine operation to avoid pattern alteration fails.
These core competencies prevent common alteration errors and garment alteration errors that plague beginners, and help master pattern fitting problems by practicing these essentials first—they’re your foundation against sewing mistakes.
Advanced Alteration Techniques
Once you’ve mastered basic techniques, complex seamlines and dart manipulation become your best friends.
Slash spread methods let you redistribute fabric where needed, while blending adjustments smooth out those awkward pattern alterations.
Smart patternmaking methods prevent common alteration error correction headaches later.
Instead of fighting pattern fitting problems, create muslin mockups first—they’re like dress rehearsals for your fabric.
Strategic seam manipulation transforms even the trickiest fits into custom perfection.
Customization and Personalization
Beyond fixing pattern alteration fails, you’ll discover how unique body shapes demand personal style choices.
Your fabric preference and individual comfort needs guide design element tweaks that transform basic patterns into custom masterpieces.
When pattern adjustment errors occur, embrace them as learning opportunities. Mastering alterations often requires learning basic sewing skills for effective results.
Each garment alteration fail teaches valuable lessons about pattern making mistakes, ultimately leading to alteration error correction mastery that reflects your distinctive style.
Frequently Asked Questions (FAQs)
What tool takes out sewing mistakes?
Like a knight’s trusty blade needs sharpening, you’ll need a seam ripper to undo stitching mistakes.
This small tool with its sharp point and curved blade cuts through threads cleanly without damaging fabric underneath.
How to make any pattern reversible?
Choose patterns with straight seams and minimal curves.
Cut two layers for each piece—one main fabric, one lining.
Sew pieces wrong sides together, creating enclosed seams that hide raw edges completely.
What are the methods of pattern alteration?
Think of pattern alteration as tailoring a rough sketch into your perfect portrait.
You’ll use three main methods: slash-and-spread for width adjustments, pivot techniques for dart manipulation, and blend-and-true for smooth shifts between alterations.
What is the most difficult thing to sew?
You’ll find fitted sleeves and set-in sleeves incredibly challenging.
They require precise armhole measurements, perfect curve matching, and complex easing techniques.
Woven fabrics make this trickier since they don’t stretch like knits do.
What happens when you skip testing pattern adjustments?
Skipping pattern adjustments leads to costly mistakes, wasted fabric, and garments that don’t fit properly.
You’ll face drag lines, twisted seams, poor drape, and uncomfortable clothing that requires extensive fixes or complete reconstruction later, which can be considered as extensive fixes.
How do you fix uneven shoulder seam placement?
When shoulder seams sit awkwardly on your frame, you’ve got a classic fitting puzzle on your hands.
Measure the distance from your actual shoulder point to where the seam falls.
Adjust the pattern by moving the shoulder seam forward or backward as needed.
Why does my neckline keep stretching out?
Your neckline stretches because you’re likely cutting on the wrong grain or skipping stabilization.
Knit fabrics naturally stretch, so you’ll need interfacing or stay-stitching around curves to maintain shape and prevent distortion.
When should you add interfacing during alterations?
Like a sturdy foundation supporting a house, interfacing reinforces areas that’ll face stress.
You’ll add it when working with necklines, buttonholes, or pockets—essentially anywhere that needs extra stability after alteration work is complete.
How do you prevent puckering after pattern changes?
Test your seam tension and use proper interfacing to prevent puckering after pattern changes.
Press seams carefully, avoid stretching fabric during construction, and make certain your needle size matches your fabric weight for smooth results.
Conclusion
Perfect alterations are absolutely life-changing when you master fixing common pattern alteration mistakes.
You’ve learned that accurate measurements, proper grainlines, correct ease calculations, and strategic dart placement form the foundation of professional results.
Don’t rush these essential steps—they’re your insurance policy against costly mistakes.
Remember that your body’s unique shape deserves custom-fitted garments, not generic patterns that pull and gap.
Practice these techniques consistently, and you’ll develop the confidence to tackle any alteration challenge with precision.


