This site is supported by our readers. We may earn a commission, at no cost to you, if you purchase through links.
Try the whip stitch for durability or blanket stitch for both function and decoration.
For delicate fabrics, a rolled hem keeps edges neat without bulk.
Don’t have fancy tools? No problem—pinking shears cut in zigzags to reduce fraying, while a simple running stitch folded twice creates a clean edge even beginners can handle.
A dab of fray check liquid works like magic on stubborn fabrics that insist on unraveling.
The right technique can transform your project from homemade to handcrafted—and wait till you see what a blind hem can do.
Table Of Contents
Key Takeaways
- Use pinking shears to cut zigzag edges that limit fraying on light to medium-weight fabrics.
- Apply Fray Check to seal raw edges quickly; it’s especially useful for delicate materials.
- Master simple hand stitches like whip and blanket stitches to create durable and decorative edges.
- Finish curved edges with bias binding for a polished, adaptable, and professional look.
Sewing Edge Techniques
You can keep your fabric projects looking neat and lasting longer by mastering a few simple techniques for finishing edges.
Whether you’re preventing fraying or reinforcing seams, choosing the right method makes all the difference.
Preventing Fraying Methods
Without proper attention, fabric edges can quickly unravel, turning your project into a fraying disaster. You’ll find several effective techniques to prevent this common sewing frustration.
Prevent unraveling chaos—master edge-finishing techniques to keep your fabric projects polished, durable, and free from fraying disasters.
- Apply fabric sealants like Fray Check along raw edges for quick protection
- Use overlocking alternatives such as a zigzag stitch when a serger isn’t available
- Try hand rolling delicate fabric edges before securing with small stitches
To find the right product, you can purchase Fray Check online. Controlling thread tension properly guarantees your edge reinforcement holds firmly without puckering.
Reinforcing Seams for Durability
Beyond preventing fraying, you’ll want to focus on reinforcing your seams for lasting garments.
Strong seams withstand wear and tear, especially at stress points like underarms and pockets. Increase stitch density in these high-tension areas using hand sewing techniques.
Consider adding fabric interfacing for extra strength. Wider seam allowance gives you more room for reinforcement stitches.
For maximum durability, consider using the strongest backstitch technique. Double-stitching creates durable edges that won’t give way during everyday use.
Choosing Right Stitching Methods
Now that your seams are reinforced, selecting the right stitch method is your next step.
Match your stitch to both fabric type and project needs. Lighter fabrics work well with whip stitches, while heavier materials need the durability of blanket stitches.
Consider your skill level too—start with simple edge finishing stitches before tackling more complex hand sewing techniques.
The best stitch balances aesthetic appeal with practical strength for your specific project, ensuring a practical strength that meets your needs.
Hand Sewing Fabric Edges
You’ll find that hand sewing fabric edges prevents fraying and extends the life of your handmade creations.
With just a needle and thread, you can transform those raw edges into durable, professional-looking finishes that stand up to regular wear and washing, giving your projects a professional-looking finish.
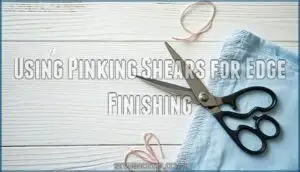
Using Pinking Shears for Edge Finishing
Pinking shears offer a beginner-friendly approach to fabric edge finishing. These specialized scissors cut in a zigzag pattern that limits how far fabric can unravel.
Pinking shears add texture and prevent fraying.
- Best for light to medium-weight woven fabrics
- Cut perpendicular to your fabric edge for maximum fray prevention
- Regular shear maintenance guarantees clean cuts every time
- Creates decorative edges while serving a practical purpose
Remember that fabric weight matters—pinking works well for cottons and linens but may not suffice for heavyweight materials.
Applying Fray Check for Extra Security
A tiny drop of Fray Check can save your fabric from unraveling chaos.
To apply for extra edge security, puncture the tip with a pin for precise fabric sealing. Place cardboard between layers to protect other areas, then gently squirt along raw edges.
Fray Check is a fabric sealant, and you can buy Fray Check from various retailers.
Allow 15-30 minutes drying time before handling. Remember, it’s flammable when wet and may stiffen fabric after drying.
Controlling Thread Tension for Delicate Weaves
Three key factors affect thread tension when handling delicate weaves.
Hold your fabric gently—too much tension can distort the weave stability and cause fabric damage.
Choose the right thread weight; lighter threads prevent tearing through fine materials.
When you notice puckering, try tension troubleshooting by adjusting your grip.
For lightweight fabrics, maintain consistent stitch quality by working on a flat surface with relaxed hands.
Finishing Raw Edges
You’ll extend your fabric’s life substantially by properly finishing those raw edges that fray so easily during wear and washing.
Properly finishing raw edges transforms your fabric projects from fragile to flawless, ensuring durability and a polished, professional look.
Techniques like bias binding, French seams, and edge reinforcement transform your handmade items from looking homemade to professionally crafted.
While preventing frustrating unraveling, these methods ensure your creations maintain a professional appearance and last longer, making them more enjoyable to use and wear.
Bias Binding for Clean Finish
Bias binding offers a polished way to finish your fabric edges.
You’ll want to match your binding width to your project—narrower for delicate items, wider for sturdier fabrics.
When hand sewing bias binding, fold it evenly around the raw edge and use small, even stitches.
Creating mitered corners takes practice but elevates your work.
For curve application, ease the binding gently while stitching to prevent puckering.
You can also customize edges by using double fold binding for a durable finish to achieve a professional look.
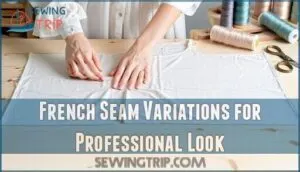
French Seam Variations for Professional Look
Creating a professional look with French seam variations transforms your handmade garments into boutique-quality pieces.
When hand sewing fabric edges, you can choose from several elegant options:
- Double French Seam: Adds extra security for delicate fabrics
- Mock French Seam: Easier alternative when working with existing seams
- Curved French Seam: Perfect for necklines and armholes
- Flat Felled Seam: Sturdier cousin to French seams for heavier fabrics
These seam finishes conceal raw edges completely, preventing fraying while elevating your work.
Edge Reinforcement Techniques for Longevity
While French seams elegantly hide raw edges, reinforcing your fabric edges substantially extends garment longevity.
You’ll find several techniques to boost seam integrity below.
| Technique | Edge Durability | Best For |
|---|---|---|
| Fabric Sealants | Medium | Delicate fabrics |
| Double-stitching | High | Heavy wear areas |
| Bias tape | Very high | Curved edges |
| Whip stitch | Medium-high | Quick fixes |
Apply these methods where garments face the most stress. Remember, proper stitch density prevents weak spots—not too sparse, not too tight!
Sewing Machine Alternatives
You don’t need fancy equipment to create professional-looking edges on your fabric projects.
From simple zigzag stitching to traditional hand overcast methods, these machine-free techniques will help you prevent fraying while adding character to your handmade items.
These techniques are useful for handmade items, and can be applied in various fabric projects.
Zigzag Stitching for Edge Finishing
Zigzag stitches offer the perfect compromise between hand finishing and professional serging.
You’ll find this versatile technique works on virtually all fabric types.
Simply adjust your stitch width and length according to your material—wider for loosely woven fabrics, narrower for tightly woven ones.
Check your tension settings before starting to prevent puckering, and use this method for quick and reliable seam finishes with minimal effort, as it delivers unlike hand sewing tips that require patience.
Overlocking for Professional Seams
In place of a dedicated serger, your regular sewing machine can create professional overlock stitches with the right accessories.
Set your machine to a zigzag stitch, attach an overlock foot, and adjust the differential feed for perfect tension. This technique mimics commercial seam finishes without expensive equipment.
Overlock machines offer versatile stitch options for various fabric types.
For lightweight fabrics, try a rolled hem setting; for heavier materials, the flatlock stitch provides durability while keeping edges neat.
Hand Overcast Stitch for Historically Accurate Finish
The time-tested overcast stitch provides historically accurate seam finishing that’s stood the test of centuries.
To achieve this classic technique, use a whipstitch either on both edges together or separately.
Choose a needle with an eye just large enough for your thread. For even, parallel stitches, maintain proper hand position as Susan demonstrates.
If you’re unfamiliar with alternative methods like French or flat felled seams, numerous YouTube tutorials can help.
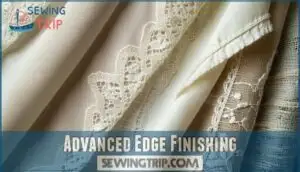
Advanced Edge Finishing
You’ll boost your sewing skills with these advanced edge finishing techniques that transform ordinary projects into professional-looking creations.
These methods prevent fraying and also add decorative elements that make your handmade items stand out with advanced edge finishing techniques.
Using Blanket Stitch for Decorative Touch
Blanket stitch offers both functional and decorative benefits for your fabric edges.
You’ll find this versatile hand stitching technique creates a protective barrier while adding visual interest.
Space your stitches evenly for professional results, and experiment with contrasting color thread choices to make edges pop.
Consider purchasing quality thread for best results.
When reaching corners, use two stitches in the same hole for crisp turns. Always secure stitch ends with a small knot beneath your final loop.
Whip Stitch for Strong and Durable Edges
While blanket stitch adds decorative flair, whip stitch offers remarkable strength for your fabric edges.
This simple hand stitching technique creates durable edges by wrapping thread around the fabric’s edge. For best results, maintain consistent edge stitch density and remember that thread type matters.
Wool fabrics benefit from cotton thread, while silk needs matching thread weight. When securing corners, take extra stitches to prevent future wear.
The whip stitch works wonderfully for fabric fray prevention on nearly all materials, and is a technique that provides remarkable strength.
Slip Stitch for Nearly Invisible Finishes
While whip stitch offers strength, slip stitch (also called ladder stitch) provides an almost magical disappearing act for your fabric edges.
When you need hand sewn seams that virtually vanish, this technique is your secret weapon.
For perfect invisible hemming:
- Thread your needle with matching thread
- Work from right to left, catching small bits of fabric on each side
- Keep stitches loose until the entire section is complete, then gently pull to close
This blind stitching method excels for securing linings and neatening edges on delicate fabrics.
Frequently Asked Questions (FAQs)
What is the best stitch for sewing edges?
For hand-sewing edges, the overcast stitch provides excellent durability and fraying prevention.
You’ll also find blanket stitch adds decorative flair while securing edges, and whip stitch offers strength for quickly finishing seams.
How long does hand-finished edge last?
Well-executed hand-finished edges can last for years with proper care. You’ll get 5-10 years from blanket, whip, or overcast stitches if you’ve used quality thread and maintained even tension throughout.
When should fabric edges remain unfinished?
You can leave edges unfinished on fabrics that don’t fray (felt, fleece), for hidden seams, or when you’re creating intentional fraying effects.
Also consider skipping finishing when working with bulky materials.
Best thread types for hand-sewn edges?
Choose mercerized cotton for everyday projects, polyester for strength, silk for delicates, and button thread for heavy fabrics.
You’ll get best results when matching thread weight to your fabric type and needle size.
Can buttonhole stitch replace overcasting edges?
Yes, buttonhole stitch can effectively replace overcasting.
It’s stronger and more decorative, creating a tight edge that prevents fraying.
You’ll get both functional durability and a professional finish in one technique.
How to finish curved or irregularly shaped edges?
Taming wild curves feels tricky, but a bias binding works wonders, flexing to follow edges.
For intricate shapes, clip the seam allowance slightly, easing fabric smoothly as you stitch.
It’s patience, precision, and a polished finish!
Conclusion
Did you know properly finished edges can extend the life of your fabric projects by 50%?
Mastering these hand sewing fabric edges tips transforms fraying nightmares into polished seams.
Whether you’re wielding pinking shears, applying fray check, or perfecting a blind hem, every method adds strength and style.
Don’t shy away from techniques like the whip stitch or rolled hem—they’re simpler than they look.
With practice, you’ll elevate your creations from basic to beautifully handcrafted.
- https://www.seamwork.com/issues/2019/03/who-knew-the-history-of-pinking-shears
- https://www.craftsy.com/post/how-to-sew-a-french-seam/
- https://vintagesewingpatterncompany.com/
- https://www.gosupps.com/yeqin-overlock-vertical-presser-foot-sa135-fits-all-low-shank-snap-on-singer-brother-babylock-euro-pro-janome-kenmore-juki-white-new-home-simplicity-elna-etc-style3-overlock-vertical-foot.html
- https://www.familyfarmhandcrafts.com/argyle-quilt-queen-19/

