This site is supported by our readers. We may earn a commission, at no cost to you, if you purchase through links.
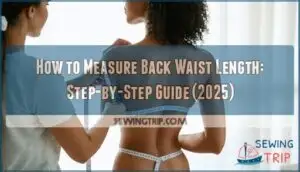
From there, run the tape down along your spine’s natural curve until you reach your natural waistline, where your torso naturally creases when you bend sideways. Don’t pull the tape taut; let it follow your body’s contours gently.
Write that number down while standing straight, and you’re set. This measurement keeps clothes from bunching, pulling weird, or gaping at the waist.
Table Of Contents
Key Takeaways
- Back waist length runs from the prominent bone at your neck base down your spine’s natural curve to your natural waistline—it’s the measurement that determines whether tops, dresses, and jackets will sit correctly on your torso instead of pulling, gaping, or riding up. – You’ll need a flexible 60-inch measuring tape and a helper to capture this measurement accurately, letting the tape follow your spine’s contours gently rather than pulling it straight, and you should always measure three times while standing naturally to ensure consistency. – Finding your true natural waistline (the narrowest point between your ribcage and pelvis, not your navel) is crucial—try wrapping elastic braid loosely around your torso and letting it settle naturally while you move to locate where it actually sits on your body. – Once you have your back waist measurement, compare it against pattern sizing charts and use the "lengthen or shorten line" printed on bodice pieces to adjust patterns for your proportions, splitting large changes across two adjustment lines for balanced alterations.
What is Back Waist Length?
Back waist length measures the distance from the base of your neck down to your natural waistline, following the curve of your spine.
It matters more than most people realize—it controls whether tops, dresses, and jackets actually fit right through your torso.
Where seams, darts, and waistbands land on your body depends entirely on this number. Get it right, and your clothes flatter. Get it wrong, and you’re stuck with pulling, gaping, and awkward bunching.
Get this one measurement right and your clothes actually fit; get it wrong and you’re dealing with pulling fabric and awkward bunching all day
Definition and Purpose in Garment Fitting
Back waist length is the measurement from the base of your neck down to your natural waistline along the curve of your spine, and it’s one of the most critical numbers you’ll need to get a garment that actually fits your torso.
Without accurate back waist measurement, you’ll struggle with bodices that ride up, jackets that pull across the shoulders, or dresses that bunch awkwardly at the waist—because garment fitting depends on matching your body proportions to pattern sizing standards, and back waist directly controls how fabric drapes over your upper body.
Back Waist Length Vs. Other Body Measurements
While bust, waist, and hip measurements tell you how wide a garment needs to be, back waist length reveals something just as important—how long your torso is from top to bottom. This vertical dimension works alongside those horizontal body measurements to create a complete fit analysis.
Your measuring tape captures width. Back waist length maps your unique body proportions. Miss this measurement and you’re working with incomplete data—garment sizing relies on both dimensions to account for waist variations and make sure clothes sit where they should on your frame.
How Back Waist Length Affects Fit and Style
Your back waist length affects how tops and jackets fit across your torso—get it wrong by even 2 centimeters and you’ll see gaping near your shoulder blades or pulling across your back.
Style variations—think high-waisted designs or longer bodices—work differently depending on your body proportions, so accurate waist measurement and pattern fitting guarantee your clothes flatter rather than frustrate. Understanding [body proportions]() is vital for achieving a well-fitted garment.
How Do You Measure Back Waist Length?
Getting your back waist length right comes down to two things: finding your actual waistline and measuring straight down your spine from the neck.
Start by locating your true waistline—bend to the side and see where your torso creases. Then run the tape from the base of your neck, down the curve of your spine, all the way to that waist point.
Locating The Natural Waistline
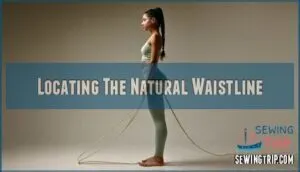
Before you can measure anything, you need to find your natural waistline—and it’s not always where you think it is. Your anatomical waist sits between your ribcage and pelvis, at the narrowest part of your torso—not at your navel.
Want to find your natural waistline? Wrap some elastic braid loosely around your torso at belly button height, then move around a bit—bend, twist, breathe. The elastic will naturally slide to where your waist actually is.
Try it a couple times to make sure you’ve got the right spot.
- Wrap elastic braid loosely around your torso at navel height
- Let it settle naturally while you move and bend
- The elastic will slide to your true waist location
- Repeat the process to confirm placement
- Remember that waist location can shift with weight changes or menstrual cycles
Stand evenly on both feet when taking your waist measurement.
Tools Needed for Accurate Measurement
You won’t get far without the right measuring tape—a flexible, non-stretch 60-inch tape is the industry standard that’ll give you accurate results every time. Beyond that, keep a piece of elastic braid or cord handy to mark your natural waistline, plus a mirror (or a friend) to check your posture. A pencil and paper help you track measurements over time, especially if your waist location shifts with weight changes or your cycle.
| Tool | Purpose | Why It Matters |
|---|---|---|
| 60" Flexible Measuring Tape | Captures back waist length and body measurements | Non-stretch fabric ensures calibration accuracy |
| Elastic Braid/Cord | Marks natural waistline | Settles at the narrowest torso point automatically |
| Mirror or Assistant | Verifies posture and tape placement | Prevents twisted tape and measuring errors |
| Pencil & Paper | Records measurements | Tracks changes for pattern adjustments |
Step-by-Step Measurement Process
Once you’ve gathered your tools and marked your waist, it’s time to walk through the actual measurement technique that’ll give you numbers you can trust.
Stand naturally with your weight balanced evenly on both feet—this body alignment matters more than you’d think. Have a helper place the tape at the base of your neck, right at that prominent vertebra, then guide it down your back following the spine curvature to your marked waistline.
Don’t pull the tape taut like a plumb line; let it rest gently along your back’s natural shape for true accuracy.
Following The Curvature of The Spine
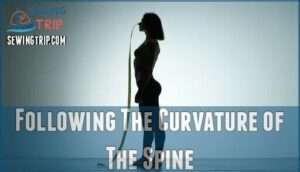
Here’s the thing about measuring your back waist: let the tape follow your spine’s natural curve instead of stretching it straight across. This isn’t just being fussy—it’s how you capture your body’s real shape.
When you follow that curve from your neck down to your waist, you’re measuring how clothes will actually sit on you. Your spine has its own alignment, and honoring that means better fit.
This curvature approach is simple but makes all the difference. Don’t pull the tape tight or flatten it—just let it trace the path your back naturally takes.
Tips for Accurate Back Waist Measurements
Three things matter most: what you’re wearing, how you’re standing, and whether you measure twice.
Slouch or yank the tape tight and your numbers will be off before you even finish.
Small mistakes like slouching or pulling the tape too tight can throw off your numbers, so it’s worth taking a moment to set yourself up for success.
Preparing The Body and Clothing
Get the tape ready, but first get your clothing right. Wear fitted undergarments or a thin, non-stretchy tank—anything bulky will throw off your back length numbers.
Your body shape shows itself best without bulky clothing in the way. Stand naturally with weight evenly balanced—this simple measurement preparation ensures your back waist length reflects how you actually wear clothes, not an artificial stance.
Maintaining Proper Posture
Stand naturally—not at attention, just comfortable. Keep your spine aligned without forcing it, and let your shoulders sit where they want to sit as long as they’re not hunched forward.
Distribute your weight evenly on both feet, let your torso settle without tensing muscles, and breathe normally—holding your breath shifts everything.
Good body positioning ensures your back length measurement captures your actual shape, not a rigid version of it.
Common Mistakes to Avoid
Measuring back waist length sounds straightforward until you hit one of these common snags.
Bad posture is the biggest culprit—slouch and your back measurement shrinks, arch too much and it stretches. A flimsy or stretchy tape won’t give you the same number twice. And if you’re measuring from your belly button instead of your actual waist? That’s a different measurement entirely.
Writing down the wrong number usually happens when you’re rushing through it. Take a second to verify before you move on.
Repeating Measurements for Consistency
Taking one measurement isn’t enough—your body shifts throughout the day, and even a quarter-inch difference can throw off your entire pattern. Here’s how to lock in consistent outcomes:
- Measure three times at the same time of day for accuracy checks
- Record each result to spot patterns and verify data consistency
- Average your measurements if they vary within half an inch
- Remeasure weekly during active projects to catch any body measurement changes
Taking multiple measurements protects you from costly fitting mistakes down the line.
Using Back Waist Length in Pattern Fitting
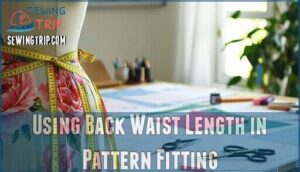
Got your back waist length? Check it against the pattern’s sizing chart. That comparison shows whether the garment will sit where it should on your body or if you’ll need adjustments.
If your measurement falls outside the pattern’s standard range, you can lengthen or shorten the bodice pieces so the waistline hits exactly where it should, saving you from a garment that rides up or bags out.
Reviewing Pattern Sizing Charts and Schematics
After you’ve got your measurements down, pull out the pattern sizing charts and schematics. Commercial patterns show both body measurements and finished garment specs, which means you can see how much ease the designer added.
Take your back waist length and compare it to what the schematic shows for torso dimensions—you’re checking if the pattern’s waist hits where yours actually sits.
| Measurement Type | What It Tells You |
|---|---|
| Body measurements | Your actual dimensions—no ease included |
| Garment specifications | Finished piece dimensions with ease factored in |
| Ease allowance | The breathing room between you and the fabric |
| Back waist length on chart | Where the designer expects your waistline to fall |
| Schematic torso length | Total length from neckline to hemline on pattern |
Sizing charts and ease can vary wildly between brands, so don’t skip measurement conversion or pattern analysis. If the chart shows a 16" back waist and yours is 15.5", you’re golden—but a two-inch difference means you’ll need alterations before cutting fabric. Always cross-reference waist measurement and garment measurement guidelines to avoid surprises mid-project.
Adjusting Patterns for Longer or Shorter Backs
Once you’ve reviewed your pattern sizing, it’s time to make those back length adjustments for the perfect fit. Most patterns include a "lengthen or shorten line" printed right on the bodice piece—that’s your sweet spot for pattern alterations. Here’s how to adjust for your body measurements:
- Measure the difference: Subtract the pattern’s back waist length from your shoulder to waist measurement
- Slash horizontally at the adjustment line, then spread pieces apart to lengthen or overlap to shorten
- Split large changes across two lines—anything over 2 cm benefits from balanced waistline modifications
- True up all seamlines after adjusting, checking neckline, armholes, and side seams stay aligned
- Test with a muslin before cutting your good fabric—80% of fit issues stem from incorrect back length
For lengthening, you’ll add paper strips and tape them securely. Shortening means folding out excess length and securing the tuck. Knowing how to locate your waist is key for accurate pattern adjustments.
These sewing techniques directly impact how your garment drapes from shoulder to waist, so take your time with garment fitting adjustments.
Comparing Body and Garment Measurements
After you measure your back waist, compare it to what the pattern schematic actually shows.
Check the schematic for measurement discrepancies—patterns often build in fit ease for movement. If your body measurement shows you need alteration needs, don’t panic.
Sizing consistency varies wildly between brands, so compare your numbers to the pattern’s back waist length and adjust accordingly based on your style preferences.
Common Issues and Solutions in Measurement
Even with careful technique, you’ll run into hiccups—your waist might shift between measurements, your posture can throw things off, or you might wonder if your numbers match industry sizing at all.
Knowing what causes these inconsistencies and how to troubleshoot them means you’ll get a reliable measurement every time, no matter your body type or how often things change.
Fluctuating Waist Location
Your waist isn’t a fixed point—it shifts slightly with bloating, weight fluctuations, and even where you’re in your menstrual cycle.
Weight changes, pregnancy effects, age factors, and posture impact can all nudge your natural waistline up or down by a quarter-inch or more.
That’s why taking waist measurements regularly—especially during pattern fitting—keeps your body measurement methods accurate and your garments fitting beautifully through life’s changes.
Adapting Measurements for Different Body Types
Different body shapes require specific adaptations to make custom garment fitting really work. Petite adjustments often shorten the back waist by 1-2 inches, while tall figures need 1-2 inches added to avoid pulling at the waistline.
Plus-size solutions may involve a Full Tummy Adjustment to prevent excess ease around the back. Muscular builds can show up to a 2-inch discrepancy between front and back measurements, so you’ll need to reshape the back waist seam.
Asymmetric needs—like scoliosis—might require splitting the pattern horizontally for accurate body measurements on each side.
Industry Standards and Sizing Considerations
The apparel industry relies on standardized sizing protocols and anthropometric data to guarantee consistent garment specifications across brands. Most pattern grading systems add 0.25 to 0.5 inches per size, with U.S. women’s size 8 averaging a 16.25-inch back waist measurement.
These measurement tools and pattern fitting techniques account for body shape and pattern making adjustments, though waist measurement techniques vary by region—European sizing differs from North American charts.
Understanding these standards helps you match commercial patterns to your unique proportions, especially for waist-to-hem calculations.
When to Alter or Re-Measure
Your body changes shape more than you realize. That dress you made last spring? It might fit differently now, even if the scale hasn’t budged much.
Re-measure your back waist length when:
- Weight changes of five pounds or more affect your torso length
- Posture issues or pregnancy alter your spine’s natural curve
- Measurement errors seem likely after sizing discrepancies appear
Body fluctuations happen, so taking accurate body measurements quarterly keeps your patterns fitting right.
Frequently Asked Questions (FAQs)
How often should you re-measure back waist length?
Your body isn’t static—it shifts with weight changes, seasonal adjustments, and body fluctuations tied to health monitoring needs.
Re-measure back waist length every three to six months, or whenever you notice fit issues in your garments, to maintain accurate waist measurement techniques and proper body measurement methods.
Can you measure back waist length on yourself?
Technically, yes—you can measure your own back waist length, though it’s tricky. Solo techniques work best with flexible measuring tape and a mirror.
For accurate body measurement methods, have someone else take the waist measurement from your natural waistline up your spine.
Does back waist length change with age?
Why does the tape measure tell such different stories across decades? Back waist length shifts with age, influenced by various factors. Growth patterns elongate torsos during adolescence, while aging effects like bone density loss, muscle mass changes, and postural shifts can gradually shorten it.
These changes alter body proportions and the natural waistline placement, which is crucial for pattern making.
What if your back waist measurement falls between sizes?
Between-size dilemmas call for smart fit adjustment. Choose the larger size if you prefer ease through the bodice, then tweak with proportional scaling during alterations.
Alternatively, grade between sizes using measurement variance data—blend one size’s shoulders with another’s waist to hem length for custom proportions.
Should you measure over or under clothing layers?
What you wear matters more than you’d think. A thin shirt gives you completely different measurements than a thick sweater.
Always measure over a single fitted layer—think a thin tee or camisole—so fabric thickness doesn’t distort your natural waistline or body position, guaranteeing your taking body measurements reflects true fit and length considerations.
Conclusion
Learning to measure your back waist length correctly changes everything about getting clothes that actually fit. You’re measuring from the base of your neck down to your natural waist—one number that stops you from dealing with poorly fitted garments.
Grab a flexible tape measure, find someone to help, and stand up straight. Follow the curve of your spine, check your numbers twice, and watch out for mistakes like hunching over or yanking the tape too tight.
Once you get this down, you’ll tweak patterns without second-guessing yourself and make clothes that feel custom-made.
- https://www.craftyarncouncil.com/standards/body-sizing
- https://en.wikipedia.org/wiki/U.S._standard_clothing_size
- https://www.youtube.com/watch?v=YynfVXhPNWA
- https://multisite.eos.ncsu.edu/www-ergocenter-ncsu-edu/wp-content/uploads/sites/18/2016/06/Anthropometric-Detailed-Data-Tables.pdf
- https://www.reddit.com/r/femalefashionadvice/comments/15sej6/guide_understanding_fit_and_proportion_in_an/

