This site is supported by our readers. We may earn a commission, at no cost to you, if you purchase through links.
 You’ll master how to add ruffles sewing by cutting fabric strips 1.5-3 times your seam length, depending on desired fullness.
Run two parallel basting lines ¼ inch apart along the raw edge, then gently pull bobbin threads while sliding fabric to create even gathers. Think of it like accordion pleating – you’re compressing length into charming waves.
Pin your gathered ruffle to the base fabric with right sides together, ensuring even distribution across the seam. Stitch with standard seam allowance, then finish edges with serging or zigzag stitches.
The secret lies in achieving consistent gathers that won’t bunch or pull. Perfect tension control separates amateur attempts from professional-looking results, and it’s key to creating a beautiful, evenly distributed ruffle, which is the result of mastering the technique.
Table Of Contents
Key Takeaways
- Cut your fabric strips 2-3 times longer than the seam – this ratio gives you the perfect fullness for professional-looking ruffles that will not appear skimpy or overly bunched.
- Use two parallel basting stitches for even gathering – place them ¼ inch apart along the raw edge, then pull only the bobbin threads while sliding fabric to create consistent, controllable gathers.
- Pin gathered ruffles with right sides together – distribute gathers evenly across the seam and stitch just below the gathering line to secure everything without catching the basting threads.
- Finish seam edges with serging or zigzag stitches – this prevents fraying and adds durability, while topstitching creates a polished, professional appearance that will withstand repeated washing.
Ruffle Fabric Preparation
Proper ruffle preparation sets the foundation for beautifully gathered fabric that adds texture and movement to your sewing projects.
You’ll need to cut your fabric strip 2-3 times longer than the edge where it’ll be attached, then apply strategic basting stitches to create those perfect, even gathers that make ruffles look professionally made.
Cutting Ruffle Fabric Strips
When cutting fabric strips for sewing ruffles, start with sharp fabric scissors to guarantee clean edges that won’t fray during gathered ruffle construction.
Cut your fabric strip on the straight grain for consistent draping, making it wide enough to accommodate seam allowances plus your desired finished width.
Proper strip preparation sets the foundation for successful ruffle attachment and professional edge finishing results.
Using high-quality sewing scissors is essential for achieving accurate cuts and preventing fabric damage.
Determining Ruffle Length and Fullness
Once you’ve cut your ruffle strips, calculating the proper length becomes your next priority.
The standard fullness ratio for sewing ruffles ranges from 2:1 to 3:1 – meaning your ruffle fabric should be two to three times longer than the edge you’re attaching it to.
Lightweight fabrics like cotton voile need less gather calculation, while heavier materials require more precise ruffle measurement for ideal ruffle density when gathering fabric.
Applying Basting Stitches
Once you’ve cut your ruffle strip to size, place two basting stitches to create perfect gathers.
Position the first basting stitch along your seam line using a longer stitch length for easy gathering. Add the second basting stitches halfway through the seam allowance.
Leave loose threads at both ends—these will become your gathering lifelines. Proper basting thread technique guarantees even ruffle alignment.
Adding Ruffles Sewing
Once you’ve prepared your ruffle strips with basting stitches, it’s time to add ruffles to your project. The key to successful ruffle sewing technique lies in choosing the right fabric choice for your design.
Lightweight cotton, voile, or organza work beautifully for delicate gathers, while heavier fabrics create more structured looks. Your sewing tools matter here – a gathering foot attachment can speed up the process, but hand-gathering gives you more control.
Different ruffle types require specific approaches: single-layer ruffles work well for casual garments, while double-layer versions add volume to formal pieces. When working with ruffle patterns, you’ll find that bias-cut strips drape more fluidly than straight-grain cuts.
This flexibility makes sewing gathered ruffles easier and creates more natural movement. Whether you’re adding ruffle trim to sleeves or incorporating full ruffles into skirts, proper preparation sets you up for success. Remember these sewing tips: keep your workspace organized, test your technique on scraps first, and don’t rush the process.
Quality ruffle sewing patterns often include helpful diagrams showing ideal placement and fullness ratios. To achieve professional results, understanding ruffler foot settings is essential for adjusting gathering ratios and stitch lengths.
Gathering Ruffle Techniques
Now you’re ready to turn those loose fabric strips into perfectly gathered ruffles that’ll make your project shine.
The key lies in mastering three essential techniques that’ll give you consistent, professional-looking results every time, and the key to achieving this is by understanding that professional-looking results are the goal.
Creating Even Gathers
You’ll achieve gather control by pulling only the bobbin threads from both ends, preventing thread locking during sewing gathered ruffles.
Adjust ruffle tension gently with your fingers, distributing gathers evenly along the length.
Your fabric choice affects thread tension requirements—lightweight fabrics need delicate handling while heavier materials demand robust threads.
Set your stitch length to 3-4mm for ideal ruffle gathering method results when you add ruffles to any project.
To master the technique, understanding basic gathering technique is essential for creating beautiful ruffles.
Using Gathering Foot Attachments
Gathering foot attachments revolutionize ruffle creation by automatically creating gathers while you sew.
Set your machine to a longer stitch length (4-5mm) and increase upper thread tension for fuller results.
These gathering tools work best on lightweight fabrics and can simultaneously attach ruffles to flat fabric through their built-in slot, dramatically boosting sewing efficiency for ruffle management projects.
To achieve professional-looking results, understanding the ruffler foot features is essential for ideal gather control.
Adjusting Ruffle Fullness
Fine-tuning your ruffle ratio transforms ordinary fabric choice into stunning dimension.
Whether you’re sewing ruffle trim or adding ruffles to sleeves, fullness control depends on your fabric’s weight and desired ruffle depth.
- Light fabrics: Use 2.5-3x ratios for dramatic gather tension
- Medium fabrics: Stick with 2-2.5x for balanced ruffle sewing tips
- Heavy fabrics: Choose 1.5-2x ratios when sewing fabric ruffles
Attaching Ruffles to Fabric
Now that your ruffle is gathered, you’ll attach it to the main fabric by aligning the raw edges and securing everything with pins.
Don’t worry if it looks a bit wild at first—precise pinning and careful stitching will bring order to the chaos.
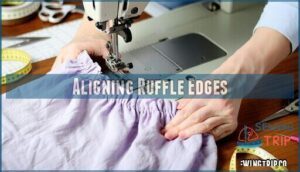
Aligning Ruffle Edges
Perfect edge alignment transforms messy ruffles into professional-looking details.
Start by matching your ruffle’s basted edge with the garment’s raw edge, keeping right sides together. This edge alignment guarantees hidden seams and proper ruffle placement.
Check that seam allowances match—typically ½ inch—for consistent joins. When sewing ruffle edges around curves, snip the seam allowance to prevent puckering and maintain smooth fabric grain alignment.
To achieve a polished finish, understanding lining fabric basics is vital for selecting the right materials and techniques.
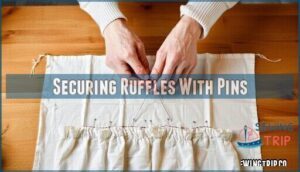
Securing Ruffles With Pins
Once your ruffles align properly, secure them with pins placed perpendicular to the fabric edge.
Pin through both ruffle and base fabric layers, spacing pins every 2-3 inches for stability.
Wrap loose gathering threads around each pin in a cross motion – this prevents your basting stitches from unraveling while you work.
Smart pinning keeps everything in place for perfect machine stitching.
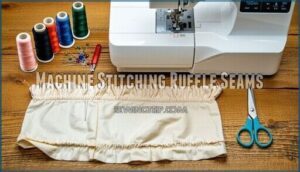
Machine Stitching Ruffle Seams
Stitch your secured ruffle using a straight machine stitch, positioning your needle just below the bottom gathering thread.
Perfect ruffle stitching requires attention to these critical elements:
- Thread Tension: Adjust to medium setting for fabric stability
- Stitch Length: Use 2.5-3mm for standard ruffle sewing tutorial applications
- Seam Finishing: Maintain consistent 1/2-inch seam allowance throughout
- Machine Stitching: Keep steady pace to prevent puckering on ruffles on sleeves
- Ruffle Hem Sewing: Backstitch at beginning and end for durability
This technique works beautifully for any ruffle fabric project.
To achieve professional results, choosing the right sewing machine needles is key for your specific sewing tasks.
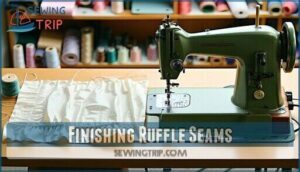
Finishing Ruffle Seams
Once you’ve attached your ruffle, proper seam finishing guarantees a professional appearance that’ll last through countless washes.
You’ll want to press, clean-finish the raw edges, and consider topstitching for both durability and that crisp, polished look.
Pressing Ruffle Seams for Polish
After stitching your ruffle seam, proper pressing transforms rough edges into professional polish.
Heat sets the gathers while creating crisp fabric lines that elevate your project’s appearance.
| Pressing Method | Fabric Type | Temperature Setting |
|---|---|---|
| Steam pressing | Cotton, linen | High heat with steam |
| Dry pressing | Silk, delicate synthetics | Medium heat, no steam |
| Press cloth method | Wool, textured fabrics | Medium heat with cloth barrier |
| Quick touch-up | All lightweight fabrics | Low heat, brief contact |
| Professional finish | Heavy cottons, canvas | High heat, firm pressure |
Position your iron away from gathered sections to avoid flattening ruffle texture.
Press seam allowances toward the main fabric, creating clean lines that showcase your ruffle details beautifully.
Using Serging or Zigzag Stitches
Strong seam finishing prevents fabric fray and guarantees your ruffles withstand repeated washing. Serging creates professional edges, while zigzag stitches offer excellent durability for home sewists without specialized equipment.
- Serging Tips: Use 3-4 threads for woven fabrics, creating clean edges that resist fraying by 80%
- Zigzag Stitches: Set stitch length to 2.0-2.5mm and width to 3-5mm for ideal fray containment
- Fabric Fray: Both techniques accommodate stretch and movement, preventing edge curling after washing
- Seam Finishing: Complete edge treatments before attaching ruffles to main garment for professional results
- Thread Choices: Match thread color to fabric for invisible finishes, or contrast for decorative effects
Topstitching for Durability and Appearance
After securing your ruffle with serging or zigzag stitches, topstitching adds the finishing touch.
Choose Thread Colors that complement your Fabric Choice, then set your Stitch Length to 2.5-3mm for visibility.
This sewing technique flattens bulky seams while providing Seam Reinforcement.
When you add ruffles using this ruffle sewing guide, topstitching transforms your Edge Finishing from functional to fabulous, creating professional results in your sewing ruffle fabric projects.
Understanding the basics of topstitching techniques is essential for achieving a polished look in your garments.
Frequently Asked Questions (FAQs)
How to attach ruffles to fabric?
Cut your ruffle strip 2-3 times longer than the edge you’re attaching it to.
Sew two basting stitches along the seam allowance, pull threads to gather, then machine stitch below the gathering line.
What stitch should I use for ruffles?
Gathering your ruffles requires two key stitches: long basting stitches for gathering (leave loose ends!), then straight machine stitching right below the gathering line to permanently attach your ruffles.
How to do ruffles on a sewing machine?
Create two basting stitches on your ruffle strip—one at the seam line, another halfway through the seam allowance.
Pull both bobbin threads gently to gather the fabric evenly before machine stitching.
Can I add ruffles to stretchy fabrics?
Yes, you can add ruffles to stretchy fabrics.
Use a ballpoint needle and stretch stitch or zigzag to maintain elasticity.
Pre-wash your fabric first, then gather using elastic thread or twin needle techniques for best results.
How do I attach ruffles to curved edges?
Pin your ruffle strip to the curved edge at quarter points first.
Ease gathers gradually between pins, matching curves naturally.
Stitch slowly, lifting presser foot frequently to maintain smooth alignment without puckering.
What interfacing works best for ruffle support?
Lightweight fusible interfacing, midweight sew-in interfacing, or bias-cut organza strips work best. You’ll want lightweight support that won’t overpower delicate gathers—fusible interfacing stabilizes without bulk while maintaining ruffle movement.
How do I prevent ruffles from twisting?
Pre-treat your fabric with steam to relax fibers, then cut ruffles on the straight grain rather than bias.
Use stabilizing stay-stitching along the gathering line to prevent distortion and maintain even tension while sewing.
Can I add multiple ruffle layers together?
Layering multiple ruffles creates stunning dimension and texture.
Stagger each layer by varying their lengths and gathering ratios—try 5:1 for the top layer, 2:1 for middle, and 3:1 for bottom to achieve beautiful cascading fullness.
Conclusion
Master your newfound ruffle skills by practicing consistent tension, perfecting your gathering technique, and experimenting with different fabric weights.
Remember that patience beats speed every time – rushing leads to uneven gathers and frustrated sighs.
Your future sewing projects will thank you for learning how to add ruffles sewing properly.
Those charming, professional-looking details transform ordinary garments into show-stopping pieces that’ll have everyone asking where you bought that gorgeous outfit.
- https://zhuanlan.zhihu.com/p/603243890
- https://sarkirsten.com/blog/ruffles-101-how-to-gather-fabric
- https://www.threadsmagazine.com/project-guides/learn-to-sew/create-beautiful-evenly-distributed-gathering
- https://www.tillyandthebuttons.com/2019/10/ten-tips-for-sewing-gathers-with-video.html
- https://thehomesihavemade.com/how-to-gather-fabric-the-right-way/

