This site is supported by our readers. We may earn a commission, at no cost to you, if you purchase through links.
You’ve got several foolproof methods to choose from. The waste knot technique lets you start with a temporary knot that you’ll snip away later.
The pin stitch creates an invisible anchor by taking tiny backstitches through your fabric layers. For quick fixes, try the loop knot method – just leave a small loop when you start stitching, then thread your needle through it.
Each technique has its sweet spot depending on your fabric and project type. The real magic happens when you match the right anchoring method to your specific sewing situation.
Table Of Contents
- Key Takeaways
- Anchoring Techniques for Sewing
- The Waste Knot
- The Pin Stitch
- No Judgement Zone: Various Anchoring Methods
- Choosing Your Preferred Anchoring Method
- Tools You’ll Need for Anchoring
- How to Sew on a Button
- Tips for Anchoring Thread in Sewing
- Common Mistakes to Avoid When Anchoring
- Frequently Asked Questions (FAQs)
- Conclusion
Key Takeaways
- You’ll master thread anchoring by choosing the right technique for your fabric type – use waste knots for slippery materials like silk and metallics, pin stitches for delicate fabrics, and loop starts for doubled thread strength.
- You can create invisible, professional-looking anchors by taking 2-3 tiny backstitches in the same spot, which eliminates bulky knots and prevents your work from looking amateur.
- You’ll prevent thread from unraveling by leaving proper tail lengths (4-6 inches when starting) and securing ends within existing stitches rather than relying on loose knots that can come undone.
- You should match your anchoring method to your skill level and project goals – beginners can start with simple knots while experienced sewers use invisible techniques, and quick repairs need fast anchors while heirloom pieces deserve pristine starts.
Anchoring Techniques for Sewing
Think of anchoring threads as laying a foundation for your entire project—without it, you’re building on quicksand.
Master your anchoring, master your sewing—everything else builds from that first perfect stitch.
Professional finishing starts with choosing the right thread type for your fabric considerations, whether you’re working with cotton, silk, or tricky metallics that love to slip away.
Start by adjusting your stitch tension appropriately, then create those essential mini backstitches beneath the surface.
Thread your needle, knot the end, and poke down beside your starting point.
Take tiny stitches over just one or two threads, looping back into each previous stitch to lock everything together.
For machine anchoring, set your straight stitch and lower that needle with confidence.
These sewing anchor techniques prevent the dreaded unraveling that’ll make you want to toss your project across the room.
Master these anchoring threads basics, and you’ll transform every sewing start and sewing finish into something truly professional.
The Waste Knot
Working with slippery threads can drive you up the wall, but the waste knot swoops in to save your sanity.
This technique shines when you’re dealing with metallics, silks, or other stubborn materials that love to slip right through your fabric.
Start by tying a simple overhand knot at your thread’s end, leaving about an inch of tail.
Here’s the key part: insert your needle down into the canvas about an inch away from where you’ll actually start stitching.
The knot sits on top of your fabric, right in line with your stitching path.
As you work your way toward the knot, your stitches on the back will catch and secure that tail.
Once you’ve stitched over it enough times, snip off the knot.
This knot placement strategy prevents waste reduction while securing tails effectively.
Canvas application becomes foolproof when anchoring threads this way.
The Pin Stitch
The pin stitch is like having a secret handshake with your fabric – it’s all about that perfect grip. This anchoring technique creates invisible security by taking tiny angled stitches that disappear into each other, giving you solid fabric grip strength without any loose ends flopping around.
Here’s how to master pin stitch security:
- Position your needle at a slight angle and pierce just one or two canvas threads for ideal canvas thread count control
- Take 2-3 small straight stitches in the same spot, pulling each tight enough to sink into the previous one
- Keep your tail length matters approach – you won’t need much since these angled stitch benefits eliminate loose ends completely
Your pin stitch anchor works best when each stitch comes up through the same hole. These sewing anchors create invisible starts for single-strand work, making your anchoring threads disappear like magic.
For stronger repairs, consider using the backstitch for durability. It’s one of those sewing techniques that looks fancy but feels surprisingly simple once you get the hang of it.
No Judgement Zone: Various Anchoring Methods
Don’t worry if your first attempts at anchoring look wonky—every sewist’s been there, fumbling with thread that seems to have a mind of its own.
You’ll discover that there’s no single "right way" to anchor your thread, and trying different methods helps you find what clicks for your hands and your projects, which is a key part of the learning process, and anchoring is a fundamental skill.
Freestyle Start
The freestyle start embraces creative freedom through knotless beginnings that let your stitching flow naturally.
You’ll take a few small stitches in the same spot, creating an anchor without traditional knots. This intuitive stitching method works perfectly when you want confident starts that won’t create bulk in delicate fabrics.
Simply make two or three tiny passes through the same hole, then gently tug your thread to test security. Your hand sewing anchor develops organically as subsequent stitches cover these initial securing thread tail positions, achieving that coveted flow state.
Some stitchers prefer the away knot start for a similar effect, utilizing knotless beginnings and seeking intuitive stitching methods.
Knotty Start
Some threads slip through your fingers like butter, making knot security essential for your sewing knotty start.
Cut one long piece, fold it in half, then thread both ends through your needle—this creates natural knot placement while doubling your thread strength.
The loop end becomes your secure sewing start, eliminating worries about beginning sewing knot visibility.
For odd-numbered strands, consider an away waste knot start.
This technique works perfectly when sewing knots need extra grip on slippery fabrics, providing an effective method for a secure sewing start.
Loop Knot Start
Here’s your ticket to thread security without the fuss. The loop knot start gives you double threading power while avoiding tails that love to wiggle loose.
- Cut one yard of thread and fold it perfectly in half
- Thread both tail ends through your needle like normal
- Start your first stitch, leaving the loop hanging on the back
- Pass your needle through that dangling loop after completing the stitch
- Weave through back stitches when finished and snip close
Many sewers find uses for loop knot thread. Loop variations work beautifully on most fabrics, giving you loop security that actually holds, and providing a sense of sewing confidence with secure stitching.
Away Knot Start
Sometimes you’ll discover the away knot method works like magic when you can’t place a regular waste knot.
Thread your needle, tie a knot at the end, then insert from front to back about 2.5cm away from your starting point. Come up where you’ll begin stitching.
| Away Knot Benefits | Thread Tail Length | Best Thread Types |
|---|---|---|
| No thread crossing | 2.5cm minimum | Cotton embroidery |
| Perfect for curves | Enough to grip | Silk threads |
| Clean finish | Easy trimming | Metallic specialty |
| Quick start | Secure hold | Wool yarns |
| Professional look | Waste-free cutting | Synthetic blends |
This technique often requires specialized tools, so explore options for an away knot needle.
This securing seam start technique prevents shadows while maintaining thread anchoring control throughout your project.
Loop Start
The loop start technique transforms your thread anchoring game by cutting bulk in half.
You’ll fold one strand of floss, thread both ends through your needle, and create an invisible start that keeps your fabric looking professional.
This method works perfectly with even thread counts.
Here’s your step-by-step process:
- Fold your thread – Cut one strand twice as long, fold it in half
- Thread the loop – Put the folded end through your needle’s eye
- Anchor through the loop – Pull your needle through the back loop after your first stitch
Loop security beats messy knots every time.
Using a loop start needle can further simplify this process.
Needle Loop Start
Mastering the needle loop start transforms your thread anchoring game completely.
Simply thread your needle, then wrap the working thread around the needle tip two to three times before piercing fabric.
This creates instant loop security without knots while maintaining perfect thread tension. The technique works across various fabric types and needle sizes, making it your go-to sewing anchor for quick, reliable thread anchoring.
Pin Stitch
Pin stitch uses a clever approach that grips fabric like a tiny anchor dropping into place.
This needlepoint application works brilliantly when you need fabric grip strength without bulk.
Here’s your step-by-step game plan:
- Start from the front – Push your needle through the fabric’s center, leaving a 1-inch tail
- Create the grip – Take a tiny backstitch over one thread, holding that tail firmly
- Lock it down – Repeat 2-3 times through the same spot
The stitch angle variations depend on your fabric’s weave.
This reliable sewing anchor beats fumbling with knots every time.
Choosing Your Preferred Anchoring Method
Now that you know the different anchoring methods, it’s time to pick your go-to technique. Your choice depends on several factors that’ll make or break your sewing success.
Consider these key factors when selecting your reliable sewing anchor:
- Skill Level – Beginners often prefer simple knots, while experienced sewers might choose invisible backstitches
- Fabric Type – Delicate fabrics need gentle pin stitches, while sturdy materials can handle stronger anchors
- Project Goals – Quick repairs call for fast knots, but heirloom pieces deserve pristine starts
- Thread Choice – Slippery metallics need waste knots, cotton threads work with most methods
Starting sewing neatly isn’t about perfection—it’s about finding what works for you. When selecting thread, remember that matching thread weight to the fabric is essential.
A thread locking stitch might feel awkward at first, but with practice, it becomes second nature. The best thread anchoring tips won’t help if you’re fighting your chosen method. Remember, even seasoned sewers switch techniques based on their project. Your goal is to prevent thread unraveling while maintaining stitch visibility that matches your standards.
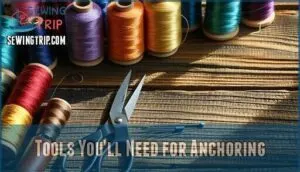
Tools You’ll Need for Anchoring
Having the right tools makes thread anchoring feel like second nature instead of wrestling with stubborn knots. You’ll need a needle that matches your fabric weight—think of it as finding the perfect key for your lock.
Quality thread won’t fray or break when you’re creating those essential anchor points. Sharp scissors are your best friend for trimming excess tails cleanly without leaving frayed ends that scream "amateur hour."
A thimble protects your fingertips from needle pricks, and you’ve got options: leather for comfort, rubber for grip, or metal for durability.
| Tool | Why You Need It |
|---|---|
| Needle sizes | Match thread thickness to fabric weight |
| Quality thread | Prevents breaking during anchoring |
| Sharp scissors | Clean cuts without fraying |
| Seam ripper | Fixes anchoring mistakes gently |
Keep these sewing essentials within arm’s reach, and your thread anchoring tips will transform from frustrating fumbles into smooth, professional starts.
How to Sew on a Button
You’ll tackle one of sewing’s most practical skills when you learn to attach a button properly – it’s like giving your favorite shirt a second chance at life.
This technique combines smart anchoring with button placement, so you won’t end up with wobbly buttons that pop off during your morning coffee routine, which is a very practical skill.
Step 1: Thread The Needle & Knot The End
Cut about two feet of thread—enough to work with but not so long you’ll tangle yourself up.
Wet one end in your mouth (yes, really!) and thread it through the needle’s eye. This classic needle threading tip works better than fancy threaders.
Double your thread and tie a secure knot at the end. For enhanced seam strength, consider using double thread knots.
These thread starting techniques prevent beginning sewing knot frustrations that plague most beginners, ensuring complete concepts are understood for a strong foundation, and using double thread knots can be very helpful.
Step 2: Create Anchor X Point
Creating proper X-Point Stability starts with positioning your button exactly where it needs to go.
Push your needle up through the first buttonhole, then down through the opposite hole to form that essential anchor cross. This Stitch Angle prevents shifting while you work.
Maintain gentle Thread Tension—too tight puckers the fabric, too loose creates sloppy anchoring.
Your Knot Placement underneath provides the foundation for secure Thread Securing Techniques.
Step 3: Position The Button
Once your anchor point’s set, it’s showtime for button placement. Push your needle up from the fabric’s underside through one buttonhole, pulling thread until the knot hugs the fabric. Flip the needle and push down through the opposite hole, creating a single thread bridge. Repeat this dance six times for rock-solid anchoring methods.
- Button placement starts with needle coming up through first hole from fabric’s back side
- Marking fabric helps guarantee your thread knot sits snugly against the underside without bunching
- Alignment tools like your fingertip keep the button steady while you work the needle magic
- Temporary adhesives aren’t needed here – your steady hand and proper threading do the trick
- Spacing considerations mean pulling thread tight to create clean lines between opposite holes
Step 4: Create The Shank
Now comes the fun part—building your button’s shank for proper button stability.
Wrap your thread around those connecting threads beneath the button six times, creating secure thread wraps. Think of it as building a tiny bridge that gives your button breathing room.
Pull tight, then push your needle back through the fabric base, keeping those anchor stitches snug for maximum thread security.
Step 5: Tie It Off
With your shank complete, you’re ready to lock everything in place. Push your needle through the fabric near the button base, avoiding the holes. Remove your spacer and wrap the thread around the stitching six times for thread security. Make three more passes through the button holes for extra knot security.
- Create a small knot under the fabric for finishing knots
- Trim thread tails close to prevent fraying
- Check knot placement stays hidden underneath
- Test your anchoring stitches by gently tugging the button
Tips for Anchoring Thread in Sewing
Once you’ve mastered basic anchoring stitches, these thread securing techniques for beginners will elevate your sewing game. Smart thread anchoring methods prevent frustration and create professional results.
- Master thread tail length – Leave 4-6 inches when starting. Too short makes anchoring tricky; too long wastes thread and tangles easily.
- Tackle securing slippery fabrics – Use waste knots for metallics and silks. These best thread types need extra grip before you clip the tail.
- Practice invisible anchoring methods – Split previous stitches to hide your work. Nobody should spot your anchor stitches on the finished piece. To achieve this, consider mastering secure knotting methods for a cleaner finish.
- Avoid preventing bulky knots – Multiple tiny backstitches beat one chunky knot every time.
Common Mistakes to Avoid When Anchoring
Even experienced sewers sometimes rush through anchoring and create preventable headaches. Puckering fabric happens when you pull anchored stitches too tightly—ease up and let the fabric breathe.
Loose ends become visible when you don’t secure them properly within existing stitches. Weak knots unravel at the worst moments, so always test your anchoring stitches before moving forward.
Visible anchors scream "amateur hour" when they peek through the fabric surface. Thread tangles multiply when you use overly long strands, so keep your working thread manageable.
These sewing mistakes cost time and frustration, but mastering proper thread management prevents them. Smart thread securing techniques for beginners focus on patience over speed—your sewing basics will thank you later.
Frequently Asked Questions (FAQs)
How do you anchor hand sewing stitches?
Like dropping an anchor to steady a boat, you’ll secure your thread’s starting point.
Simply tie a small knot at your thread’s end, then take a tiny backstitch through the fabric layers to lock everything in place.
How do you anchor thread without a knot?
You can anchor thread using a tiny backstitch through the fabric’s inside layer, then pull the needle through that same stitch loop.
This creates a secure hold without visible knots on your project’s surface.
What is an anchor stitch?
An anchor stitch secures your thread at the start or end of embroidery without visible knots.
You’ll take a small stitch, then pass through the same spot several times, creating a hidden lock that won’t budge.
Why is it important to anchor a stitch?
Proper anchoring prevents your thread from pulling loose and unraveling your work. Without it, you’ll watch hours of careful stitching come undone with just one tug—nobody wants that frustration!
How do you use a needle anchored stitch?
Thread your needle and insert it through the fabric’s back side.
Pull through, then take a tiny backstitch over one thread.
Repeat 2-3 times in the same spot to lock securely before continuing your embroidery work.
How do you stitch over a flint anchor?
Smooth as silk, you’ll insert your needle through the fabric layers, carefully working around the flint anchor’s edges.
Take small, even stitches that follow the anchor’s contours, ensuring you don’t catch or damage it.
How to anchor thread when hand sewing?
Start by knotting your thread end, then take a tiny backstitch through the fabric’s inside layer.
Pull snugly to secure.
For extra hold, loop through the same spot twice before continuing your stitching, which can provide extra hold.
How to secure thread when sewing?
Tie a knot at your thread’s end, then take a small backstitch through the fabric layers.
Pull tight to lock it in place.
For extra security, make another tiny stitch through the same spot, which provides extra security.
What is the anchor stitch?
Like a ship’s anchor keeps vessels steady in rough waters, the anchor stitch secures your thread without visible knots.
You’ll take tiny stitches through fabric layers, creating invisible security that won’t show on your finished work, providing invisible security.
How to lock a running stitch?
End your running stitch by taking a small backstitch through the last stitch you made.
Pull the needle through, then repeat this backstitch once more to create a secure lock that won’t unravel.
Conclusion
Mastering how to anchor sewing is like building a house – you need a solid foundation before adding the fancy details.
With these seven techniques in your toolkit, you’ll never watch your hard work unravel again.
Start with the waste knot for practice, then experiment with pin stitches and loop methods.
Remember, each project deserves the right anchoring technique.
Your future self will thank you when every seam stays perfectly intact through countless washes and wears.
- https://www.quora.com/How-do-I-tie-a-starting-and-ending-knot-in-sewing
- https://www.youtube.com/watch?v=daICD5Y5No8
- https://www.needlenthread.com/2008/09/starting-your-thread-anchor-stitches-on.html
- https://www.reddit.com/r/Visiblemending/comments/po6oop/what_is_the_best_way_to_anchor_your_threads_to/
- https://www.serendipityneedleworks.com/anchoring-your-thread/

