This site is supported by our readers. We may earn a commission, at no cost to you, if you purchase through links.
A forgotten saddle, sunken deep into the back row of a tack room, still remembers the burnished red it wore decades ago. Weather and time strip leather’s color, leaving character but stealing vibrancy.
Bringing it back isn’t guesswork; it’s a craft. When you know how to apply leather dye, you don’t just patch old scars—you rewrite a piece’s story, from dusty tan to midnight blue or oil-black sheen.
Get each step right, and worn leather transforms—texture stays, but the finish feels custom and strong enough to last. Possibility opens up with every well-blended layer, and mastery lies just ahead.
Table Of Contents
- Key Takeaways
- Why Apply Leather Dye?
- Choosing The Right Leather Dye
- Identifying Suitable Leather Types
- Preparing Leather for Dye Application
- Essential Tools and Safety Precautions
- Step-by-Step Guide to Applying Leather Dye
- Advanced Leather Dyeing Techniques
- Sealing and Conditioning Dyed Leather
- Maintaining and Caring for Dyed Leather
- Frequently Asked Questions (FAQs)
- Conclusion
Key Takeaways
- Dyeing leather lets you restore color, customize finishes, and strengthen each piece for longer life.
- Successful leather dyeing relies on thorough cleaning, proper masking, and using the right dye for your leather type.
- Layering thin coats, drying evenly between applications, and sealing the final result protect color and texture.
- Routine care with cleaning, conditioning, and UV protection keeps dyed leather vibrant and durable.
Why Apply Leather Dye?
Dyeing leather isn’t just about changing color—it’s about taking control of your project and making it yours. Whether you’re breathing new life into worn-out boots or putting your stamp on a fresh piece, the right dye transforms ordinary leather into something that stands out.
Dyeing leather turns an ordinary item into something uniquely yours, giving you the power to transform and personalize every project
Here’s what dyeing can do for your work.
Benefits of Dyeing Leather
Color restoration through leather dyeing techniques breathes new life into faded goods while slashing replacement costs. You’ll preserve the material’s structural integrity, customize your aesthetic with dye customization options, and reduce waste—sustainability benefits that matter.
For more on how durable, color-rich fabrics elevate sustainable style, check out this guide on the unique longevity of natural fiber sewing benefits.
Professional leather conditioning post-dye ensures durability. Master these dyeing methods, and you’re not just maintaining leather care standards—you’re commanding aesthetic renewal on your terms.
If you’re looking to pair professional leather care with the right cleaning routine for any accessory, this guide to choosing the best fabrics offers practical tips on how to get the most life from your favorite pieces: how fabric choice impacts accessory care and durability.
Effective leather dye application requires understanding of leather dye techniques to achieve desired results.
Restoring and Customizing Leather Goods
You control leather restoration by matching original colors or creating custom finishes that reflect your vision. Commercial recoloring balms revive worn furniture and interiors, becoming colorfast after buffing.
Repair scuffed boots with color-matched balm, fill gouges with filler compound, then feather dye outward for smooth blends. Master these leather dyeing techniques, and you’ll transform faded items into tailored statements while preventing future color loss through proper leather conditioning.
For best results, use a leather color kit to achieve professional-quality finishes.
Enhancing Durability and Appearance
Beyond restoration, dyeing leather fundamentally improves color stability and surface protection. Proper dye penetration combined with UV-resistant leather finishes doubles abrasion resistance—from 1,500 to 3,000 cycles in standardized tests.
These protective layers prevent fading, resist stains, and maintain texture through routine wear. When you pair quality leather dye with strategic leather conditioning, you’re engineering longevity into every piece, not just applying color.
Choosing The Right Leather Dye
Picking the right leather dye sets the foundation for your entire project. Each type brings its own look, feel, and technique.
Here’s what you need to know before you get started.
Alcohol-Based Vs. Water-Based Dyes
Ever wondered why some leather feels stiff after dyeing while others stay supple? Alcohol-Based Dyes punch deep for rapid dye penetration and bold color depth, but can rob leather flexibility if you skip conditioning.
Water-Based Dyes bond slower, boost dye fixation, and keep leather soft. For safer leather finishing, water-based dyes win on solvent safety and low odor.
If you want practical advice for prepping and working with leather alongside these dye tips, check out this helpful guide on essential leather sewing tips and tricks.
Oil and Pigment-Based Options
Oil-based dyes and pigment finishes put lasting richness and bold, even color in your hands, opening up new ways to treat leather beyond basic stain. Oil solubility drives deep color fastness and limits dye migration.
Pigment density boosts finish enhancement, letting you master sophisticated leather dyeing techniques. Pigment dyes offer unmatched coverage for smooth, consistent leather finishing and sharp, custom dye application.
Selecting The Best Color for Your Project
Color defines every leather project’s mood and legacy. Lean on Color Theory for shade matching—test swatches in daylight to check accuracy. Earthy leather tones suit classic looks, while bold colors make a statement. Match finish options to your item’s use, or mix and layer for color correction and blending using sophisticated leather dyeing techniques.
- Neutral browns blend for tradition
- Black signals authority and formality
- Contrasting details pop through complementary dyeing techniques
Identifying Suitable Leather Types
Not every type of leather takes dye in the same way. Before you start, it helps to know which kind you’re working with. Here’s what you need to look for.
If you’re interested in protecting your leather projects from wear and keeping repairs looking fresh, check out these practical maintenance tips for long-term results in this expert guide on fixing peeling leather couches.
Vegetable-Tanned Vs. Chrome-Tanned Leather
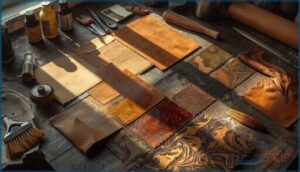
No two tanning methods tell the same story. Vegetable-Tanned Leather absorbs dye deeply, builds a rich patina, and flexes with time, but don’t expect neon shades or bulletproof color fastness.
Chrome-Tanned Leather, on the other hand, soaks up vivid colors, resists fading, and feels soft—though its environmental impact and chemical load outpace the vegetable approach.
Choose with intent.
Full-Grain, Top-Grain, and Split Leather
Picture three paths in leather dyeing: Full-Grain, Top-Grain, and Split. Full-Grain boasts tight fiber density and deep dye penetration, revealing a rich patina over time. Top-Grain offers uniformity, easier finishing, and controlled color. Split leather, with loose fibers, absorbs dye fast but risks over-darkening.
Match your Dyeing Techniques to Leather Grain Types for the best results in leather care and finishing.
Preparing Leather for Dye Application
Getting your leather ready is the first step to a clean, even dye job. You need to prepare the surface so the color goes on smooth and stays put.
Here’s what you should do before you start dyeing.
Cleaning and Deglazing The Surface
Ever wonder why some leather dye jobs look patchy? Surface Prep is the answer.
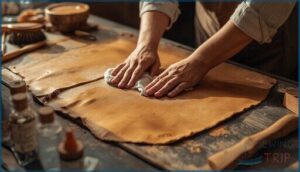
Start by wiping dust with a dry cloth, then use a pH Balancing leather cleaner to lift residues. Apply leather preparer or deglazer for thorough Leather Deglazing—this strips old leather finish and boosts Dye Penetration.
Careful surface preparation sets the stage for bold, even color.
Removing Old Finishes and Oils
Think your leather’s ready for dye? Not until you tackle stubborn oils and finishes. Use Deglazer Methods for deep Finish Stripping—solvent-based deglazers like Fiebings cut through factory coatings and grease, leaving a clean, absorbent surface.
For heavy Oil Removal, repeat Leather Cleaning and let the piece air dry. Proper Surface Preparation ensures your leather restoration won’t peel, streak, or fade.
Protecting Hardware and Masking Areas
Once you’ve stripped oils and finishes, turn your focus to Masking Techniques. Use painter’s tape—FrogTape Delicate Surface works well—for Hardware Protection. Press tape edges tight for solid Dye Boundary Control.
For intricate areas, try Resist Applications with Pro Resist or acrylics. Edge Sealing prevents bleed.
Wear latex gloves and prep with leather preparer, spray bottle, or sponge for clean results.
Essential Tools and Safety Precautions
Before you start dyeing leather, you need the right gear and setup to work safely. Protecting yourself and your workspace is just as important as getting a good finish.
Here’s what you’ll need for a safe and effective process.
Gloves, Masks, and Protective Clothing
Hand protection is the first line of defense. Choose nitrile protective gloves over latex or leather—they stand up to most dye solvents, cut skin irritation, and keep your grip steady.
For real respiratory safety, use a half-face respirator with organic vapor filters. Top off with chemical-resistant protective gear certified for liquid splashes to secure your leather care workflow.
Setting Up a Well-Ventilated Workspace
You want a workspace where Ventilation Systems and Airflow Control move fumes out, not through your breathing zone. Set up your table upwind of exhaust fans. Proof you’re serious about Safety Protocols? Follow this checklist:
- Use local exhaust in Workspace Layouts.
- Keep air moving straight, not swirling.
- Never skip ventilation during Leather Dyeing and Finishing.
Safe Handling and Disposal of Dyes
Ventilation Systems clear the air, but mastering Dye Storage and Waste Management locks down harm. Keep Leather Dye in sealed, labeled containers, far from heat. Use containment trays to catch leaks—one spill’s all it takes to ruin a project. For Hazard Control, treat every leftover and rag as hazardous—dispose per regulations for safe, responsible Leather Protection.
| Hazard | What To Do | Why It Matters |
|---|---|---|
| Dye Spills | Absorb, seal, label waste | Prevents surface and skin harm |
| Fume Exposure | Use masks, ventilate room | Avoids health risks |
| Unused Dye | Store cool, away from sun | Preserves chemistry, stops fire |
| Rags & Gloves | Treat as chemical waste | Protects environment |
| Leftover Liquid | Use hazardous disposal vendor | Meets regulations, avoids fines |
Step-by-Step Guide to Applying Leather Dye
Applying leather dye takes patience, the right tools, and a steady hand. You’ll want to follow each step closely to get a smooth, even finish.
Here’s how to tackle the process from start to finish.
Choosing and Using Applicators (Dauber, Sponge, Brush)
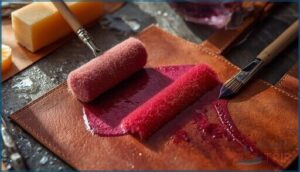
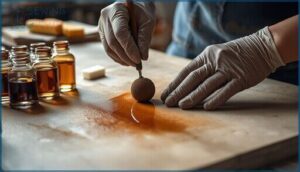
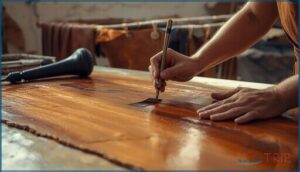
The right applicator turns dye into art. Wool dauber techniques offer fast, broad coverage for big surfaces. Sponge effects let you feather edges and shade details. Brush strokes excel in tight seams and layered color.
Master applicator care—clean brushes after use, rinse sponges, or discard daubers—to keep dye absorption and brush application consistent across every project.
- Wool dauber: quick, even coverage
- Sponge: controlled shading, soft transitions
- Paintbrush: precise lines, detailed work
- Applicator care: clean or dispose after use
Applying Even Coats and Layering Color
Precision is your ally in Dyeing Leather. Use Even Coat Methods—thin, overlapping strokes with a dauber or sponge—to prevent streaks and blotches.
Build Color Depth Control through Dye Layering Techniques: three to six coats, each deepening saturation.
This approach delivers rich Leather Finish Effects, lets you manage saturation, and guarantees a perfect Dye Application for custom Leather Dyeing.
Drying Techniques Between Coats
Patience is the secret ingredient that turns each dye layer into a smooth, impeccable finish.
Control evaporation and avoid tacky surfaces by keeping drying times consistent. For best results, use:
- Air Drying for thin coats—wait 20–30 minutes between layers.
- Heat Application with a hairdryer on low for faster results.
- Monitor coat thickness to prevent uneven Leather Finishing Methods.
Advanced Leather Dyeing Techniques
Once you’ve mastered the basics, you can push your leather projects even further.
There are techniques that let you create custom colors, add depth, or use natural materials for unique effects.
Here’s how you can take your dye work to the next level.
Creating Custom Colors and Blends
Why settle for off-the-shelf when you can engineer your own masterpiece? Custom blends access true control—mix primary Leather Dye colors using Color Theory principles for unique shades. Adjust intensity with neutral bases and test every batch on scrap. Use these practical ratios as your starting point:
| Dye Mixing Ratio | Resulting Shade | Tinting Techniques |
|---|---|---|
| 1:1 Red:Blue | Burgundy | Layer, dilute |
| 2:1 Yellow:Blue | Olive Green | Gradual add |
| 1:2 Orange:Black | Rust | Blend, adjust |
Special Effects: Antiquing, Gradients, and Highlights
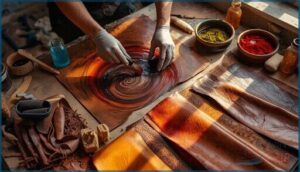
Want your leather project to turn heads? Master these Dyeing Techniques for bold Leather Patina and depth. Use Antique Finishes to boost contrast in tooled designs. Try Gradient Techniques for smooth ombré effects across panels. Employ Highlighting Methods to pop raised details. Follow this sequence:
- Apply base dye.
- Layer gradients.
- Work in antique paste.
- Highlight edges.
Natural Dyeing Methods (Vinegaroon, Tea, Plant-Based)
Ever tried turning leather black with vinegaroon? That’s real chemistry—iron acetate reacts with tannins for a deep, permanent color.
Boost brown warmth using Tea Tannins, or create earthy reds with Plant Dyes like madder root.
For true Eco Dyeing, swap metal salts for Natural Mordants from aloe or pomegranate. Natural Dyeing Methods let you control color and environmental impact.
Sealing and Conditioning Dyed Leather
After dyeing, your leather needs sealing and care to lock in color and protect the finish. This stage defines how your work will look and feel for years to come. Here’s what to focus on next.
Selecting and Applying Leather Sealers
Leather Finishing isn’t just about looks—it’s about preservation. Select a top coat sealer for lasting Leather Protection and Sealing, matching sealer type to your dye and usage.
Acrylic sealers suit most needs, while wax and resin finishes boost natural feel and Dye Compatibility.
Apply thin, even coats using recommended Application Methods to guarantee finish durability and reliable Leather Conditioning and Protection.
Buffing and Polishing for Shine
Once your Leather Sealer settles, grab a soft cloth and start Leather Buffing in steady, circular motions. This Polish Technique forces waxes from your finish into every pore, building a barrier and pumping up natural shine.
Shine Enhancement shows up fast—buffed leather throws light back with more intensity. Consistent Wax Application and Gloss Measurement guarantee your Leather Finish competes with anything factory-made.
Conditioning for Softness and Longevity
You’ve buffed your finish, but the job’s not done if you want that supple flex and lasting color. Conditioning breathes life back into the hide, preventing cracks and hardening. Invest in Moisture Control and Softness Restoration with proper Leather Conditioner.
Apply for:
- Fiber Lubrication and flexibility
- Leather Preservation and Dyeing durability enhancement
- Simple, effective Leather Crafting and Restoration
Maintaining and Caring for Dyed Leather
Once your leather is dyed and looking sharp, keeping it in good shape is straightforward. With the right habits, you can protect the finish and keep the color strong. Here’s what you need to focus on next.
Routine Cleaning and Conditioning
Think of Leather Maintenance like oiling the gears of a cherished machine—skip routine Leather Care and you risk seizing up that finish.
For reliable Leather Treatment and Conditioning, dust weekly using a dry cloth, then, when grime strikes, spot-clean with pH-balanced Cleaning Products.
Follow with thin coats of Leather Conditioner every few months for Leather Protection and years of resilience, not regret.
Protecting Against Fading and Stains
Guarding color stability demands more than wishful thinking—use UV protection like window films or blinds, rotate exposed surfaces, and avoid direct sun to anchor fade prevention.
Maintain leather finishes and refresh your leather sealer every few months to boost stain resistance. A quality leather conditioner and regular leather protection routine will keep dye locked in and surface staining at bay.
Troubleshooting Common Dyeing Issues
Ever wondered what stands between you and perfectly dyed leather? Sometimes dyeing leather means tackling streaks, cracks, or migration. Tame the chaos with this battle plan:
- Strip and repeat thin dye application for color correction.
- Oil to rebalance patchiness after dye migration.
- Repair peeling or delaminating finishes for restoration.
- Strip, re-oil, and re-dye as needed for stain removal.
Frequently Asked Questions (FAQs)
What is leather dyeing?
Funny thing—leather dyeing is less about painting a surface and more like coaxing color right into the hide’s core.
This dyeing process locks pigment into the fibers, blending Dye Chemistry, Leather Dye Basics, and true craftsmanship.
Can leather be dyed?
Yes, leather can be dyed. Leather dyeing lets you restore faded goods, achieve custom color fastness, or revamp old pieces.
Proper Leather Dye Types, preparation, and care give deep dye penetration and lasting results in DIY or professional Leather Restoration.
How do you dye leather?
Dyeing leather is like planting roots for a new tree—start with Leather Preparation, clean and deglaze for strong Dye Penetration, apply even Dye Application, allow full drying, then lock it in with Color Fixing and Leather Finishing.
How do I choose a leather dye?
Start by checking Leather Finish Types and Dye Compatibility Checks.
Choose a Dye Base Selection—alcohol, water, or oil—based on Leather dyeing techniques and Leather Dyes and Applications.
Always test Color Fastness and color options before committing.
How do you apply leather color?
Color Theory drives your results—layer dye in thin, even coats, using controlled Applicators for consistent Dye Penetration.
Application Methods include circular motions and alternating directions.
Focus on Fade Prevention and smooth Leather Finishes with professional Dye Application and Coloring Techniques.
Is it better to dye leather wet or dry?
You’ll get deeper dye penetration and better control over color shift by applying leather dye to dry leather.
Dampen the surface for even coverage if you want smoother results, especially with water-based dyes. Moisture control matters.
Do you oil leather before dying?
Oil application before leather dyeing isn’t a hard rule, but lightly oiling dry vegetable-tanned leather can even out dye penetration and prevent stiffness. Avoid heavy or wax-based conditioners—they block color. Timing and method depend on your Leather Care goals.
How long to let leather dye dry before buffing?
Patience pays off in the dyeing process—let leather dye dry at least 24 hours before buffing. Test dryness with a clean cloth; minimal rub-off means it’s ready.
Drying Time Factors include humidity, Dye Absorption Rates, and Leather Finish Types.
Can I dye leather shoes without removing the laces?
You shouldn’t skip lace removal if you want true color consistency and stain prevention. Leaving laces increases dye migration, risks marking the eyelets, and blocks full leather preparation.
For clean Leather Finishing, remove laces before the dyeing process.
Will rain damage freshly dyed leather items?
Rain damage risks are highest right after dyeing. Fresh color can bleed, streak, or stain if exposed to rain.
Use Leather Sealer and proper drying time to boost durability, prevent water spots, and guarantee lasting moisture protection for your finish.
Conclusion
A well-dyed piece of leather is proof that fortune favors the bold. When you set out to master how to apply leather dye—layer by layer, with the patience of rain soaking into earth—you claim control over both repair and reinvention.
Trust your touch, calibrate each move, and let your choices leave their mark. In hands that respect the process, color won’t fade quietly. It stands ready to carry your story forward, built to endure.
- https://oldtownleathergoods.com/leather-dyeing-techniques/
- https://www.masterclass.com/articles/how-to-dye-leather
- https://www.instructables.com/how-to-dye-leather/
- https://www.goldbarkleather.com/sourceblog/a-basic-guide-to-dyeing-leather
- https://www.rustictown.com/blogs/editors-desk/the-art-and-craft-of-leather-dyeing-a-comprehensive-guide


