This site is supported by our readers. We may earn a commission, at no cost to you, if you purchase through links.

Your braid foundation determines whether your sew-in lasts two weeks or two months, and whether you wake up with a headache or healthy hair underneath. The difference between a perfect install and a disaster often comes down to how you prep those cornrows—the tension, the direction, and the pattern you choose.
Getting your braids right from the start protects your natural hair, keeps your style fresh longer, and saves you from costly redo appointments.
Table Of Contents
Key Takeaways
- Your braid pattern determines whether your sew-in lasts two weeks or two months, directly impacting tension distribution, scalp health, and whether your natural hair stays protected or suffers breakage and traction alopecia.
- Proper preparation—including clarifying, deep conditioning, strategic sectioning, and controlled tension—creates the flat, secure foundation that prevents lumps, slippage, and premature loosening of your installation.
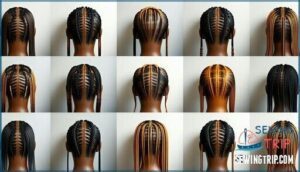
- Different braid patterns serve specific styling needs: vixen offers versatile parting options, beehive provides maximum hold for full installs, and zig-zag reduces scalp soreness while accommodating layered looks.
- Ongoing maintenance matters as much as the initial install—moisturize your scalp every few days with lightweight products, wash every two weeks to prevent buildup, and watch for signs like loosening braids or irritation that signal it’s time for removal.
Why Braid Patterns Matter for Sew-Ins
Your braid pattern isn’t just the foundation for your sew-in—it’s what determines how long your install lasts, how natural it looks, and whether your scalp stays healthy.
The wrong pattern can lead to tension headaches, breakage, and a weave that won’t lie flat. Let’s break down why getting this step right matters so much.
Role of Braid Patterns in Sew-in Longevity
Think of your braid pattern as the blueprint for your sew-in—it’s what determines whether your install stays sleek and secure for weeks or starts lifting and looking lumpy after just a few days. When you choose the right sewin braid pattern options, you’re setting yourself up for better tension control and improved hair health.
The importance of braid patterns can’t be overstated—they directly affect maintenance needs and longevity factors, keeping your style fresh longer while protecting your natural hair underneath.
Impact on Hair Health and Tension Distribution
Your choice of braid patterns directly impacts tension distribution and scalp health. Zig-zag and diagonal patterns spread pressure more evenly than straight-back styles, reducing hair breakage and tension alopecia risk along your hairline.
Beehive patterns can concentrate tension at the crown, potentially compromising blood flow by up to 35%. Flat braiding lowers traction by 18%, protecting hair with sewins while minimizing cuticle damage and fiber breakage that weaken your strands over time. Consequently, it’s important to understand braid pattern advantages for the best results.
Common Mistakes and Risks of Improper Braiding
Even small braiding mistakes can have lasting effects. Improper tension triggers traction alopecia—79% of people with chronic tight braids develop permanent edge loss. Uneven parting creates lumps and visible gaps that compromise your sew-in’s look.
Loose ends unravel 30–38% faster in three weeks, while skipping prep increases hair breakage by 35%. Poor product choices cause buildup, raising scalp complaints by 31% and cutting your install’s lifespan short.
Constant tension can lead to permanent follicle scarring.
How to Choose The Best Braid Pattern
Choosing the right braid pattern isn’t just about what looks good—it’s about protecting your hair and making sure your style works the way you want it to.
You’ll need to think about where you want to part your hair, how sensitive your scalp is, and what kind of look you’re going for. Let’s break down what to think about so you can pick a pattern that fits your needs.
Assessing Your Desired Style and Parting
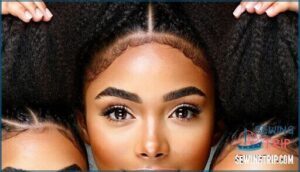
Before you commit to a pattern, picture exactly where you want to style your hair—whether it’s a sleek middle part, a dramatic side sweep, or the freedom to switch between looks. Your hairstyle goals and parting preferences drive everything.
If you’re planning updos or ponytails, choosing braid patterns with multiple leave-out sections gives you flexibility. Consider your face shape and occasion planning, too—certain sewin braid pattern options naturally complement specific features and lifestyles better than others.
Matching Patterns to Hair Type and Scalp Sensitivity
Your hair texture and scalp conditions should guide your pattern suitability choices. Thick, coarse hair thrives with beehive braiding patterns that reduce slippage by 19%, while fine or thinning strands need perimeter braids to lower edge breakage by 27%.
During client consultation, discuss scalp sensitivity—zig-zag patterns cut soreness by 22% and help with tension control. Matching braid patterns to your specific needs prevents hair loss and keeps you comfortable throughout wear.
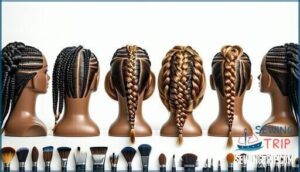
Popular Braid Patterns and Their Uses
Let’s walk through the most trusted patterns stylists use to MANAGE everything from sleek center parts to dramatic side sweeps. Each braiding pattern SERVES a specific purpose when cornrowing for sew-ins:
- Vixen ADAPTABILITY: Four-quadrant design lets you switch between ponytails and multiple partings
- Beehive benefits: Circular pattern REINFORCES full head installations for up to 12 weeks
- Zig-zag layering: Perfect for blending dimensional styles with natural movement
- Diagonal styling: Works beautifully with swooped bangs and angled parts
- U-part customization: Minimal leave-out for natural-looking installations
Choosing braid patterns that match your goals makes all the difference in braiding hair for sew-ins.
Step-by-Step Guide: Braiding Down for a Sew-In
Now that you’ve chosen your braid pattern, it’s time to get your hands dirty with the actual braiding process. The steps below will walk you through everything from washing your hair to creating those flat, secure cornrows that’ll hold your sew-in in place.
Follow along carefully, and you’ll have a solid foundation that looks natural and lasts for weeks.
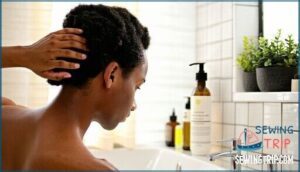
Prepping and Cleansing Your Natural Hair
Think of your natural hair as the foundation of a house—if it’s not clean and solid, everything you build on top will eventually fall apart. Start with a clarifying shampoo to remove product buildup, then follow with a sulfate-free cleanser and deep conditioner. This process guarantees your scalp is clean and your strands retain moisture.
| Step | Product Type | Purpose |
|---|---|---|
| 1. Clarify | Clarifying Shampoo | Removes product buildup and residue |
| 2. Cleanse | Sulfate-Free Shampoo | Gently cleanses without stripping natural oils |
| 3. Condition | Deep Conditioner | Restores moisture retention and strengthens hair |
| 4. Prep | Lightweight Leave-In + Natural Oil | Protects scalp and aids pre-braid stretching |
After conditioning, gently detangle using your preferred detangling methods, working from ends to roots. Apply a light leave-in conditioner and natural oil like argan or coconut to your scalp. If needed, trim your ends to prevent tangles. Stretch your hair through blow-drying or a heat-free method—this makes braiding smoother and helps maintain proper hair care throughout your sew-in’s wear period.
Sectioning and Detangling Techniques
Once your hair is prepped, proper sectioning becomes the roadmap that prevents you from getting lost halfway through—trust me, skipping this step turns a two-hour braid session into a four-hour tangle nightmare.
Use clips to divide your natural hair according to your chosen braiding pattern, then work through each section with a wide-tooth comb or detangling brush. Apply a light product to maintain tension control and prevent breakage while keeping your hair care foundation intact.
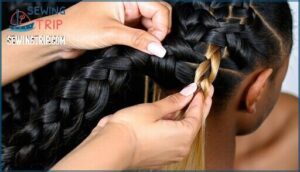
Creating Flat, Secure Braids
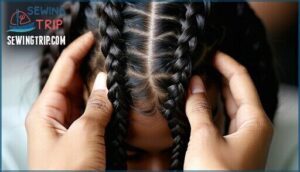
The secret to a perfect sew-in isn’t fancy products or expensive extensions—it’s cornrows so flat they practically melt into your scalp. Braid flatness determines how natural your sew-in looks and how long your pattern longevity lasts.
Keep these tension control basics in mind:
- Pull each section firm but comfortable—your scalp shouldn’t ache
- Use your thumbs to press braids down as you weave
- Check that straightback rows sit flush before moving forward
Secure braiding protects your hair while giving wefts something solid to grab.
Adding Synthetic Hair for Strength (if Needed)
If your natural hair feels too fine or slippery to hold the weft securely, weaving in a bit of synthetic extension hair while you cornrow can give your foundation the grip it needs. Choose fiber types like Kanekalon or braiding hair for sewins—they blend easily and add structure without bulk. Use blending techniques that keep tension control steady: fold the synthetic hair into your natural sections at the root, then braid patterns together smoothly.
Check braid thickness and scalp sensitivity as you go.
| Factor | Recommendation | Why It Matters |
|---|---|---|
| Fiber Types | Kanekalon or toyokalon braiding hair | Lightweight, secure grip for weaving |
| Blending Techniques | Fold synthetic at root, braid together | Creates unified, natural-looking braids |
| Tension Control | Firm but comfortable pull | Prevents breakage and scalp discomfort |
| Braid Thickness | Match natural hair density | Avoids lumps under wefts |
| Scalp Sensitivity | Use minimal synthetic if tender | Reduces irritation during wear |
Tips to Avoid Excessive Tension and Breakage
Now that you’ve reinforced your braids with synthetic hair, keeping that foundation comfortable and secure is the real key for protecting your natural hair underneath. Start by adjusting braid size—thinner cornrows distribute weight better and reduce strain on your hairline. Watch your parting angles; clean, even sections prevent overlap that tugs sensitive spots.
Tension control matters most: if your scalp feels tight or you see bumps, you’ve gone too far. Choose lightweight products that won’t weigh down braid patterns, and commit to maintenance practices like moisturizing every few days to keep braiding hair for sewins flexible, preventing hair damage before it starts.
Essential Braid Patterns for Sew-in Installations
Choosing the right braid pattern is like building a foundation for your house—it determines how well everything holds up and what you can do with it later.
Different patterns serve different purposes, from creating adaptable parting options to supporting specific styles like bangs or updos. Let’s look at the most popular patterns you’ll want to know for your sew-in installation.
4. Way Vixen Pattern for Versatility
When you need multiple parting options without reinstalling your entire sew-in, the 4-way vixen pattern becomes your go-to foundation. This braiding pattern divides your head into four quadrants, giving you serious styling adaptability.
You can switch from a middle part to a side part, pull your hair into ponytails, or create half-up styles without exposing your cornrows. The quadrant styling also helps balance tension across your scalp, reducing stress on any single area.
Zig-Zag and Diagonal Patterns for Layered Looks
For styles that need swooped layers or angled parts that don’t sit in straight lines, zig-zag and diagonal braid patterns give you the flexibility to make it all work.
These braiding patterns accommodate creative placement beautifully, letting you achieve layered volume without fighting against your cornrow foundation. The zigzag pattern complexity aids hair weaving for curls, twists, and styles with styling adaptability that diagonal sewin installations bring to the table.
Straight-back and Beehive Patterns for Beginners and Full Sew-ins
Straight-back cornrows are where most stylists start, and beehive patterns remain the go-to choice when you want full coverage with maximum staying power. Here’s why they’re perfect for beginner braiding and full sew-ins:
- Tension control is easier to manage with straight, horizontal rows
- Pattern longevity allows for 8–12 weeks of protective style wear
- Beehive benefits include secure weft placement for closures
- Sewin installations lay flatter with simple, predictable braiding patterns
- Full coverage works seamlessly without complicated leave-out sections
These foundational braid patterns give you confidence while protecting your natural hair.
U-part and Asymmetrical Patterns for Custom Styles
U-part and asymmetrical patterns unleash creative freedom when you’re aiming for a tailored look that blends seamlessly with your natural texture. These installation techniques offer unique aesthetics with minimal leave-out, letting you experiment with creative placements like side-swept styles or off-center parts.
The importance of braid patterns shows here—your braids support the weave while your leaveout flows naturally. This protective style combines best practices for sewins with adaptability options that make your hair truly yours.
Best Practices for Sew-in Maintenance and Hair Health
Getting your braids right is only half the battle—keeping them healthy makes all the difference.
Once your sew-in is installed, your scalp and hair still need attention to stay in good shape. Here’s what you need to know about maintaining your sew-in and protecting your natural hair underneath.
Scalp Moisturizing and Product Recommendations
Keeping your scalp hydrated under a sew-in isn’t just a comfort thing—it’s what separates a healthy protective style from one that leaves your hair worse off than before.
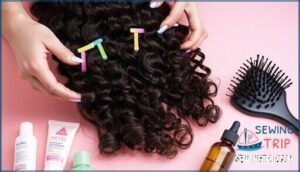
Reach for water-based leave-in conditioners or lightweight scalp sprays with ingredients like aloe vera and glycerin. Apply oil (like jojoba or grapeseed) to your edges and partings every few nights to lock in moisture without heavy build-up.
Avoiding Product Buildup and Scalp Irritation
Too much product is one of the fastest ways to turn a protective style into a problem. Heavy oils and creams clog follicles and trap dirt, creating the perfect recipe for scalp irritation and buildup.
Stick to lightweight products and wash your scalp with sulfate-free shampoo every one to two weeks. This washing frequency keeps your natural hair and hairline healthy without stripping moisture.
Deep condition before installation, and choose quality extensions—synthetic fibers can irritate faster than human hair. Maintaining hair health means staying light-handed with products and keeping those braids clean.
Inspecting and Adjusting Braids During Wear
Your braids aren’t just sitting there doing nothing—they shift, loosen, and react to how you move, sleep, and style your hair. Check weekly for braid loosening around edges and parting adjustments where hair extensions meet scalp.
Run fingers along braids for tension monitoring—tightness means inflammation risk. Perform scalp assessment for redness or bumps. Sniff for odor prevention needs, which signal buildup from synthetic hair or weaving threads, keeping maintaining hair health front and center.
Signs It’s Time to Remove or Redo Your Sew-in
Even braids that looked perfect on install day don’t last forever—they send signals when they’re past their prime. Watch for scalp irritation like itching or redness, braid looseness at the roots, odor buildup that won’t wash away, excessive shedding when you touch your natural hair, and style degradation where weaving threads loosen.
These signs mean your hair extensions and synthetic hair need removal before damage sets in.
Frequently Asked Questions (FAQs)
How long should I leave my hair braided before installing the sew-in?
Like a foundation that needs time to set, your braids should rest at least a few hours, ideally overnight, before the sew-in installation.
This braid duration allows natural hair to adjust and guarantees styling comfort while supporting beneficial hair growth and maintenance impact throughout the wear period.
What should I do if my braids start to feel too tight or uncomfortable?
If your braids feel too tight, don’t wait—Immediate Relief starts with loosening or removing them to prevent hair loss and scalp damage.
Scalp Sensitivity signals stress, so seek Professional Help if discomfort persists beyond styling adjustments for Long-Term Solutions promoting healthy hair growth.
Is it necessary to trim my natural hair before braiding it for a sew-in?
Snipping away split ends isn’t absolutely required, but it’s smart to remove damaged hair before braiding.
Trimming prevents tangling, reduces breakage during installation, and helps your sew-in styling look polished from root to tip.
How often should I wash my hair while wearing a sew-in?
Washing frequency matters—aim to cleanse every two weeks to maintain scalp health and prevent product buildup.
Drying techniques are essential; use low heat and gentle methods to preserve both your natural hair and weaving, which aids styling flexibility while protecting your haircut’s foundation.
How long should cornrows be for sew-ins?
The length of your cornrows acts like a safety net for your sew-in—they should extend to your natural hairline or just beyond it, guaranteeing braid stability and ideal length for secure weft attachment.
Hair texture, sew-in style, and styling adaptability all influence this decision.
Can you braid wet hair for installations?
Braiding wet hair for installations isn’t recommended. Wet hair risks braid slippage and extended drying time under extensions, which can lead to mildew and scalp sensitivity.
Dry hair promotes better product absorption and styling adaptability.
What thread works best for sewing wefts?
Cotton-polyester blends dominate professional installations, with 80% of stylists preferring them for durability.
You’ll want strong thread and the right needle size for your weft thickness. Thread material and stitch types directly impact styling adaptability and longevity.
How do you sleep with fresh braids?
Sleep on a satin pillowcase or wear a silk scarf or bonnet to protect fresh braids. This nighttime routine minimizes friction, preserves styling flexibility, and aids braid maintenance—whether you’re rocking a beehive pattern, bangs, or another hair styling technique.
Should edges be braided or left out?
Deciding between braiding or leaving out edges depends on your hairline stress and styling options. Braiding them offers protective benefits and minimizes edge tension, while leaving them out increases styling flexibility for bangs or softer looks.
Conclusion
The strongest sew-in starts before you even touch a needle—it’s built into how you braid down for a sew-in. Those cornrows are the difference between a style that holds or one that slides out in days.
Choose a pattern that matches your hair type, keep tension gentle but firm, and don’t rush the foundation. Your scalp will thank you, your extensions will stay put, and you’ll finally get the lasting style you’ve been chasing. Solid braids mean solid results.
- https://shop.luvmehair.com/blogs/wig-guest-post/sew-in-braid-patterns-styles
- https://un-ruly.com/vixen-sew-need-know/
- https://m.unice.com/blog/how-long-does-a-sew-in-last/
- https://www.blackshowhair.com/blogs/news/best-braiding-patterns-for-next-sew-in
- https://bundlefactory.com/blogs/news/guide-tips-scalp-care-how-to-for-hair-weave-beginners

