This site is supported by our readers. We may earn a commission, at no cost to you, if you purchase through links.
For tension testing, use contrasting thread colors in your bobbin and needle, then sew test stitches on scrap fabric. Proper tension creates balanced stitches where threads meet in the fabric’s center, with no bobbin thread visible on top.
Check thread weight matches your fabric – heavier materials need thicker threads while delicate fabrics require finer options. Perfect tension isn’t just about the thread itself though, it’s also about proper tension, thread weight, smooth consistency, rough patches, and balanced stitches.
Table Of Contents
- Key Takeaways
- How to Test Thread Tension
- Choosing The Correct Bobbin for Your Machine
- Understanding Good Thread Tension
- Checking Bobbin Tension and Making Adjustments
- The Impact of Thread Thickness on Tension
- Tips for Drop-in Bobbin Style Machines
- Understanding Thread Size Classification
- Tips for Checking Sewing Thread Quality
- Frequently Asked Questions (FAQs)
- Conclusion
Key Takeaways
- Test thread strength by gently tugging it – quality thread won’t snap under normal handling pressure and should feel smooth without fuzzy spots or thick areas when you run it between your fingers.
- Check tension with contrasting thread colors – sew test stitches using different colored threads in your needle and bobbin to easily spot when threads meet properly in the fabric’s center rather than showing on the surface.
- Match thread weight to your fabric type – heavier materials need thicker threads, while delicate fabrics require finer options to prevent puckering, breakage, and uneven stitches.
- Use machine-specific bobbins for proper tension – universal bobbins aren’t truly universal and can cause tension problems, so you’ll need bobbins designed for your exact sewing machine brand and model.
How to Test Thread Tension
Proper thread tension creates balanced stitches that meet in the fabric’s center, preventing puckering and thread breaks.
You’ll need to test both your bobbin and upper thread tensions regularly to maintain consistent stitch quality throughout your sewing projects, ensuring proper thread management.
Importance of Bobbin Thread Tension
Proper bobbin tension serves as the foundation for professional-quality sewing results.
When your machine calibration is off, you’ll face these common problems:
Poor calibration turns your sewing machine into a fabric-shredding nightmare
- Thread breakage from excessive tension pulling too hard on delicate fibers
- Fabric puckering when unbalanced forces create unwanted wrinkles and distortion
- Poor sewing stitches that appear loose, uneven, or completely malformed
Checking thread tension regularly prevents costly project failures.
Your bobbin tension works hand-in-hand with upper thread settings to create balanced stitches.
When you adjust bobbin tension correctly, threads meet perfectly in the fabric’s center, creating strong, even seams.
Think of tension as a delicate dance between two partners—both must move in harmony.
Test thread tension before starting any project to avoid frustration later.
Testing Bobbin Tension
Testing your bobbin tension doesn’t have to feel like rocket science. Here’s how to check if your tension settings are spot-on:
- Insert a freshly wound bobbin into your bobbin case
- Hold the bobbin case by the thread and give it a gentle jerk
- Watch the case’s movement – it should slide down 1-2 inches, then stop
- Test on scrap fabric using the same thread and fabric types as your project
For drop-in bobbins, sew a test seam first. The bobbin case shouldn’t fall freely (too loose) or stay completely still (too tight).
This simple test prevents thread breakage and tension issues before they ruin your sewing project.
Adjusting Bobbin Tension
You’ll want to make small adjustments to find that sweet spot where your stitches look professional.
Start by locating the tiny screw on your bobbin case—this controls your tension settings. Turn it clockwise to tighten or counterclockwise to loosen, but only in quarter-turns to avoid overdoing it.
Here’s your step-by-step approach:
- Test your current bobbin tension by holding the bobbin case and giving it a gentle flick
- Make small adjustments to the screw based on whether the case drops too fast or stays put
- Sew test stitches on scrap fabric to check thread balance before starting your project
Remember, checking sewing thread quality starts with proper sewing tension. When adjusting bobbin tension, patience pays off—rushing leads to frustration and wonky stitches.
Choosing The Correct Bobbin for Your Machine
You’ll run into tension problems if you use the wrong bobbin for your sewing machine.
Universal bobbins aren’t actually universal, so you need to choose machine-specific bobbins that match your exact brand and model.
Universal Bobbins Vs. Machine-Specific Bobbins
You can’t just grab any bobbin off the shelf and expect it to work. "Universal" bobbins aren’t actually universal—they’re marketing magic that often leads to frustration.
Universal bobbins are just clever marketing that leads to sewing headaches
Machine-specific bobbins fit your sewing machine’s exact specifications, while universal options create compatibility headaches. Using the wrong bobbin affects thread compatibility and bobbin tension, causing visible bobbin thread on top or loose stitches.
Different bobbin types vary in sizing and materials, from lightweight plastic to sturdy metal construction.
- Class 15 bobbins measure 20.3-20.6mm diameter with 11.7mm width
- L-Style bobbins share the same diameter but narrow to 8.9mm width
- M-Style bobbins expand to 24.9mm diameter for industrial machines
- Bernina’s CB and B9 bobbins feature unique profiles rejecting generic substitutes
It’s vital to check the bobbin compatibility guide to facilitate smooth operation.
Bobbin Compatibility With Different Brands
Machine-specific bobbins guarantee proper fit and tension for your sewing machine.
Each brand like Brother, Singer, Janome, and Bernina requires specific bobbin types that match their unique specifications.
Universal bobbins aren’t truly universal and can cause thread thickness issues or poor stitch quality.
Check your machine’s manual for the exact bobbin materials—plastic or metal—and size requirements.
Drop-in bobbins differ from removable bobbin cases, so verify compatibility before purchasing.
Using the wrong bobbin creates tension problems that affect your project’s quality and durability, and can lead to issues with stitch quality.
Understanding Good Thread Tension
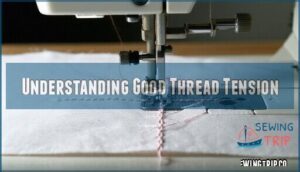
Good thread tension creates stitches that meet perfectly in the middle of your fabric layers.
When you’ve got it right, you won’t see bobbins thread peeking through on top or upper thread showing underneath.
Desired Stitch Formation
Now that you’ve selected the right bobbin, you need to understand what perfect stitch formation looks like.
Your threads should interlock at the fabric’s center, creating balanced stitches without visible loops or puckering.
Perfect stitch formation depends on these key factors:
- Stitch Balance – Upper and lower threads meet exactly at fabric’s midpoint
- Thread Control – Both threads maintain consistent tension throughout the seam
- Fabric Tension – Material stays flat without bunching or pulling
When you achieve proper thread tension and stitch quality, your seams will look identical on both sides.
This balanced formation prevents thread breakage and guarantees your projects maintain their shape over time.
To achieve superior results, it’s vital that you examine the stitch length settings for your specific sewing project.
Avoiding Visible Bobbin Thread on Top
Visible bobbin thread on your fabric’s surface signals tension problems that need immediate attention.
When bobbin tension runs too loose, the upper thread pulls the bobbin thread through the fabric, creating unsightly loops and dots on top. Proper tension adjustment guarantees threads lock together within the fabric layers, not on the surface.
Test your bobbin settings by examining sample stitches closely. Quality sewing techniques require balanced thread tension between upper and lower threads.
Adjusting bobbin tension eliminates thread visibility issues and produces professional-looking seams that enhance your project’s overall appearance.
Preventing Visible Upper Thread on Underside
When your upper thread shows on the fabric’s underside, you need better Thread Balance through proper Tension Control. This happens when your upper thread tension is too loose compared to your bobbin thread.
- Test thread tension by sewing on scrap fabric matching your Fabric Choice
- Gradually increase upper thread tension until threads meet inside the fabric layers
- Check that your Stitch Length settings work with your thread quality for ideal results
Checking Bobbin Tension and Making Adjustments
Proper bobbin tension guarantees your stitches form correctly and prevents thread problems that can ruin your project.
You’ll need to check and adjust this tension regularly, especially when switching between different thread types or weights, to ensure proper functioning.
Steps for Machines With Removable Bobbin Cases
When working with removable bobbin case machines, you’ll need to master the art of bobbin case removal and thread tensioning.
Start by pulling out the bobbin case and loading a freshly wound bobbin. Hold the thread at the case opening and give it a quick downward flick.
If the case drops like a rock, there’s no tension. If it won’t budge, tension’s too tight. You want it to fall about one to two inches – that’s the sweet spot for proper bobbin tension.
This simple test prevents thread breakage and helps guarantee quality stitches during sewing machine maintenance.
Proper bobbin case selection is vital for achieving superior sewing results.
Steps for Machines With Drop-in Bobbins
Drop-in bobbin machines require a different approach for checking thread tension. Start by threading your sewing machine completely and creating a test seam on scrap fabric. If you notice the bobbin thread appearing on top, it’s time for bobbin adjustment.
Here’s your step-by-step process:
- Thread and test – Complete the threading process and sew a sample seam
- Locate the screw – Find the small flat-head screw near the bobbin case area
- Make tiny adjustments – Turn clockwise to tighten or counterclockwise to loosen tension
Remember, small tweaks work best with drop-in bobbins. Proper bobbin tension settings are essential for achieving balanced stitches and preventing thread breakage.
Common Issues and Solutions
Troubleshooting tension issues doesn’t have to feel like solving a puzzle.
When your machine acts up, these problems typically signal the need for thread tension adjustment:
- Thread Breakage – Your bobbin thread snaps during stitching
- Fabric Puckering – Seams bunch up instead of lying flat
- Machine Errors – Visible bobbin thread appears on your fabric’s surface
Adjusting bobbin tension solves most stitch quality problems.
Start with small quarter-turn adjustments to the tension screw, then test on scrap fabric using your project thread.
The Impact of Thread Thickness on Tension
Thread thickness directly affects how well your bobbin tension works with your fabric and upper thread.
Thicker threads need more space to move freely between the tension plate and bobbin case, while finer threads require the plate to sit closer to the case for proper control, which is crucial for the tension to work correctly.
How Thread Thickness Affects Tension
Thread thickness dramatically impacts how your machine forms stitches.
When you use thick threads, they require more space to move freely through the bobbin case, while fine threads need closer contact for proper control.
Factory settings work best with 50-60 weight threads, but deviation from this standard means you’ll need manual adjustments.
Understanding thread tension basics is essential for achieving balanced stitches.
| Thread Weight | Tex Value | Tension Dial Setting | Common Issues |
|---|---|---|---|
| 30 wt (thick) | 33 Tex | 3-5 (looser) | Loops on fabric back |
| 40 wt (medium) | 25 Tex | 4-6 (standard) | Balanced stitches |
| 50 wt (fine) | 20 Tex | 5-7 (tighter) | Thread breakage |
| 60 wt (very fine) | 17 Tex | 6-8 (tightest) | Skipped stitches |
Testing sewing thread with scrap fabric prevents costly mistakes on your actual project, and ensures you achieve the desired sewing results with the right thread tension and proper control.
It is crucial to follow these guidelines to maintain optimal thread quality and avoid issues like thread breakage.
Adjusting Tension for Different Thread Thicknesses
Now that you understand how thread thickness affects tension, you’ll need to make specific adjustments to achieve perfect stitches.
Different thread weights require different tension settings to prevent puckering or loose stitches.
Here’s how to adjust tension for various thread thicknesses:
- Fine threads need tighter tension settings since they require closer contact between the tension plate and bobbin case for proper control.
- Thick threads need looser tension settings to allow adequate space for the thread to move freely through the bobbin case mechanism.
Test your adjustments by sewing on fabric scraps using contrasting thread colors in the needle and bobbin. This makes it easy to spot when bobbin tension needs fine-tuning for ideal stitch formation.
Tips for Drop-in Bobbin Style Machines
Drop-in bobbin machines need special attention when checking thread tension since you can’t remove the bobbin case for testing.
You’ll need to sew test seams and watch for tension problems like visible bobbin thread on top or loose stitches underneath.
Importance of Testing and Adjusting Tension
Testing and adjusting tension on drop-in bobbin machines prevents stitching disasters.
When tension control fails, your threads become unruly partners instead of working together. Poor thread balance creates visible bobbin thread on top or loose upper thread underneath.
Tension Issues and Solutions
| Problem | Solution |
|---|---|
| Bobbin thread shows on top | Increase upper thread tension |
| Upper thread visible underneath | Decrease upper thread tension |
| Puckered fabric | Reduce overall fabric tension |
| Loose, sloppy stitches | Tighten both thread tensions |
Understanding thread tension requires testing with scrap fabric first. Check your stitch quality by examining how threads interlock within the fabric layers. Proper sewing precision happens when threads meet perfectly in the middle.
Testing bobbin tension saves time and materials by catching problems early. Remember, small adjustments make big differences in your final results.
Troubleshooting Common Tension Issues
Three major tension problems plague drop-in bobbin machines and can turn your sewing project into a frustrating mess.
When thread tension goes wrong, you’ll face these telltale signs:
- Skipped Stitches and Thread Nesting occur when bobbin tension is too loose, creating loops and tangles that’ll make you want to toss your machine out the window
- Puckered Fabric and Broken Thread happen when tension is too tight, causing your fabric to bunch up like an accordion
Looping Underside and uneven stitches signal poor stitch formation from imbalanced thread tension.
Test your bobbin tension using contrasting thread colors to spot problems quickly. Remember, thread quality matters just as much as proper adjustment.
Understanding Thread Size Classification
Thread sizing systems can confuse even experienced sewers since manufacturers use different measurement methods.
Understanding these classifications helps you match thread weight to your fabric and project requirements for professional results.
Different Units Used for Thread Size
Mastering thread size classification can feel like decoding a foreign language, but it’s simpler than you think.
You’ll encounter several measurement systems when testing sewing thread. Thread Weight uses numbers like 30wt or 40wt—higher numbers mean finer threads. Denier Systems measure mass in grams per 9,000 meters of thread. Metric Units like Tex calculate grams per 1,000 meters.
The English Count system measures cotton threads differently than synthetic ones. Size Conversion charts help translate between these systems since manufacturers use different standards.
Understanding Thread Classification prevents ordering mishaps—imagine buying "heavy-duty" thread that’s actually gossamer-thin! Each system serves specific industries, so knowing the basics of thread thickness measurements saves time and frustration when selecting materials for your projects.
Choosing the right thread types is vital for ensuring the quality and durability of your sewing projects.
Importance of Knowing Thread Weight
Knowing your thread weight helps you match materials perfectly and avoid sewing disasters.
Thread Weight directly impacts Fabric Choice and Sewing Performance.
Heavier threads need different needle sizes and tension settings than lighter ones.
Thread Classification systems help you understand thread thickness and thread quality relationships.
When you know thread size, you can predict tensile strength and adjust your machine accordingly.
- Think of thread weight like clothing sizes—the wrong match creates problems, but the right fit makes everything work smoothly
Yarn Conversion charts become your best friend when switching between different thread types and weights.
Tips for Checking Sewing Thread Quality
You can easily spot high-quality thread by checking its strength, smoothness, and consistency. Test your thread’s durability with simple at-home methods to verify it won’t let you down mid-project.
Identifying High-Quality Thread
Quality thread starts with examining the fiber content and yarn weight specifications on the spool.
You’ll want to check for color consistency throughout the entire thread—no fading or uneven spots that scream "bargain bin blues."
Run your fingers along the thread to assess texture; high-quality thread feels smooth and even.
Thread materials like polyester offer durability, while cotton provides natural appeal.
Look for reputable brands that specify tensile strength ratings.
When checking sewing thread quality, avoid threads with fuzzy, uneven surfaces or brittle texture.
Testing sewing thread involves gentle tugging—quality thread won’t snap easily under normal handling pressure.
The selection of thread also depends on understanding thread quality standards to guarantee the best results.
Testing Thread Strength and Durability
Once you’ve identified high-quality thread, testing its performance under real conditions reveals its true worth.
Thread breakage during sewing often signals weak tensile strength, while fabric fraying points to poor abrasion resistance.
Here are three practical tests you can perform:
- Tensile testing – Pull the thread steadily until it snaps. Strong thread requires significant force and breaks cleanly rather than stretching excessively.
- Snap resistance check – Give the thread a quick jerk. Quality thread won’t break from sudden tension that mimics machine stress.
- Abrasion test – Rub thread against rough fabric or sandpaper. Durable thread maintains its integrity without significant weakening.
Thread weight and thread thickness affect these results. Heavier threads typically show better tensile strength, while thread quality determines color fading resistance over time. Understanding thread strength factors is essential for selecting the right thread for your project.
Frequently Asked Questions (FAQs)
How do you check sewing thread quality?
Pull thread until it breaks to test strength. Rub against rough surfaces to check abrasion resistance. Verify thread feels smooth and strong. High-quality thread won’t fray easily.
How do I check the quality of my sewing stitches?
Examine your stitches closely—they’ll tell you everything you need to know. Check if threads meet evenly in fabric’s center, with no puckering or visible bobbin thread on top.
How do I know if my bobbin thread is good?
Check your bobbin thread by pulling it until it breaks to test strength.
Look for smooth texture without fraying or weak spots.
Verify that it matches your fabric weight and doesn’t show visible wear or fading.
Why is it important to test your sewing thread before sewing?
Like finding a crack in your foundation before building, testing thread prevents project disasters.
Poor-quality thread breaks mid-seam, bleeds colors, or creates uneven stitches that ruin your work and waste precious time, which is why testing thread is crucial.
How do I choose the right thread for my sewing project?
Match your thread weight to fabric weight—lightweight fabrics need fine thread, heavy fabrics require thick thread. Consider fiber content compatibility and choose reputable brands for consistent quality and durability.
How do you know if a thread is too tight?
Thread breakage, puckering, or visible bobbin thread signals excessive tension.
You’ll notice fabric pulling tight, stitches looking bunched, or threads snapping during sewing.
Test by pulling fabric apart—balanced tension means both threads break together.
How do I know if my thread tension is too tight?
Too-tight tension creates puckered fabric, frequent thread breaks, and visible needle thread on your fabric’s underside.
You’ll see the bobbin thread pulling upward instead of meeting threads in the fabric’s center.
Can I use any type of bobbin for my sewing machine?
No, you can’t use any bobbin with your machine.
Universal bobbins aren’t truly universal and can cause tension issues.
Use machine-specific bobbins designed for your brand and model to guarantee proper stitch formation and avoid loose threads.
What are the consequences of using thread of the wrong thickness?
Like forcing a size 12 foot into a size 8 shoe, wrong thread thickness creates chaos.
You’ll get puckering, thread breakage, and uneven stitches because the tension can’t balance properly between thick and thin threads.
How do I check the quality of my sewing thread?
Pull your thread until it breaks to test strength, then rub it against a rough surface to check abrasion resistance. Quality thread won’t fray easily and maintains consistent thickness throughout.
Conclusion
Mastering how to check sewing thread transforms your projects from frustrating failures to professional successes.
You’ve learned to examine thread quality through visual inspection and touch tests, evaluate tension with contrasting colors, and match thread weight to fabric requirements.
These skills prevent common stitching problems like puckering, breaking, and uneven seams.
Remember to test tension adjustments on scrap fabric before starting your actual project.
Quality thread assessment becomes second nature with practice, ensuring consistent results every time you sew.
- https://www.zwickroell.com/industries/textiles/testing-of-threads-yarns-and-twine
- https://mhthread.com/blog/products/mh-thread-size-conversion-chart
- https://www.azom.com/materials-video-details.aspx?VidID=798
- https://www.fibre2fashion.com/industry-article/2239/quality-assessment-of-sewing-threads
- https://textilessupplychain.com/news/top-sewing-thread-testing-methods-you-should-know-based-on-gb-t-6836-2007

