This site is supported by our readers. We may earn a commission, at no cost to you, if you purchase through links.

Plan your steps ahead and gather quality supplies. You’ll want to create a test version first to work out any kinks.
Film each step clearly while explaining your process in simple terms. Keep your camera steady and lighting bright.
Break complex techniques into smaller chunks that viewers can follow easily. Remember to show common mistakes and how to fix them.
Most importantly, speak naturally like you’re teaching a friend over coffee. The secret lies in understanding what beginners struggle with most, and being able to explain it in a way that is easy to follow.
Table Of Contents
Key Takeaways
- Choose simple projects like A-line skirts with stable fabrics such as cotton that won’t slip around while you’re filming and explaining techniques to beginners.
- Create a test muslin first to work out fitting issues and construction problems before touching your good fabric, then document all adjustments for your pattern.
- Film with steady camera work and bright, even lighting while speaking naturally like you’re teaching a friend over coffee rather than using overly formal language.
- Break complex techniques into smaller, manageable steps and show common mistakes with their fixes so viewers can follow along without getting overwhelmed, using simple projects.
Selecting a Project
You’ll want to start with simple styles like A-line skirts or basic tops that won’t overwhelm you as a beginner.
Choose stable fabrics such as cotton or medium-weight knits that are easy to handle and won’t slip around while you’re learning the basics.
Simple Styles
Your sewing-journey starts with choosing beginner-friendly designs that won’t leave you tangled in frustration.
A-line skirts and basic dresses offer forgiving silhouettes that hide minor mistakes while you master fundamental techniques.
Boxy tops provide straight seams and minimal shaping, making them perfect first projects.
Start with simple patterns featuring minimal darts, few pieces, and straightforward construction.
Online sewing tutorial sites recommend knit jerseys for their stretch and forgiveness.
Avoid complex details like princess seams, buttonholes, or fitted sleeves initially.
These sewing simple styles build confidence while teaching essential skills through manageable sewing project tutorials.
Stable Fabrics
When choosing fabric for your first sewing tutorial project, think of it as picking the right dance partner. You want someone who won’t step on your toes while you’re learning the moves.
Choose fabric like choosing a dance partner—find one that won’t trip you up while you’re learning the steps.
Here’s your fabric starter pack:
- Woven cotton – Your reliable best friend that forgives mistakes
- Linen blends – Forgiving texture that hides wonky stitches
- Medium fabric weight – Won’t slide around like silk or bunch like canvas
- Knit jerseys – Stretchy comfort for beginner-friendly fits
Skip slippery satins and tricky patterns initially. Many projects begin with quality cotton materials.
These stable fabric types make following sewing instructions much easier than wrestling with difficult materials.
Creating a Pattern
You’ll need a pattern that fits your body before you can start sewing your garment.
You can draft one from scratch using your measurements, trace an existing piece of clothing that fits well, or modify a store-bought pattern to match your size.
Drafting
Creating precise patterns starts with your body measurements and a solid foundation.
Pattern drafting transforms your vision into wearable reality through careful sloper manipulation and systematic approach.
- Start with your basic bodice block using body measurements for accurate fit
- Apply pattern grading techniques to adjust sizes systematically across different measurements
- Use vector software like Adobe Illustrator for professional pattern alterations and precision
This sewing tutorial method guarantees perfectly fitted sewing patterns for all your sewing projects, using a systematic approach and resulting in a perfectly fitted outcome.
Tracing
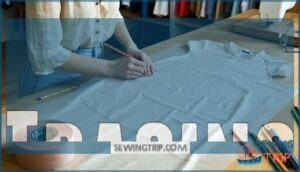
Grab your sewing tracing paper and lay it over your favorite garment. This garment replication method captures perfect fit details that commercial patterns often miss.
Smooth the pattern paper across sleeves, bodice, and hem areas. Mark seam lines, darts, and curves with precision. This sewing pattern tracing technique creates custom templates from clothes you already love wearing.
Many designers find accurate body measurements essential for achieving the best fit. You can learn more about creating custom sewing patterns at accurate body measurements.
| Tracing Techniques | Best Garments | Paper Type |
|---|---|---|
| Direct overlay method | Fitted tops, dresses | Tissue paper |
| Rubbing technique | Textured fabrics | Tracing paper |
| Pin-and-mark system | Delicate garments | Pattern paper |
| Fold-and-trace method | Symmetrical pieces | Kraft paper |
Modifying
Pattern alterations transform commercial designs into custom masterpieces. You’ll adjust fit and style to match your vision perfectly.
- Take precise body measurements for accurate pattern alterations
- Grade between sizes when your measurements span multiple pattern sizes
- Adjust darts and seams to improve fit around curves
- Modify necklines and sleeve lengths for design changes and style variations
- Blend graded lines smoothly between different sizing points for professional results
Sewing Supplies
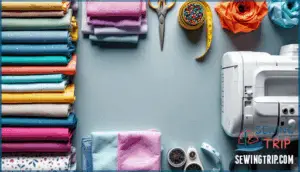
You’ll need the right fabric and tools before you start sewing your project.
Choose stable medium-weight fabrics like cotton and invest in quality scissors, pins, a tape measure, and a good sewing machine to make your work easier.
Fabric
Your fabric selection can make or break your sewing project. Start with stable, medium-weight cotton poplin or linen blends that won’t slip around while you’re cutting and stitching.
These fabric types offer forgiveness for beginners while maintaining structure. Pay attention to fabric grain – it affects how your garment hangs and moves.
Jersey knits work perfectly for basic tees, while woven fabrics suit structured pieces. Consider fabric care requirements before buying.
When fabric sourcing, choose options that match your skill level. Avoid slippery silks or stretchy materials until you’ve built confidence with easier sewing fabrics. Consider using cotton poplin material for its versatility.
Tools
Once you’ve picked your fabric, you’ll need the right Essential Sewing Tools to bring your project to life.
Quality sewing supplies make all the difference in creating professional results for your sewing tutorial.
Your toolkit should include these must-have items:
- Measuring Tools – tape measure and rulers for accurate pattern drafting
- Cutting Tools – sharp fabric shears and rotary cutters for clean edges
- Marking Tools – fabric pencils and tracing wheels for pattern transfer
- Sewing Machine – reliable stitching power for construction
- Pressing supplies – iron and board for crisp seams
For precise cutting, you’ll need fabric scissors for clean edges.
These sewing tools transform your video tutorials into hands-on success.
Sewing Tips
You’ll save time and avoid mistakes when you follow clear instructions and pin your fabric properly. These basic techniques help you create professional-looking results even if you’re just starting out.
Instructions
Once you’ve gathered your supplies, writing effective sewing instructions becomes your next challenge.
Creating a quality sewing tutorial means thinking like both teacher and student. Your sewing guide should speak to beginners and experienced sewers alike.
Write with clear language that eliminates confusion. Break complex steps into smaller chunks. Nobody wants to decipher cryptic directions when they’re holding sharp scissors. Consider your skill level target audience – are you teaching basic seams or advanced tailoring techniques?
Your sewing instruction should include these elements:
- Step order that flows logically from start to finish
- Visual aids like photos or diagrams for tricky parts
- Troubleshooting tips for common mistakes
- Video tutorials links when helpful
- Sewing lessons that build on previous knowledge
Test your instructions by having someone else follow them. What seems obvious to you might stump others completely. A thorough approach often involves using a sewing instruction guide.
Pinning
Smart pinning techniques can make or break your sewing project. Choose the right pin types for your fabric – ballpoint pins work best with knits while sharp pins suit woven materials.
The right pins are your fabric’s best friend—choose wisely and your seams will thank you.
Focus on pin placement by inserting pins perpendicular to seam lines, about two inches apart. For fabric preparation, smooth out wrinkles before pinning to avoid puckers later.
When handling curves, place pins closer together – every inch works well for tight curves. This curve pinning method keeps fabric layers aligned perfectly.
Remove pins just before your needle reaches them to prevent breaking or dulling. These sewing tips transform tricky sections into manageable steps for any sewing tutorials.
Making a Muslin
Creating a muslin prototype often feels like insurance for your sewing project. This test garment lets you work out all the kinks before touching your good fabric. Think of it as your dress rehearsal.
Start with inexpensive muslin fabric or old bedsheets for your mockup. You don’t need perfection here – just something that mimics your final fabric’s weight and drape.
Cut out all pattern pieces following the same markings you’d use for the real deal. Muslin construction should mirror your planned sewing process. Baste seams temporarily rather than finishing them completely.
This approach saves time while giving you the fit information you need. For best results, iron muslin squares after cutting them out.
When sewing muslin, focus on evaluating fit rather than beauty. Pin where adjustments feel necessary. Mark problem areas directly on the fabric. Your fitting muslins become roadmaps for success, showing exactly where tweaks are needed before the final version.
Fitting The Muslin
Once your muslin is sewn, it’s time for the real test—putting it on. This is where the magic happens in your fitting process.
Stand in front of a mirror and really look at how the garment sits on your body. Does it pull across the chest? Gap at the waist? Feel too tight in the arms?
Mark problem areas with a fabric pen or pins while you’re wearing the muslin. Don’t be shy about pinching out excess fabric or noting where you need more room.
This prototype testing phase saves you from heartbreak later when working with your good fabric. Common fit issues include shoulders that are too wide, armholes that bind, or a waist that hits in the wrong spot.
If you’re fitting pants, be sure to address any crotch fit issues as well. Take photos from different angles—sometimes the camera catches what your eyes miss.
Document your muslin adjustments with measurements so you can transfer these pattern alterations accurately to your final pattern pieces.
Transferring to Fabric
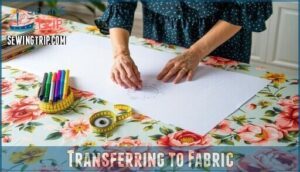
After perfecting your muslin, it’s time to bring your vision to life on the final fabric. Start with proper Pattern Placement by laying your fashion fabric flat on a cutting table.
Pinning your adjusted pattern pieces to the fabric requires paying close attention to Fabric Grain alignment – the straight grain should run parallel to the selvage edge. For Fabric Marking, use a tracing wheel with sewing transfer paper pattern or fabric-safe markers to trace around each piece.
Mark all construction details like notches, darts, and pocket placements. Don’t skip the sewing fabric grainlines – they’re your roadmap for professional results. Transfer Methods vary by fabric type, with delicate materials needing gentle handling, while sturdy cottons can handle more pressure.
For challenging fabrics like plaids or stripes, baste the pattern directly to guarantee perfect alignment. Take your time with Cutting Accuracy. Sharp scissors and steady hands make all the difference. Following these sewing tutorials guarantees your sewing pattern transfers flawlessly from paper to fabric.
Adding Details
Now you’re ready to make your project special with finishing touches that show your personal style.
Adding details like shirring or decorative stitches transforms a basic garment into something unique that reflects your creativity and skill level.
Shirring
Once you’ve transferred your pattern to fabric, shirring adds beautiful texture and fit.
This decorative technique gathers fabric using elastic thread, creating stretchy areas that conform to your body.
Master these shirring basics for stunning results:
- Fabric Choice – Select lightweight materials like cotton voile or silk for best gathering
- Shirring Techniques – Wind elastic thread in your bobbin, regular thread on top
- Design Variations – Create parallel rows or curved patterns for unique sewing projects
Steam finished shirring to activate the elastic’s gathering power.
Decorative Stitches
Why settle for plain when you can add pizzazz? Decorative stitches transform ordinary garments into stunning pieces.
Your sewing machine offers various stitch types like zigzag chains and rope stitches for impressive decorative effects.
Focus on stitch placement around necklines and sleeves for maximum impact. Thread selection matters—experiment with different weights on scraps first.
These sewing techniques elevate your projects beyond basic construction, making every garment uniquely yours.
Frequently Asked Questions (FAQs)
How to create a repeating pattern?
You don’t need fancy software to create stunning repeating patterns.
Start with simple geometric shapes, then duplicate and rotate them systematically.
Use graph paper or free online tools to map your design before transferring to fabric.
How do I become a clothing pattern maker?
Start by mastering basic sewing skills and garment construction.
Learn pattern drafting through courses or tutorials. Practice creating patterns from existing clothes.
Study fit and proportions. Build a portfolio showcasing your pattern-making abilities to attract clients.
How do I start a sewing project?
Pick your design, choose your fabric, and gather your tools.
Draft or buy a pattern that fits your skill level.
Cut carefully, pin precisely, and sew step by step.
Test fit as you go.
How do you write a project plan for sewing?
Outline your design goals, choose fabrics and patterns, list required materials and tools.
Break construction into numbered steps with time estimates, and include fitting checkpoints to guarantee your project stays on track.
How do I set up proper lighting for filming?
Soft, even light transforms your workspace into a professional studio.
Position two LED panels at 45-degree angles to eliminate harsh shadows.
Add a ring light for close-ups.
Natural window light works too, but avoid direct sunlight’s glare.
What camera equipment works best for close-ups?
For capturing detailed stitching, you’ll want a DSLR or mirrorless camera with a macro lens.
The 60mm or 100mm macro lenses work perfectly for close-ups, letting you showcase every thread and technique clearly.
How should I organize my tutorial content outline?
Start with your project’s basics, then break down each step logically.
Group similar techniques together, include material lists upfront.
Add troubleshooting sections for common mistakes.
End with finishing touches and styling tips.
Whats the ideal video length for tutorials?
Like a perfectly timed recipe, your sewing tutorials should run 10-15 minutes for complex techniques and 5-8 minutes for simple skills.
You’ll keep viewers engaged without overwhelming them, letting them absorb each step comfortably, which is crucial for simple skills to be learned effectively.
How do I edit and upload tutorial videos?
Choose simple editing software like iMovie or DaVinci Resolve.
Keep cuts clean, add clear titles, and guarantee good audio quality.
Upload to YouTube with SEO-friendly titles and descriptions.
Include timestamps for different techniques.
Conclusion
Starting your first sewing tutorial might feel overwhelming, but you don’t need perfect skills to teach others.
Focus on clear explanations and steady camera work. Remember that viewers connect with authentic instruction more than flawless technique.
You’ve learned how to create sewing tutorial content that genuinely helps beginners succeed. Practice these filming and teaching methods with simple projects first.
Your enthusiasm for sewing will shine through, making complex techniques feel achievable for new sewers everywhere.


