This site is supported by our readers. We may earn a commission, at no cost to you, if you purchase through links.

First, press your fabric to remove wrinkles, then apply fabric stiffener like Terial Magic (diluted 1:1 with water) for better stability.
Use a brayer to firmly adhere the fabric to your fabric cutting mat, ensuring no air bubbles remain.
Install the rotary blade designed for textiles and perform a test cut on scrap fabric first.
Adjust blade depth settings as needed – typically between 2-4 for most fabrics.
The machine excels at cutting appliqués, quilt pieces, and pattern templates with precision that hand-cutting simply can’t match.
Keep your mat clean between projects for consistent results.
Master these fundamentals, and you’ll discover techniques that transform even the trickiest fabrics into perfectly cut pieces every time.
Table Of Contents
Key Takeaways
- Prep your fabric properly – You’ll need to press out wrinkles and apply fabric stiffener, like Terial Magic, for stability, then use a brayer to firmly adhere the fabric to your cutting mat without air bubbles.
- Choose the right blade and settings – You’ll get the best results with the Rotary Auto Blade DX for most fabrics, setting the blade depth between 2-4, depending on material thickness, and always test cut on scraps first.
- Use fusible backing for cleaner cuts – You’ll achieve professional results by applying fusible web backing to prevent fraying and shifting, making it essential for appliqué work and delicate fabrics.
- Maintain your equipment and test everything – You’ll avoid frustrating failures by keeping your mat clean, replacing dull blades promptly, and running test cuts before cutting your final pieces to verify that the settings work correctly.
Fabric Cutting Projects for Scanncut
The Brother ScanNCut transforms your fabric cutting from tedious hand-cutting to precise, automated precision for countless creative projects.
You can create professional appliques, cut quilt pieces with perfect accuracy, slice through sewing patterns, and tackle specialized tasks like English paper piecing templates, utilizing the machine’s capability for automated precision.
Applique
Creating fused applique with your Brother ScanNCut transforms ordinary fabric into stunning decorative elements.
The Iron-On Fabric Appliqué Contact Sheet prevents fraying and guarantees clean cuts for professional results.
- Select fusible web backing for stability during scanncut fabric cutting
- Use fabric stabilizer on delicate materials before applying iron on backing
- Keep applique shapes under 2 inches for precise brother scanncut tutorial results
- Test your scanncut fabric blade on scraps before cutting final pieces
- Apply steady pressure when adhering fabric to prevent shifting during cuts
Quilt Pieces
Beyond applique work, your ScanNCut excels at cutting precise quilt pieces that’ll make your grandmother jealous. You’ll transform fabric layers into stunning quilt blocks using specialized cutting techniques that save hours of tedious hand-cutting.
Start with piece templates or upload quilt designs from Electric Quilt 8 software. The machine handles geometric shapes, star points, and intricate curves with surgical precision. Your brother scanncut tutorial begins with proper fabric preparation—press wrinkles out and apply fusible backing for stability.
| Fabric Type | Blade Choice | Mat Setup |
|---|---|---|
| Cotton quilting | Thin Fabric Auto Blade | Standard mat + High tack sheet |
| Flannel/thicker | Rotary Auto Blade DX | Fabric mat (DX models) |
| Batik/tight weave | Auto Blade | Standard mat + backing |
| Pre-cuts/strips | Thin Fabric Blade | High tack support sheet |
| Delicate fabrics | Rotary blade | Low tack mat |
Test cuts prevent disasters—nobody wants wonky triangles ruining their masterpiece. Scanncut fabric cutting delivers consistent results when you match blade depth to fabric thickness, ensuring clean edges for perfect quilt assembly. This process is crucial for achieving professional-looking quilts with clean edges and perfect quilt assembly.
Sewing Patterns
Your Brother ScanNCut transforms pattern making into a precise, efficient process. The machine handles fabric cutting for sewing patterns with remarkable accuracy, eliminating tedious hand-cutting sessions.
Load your sewing pattern pieces into the ScanNCut DX models software or scan existing paper patterns directly onto the cutting mat. Proper fabric prep remains critical for professional results.
Press your material thoroughly and apply backing when needed for delicate fabrics. The machine cuts through multiple layers simultaneously, saving hours on complex projects.
Select appropriate blade settings based on fabric weight and texture. Test cuts on scraps first to verify blade depth and cutting speed. The ScanNCut’s precision guarantees consistent seam allowances across all pattern pieces.
Understanding fabric grain lines is essential for achieving accurate cuts and professional finishes. This technology revolutionizes home sewing by delivering commercial-quality cuts every time.
Your finished garments will showcase the crisp edges and accurate proportions that separate amateur work from professional-grade construction.
Other Uses
Your ScanNCut’s fabric cutting techniques extend far beyond standard sewing patterns into creative territory.
Craft fabric masks using felt or cotton with precise cuts that fit perfectly.
Create custom home decor pieces like fabric wall art or decorative pillows using embroidery designs as templates.
Design personalized gift tags from specialty materials, or combine fabric painting with your Brother ScanNCut’s precision for unique artistic pieces.
ScanNCut DX models excel at handling diverse materials, making this fabric cutting machine perfect for experimental projects that push creative boundaries.
Setting Up Scanncut for Fabric Cutting
Setting up your ScanNCut for fabric cutting requires choosing the right blade and mat combination for your specific project.
The blade type depends on whether you’re cutting backed or unbacked fabric, while your mat selection determines how well the fabric adheres during cutting.
Blades for Fabric
Choosing the right blade transforms your fabric cutting experience from frustrating to fantastic.
The right blade turns cutting chaos into clean, professional results every time.
The Rotary Auto Blade DX delivers superior results for most fabric projects, using a rolling action that prevents fabric distortion and fraying.
For lightweight materials under 0.5mm, the Thin Fabric Auto Blade provides precision cutting without backing material.
The standard Auto Blade works well for backed fabrics but isn’t recommended for delicate textiles.
Each blade’s cutting edge is engineered for specific fabric weights and textures.
Your rotary blade choice determines whether you’ll achieve clean, professional cuts or deal with ragged edges and incomplete patterns.
Understanding fabric cutting tools essentials is vital for selecting the right blade and achieving outstanding results.
Backings and Mats
Once you’ve selected the right blades, your brother scanncut mats and fabric backing materials determine cutting success. Proper setup prevents fabric shifting and guarantees clean edges.
- Choose appropriate cutting surfaces: Use fabric mats for unbacked materials or standard mats with adhesive sheets for backed fabrics. Fabric cutting mats provide ideal grip for delicate cotton and flannel.
- Select suitable backing types: Apply fusible web or interfacing to stabilize loose weaves. Heat ‘n Bond Lite works well for scanncut fabric settings, creating firm adherence without residue.
- Maintain mat adhesive: Clean your scanncut mat after each session with baby wipes. Fresh tackiness prevents incomplete cuts and extends mat life substantially.
Understanding the cutting material limits is vital for achieving the best results with your Brother ScanNCut.
Cutting Plain Fabric on Scanncut
Cutting plain fabric on your ScanNCut requires proper preparation to achieve clean, precise cuts.
Start by pressing your fabric to remove wrinkles and secure it properly to your cutting mat for best results.
Press Fabric
Proper fabric preparation sets the foundation for precise cuts and professional-looking results.
Start by pressing your fabric with an iron to eliminate wrinkles and create a smooth, flat surface.
This essential step in fabric preparation prevents cutting inaccuracies and helps your pieces maintain their intended shape.
Use appropriate ironing tips for different materials: cotton responds well to medium heat with steam, while delicate fabrics require cooler temperatures.
For wrinkle removal, work systematically across the fabric surface, allowing the heat to penetrate stubborn creases.
If you’re working with thin or flimsy materials, consider fabric stiffening techniques like light starch spray to add stability without compromising flexibility.
These smoothing techniques create ideal conditions for your cutting blade to glide through the material cleanly.
When fabric pressing is done correctly, you’ll notice improved fabric stability during cutting, which translates to cleaner fabric edges and reduced fabric fraying in your finished projects.
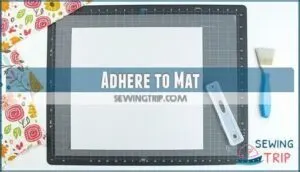
Adhere to Mat
Perfect mat preparation starts with positioning your fabric carefully on the cutting mat’s adhesive surface.
Place the fabric grain-aligned, ensuring complete contact without bubbles or wrinkles.
Use a plastic scraper for fabric stabilization, smoothing from center outward with firm pressure.
Test fabric adhesion by lifting a corner—it should resist removal.
If your Brother ScanNCut cutting mat lacks proper tackiness, consider mat cleaning or replacement with adhesive sheets.
Always perform test cuts on scraps before committing to your final fabric placement for achieving professional-looking cuts and extending the life of your tools.
Understanding the importance of a cutting mat is essential for achieving professional-looking cuts and extending the life of your tools.
Cutting Fabric With Fusible Backing
When you’re cutting fabric with fusible backing, you’ll get cleaner edges and better results than cutting plain fabric alone.
The backing prevents fraying and helps your ScanNCut blade slice through material more precisely, making it perfect for applique projects.
Apply Backing
Fusible web transforms your fabric cutting game by creating a stable foundation that prevents shifting and fraying. Start with pressed, wrinkle-free fabric for maximum adhesion results.
Here’s your step-by-step backing process:
- Place the rough side of your fusible backing against the fabric’s wrong side
- Apply firm iron pressure using medium heat to activate the adhesive completely
- Work in sections if dealing with larger pieces to achieve even coverage
- Let the fabric cool for 30 seconds before handling to set the bond
- Test a corner by gently tugging to confirm full adhesion
Iron on backing creates the perfect marriage between fabric and cutting mat. Quality adhesive types like HeatnBond Lite provide consistent fabric stabilization without bulk. Backing sheets eliminate the guesswork—your applique backing stays put during intricate cuts, giving you clean edges every time.
Fabric adhesion issues disappear when you’ve properly fused your fabric stabilizers. For successful fabric cutting techniques, mastering the properties of different fabrics and their requirements is vital to achieve the best results.
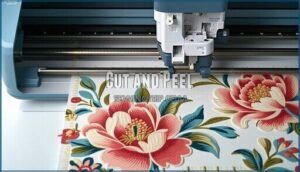
Cut and Peel
With the backing securely attached, position your fabric face-down on the cutting mat.
Load your design into the Brother ScanNCut software and select appropriate cut settings for your material thickness. Start the cutting process and monitor the blade’s progress.
Once complete, use proper peel techniques to remove excess fabric while leaving your precise shapes intact. The backing provides stability during this step, preventing stretching or distortion.
Clean cuts separate easily from the backing material. This cut and peel method guarantees consistent results across multiple identical pieces.
Remember to perform regular mat maintenance and blade care between projects for superior fabric cutting performance.
Tips for Successful Fabric Cutting
Getting consistent, clean cuts from your ScanNCut requires testing your setup before cutting your final fabric.
Start with fabric scraps to verify your blade depth and cutting speed settings work perfectly with your specific material and backing combination.
This step is crucial for ensuring that your cutting speed settings are appropriate for the task at hand.
Test Cuts
Never cut your good fabric without running fabric trials first. Your Brother ScanNCut’s performance varies drastically between materials, making cut settings adjustments necessary for each project. Material samples save you from heartbreak when expensive fabric gets ruined by incorrect blade tests.
Smart fabric cutting starts with precision cuts on scraps. Access the test cut function through your ScanNCut software menu, then select a small geometric shape. Here’s your testing roadmap:
- Choose your test location – Pick an unused corner of your cutting mat
- Run the sample cut – Let the machine complete its 1cm test pattern
- Evaluate the results – Peel the test piece to check clean edges
Perfect test cuts remove cleanly without fraying or tearing the backing material. If cuts appear incomplete or jagged, you’ll need different settings before proceeding with your actual project.
Adjust Blade Depth
Mastering blade calibration transforms your Brother ScanNCut into a precision cutting machine.
Set depth settings to 0.5mm for lightweight cotton, 1mm for felt or denim, and 1.5mm maximum for thick wool.
The auto blade and thin fabric auto blade require different adjustments based on fabric types.
Regular blade maintenance and proper cutting speed guarantee clean cuts every time.
Understanding key blade depth settings is vital for achieving precise cuts in various fabrics.
Troubleshooting Fabric Cutting Issues
Even the best ScanNCut setup can run into problems when cutting fabric. You’ll face common issues like fabric shifting, frayed edges, or incomplete cuts that can frustrate your project progress.
Fabric Shifting
When fabric slippage strikes your Brother ScanNCut projects, insufficient mat adhesion is usually the culprit.
Start by checking your mat’s stickiness—worn mats cause 70% of cutting alignment failures.
Clean your mat with appropriate cleaner to restore tackiness, or apply a high-tack adhesive sheet for extra grip.
Press fabric firmly onto the mat using a brayer, ensuring no corners lift.
For slippery materials, add stabilizers underneath for better edge control.
Test your setup with sample cuts before committing to final pieces, and always inspect material placement before cutting begins.
Frayed Edges
When your ScanNCut leaves you with frayed edges, don’t panic—this common issue has straightforward solutions.
Lower your blade pressure settings by 20-30% to prevent fiber pulling during cuts. Apply fusible stabilizers before cutting to reduce fraying by up to 75% in quilting cottons.
Use fabric-specific blades like rotary cutters for better edge control. After cutting, finish raw edges with zigzag stitching or fray check sealer for professional results.
To achieve accurate cuts, understanding fabric cutting mistakes is essential for preventing errors and ensuring high-quality finishes, which helps in avoiding common issue.
Incomplete Cuts
Why do incomplete cuts happen during your brother scanncut fabric cutting projects? Several factors contribute to missed sections and partial patterns. Dull blades struggle with fabric density, while incorrect depth settings fail to penetrate materials completely. Mat adhesion problems cause uneven pressure distribution, resulting in skipped areas.
Regular maintenance prevents most blade issues affecting cut quality:
- Sharp blades slice cleanly – Replace worn blades that tear fabric instead of cutting
- Proper depth settings penetrate fully – Adjust blade depth between 3-4 for cotton fabrics
- Strong mat adhesion prevents shifting – Use high-tack mats for secure fabric placement
- Clean equipment maintains performance – Remove residue buildup from blades and cutting surfaces
Test cuts identify problems before starting scanncut fabric projects, helping achieve consistent fray prevention and professional results.
Frequently Asked Questions (FAQs)
Can a brother scanncut cut a quilt?
Yes, you can cut quilt pieces with a Brother ScanNCut using quilt block patterns, scanned designs, or Electric Quilt software. It’ll handle fabric cutting for piecing and appliqué work perfectly.
Can a scanncut cut fabric?
You’ll cut fabric like a pro using proper blades and mats. Choose thin fabric blades for unbacked materials or auto blades for backed fabrics, ensuring clean cuts every time.
What is a brother scanncut?
Picture crafting intricate quilt blocks with laser-like precision—that’s your Brother ScanNCut in action.
It’s a cutting machine that slices through fabric, paper, and vinyl using interchangeable blades and mats for precise crafting projects, allowing for laser-like precision in your work.
What should I do if my brother scanncut blade is dull?
Replace your dull blade immediately for superior cutting performance.
Brother recommends blade replacement when cutting quality declines.
Simply remove the old blade and install a new one following your manual’s instructions.
Can you use a fabric pen with a brother scanncut DX?
Fabric pens work perfectly with Brother ScanNCut DX machines through the Universal Pen Holder accessory.
Simply insert your water-soluble fabric pen into the holder, load your design, and watch as precise sewing lines appear on your fabric pieces.
How do I use scanncut?
Turn on your ScanNCut, select your design from the machine’s library or import one.
Choose the right mat and blade combo for your material.
Load your material onto the mat, adjust blade depth if needed, then press the flashing C button to start cutting.
Can Brother scan and cut cut fabric?
Yes, Brother ScanNCut machines cut fabric beautifully, but unlike paper’s straightforward nature, fabric demands respect.
You’ll need proper blades, mats, and backing materials. Different fabrics require specific techniques for clean, professional results.
What setting to cut fabric on Cricut?
Select "Fabric" or "Leather" on your Cricut Dial, then choose the specific fabric weight in Design Space. You’ll need the Rotary Blade and FabricGrip mat for best results.
What is the fabric mat for brother scan and cut?
The Fabric Mat for Brother ScanNCut DX machines replaces high tack fabric support sheets, providing specialized adhesive surface that grips unbacked fabric securely during cutting operations.
What is the best tool for cutting fabric?
While many think you need expensive tools, Brother’s Rotary Auto Blade DX stands out as the top fabric-cutting tool.
It handles delicate and thick fabrics effortlessly, delivering precise cuts every time.
Conclusion
Mastering how to cut fabric with a Brother ScanNCut transforms your crafting experience from tedious hand-cutting marathons into precise, efficient projects.
Just like upgrading from scissors to a laser-guided system, your accuracy improves dramatically while saving hours of work.
Start with proper fabric preparation and test cuts, then gradually tackle complex materials.
Remember that blade depth and mat adhesion determine success rates.
With consistent practice using these techniques, you’ll achieve professional-quality results that elevate every quilting, appliqué, and sewing project you create.
- https://support.electricquilt.com/articles/scanning-eq8-pdfs-into-brother-scan-n-cut/
- https://www.godsvessels.com/
- https://lifesewsavory.com/what-can-you-cut-with-a-brother-scanncut/
- https://www.brother.ca/en/p/CADXMATF12
- https://www.swingdesign.com/a/answers/6026170/What-mat-do-I-use-in-the-scanNCut-to-cut-fabric-for-quilts


