This site is supported by our readers. We may earn a commission, at no cost to you, if you purchase through links.
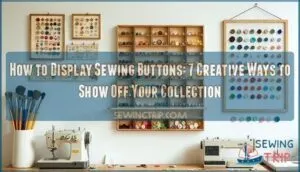
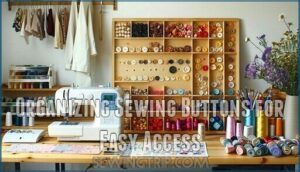
Those wall organizers with little compartments? Perfect for keeping buttons within reach while making your sewing corner look intentional. Mason jars and old wooden bowls nail that farmhouse vibe if that’s your thing.
Going for something more modern? Those clear acrylic boxes do the trick without looking cluttered.
Good lighting makes all the difference—it shows off those intricate details and turns your buttons into real eye-catchers. The sweet spot is finding that balance between practical storage and something that actually looks good. Your buttons end up doing double duty as both organization and decoration that shows off your style.
Table Of Contents
- Key Takeaways
- Best Ways to Display Sewing Buttons
- Essential Materials for Button Displays
- Step-by-Step Guide to Framing Buttons
- Organizing Sewing Buttons for Easy Access
- Creative DIY Button Display Projects
- Display Techniques for Retail and Craft Fairs
- Tips for Preserving and Showcasing Vintage Buttons
- Frequently Asked Questions (FAQs)
- Conclusion
Key Takeaways
- Frame vintage button cards with acid-free materials – Use photo corners instead of glue to mount delicate cards, protecting them from damage while creating stunning wall art that preserves your collection’s history.
- Sort and store buttons in clear containers by color or material – Glass jars, compartment organizers, and stackable boxes keep buttons visible and accessible while adding visual appeal to your sewing space.
- Create functional displays that match your decor style – Choose farmhouse mason jars, mid-century acrylic containers, or rustic shadow boxes to turn button storage into decorative elements that complement your home.
- Use proper lighting and mounting techniques for professional results – LED strips highlight button details without heat damage, while secure wall mounting at eye level (57-60 inches) ensures comfortable viewing and prevents fading.
Best Ways to Display Sewing Buttons
Your button collection deserves more than hiding in a sewing box. The right display method turns ordinary buttons into eye-catching decor while keeping them organized and accessible for your next project.
Framing Vintage Button Cards Without Damage
Those delicate vintage button cards with their paper backing and fine print might look fragile, but there’s actually a foolproof way to frame them without causing any damage at all.
Use acid-free backing and archival framing materials to protect your button cards from yellowing. Mount them with photo corners instead of glue – this card preservation method lets you remove them later if needed.
Good display lighting will showcase every detail without fading.
Creating Wall Art With Button Collections
Your button collection can become stunning wall art that turns forgotten treasures into conversation pieces.
Try shadow box displays for dimensional impact, arranging buttons by color palettes for visual flow. Mixed media art combines buttons with fabric scraps or vintage postcards.
Frame style choices—rustic wood or sleek metal—set the mood. Focus on layout and composition, clustering similar sizes while varying textures for eye-catching displays.
Showcasing Buttons in Farmhouse or Mid-century Modern Styles
Your button collection deserves better than hiding in a drawer—the right display style transforms it into something guests actually notice and admire.
The right decor style can turn a simple button collection into a statement piece that perfectly complements your home’s aesthetic.
For Farmhouse Chic, display vintage buttons in weathered wood frames with burlap backing. Mid-century Flair calls for sleek shadow boxes with clean lines and neutral mats.
Rustic Displays work beautifully in mason jars or vintage tins, creating authentic Vintage Charm that celebrates your button collection’s history.
Displaying Buttons in Bowls, Jars, or Containers
You know what’s funny? The best storage solutions are often right in front of us. Grab any old jar or bowl, and suddenly your button chaos becomes this gorgeous little display.
Those vintage buttons you’ve been hoarding deserve containers that actually show them off. Glass works great because you can see everything at a glance, plus it keeps things tidy without eating up half your craft room.
Sometimes the simplest solutions are the most beautiful—turning everyday containers into stunning button showcases transforms clutter into curated charm. Your vintage buttons deserve Container Aesthetics that match their character. Material Choice matters—glass jars offer Button Visibility while maintaining Space Efficiency for your button collection.
Consider these display approaches:
- Mason jars by color – Sort buttons into clear containers for easy identification
- Vintage bowls by era – Group buttons thematically for cohesive displays
- Repurposed tins – Use decorative containers that complement your sewing space
This approach to displaying vintage buttons creates accessible Button storage methods while showcasing your collection beautifully.
Essential Materials for Button Displays
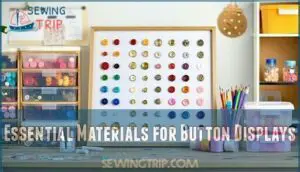
Want your button display to look sharp? Start by gathering the basics. Grab some frames with acid-free backing, clear mounting adhesives, storage containers to keep things organized, and whatever decorative elements will make your collection pop.
Getting your button display just right starts with having the right materials on hand. You’ll need frames with acid-free backing, clear mounting adhesives, organized storage containers, and a few decorative touches to make your collection shine.
Frames and Backing Papers for Wall Art
Picture frames aren’t just for photos—they’re the perfect stage for turning your button collection into stunning wall art that catches every visitor’s eye. Choose frames with deep profiles or shadow boxes for dimensional displays. Your backing material sets the stage—neutral linen works beautifully, while vintage-inspired papers complement antique button cards perfectly.
Consider glass options carefully. Regular glass protects your display, while UV-filtering glass preserves delicate vintage buttons from fading. Layout design matters too—arrange buttons by color gradients or create geometric patterns that draw the eye across your wall art masterpiece.
| Frame Type | Best For |
|---|---|
| Standard Picture Frames | Flat button cards, vintage collections |
| Shadow Boxes | Dimensional buttons, layered displays |
| Floating Frames | Modern aesthetics, minimalist looks |
Adhesives and Mounting Tools
Nothing ruins a beautiful button display quite like wobbly attachments or adhesive residue. That’s why choosing the right adhesive types matters so much when creating button displays.
For framing vintage button cards, use acid-free photo corners instead of tacky glue to protect delicate materials.
Mounting techniques should include proper tool selection, like sawtooth hangers for lightweight frames. These preservation methods guarantee display safety while maintaining your collection’s value.
Sorting and Storage Containers
Good storage transforms a jumbled button mess into something you’ll actually want to look at and use.
Clear containers are your friend here – you can spot exactly what you need without digging around. Small divided boxes work great for keeping your vintage mother-of-pearl separate from chunky coat buttons.
Smart storage turns a chaotic button collection into an organized treasure trove that’s both functional and beautiful. Clear plastic boxes let you see your buttons at a glance, while compartment organizers keep different types separated.
Consider container materials like acrylic for durability or glass jars for aesthetic appeal. Size matters – small compartments work for delicate vintage buttons, larger ones for bulky statement pieces.
Decorative Embellishments and Display Aids
Decorative touches are what make button displays pop. Think of them as the extras that take your collection from basic to beautiful.
The right display elements don’t just make buttons look better—they help you create displays that actually work with your room’s style.
Think of decorative embellishments as the jewelry for your button displays—they’re the finishing touches that transform a simple collection into something truly eye-catching. These display aids improve button aesthetics while creating themed displays that complement your home decor.
- Display lighting – LED strips or small spotlights highlight vintage frames and button cards
- Shadow boxes – Add depth and protection for delicate buttons
- Fabric backgrounds – Velvet or linen creates stunning button placement contrast
- Decorative labels – Vintage-style tags identify button types and origins
Step-by-Step Guide to Framing Buttons
Framing your button collection transforms scattered pieces into stunning wall art that protects and showcases each treasure.
This step-by-step approach ensures your vintage buttons stay damage-free while creating a display that fits any room’s style.
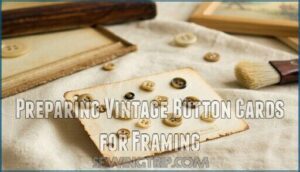
Preparing Vintage Button Cards for Framing
Those delicate vintage button cards might look sturdy, but they’re actually more fragile than a butterfly’s wing – one wrong move and you’ll damage both the card and your collection’s history.
Start by examining each card for weak spots or tears. Clean gently with a soft brush to remove dust. Handle cards by their edges only, never touching the buttons themselves.
Use acid-free backing material to reinforce fragile areas before mounting.
Choosing and Assembling The Right Frame
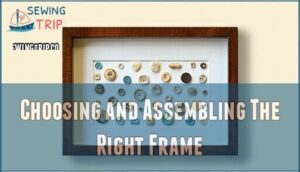
Your frame choice can make or break the entire display, so let’s find the perfect match for your button treasures. Here’s what matters most:
Frame Material: Go with sturdy wood like antique oak for vintage vibes, or sleek metal if you want something more modern.
Glass Types: UV-protective glass is worth it—keeps those vintage buttons and cards from fading over time.
Backing Options: Stick with acid-free matting that works with your collection’s style.
Mounting Techniques: Make sure there’s enough depth for chunky buttons while keeping everything looking clean.
The real key? Pick something that fits your space and tells the story you want your collection to share.
Match your framing choices to your décor and the story you want your collection to tell.
Securing Buttons With Acid-free Photo Corners
Photo corners might seem like old-fashioned scrapbook supplies, but they’re actually the safest way to secure buttons without causing permanent damage to vintage cards or backing materials.
Choose acid-free photo corners for archival corner longevity and proper button card preservation.
Apply corners at diagonal angles using gentle pressure, making sure your vintage buttons stay secure while maintaining easy removal for future button collection management and organizing sewing supplies needs.
Mounting and Hanging Your Finished Display
Getting your button display properly mounted and hung is like the grand finale of a beautiful performance – all your careful preparation comes together in this final, important step.
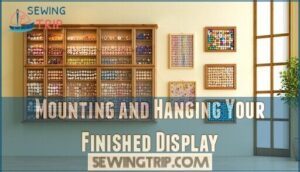
Choose wall mounting options that match your display case mounting needs – lightweight frames work with standard picture hanging hardware choices, while securing heavy displays requires sturdy wall anchors.
Consider gallery wall layouts for multiple framed pieces, creating stunning DIY home decor projects that showcase your handmade decorations beautifully.
Organizing Sewing Buttons for Easy Access
Smart organization turns a jumbled button collection into a sewing resource you’ll actually use.
The right storage system helps you find the perfect button quickly, whether you’re sorting by color, material, or project needs.
Sorting Buttons by Color, Type, or Material
Imagine your button collection as a colorful puzzle where every piece needs to find its perfect spot. Start with Color Organization—group buttons into rainbow sections or neutral tones. Then tackle Material Groups, separating plastic from metal, wood from ceramic.
Type Classification comes next: organize by shank buttons, two-hole, and four-hole varieties. This Sorting Efficiency approach transforms chaos into organized Storage Solutions, making your button collecting hobby both beautiful and functional for any organizing systems you choose.
Using Jars, Plastic Boxes, and Compartment Organizers
Once you’ve sorted your buttons, the real magic happens when you pick the right containers to keep them organized and within easy reach. Clear visibility becomes your best friend here, so transparent storage solutions work wonders for quick identification.
Consider these popular organizing systems:
- Glass jars – Perfect for displaying colorful buttons while keeping dust away
- Compartment organizers – Plastic boxes with adjustable dividers amplify space optimization
What matters most is finding containers that actually work for how many buttons you have and how much space you’re dealing with.
The key is choosing container types that match your collection size and workspace needs.
Stringing or Carding Buttons for Neat Storage
Threading buttons onto string transforms a chaotic pile of fasteners into organized rows that look like colorful jewelry for your sewing room. Use strong cotton thread for durability, sorting buttons by color or size as you work.
String similar types together—vintage buttons on one strand, modern ones on another. Tie knots between groups to prevent sliding, creating neat display options that double as functional storage for your button collection management.
Labeling and Categorizing Your Collection
Think of labeling your button collection like creating a roadmap—without clear markers, you’ll spend more time hunting than creating.
Start with simple categorization methods: sort by color, material, or size on each container. Use archival labels that won’t damage button cards over time.
Create a collection taxonomy with metadata importance in mind—note button type, vintage era, and project potential. This button collection management system transforms chaos into creative efficiency.
Creative DIY Button Display Projects
Once you’ve got your buttons sorted and stored, it’s time to get creative with fun display projects.
These hands-on ideas let you turn your button collection into beautiful decor that shows off your sewing passion while adding charm to your home.
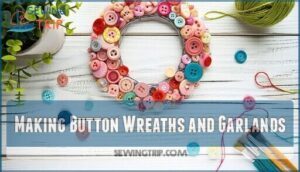
Making Button Wreaths and Garlands
Button wreaths and garlands transform your spare buttons into stunning decorative pieces that bring color and texture to any room. Choose wreath base options like foam rings or wire frames, then layer buttons using varied placement patterns for visual interest.
For button garlands, consider stringing techniques and length considerations based on your space.
Seasonal wreath themes make these creative button crafts perfect year-round decorating ideas with buttons.
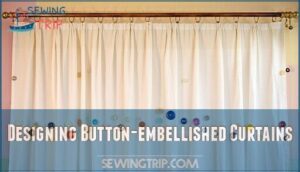
Designing Button-embellished Curtains
Your ordinary window treatments can become stunning focal points when you add buttons along the hems, ties, or rod pockets.
Choose fabric choice that complements your curtain style—lightweight cotton works perfectly for a cafe curtain design.
Color coordination matters: match button tones to your decor or create contrast for visual interest.
Strategic button placement along seams adds charm while reinforcing hanging methods for both function and ornamentation.
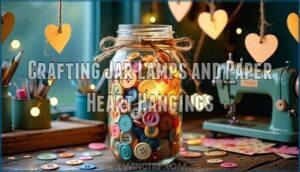
Crafting Jar Lamps and Paper Heart Hangings
Transform ordinary mason jars
- Button Lamp Safety: Use LED string lights to prevent overheating your vintage button collection
- Paper Heart Designs: Cut heart templates, then secure buttons with craft adhesive for lasting ornamentation
- Jar Lamp Styles: Layer buttons by color inside clear glass for stunning craft projects with visual depth
Seasonal and Holiday Button Decor Ideas
Nothing transforms your button collection quite like dressing it up for the holidays – and it’s easier than you might think.
Create Christmas Button Ornaments by threading red and green buttons onto wire, or craft Halloween Button Crafts using orange and black vintage button collections on spooky cards.
Easter Button Eggs make charming spring displays, while Thanksgiving Button Art celebrates autumn colors.
Design Patriotic Button Decor for summer gatherings, Valentine project hearts, festive wreaths, or button garland.
Display Techniques for Retail and Craft Fairs
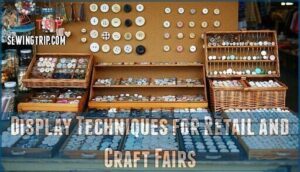
When selling at retail stores or craft fairs, your button display needs to work as hard as you do.
Smart presentation techniques like modular panels and portable cases can boost sales while keeping your collection organized and accessible to customers.
Modular Button Panels and Magnetic Boards
If you’ve ever rearranged your button collection for the third time this week, magnetic boards might just become your new best friend. These modular systems let you swap button cards instantly without damaging delicate vintage pieces.
Panel customization options work perfectly for retail applications where display velocity matters.
Magnetic strengths vary by material choices, so test different options when organizing sewing supplies and sewing notions for best hold.
Transparent Acrylic Trays and Interactive Kiosks
Clear acrylic trays turn your button collection into a stunning visual showcase that customers can’t help but explore. These transparent containers heighten material sorting efficiency while boosting retail display conversions through organized color groupings.
Here’s how acrylic tray benefits transform your sewing notions display:
- Compartment visibility – Customers see every button without lifting lids
- Easy restocking – Quick container swaps keep displays fresh
- Interactive button selection – Touch-friendly browsing increases sales
- Stackable design – Space is used more efficiently while organizing sewing supplies
- Kiosk customization options – Mix sizes for varied button collections
Professional displays encourage longer browsing and higher purchase rates.
Portable Display Cases for Events
Craft fairs and sewing expos can turn into a logistical nightmare when you’re lugging heavy display cases from table to table. That’s why lightweight, portable cases with Custom Case Inserts have become a significant advantage for organizing sewing supplies on the go.
Choose cases under 15 pounds with built-in LED strips and foam compartments to showcase your buttons professionally while maintaining mobility.
Arranging Buttons by Material and Style
Smart organization starts with grouping buttons like a curator arranges art – by material first, then by style within each category. This creates visual harmony while letting your collection tell its own story.
- Plastic buttons – Sort by color intensity and finish (matte, glossy, translucent)
- Metal buttons – Group brass, silver, and copper tones separately for matching sets
- Wood buttons – Arrange by grain pattern and natural color variations
- Ceramic pieces – Display painted designs alongside solid colors on cards
- Vintage materials – Create themed displays that showcase different eras and styles
What starts as organizing supplies becomes something closer to curating a small museum.
This approach transforms organizing sewing supplies into an engaging display experience.
Tips for Preserving and Showcasing Vintage Buttons
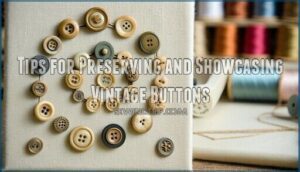
Vintage buttons are treasures that deserve careful handling to maintain their beauty and value over time.
With the right preservation techniques and display materials, you can showcase these delicate pieces while keeping them safe from damage.
Protecting Fragile or Rare Button Cards
Vintage button cards are like delicate old photographs—one wrong move and decades of history can crumble in your hands. Handle them with cotton gloves to prevent oils from damaging the cardstock.
Store cards in archival sleeves before placing them in your display container. Use proper handling techniques when moving cards, supporting them from underneath.
Secure mounting prevents stress on fragile edges while UV protection preserves original colors.
Using Acid-free and Archival Materials
Think of acid-free materials as the invisible bodyguards that keep your button collection safe from the silent killer known as acid migration. When framing vintage cards or storing buttons in containers, these archival-quality materials prevent yellowing and deterioration over decades.
Essential acid-free supplies for long-term preservation:
- Archival paper quality backing and matting boards that won’t yellow
- Acid-free adhesives like photo corners instead of regular tape
- Safe mounting techniques using museum-quality scrapbook paper
- Conservation best practices with pH-neutral storage containers
Cleaning and Maintaining Button Displays
Dust settles on button displays faster than you’d think, and without regular care, your beautiful collection can lose its sparkle and charm. Use a soft-bristled brush for Dust Removal on delicate vintage cards. For Stain Removal, dab gently with cotton swabs and mild soap—never soak the container or cards directly. Material Preservation means keeping displays away from harsh Display Lighting and guaranteeing proper Pest Control with cedar sachets.
| Maintenance Task | Frequency | Method | Materials Needed | Special Notes |
|---|---|---|---|---|
| Dust Removal | Weekly | Soft brush strokes | Fine paintbrush, microfiber cloth | Work in circular motions |
| Stain Removal | As needed | Gentle dabbing | Cotton swabs, mild soap | Test on hidden area first |
| Color fade check | Monthly | Visual inspection | Good lighting | Rotate display areas |
| Pest Control | Quarterly | Cedar placement | Cedar sachets, vacuum | Check for insect damage |
| Frame cleaning | Bi-annually | Glass cleaner | Lint-free cloths | Remove buttons first |
Sewing forum discussions often recommend rotating your displays to prevent uneven color fading from sunlight exposure.
Incorporating Trends and Sustainable Materials
Today’s sewing forum discussions reveal exciting shifts toward eco-friendly buttons made from recycled materials. These buttons are often made from natural raw materials for a reduced environmental impact.
Your DIY project can showcase natural alternatives with impressive biodegradability rates that align with consumer preferences for sustainable manufacturing.
Sort these buttons by color in your favorite container, mixing vintage pieces with modern sustainable options to create displays that reflect both timeless style and environmental consciousness.
Frequently Asked Questions (FAQs)
What is the best way to display sewing buttons?
Several proven methods work best for showcasing your button collection. Framing vintage button cards preserves them while creating stunning wall art.
Display aesthetics improve with proper lighting considerations and space optimization.
Rotate collections frequently for farmhouse style charm at craft shows.
How can I make a button display that is both stylish and functional?
When you want storage that actually works, pick organizers that look good but don’t hide your buttons away where you can’t reach them.
Combining display aesthetics with practical storage means choosing solutions that look great while keeping buttons accessible.
Consider clear acrylic organizers for space optimization, vintage mason jars for farmhouse style, or shadow boxes that work perfectly for an antique booth or craft show setup.
What materials do I need to display sewing buttons?
You really only need five things to display buttons well. Start with archival materials – photo corners work great for protecting vintage pieces. Get some nice scrapbook paper for backgrounds that make your buttons pop. A bit of tacky glue keeps loose ones in place. Pick up some sturdy mounting board as your foundation. Then find a good display case with decent lighting to show everything off properly.
Five fundamental materials make displaying buttons simple: archival quality materials like photo corners protect vintage cards, scrapbook paper creates attractive backgrounds, tacky glue secures loose buttons, mounting board types provide sturdy foundations, and display case options with proper lighting considerations showcase your collection beautifully.
What are the steps involved in displaying sewing buttons?
Before arranging your collection, gather your materials and plan your layout. Preparation Steps start with Material Selection – choose frames, tacky glue, and scrapbook paper. Then focus on Display Arrangement using photo corners for a FREE button card printable look.
- Sort buttons by color, material, or size on a clean workspace
- Secure vintage cards with acid-free photo corners to prevent damage
- Layer scrapbook paper behind buttons for visual depth and contrast
Consider Aesthetic Considerations and Preservation Methods when finalizing your display arrangement.
What are some tips for displaying sewing buttons?
Your button collection’s success depends on thoughtful display lighting and secure mounting techniques. Arrange buttons with proper spacing using scrapbook paper in shoe boxes or clear ziplock bags.
Maintain color coordination throughout displays and plan rotation frequency to prevent fading. Download a FREE button card printable to organize vintage pieces professionally.
What lighting works best for button displays?
Proper lighting transforms your button collection from hidden treasures into stunning focal points. LED displays offer bright, even illumination without heat damage, while softbox lighting creates professional-grade results.
Natural light works beautifully for daytime viewing, but avoid direct sunlight on vintage pieces.
How do you photograph buttons for catalogs?
When photographing buttons for catalogs, proper Button Lighting eliminates shadows while Studio Backdrops in neutral tones showcase colors clearly.
Macro Photography captures intricate details, and Photo Editing enhances contrast for professional Catalog Styling results.
Can humidity damage displayed vintage buttons?
Like moisture attacking fabric fibers, humidity poses serious risks to vintage button collections through warping, corrosion, and deterioration.
Control climate with scrapbook paper barriers, sealed ziplock bags, and proper ventilation to preserve your treasured buttons.
Whats the ideal viewing height for displays?
At eye level—usually 57 to 60 inches from the floor—your button displays achieve ideal visual comfort.
This standard gallery height ensures comfortable viewing without neck strain, whether you’re organizing buttons in ziplock bags, mounting framed collections, or arranging displays on scrapbook paper.
How do you price buttons for selling?
What price point are you shooting for? Smart Button Pricing starts with basic Cost Calculation—add materials, labor, and overhead, then multiply by 5 for healthy Profit Margins.
Check Market Research around similar buttons at craft fairs before diving into Price Negotiation with customers.
Conclusion
Picture your buttons catching morning light, each one telling its own story while serving your creative needs. Learning how to display sewing buttons doesn’t just organize your collection—it transforms everyday supplies into functional art.
Learning how to display sewing buttons transforms ordinary supplies into functional art that catches light and tells stories
Whether you choose vintage frames, glass jars, or modern compartment systems, your buttons become both decoration and inspiration. With proper materials and thoughtful arrangement, you’ll create displays that celebrate craftsmanship while keeping everything within reach for your next project.

