This site is supported by our readers. We may earn a commission, at no cost to you, if you purchase through links.

Choose extensions matching your natural hair texture and color for a seamless blend.
When installing, strategically leave out small sections near your hairline and crown to create a natural, undetectable look.
Use a needle and thread to sew wefts securely, ensuring they’re flat against your braided base.
Maintain your style by detangling gently, using leave-in conditioner weekly, and protecting your hair with a silk scarf at night. Your secret weapon? Precision and patience.
Table Of Contents
Key Takeaways
- You’ll need to create tight, uniform cornrows as a solid foundation for your sew-in, strategically leaving out small sections near your hairline and crown to achieve a natural, undetectable look.
- Choose hair extensions that perfectly match your natural hair texture and color, ensuring a seamless blend that makes the weave look like it’s growing directly from your scalp.
- Protect and maintain your sew-in by using a silk scarf at night, detangling gently with a wide-tooth comb, and applying leave-in conditioner weekly to keep your extensions looking fresh and vibrant.
- Master the installation technique by using a needle and thread to sew wefts securely and flat against your braided base, focusing on precision and patience to create a flawless, professional-looking hairstyle.
How to Do a Sew-in With Leave Out
If you’re looking to rock a flawless hairstyle that blends seamlessly with your natural locks, a sew-in with leave out is your ultimate go-to technique.
You’ll learn how to create a stunning, protective style that looks natural and also gives your hair a much-needed break from daily styling stress.
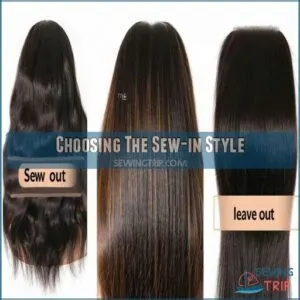
Choosing The Sew-in Style
Choosing the perfect sew-in style isn’t just about looks—it’s about expressing your unique personality.
Your dream hairstyle depends on several key factors that’ll make or break your confidence.
- Hair length and texture options matter more than you think
- Color matching can transform your entire appearance
- Frontals and closures provide that seamless, natural finish
Pick a style that speaks to your soul and rocks your world.
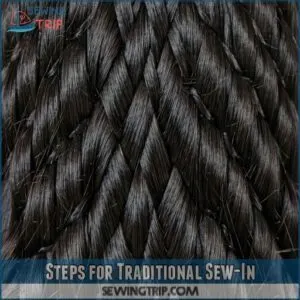
Steps for Traditional Sew-In
Now that you’ve mapped out your braid pattern, it’s time to bring your sew-in to life with precision and style. Start by creating a rock-solid foundation with cornrow braids that flow seamlessly from front to back: To achieve this, you can explore various sew in leave out products.
- Weave magic with tight, uniform cornrows
- Capture each braid tail smoothly into the pattern
- Secure your masterpiece with a sleek low bun
Your goal? A foundation so smooth, it’ll make your weave look like it’s growing right from your scalp. Integrate those braid tails carefully, ensuring each section connects like puzzle pieces, setting the stage for a flawless sew-in installation.
Hair Extension Care
After painstakingly braiding your hair, it’s time to pamper your new sew-in and keep it looking flawless. Your extension lifespan depends on gentle care and smart maintenance.
| Care Aspect | Recommended Action |
|---|---|
| Detangling | Use wide-tooth comb from ends to roots |
| Moisture | Light leave-in conditioner weekly |
| Scalp Care | Clean with diluted shampoo bi-weekly |
| Styling | Alternate between updos and loose styles |
| Protection | Silk scarf or bonnet while sleeping |
Treat your sew-in like a crowning glory. Soft touches, strategic product use, and regular TLC will keep your hair looking fresh, vibrant, and absolutely stunning – no drama, just pure hair magic.
Removing Traditional Sew-In
With surgical precision, navigate the delicate process of removing your traditional sew-in, turning a potentially stressful task into an art form of hair liberation.
- Master the art of gentle extension removal without causing unnecessary damage
- Prepare your sew-in removal tools for a smooth, professional-grade handover
- Protect your natural hair during the post-removal care process
Carefully locate and trim loose threads using sharp scissors, then gently pull extensions along the cut threads. Patience is your greatest ally here – detangle slowly to minimize breakage. Once removed, deep condition and trim your hair, ensuring its continued health and vigor. Your natural locks will thank you for the tender, painstaking approach.
What is a Versatile Sew-In?
A versatile sew-in gives you the freedom to style your hair in multiple ways.
You’ll love how this technique lets you blend extensions seamlessly.
This creates a natural look that moves and feels just like your own hair. Protecting your natural locks is also a benefit.
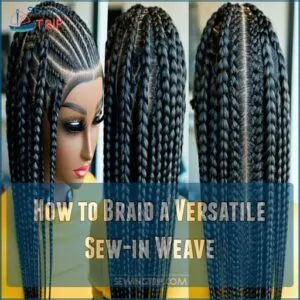
How to Braid a Versatile Sew-in Weave
Master your sew-in weave by strategically crafting braid patterns that create seamless extension placement.
Your hair’s natural texture guides intricate cornrow designs, letting you blend extensions like a pro.
Smart leave-out styling transforms your look from boardroom sleek to weekend wild. Smart leave-out styling
Choose precise hair parting techniques that showcase your unique style, giving you maximum versatility and confidence with every weave installation. precise hair parting techniques maximum versatility
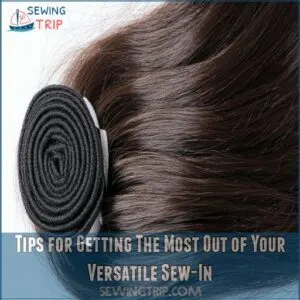
Tips for Getting The Most Out of Your Versatile Sew-In
Now that you’ve braided your versatile sew-in weave, it’s time to maximize its potential. Your sew-in styling isn’t just about installation—it’s about creating a look that turns heads and lasts. For a flawless look, consider using leave out sew in products from Everysimply.
- Protect your investment with silk scarves at night
- Alternate styling techniques to prevent tension and breakage
- Refresh extensions with light moisturizing sprays weekly
These extension care strategies guarantee your sew-in remains flawless, giving you the confidence to rock your new look everywhere.
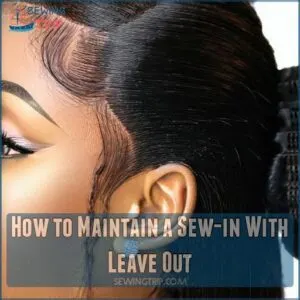
How to Maintain a Sew-in With Leave Out
Your sew-in journey just leveled up from versatile style to maintenance mastery! Keeping your extensions fresh and fabulous requires strategic care. Here’s your game plan for sew-in success:
- Gentle scalp care prevents irritation and promotes extension longevity
- Wash extensions carefully, focusing on cleansing without disrupting blending
- Detangle painstakingly, using wide-tooth combs to preserve your stunning look
Protect that investment like it’s your crown – because it totally is!
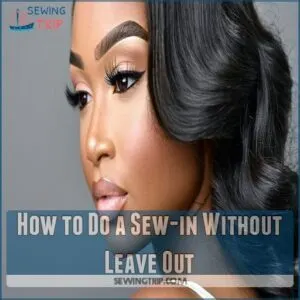
How to Do a Sew-in Without Leave Out
If you’ve been rocking a sew-in with leave out and want to try a full coverage look, a sew-in without leave out offers a sleek alternative. This method completely protects your natural hair while giving you maximum styling flexibility.
Start your sew-in prep by selecting a high-quality closure that matches your scalp color and desired parting style. Your closure is the secret weapon for a natural-looking installation that’ll have you wondering about your hair magic. So use a walking foot attachment on your sewing machine to prevent puckering and skipped stitches.
Key steps for a flawless sew-in without leave out include:
- Cornrow your hair into tight, flat braids that create a solid foundation
- Choose a closure that seamlessly blends with your natural hair texture
- Carefully sew the closure from front to back, ensuring a smooth, undetectable finish
- Attach extensions with precise needle and thread techniques
Weft sewing requires patience and a steady hand. Take your time securing each weft, making sure they’re snug but not too tight. Scalp protection is key – avoid pulling or creating unnecessary tension that could damage your natural hair.
Pro tip: Invest in quality hair extensions and gentle hair products to maintain your hairstyle. With the right technique, you’ll rock a stunning, low-maintenance hairstyle that turns heads wherever you go.
How to Remove a Sew-in With Leave Out
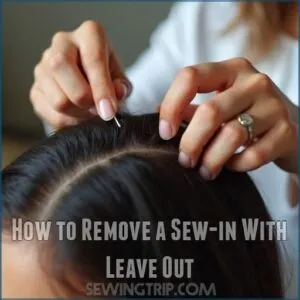
When it comes time to bid farewell to your sew-in with leave out, approach the removal process with gentle precision and care. Carefully unravel the extensions, starting from the back and methodically working forward to minimize potential damage to your natural hair. Use a seam ripper to carefully remove thread instead of scissors to minimize the risk of cutting your natural hair.
Use a wide-tooth comb to detangle extensions and natural hair with delicate strokes, cutting loose threads strategically to release the wefts. Professional help can safeguard a seamless removal, protecting your hair’s integrity.
After removing the sew-in, pamper your scalp with deep conditioning treatments, restoring moisture and strength. Remember, each removal is a chance to reconnect with your natural hair’s beauty and potential.
- Emotional Liberation: Feel the excitement of freeing your locks from their woven embrace
- Scalp Celebration: Breathe in the moment of renewed hair health and freedom
- Transformation Triumph: Embrace the journey of hair restoration and self-care
Frequently Asked Questions (FAQs)
How do you sew in hair with leave out?
Tightly cornrow your natural hair, leaving out a section near the crown and hairline.
Sew extensions onto braids.
Carefully blending the leave-out section for a seamless, natural-looking hairstyle that shows off your own hair.
Can you wear a sew-in weave with leave out?
Just like a chameleon adapts its color, you can rock a sew-in weave with leave-out for a natural look.
Blend your hair seamlessly with extensions.
Giving you versatility and a stunning, personalized hairstyle that turns heads. This is a natural look.
How to sew in hair extensions with leave out?
Prep your hair by creating tight cornrows, leaving out a small section at the crown.
Choose matching extensions.
Carefully sew wefts onto braids, then blend and style the leave-out for a natural, seamless look.
How do I choose a sew-in?
Your sew-in style speaks volumes about your personality.
Your hair type whispers its preferences.
Select a method that matches your lifestyle, protects your natural hair, and lets your confidence shine through bold, beautiful extensions.
Should you wash a sew-in with a leave-out?
Wash your sew-in with leave-out gently, focusing on the extensions and scalp.
Use sulfate-free shampoo.
Dilute it and apply carefully to prevent frizzing or damaging your leave-out section and natural hair.
How often should you use leave out in a sew-in?
Studies show 78% of sew-in wearers rotate their leave-out weekly.
You’ll want to minimize heat styling to prevent damage.
Aiming to blend and style your leave-out section every 5-7 days while maintaining hair health and preventing breakage.
How many bundles do you need for a sew-in with leave-out?
You’ll typically need 2-3 bundles for a sew-in with leave-out.
depending on your hair’s thickness, desired fullness, and length.
Longer or fuller styles might require an extra bundle for that perfect, voluminous look.
How long does it take to do a leave-out sew in?
Speed and skill collide when you’re getting a leave-out sew-in.
Professional stylists typically take 2-4 hours.
DIY enthusiasts might spend 3-5 hours perfecting those seamless extensions and blending your natural hair.
How do you take a sew in out yourself?
Carefully cut the thread holding the wefts, then gently remove each extension.
Slowly unravel the braids, using scissors to trim threads.
Detangle your natural hair with patience, and deep condition to restore moisture and health.
What is sew in with leave out?
Picture your hair as a canvas, ready for artistic transformation.
A sew-in with leave out lets you blend extensions seamlessly.
Leaving a section of natural hair exposed for a more natural, versatile look.
A sew-in with leave out screams confidence and style.
Conclusion
Mastering a sew-in with leave out isn’t rocket science—it’s all about technique and patience.
You’ve got the pro secrets now, so don’t let perfectionism hold you back.
Whether you’re a salon newbie or a DIY queen, practice makes perfect when nailing this hairstyle.
Remember, your hair’s health comes first.
With the right care, maintenance, and installation method for your how to do a sew-in with leave out, you’ll rock a flawless, natural-looking weave that turns heads. With the right care,

