This site is supported by our readers. We may earn a commission, at no cost to you, if you purchase through links.
Easing is the technique that joins two pieces with slightly different lengths, distributing the extra fabric so smoothly that no one can tell it was ever there. It’s what separates homemade-looking garments from professional ones.
Master this skill, and your sleeves will set cleanly, your curves will shape naturally, and your seams will lie flat without a single unwanted gather in sight.
Table Of Contents
Key Takeaways
- Easing is the technique of smoothly joining two fabric pieces with slightly different lengths without creating puckers or gathers, and it’s what separates professional-looking garments from homemade ones—especially in curved seams like sleeve caps and armholes.
- The key to successful easing lies in dividing seams into sections, pinning at matched points to distribute excess fabric evenly, and using steam pressing to relax fibers and set the seam permanently.
- Machine sewing works faster for most easing tasks (under 3 minutes versus 10-20 by hand), but hand sewing gives you better control on delicate fabrics and reduces unintentional gathers by up to 40%.
- Matching your needle size to fabric weight, maintaining proper machine tension, and pressing—not dragging—along seam allowances prevents the puckering that ruins 40% of home-sewn garment seams.
What is Easing in Sewing?
Easing in sewing might sound tricky at first, but it’s really just a helpful technique that solves a common problem. When one piece of fabric is slightly longer than the piece you’re joining it to, easing helps you smooth out that extra length without creating puckered or bunched seams.
Let’s break down what easing means, how it differs from the term "ease," and when you’ll actually need to use this technique in your sewing projects.
Definition and Purpose of Easing
Easing is the clever trick that lets you join two pieces of fabric with slightly different lengths—without ending up with puckers, pleats, or that awkward bunching that screams "homemade mistake." This fabric easing technique helps you distribute extra length smoothly along a seam, creating smooth seams that look polished and professional.
Here’s what easing does for your sewing projects:
- Guarantees fabric alignment by matching uneven edges perfectly
- Prevents puckering that ruins the professional finish of your garment
- Allows design integration of shaped seams, like setting sleeves smoothly
- Improves garment fit by adding subtle shaping without visible gathers
- Creates curves and contours that follow your body’s natural lines
Mastering easing transforms homemade projects into polished, wearable pieces you’ll be proud to wear.
Difference Between Ease and Easing
You’ve just learned what easing does—now let’s clear up the confusion between "ease" and "easing," two terms that sound similar but mean totally different things.
Ease is a measurement—it’s the numerical difference between your body and the finished garment. For example, a blouse might’ve 2 inches of ease at the bust for comfortable movement. This ease measurement gets calculated during pattern drafting.
Easing is a sewing technique you use when joining fabric pieces with slightly different lengths. It’s the hands-on method of distributing that extra fabric smoothly—like fitting a sleeve cap into an armhole without creating puckers. This technique helps shape fabric, particularly around challenging body curves.
When to Use Easing in Garment Construction
Knowing what easing is won’t help much if you don’t know when your project actually needs it. You’ll rely on fabric easing techniques whenever pattern pieces don’t match up perfectly. Here’s when easing becomes essential in garment construction:
- Curved Seams like sleeve caps meeting armholes or necklines joining bodices
- Fitted Garments where you’re distributing excess fabric around darts or princess seams
- Fullness Control when adding design elements like soft gathers or controlled volume
- Fabric Types that behave differently—wovens need easing more than stretchy knits
- Design Elements requiring shape, like easing a skirt waistband onto a curved hip line
Mastering these situations means avoiding puckered seams every time.
Preparing Fabric for Easing
Before you start easing, you need to prep your fabric pieces properly. This means measuring carefully, gathering the right tools, and understanding what your pattern requires.
Let’s walk through each step so you’re set up for success.
Measuring and Marking Fabric Pieces
Before your needle hits the fabric, accurate measuring and marking make the difference between a seam that lies flat and one that fights you every step of the way. Start by comparing your fabric pieces against the pattern, checking measurements at key points along the edges. Use chalk or fabric markers to note where excess fabric needs easing.
Pay attention to the fabric grain, since it affects how pieces stretch and behave. Mark measurement points clearly so you know exactly where adjustments happen.
Tools Needed for Easing Techniques
You’ll need a small toolkit to ease fabric smoothly, but none of the tools are fancy or hard to find. Here’s what works best:
- Specialty Pins: Glass-head pins keep fabric layers securely without slipping during easing
- Easing Foot: This sewing machine attachment feeds fabric at different rates, perfect for curved seams
- Pressing Hams: These rounded cushions shape curved areas while steam relaxes the fabric fibers
Standard needles and thread complete your setup, making easing straightforward and manageable.
Checking Pattern Ease Requirements
Every pattern envelope lists ease measurements, and reading them correctly saves you from a garment that’s too tight or swimming on your body. Look at the finished garment measurements on the back of your sewing pattern, then compare them to your body measurements. The difference you calculate tells you the ease amount built into that design.
Multi-size patterns often include different ease distribution across sizes, so understanding pattern ease types helps you choose the right fit before cutting fabric.
Step-by-Step Easing Techniques
Now that your fabric is prepped and ready, it’s time to ease those seams together. There are a few different methods you can use, and each works better depending on what you’re sewing.
Let’s walk through the main techniques so you can pick the one that fits your project best.
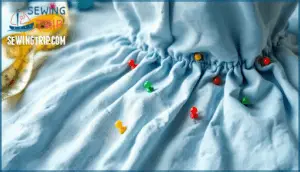
Pinning and Sectional Easing Methods
Think of easing like fitting puzzle pieces together—one piece has a little extra edge that needs to blend smoothly into the other without bunching up.
Here’s how pinning and sectional easing work:
- Divide the seam into equal sections (quarters or thirds work well for curved seams)
- Match and pin at each section mark, distributing excess fabric evenly between pins
- Adjust pin placement based on fabric types—delicate materials need gentler tension control than sturdy ones
This fabric manipulation technique prevents puckering while maintaining smooth seam lines.
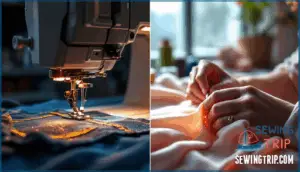
Easing by Machine Vs. Hand Sewing
When should you reach for your machine versus a hand needle? The choice depends on your project’s demands and fabric type.
Machine Speed transforms easing tasks—a sleeve head takes under 3 minutes versus 10–20 minutes by hand. Stitch Quality stays consistent with machines, maintaining uniform tension that prevents puckering in over 90% of seams. However, Hand Control shines on delicate fabrics, reducing unintentional gathers by up to 40%. For small projects or repairs, hand sewing is ideal due to its precision.
| Factor | Machine Sewing | Hand Sewing |
|---|---|---|
| Fabric Suitability | Medium to heavy wovens, long seams over 18 inches | Delicate materials, specialty inserts under 2 inches |
| Seam Strength | 10–20% stronger, withstands 100+ wash cycles | Comparable strength in short segments with reinforced stitches |
| Best Use | High-volume construction, curved seams | Custom garments, complex contours requiring precision |
Sewing machine methods excel for everyday construction, while fabric manipulation methods requiring intricate adjustments call for hand sewing. Most sewists blend both easing fabric techniques—87% use machines for general seams, reserving hand work for specialty areas.
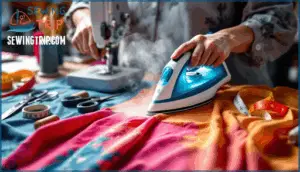
Using Steam Pressing to Relax Fabric
Steam pressing might seem like an optional finishing touch, but it’s actually your secret weapon for convincing stubborn fabric to cooperate. Heat relaxes fibers, letting you smooth a puckered seam without wrestling it.
Adjust your iron settings based on fabric type—cotton tolerates high steam temperature, while synthetics need cooler pressing cloths to avoid damage. These fabric manipulation methods transform tricky easing fabric techniques into manageable sewing techniques.
Tips to Avoid Puckering and Uneven Seams
Getting smooth, professional seams takes more than just knowing how to ease fabric. You need the right approach to tension, tools, and finishing touches.
Let’s look at three key areas that’ll help you avoid those frustrating puckers and uneven spots.
Managing Fabric Tension During Sewing
Keeping your fabric tension steady is like finding the right balance on a guitar string—too tight and it’ll snap, too loose and you’ll get a mess. Check your machine’s tension dial before sewing fabric pieces together.
If you notice a puckered seam, your tension troubleshooting should start with the fabric feed. Adjust the differential feed if your machine has one, and let the fabric move naturally without pulling or pushing it through.
Selecting The Right Needle and Thread
Your needle size and thread weight work like partners—when they’re mismatched, even the best tension settings won’t save you from a puckered seam. Here’s how to match them for quality stitching:
- Lightweight fabrics need fine needles (size 60/8–70/10) and thin thread for clean seams
- Medium-weight fabric compatibility works best with universal needles (size 80/12–90/14) and all-purpose thread
- Heavy fabrics require sturdy needles (size 100/16–110/18) and thicker bobbin thread for strength
- Knit fabric calls for ballpoint needles to prevent snags while weaving them through delicate fibers
Match your needle type to your fabric’s personality, and you’ll see the difference in your stitch quality.
Pressing and Setting Eased Seams
Once you’ve matched your needle and thread, pressing becomes the final step that locks your eased seam into its smooth, professional shape. Use steam pressing with a pressing cloth to gently coax the fabric into place without flattening it.
Set your iron settings based on fabric type, then press—don’t drag—along the seam allowance. This sewing technique helps control tension and sets the ease permanently, giving your garment construction that polished finish.
Adjusting Patterns for Proper Ease
Getting the fit right starts with understanding what ease your pattern already includes and how to adjust it.
You’ll need to know how to calculate ease, make pattern changes, and work with both positive and negative ease.
These skills help you create garments that fit exactly the way you want them to.
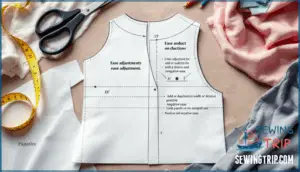
Calculating Wearing and Design Ease
Before you pick up your scissors, understanding the importance of ease in garment fit helps you create clothes that actually work. Total ease calculation is straightforward: subtract your body measurement from the pattern’s finished garment measurement. Here’s what you need to know:
- Wearing ease for woven fabrics generally means 2 inches at the bust, 1 inch at the waist, and 1.5 inches at the hip
- Design ease adds extra room beyond wearing ease, varying by fit category ranges like fitted (2–3 inches) or loose (4–6 inches)
- The pinch test estimation works by pinching fabric at the bust, then multiplying that width by four for total ease
- Woven vs. knit fabrics need different approaches—pattern company standards often show negative ease for stretchy knits
Calculating garment measurements before cutting saves frustration later.
Modifying Patterns for Desired Fit
After you’ve figured out your ease numbers, the next step is adjusting your pattern pieces to match the fit you’re after.
Here’s how different fit adjustments work:
| Adjustment Type | When to Use | Common Method |
|---|---|---|
| Grading patterns | Change between standard sizes | Blend lines between two size cutting lines |
| Combining sizes | Your measurements span multiple sizes | Cut one size at bust, another at hip |
| Muslin fitting | Test garment shape before final fabric | Sew cheap fabric, mark needed changes |
| Length changes | Adjust sleeve or torso | Use lengthen/shorten lines on pattern |
| Style alterations | Modify design ease or silhouette | Add or remove width at seams |
Start with a muslin—it shows exactly where your garment fit needs tweaking.
Understanding Negative and Positive Ease
The difference between positive and negative ease can make or break the fit of your finished garment. Positive ease means the garment measures larger than your body, creating added fullness and a looser silhouette. Negative ease works the opposite way—the garment is actually smaller than your measurements, which only works with stretchy knit fabrics that conform to your body.
Understanding ease in sewing helps you match fabric choice and design intent with your fit preferences for body-conforming or relaxed silhouette effects.
Frequently Asked Questions (FAQs)
How do you determine the amount of ease needed in a garment?
Start by looking at your body measurements and comparing them to the finished garment measurements listed on your pattern. Ease is the difference between these two numbers.
Fabric type, garment style, and fit preferences all play a role. Understanding ease in sewing helps you achieve better garment fit and design while allowing proper body movement.
What are some alternative methods to ease stitching?
Instead of ease stitching, you can try Water Easing to relax fibers, Glue Basting to temporarily secure excess fabric, placing Tissue Paper under puckers, using Dental Floss for gathering, or Elastic Thread for controlled techniques.
Are there any specific fabrics that require different techniques for easing?
Yes, different fabrics need adjusted easing approaches. Knit fabrics stretch naturally, requiring minimal easing compared to woven fabrics.
Delicate fabrics like silk need careful treatment, while heavy materials and bias-cut pieces demand careful pinning to control excess fabric without distortion.
How do you ease sleeves into armholes?
Sewing sleeves into armholes feels like solving a puzzle—match notches, pin at quarter points, then ease the sleeve cap’s fullness along the seamline.
Distribute excess evenly to prevent pleats, clip curves afterward, and understitch for a professional finish.
What fabrics are hardest to ease smoothly?
Slippery fabrics like silk and satin resist easing because their surface texture makes controlling fabric pieces difficult.
Heavy woven fabrics such as denim or canvas lack bias stretch, creating stiff seams.
Tightly woven synthetic fabrics won’t compress easily along the seam allowance, even with pins and careful straight stitching.
Can you ease thick or heavyweight fabrics?
Heavyweight fabrics like wool coats or denim can be eased, but they need wider seam allowance and careful attention.
Use a longer stitch length when you sew, strong pins to secure fabric pieces, and serious pressing techniques with steam to coax those stubborn fibers into place.
How much ease is too much?
If you struggle with fit alterations after sewing, you’ve added too much. Excessive fullness creates bunching instead of comfort.
Design considerations matter—loose fit needs intention, not accident. When ease impacts movement or drapes poorly, it’s time for adjustments. Balance style with function.
Why does my easing create gathers instead?
Roughly 80% of easing problems result from incorrect Tension Issues or Stitch Length settings.
You’re creating gathers because too much fabric is compressed into too small a space—often from tight pins, skipped Pressing Technique steps, or mismatched Fabric Weight management during sewing.
Conclusion
Studies show that poorly eased seams account for nearly 40% of fitting complaints in home-sewn garments. Now that you know how to ease in sewing, those rippled shoulders and puckered curves are behind you.
The secret isn’t complicated—it’s about patience, proper pinning, and letting your iron do half the work. Practice on scraps first, then watch your sleeves set like they came from a tailor’s workroom.
With each seam, you’re building the kind of skill that makes people ask, "Where did you buy that?"
- https://www.uen.org/cte/family/clothing-1/downloads/construction/ease.pdf
- https://www.seamwork.com/sewing-tutorials/understanding-ease
- https://dresspatternmaking.com/blog/ease-in-patterns-and-blocks
- https://www.cochenille.com/the-pinch-test-understanding-ease-in-clothing/
- https://sewingforaliving.com/sewing-ease-how-to-add-it-to-patterns/

