This site is supported by our readers. We may earn a commission, at no cost to you, if you purchase through links.

Apply too much heat, and you’ll scorch the delicate fibers. Skip the protective barriers, and you’ll flatten the fabric’s natural texture.
The good news? Four straightforward steps will smooth out those wrinkles without damaging your garment. You’ll need the right temperature setting, a pressing cloth, and a bit of patience to restore your wool’s crisp appearance.
Table Of Contents
Key Takeaways
- Iron wool at the correct temperature (around 300°F or two dots on your dial) using a pressing cloth and medium steam to smooth wrinkles without scorching the delicate fibers.
- Always let wool dry completely flat for 15-30 minutes after ironing before hanging on padded hangers to prevent new creases and maintain the garment’s shape.
- Iron wool sparingly—experts recommend only every five wears or once per season since over-ironing can damage fibers and reduce your garment’s lifespan by up to 25%.
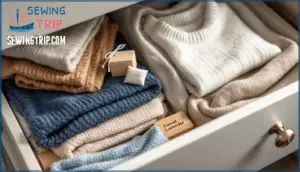
- Store ironed wool in breathable cotton bags in a well-ventilated closet below 60% humidity to prevent mildew, pest damage, and wrinkles from returning.
Ironing Wool in 4 Steps
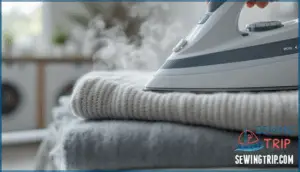
Ironing wool doesn’t have to be intimidating if you follow the right approach. The key is using gentle heat, protective barriers, and a bit of patience to smooth out wrinkles without damaging the fibers.
Here’s how to do it safely and effectively.
Set Iron to Wool Temperature
The secret to wrinkle-free wool starts with dialing your iron to the right heat—too hot and you’ll singe the fibers, too cool and those creases won’t budge. Look for the wool setting on your iron—it’s usually marked with two dots and sits around 300°F, the best temperature for relaxing wool fabric without causing damage.
- Check your iron types: Steam irons work best, but dry irons can work with wool with the right steam settings and technique.
- Test first: Press an inconspicuous spot like an inside seam to confirm the temperature won’t scorch your garment.
- Monitor steam settings: Medium steam prevents fabric damage while giving you enough moisture to release stubborn wrinkles.
Lay Garment Flat and Reshape
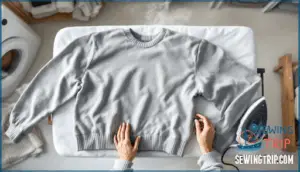
Once your iron’s at the right temperature, spread your wool garment on an ironing board and smooth it out with your hands, coaxing it back into its natural shape before you even think about applying heat. This flat reshaping benefits the wool fabric by aligning fibers properly, which shortens drying time and prevents new creases from forming during storage.
- Gently tug sleeves and hems: Restore the garment’s original dimensions without stretching the weave.
- Check for bunched fabric: Smooth any twisted areas to make certain wrinkles release evenly when you iron.
Use a Pressing Cloth and Steam
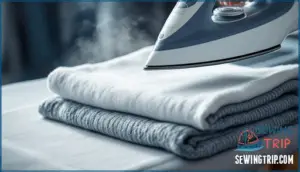
Protecting wool from direct heat takes just two simple tools—a clean barrier cloth and a steady stream of moisture—to safely press out every stubborn crease. Here’s your ironing wool garments game plan:
- Place a pressing cloth over the wool: Use white cotton or muslin as your cloth material to block direct contact between iron and fibers.
- Adjust steam levels to medium-high: Steam ironing relaxes wool’s structure without scorching.
- Set iron settings between 148°C and 166°C: This wool-safe range prevents fiber damage while releasing wrinkles effectively.
- Glide in smooth motions as a safety measure: Technique variations matter—hover for delicate areas, press gently for stubborn creases, never linger in one spot.
Allow Garment to Dry and Hang Carefully
The moment your iron lifts away, patience becomes your best friend—rushing to fold or hang damp wool invites the very wrinkles you just worked to remove. Let your wool coat rest flat for 15–30 minutes so proper airflow can finish the job. Once completely dry, transfer it to padded hangers to support shape retention and prevent stretching across the shoulders—wire hangers create dents that undo all your effort.
| Drying Stage | Hanging Method | Why It Matters |
|---|---|---|
| First 15–30 min | Lay flat on towel | Prevents new wrinkles from forming while fibers cool |
| After drying | Use padded hangers | Maintains shoulder shape and prevents fabric stress |
| Long-term storage | Well-ventilated space | Allows moisture to escape, keeps wool fresh |
| During humid seasons | Add breathing room | Reduces risk of mildew in proper storage conditions |
How to Fix Scorch Marks on Wool
Even with careful ironing, you might notice a scorch mark on your wool garment. Don’t panic—these marks can often be lifted with a few household items.
Here’s how to tackle them depending on the severity and color of your fabric.
Sponge With White Distilled Vinegar
If you’ve ever scorched wool while ironing, white distilled vinegar might just be your saving grace. This household staple can lift light scorch marks without damaging delicate wool fibers. Here’s how to tackle the problem:
- Dampen a clean white cloth with undiluted white distilled vinegar
- Gently dab the scorched area—don’t rub or scrub
- Blot carefully to lift the discoloration without spreading it
- Repeat until the mark fades, then let your wool garment air dry completely
The vinegar’s mild acidity breaks down the shiny, burnt appearance while preserving your wool’s integrity.
Buff Away With an Emery Board
When a light scorch mark refuses to budge, grab an emery board—the same nail file sitting in your bathroom drawer—and gently work it over the damaged fibers. Use short, feathery strokes across the scorched spot, moving in one direction to avoid pilling or tearing the wool. Fine-grit emery boards work best for delicate wool fibers, while coarser versions suit heavier fabrics. This technique practically shaves away surface damage without compromising the weave underneath.
If you don’t have an emery board handy, a fabric shaver can achieve similar results.
Dilute Hydrogen Peroxide for Light-colored Wool
For light-colored wool bearing the ghost of a scorch mark, hydrogen peroxide mixed with water offers a gentler bleaching action than vinegar or abrasion alone. Combine one part hydrogen peroxide with two parts water—this peroxide concentration protects wool fibers while targeting discoloration.
Dip a clean white cloth into the solution and blot the mark using a dabbing motion, never rubbing. Your application technique matters: work from the outer edges inward to prevent the stain from spreading.
Always conduct colorfastness testing on a hidden seam first, especially if stain severity seems minor. Hydrogen peroxide works best on fresh marks; older burns may require professional restoration.
Frequency of Ironing Wool Clothes
You don’t need to iron wool clothing often—that’s one of wool’s hidden strengths. Experts recommend ironing wool jumpers every five wears or even just once per season if you store them right.
Here’s why occasion matters and what affects your ironing routine:
- Fiber blends dictate frequency: Pure wool resists wrinkles better than wool-cotton blends, meaning fewer sessions with the iron.
- Consumer habits show most people iron wool less than four times yearly, favoring steam refresh between wears.
- Over-ironing impacts garment longevity—excessive heat causes shine and can shorten your wool’s lifespan by up to 25%.
Expert advice is clear: iron only when necessary, usually before formal events or after storage, to keep your wool looking sharp without unnecessary wear; using a pressing cloth is also recommended to prevent shine.
Proper Storage of Ironed Wool Clothes
Getting wrinkles out is only half the battle—storing your wool properly keeps those crisp results from going to waste. The way you store freshly ironed wool directly impacts how long it stays smooth and ready to wear.
Here’s what you need to do to protect your work and keep your wool looking sharp.
Allow Clothes to Dry Completely
Your wool garments need zero moisture before they enter storage—think of it as the golden rule of fiber integrity. Air drying on a rack prevents mold, yellowing, and pest problems that plague damp wool.
Properly dried items keep 15% more tensile strength after a year and cut odor issues by two-thirds. Skip this step, and you’re inviting moisture buildup that damages fibers and attracts unwanted guests.
Give your wool time to air dry completely in a spot with good airflow before putting it away. To prevent damage, consider proper moth protection during storage.
Hang in a Well-ventilated Closet
Think of your closet as a breathing space for wool—proper ventilation keeps fibers fresh and preserves your hard work at the ironing board. Humidity control matters here: keeping levels below 60% cuts mildew risk by over 20% and stops that musty smell from settling in. Temperature-controlled closets between 16–20°C help wool coat fibers maintain softness for up to three years.
Here’s your ventilation checklist for preventing wrinkles and damage:
- Choose padded hangers to reduce hanger marks by 40% and support wool coat shoulders without stretching
- Space garments at least two inches apart so air circulates freely around each piece
- Keep closet doors open periodically to refresh stale air and reduce moisture buildup
- Position your well-ventilated closet away from direct sunlight, which fades color by 38% annually
- Monitor humidity with a simple gauge—consistent airflow beats sealed storage every time
This breathing room sets you up perfectly for the next layer of protection: garment bags.
Cover With a Cotton Bag for Long-term Storage
Your well-ventilated closet needs one more layer of armor: a cotton bag. This breathable fabric choice delivers 27% better airflow than synthetic covers, keeping moisture away while your wool maintains its shape. Cotton bags prevent fiber matting and preserve garment silhouette 50% longer than alternatives, while slashing bacteria and fungi growth by 60%.
Here’s what cotton bag benefits bring to proper storage:
- Dust and dirt protection without trapping moisture that invites mildew
- Pest prevention—33% less insect damage compared to polyester or plastic covers
- Shape retention through gentle, breathable coverage that lets fibers rest naturally
Wrap heavier pieces in acid-free tissue inside your cotton bag to cut yellowing by 21% over two years.
Alternative Ironing Methods for Wool
If you don’t have access to an ironing board or prefer working without one, you’ve got options. A few simple adjustments to your setup can give you the same wrinkle-free results.
Here’s how to make it work with what you have on hand.
Use a Thick White Bath Towel on a Firm Surface
If you don’t have an ironing board handy, a thick white bath towel spread across a firm surface works just as well. Choose a towel with adequate thickness to cushion your wool garment and prevent imprints from the surface below. A kitchen table or countertop provides the surface firmness you need for effective wrinkle removal. Smooth the wool flat, then use your iron with a pressing cloth to release creases using proper ironing techniques.
| Factor | Why It Matters |
|---|---|
| Towel Thickness | Protects wool from hard surface imprints |
| Surface Firmness | Provides resistance for effective pressing |
| Towel Material | White cotton prevents dye transfer during steaming |
| Alternative Surfaces | Kitchen tables or counters work when boards aren’t available |
Use a Spray Bottle With Distilled Water for Dry Irons
When your iron lacks a steam function, a spray bottle filled with distilled water becomes your secret weapon for wrinkle removal. Here’s how to master this technique:
- Fill a clean spray bottle with distilled water to prevent mineral deposits on your iron’s soleplate
- Position the bottle 6-8 inches from the wool and lightly mist wrinkled areas
- Let the fabric absorb moisture for 30 seconds before ironing
- Press gently with your iron through a white pressing cloth
- Check fabric wetting levels—damp works better than soaking wet
Distilled water benefits your wool by avoiding the minerals in tap water that cause staining. This spray bottle method gives you control over moisture levels while protecting delicate fibers during ironing.
Spritz Wool With Cool Water Before Ironing if Needed
Sometimes stubborn creases need a little extra help, and a quick spritz of cool water can make all the difference. Here’s how to master this spritzing technique for removing wrinkles from wool:
- Fill your spray bottle with cool distilled water to avoid mineral deposits
- Position the bottle 8-10 inches away and lightly mist wrinkled sections
- Let fabric absorb moisture for 20-30 seconds before ironing wool
- Aim for damp, not soaked—proper fabric saturation level prevents water marks
Additional Tips for Wrinkle-Free Wool
Getting your wool garment wrinkle-free is one thing—keeping it that way is another.
A few simple precautions during the ironing process can save you from unexpected problems down the road. Here’s what you need to watch out for to protect your wool while you work.
Avoid Printed or Colored Towels to Prevent Dye Transfer
A splash of color from a patterned towel might brighten your laundry room, but it can spell disaster for your wool garment. When removing wrinkles from wool, dye transfer risks are real—especially at high heat. The dyes in printed or colored fabrics can bleed onto your delicate wool, leaving permanent stains. That’s why towel material matters during garment care.
| Cloth Type | Safe for Wool? | Why It Matters |
|---|---|---|
| Colored towels | ❌ No | Dyes transfer under heat and moisture |
| White cotton | ✅ Yes | No colorfastness testing needed |
| Muslin fabric | ✅ Yes | Breathable, heat-safe alternative cloth options |
Always choose safe pressing cloths—white cotton dish towels or unbleached muslin work perfectly for wool garment care without risking color damage.
Substitute With a White Cotton Dish Towel or Muslin for a Pressing Cloth
Your kitchen drawer already has the perfect tool—a plain white cotton dish towel or a square of muslin makes an ideal barrier between your iron and wool. These alternative pressing cloths protect fabric without dye transfer risks. Cloth material comparison shows cotton’s tight weave distributes heat evenly, while muslin fabric weight stays light enough to let steam through.
- Pick the right weave: Towel weave matters—choose tightly woven cotton or muslin to prevent iron plate marks from transferring to your wool while ironing with a cloth
Frequently Asked Questions (FAQs)
Can I use a regular ironing board for ironing wool?
Yes, you can use a regular ironing board for ironing wool—think of it as your trusted sidekick for taming stubborn creases.
Board surface stability concerns matter, though. Check for adequate padding impact and heat resistance before starting.
Always use a pressing cloth to protect wool fibers during the ironing process.
Is it necessary to use distilled water when ironing wool?
You don’t need distilled water for ironing wool. Tap water works fine for most steam irons.
However, distilled water benefits your iron by preventing mineral buildup that can clog steam vents or leave residue on wool fabric.
How do I remove scorch marks from wool?
Scorch marks from ironing wool can often be remedied at home. Gently sponge shiny areas with white distilled vinegar to lift discoloration.
For slight scorching, buff the mark with an emery board. Light-colored wool responds well to diluted hydrogen peroxide applied carefully to the affected area.
Can wool coats be steamed instead of ironed?
Steaming wool clothing with a garment steamer works beautifully and avoids ironing drawbacks like scorching. Steamers vs. irons? Steam relaxes wool fibers gently, removing wrinkles from wool coats without direct heat contact.
What causes wrinkles in wool clothing most often?
Wool fibers naturally "give" under pressure—sitting too long leaves Wearing Wrinkles, while improper Storage Wrinkles appear from wire Hanger Damage or tight Packing Creasing.
Lightweight wool clothing wrinkles more easily than heavier fabrics, though humidity and fiber elasticity help wrinkles relax.
Do wrinkle release sprays work on wool fabric?
Wrinkle release sprays can work on wool fabric, though spray effectiveness varies by wool type and application techniques. They’re convenient for light wrinkles but don’t match steaming or ironing for stubborn creases, making cost comparison worth considering.
How long to hang wool before wrinkles disappear?
Most wool wrinkles disappear within 24 hours of hanging on padded hangers.
Fiber relaxation depends on humidity effects, wool weight, and wrinkle severity. Heavier wool coats may need longer storage time for complete wrinkle removal.
Are padded hangers necessary for preventing wool wrinkles?
While padded hangers aren’t a must-have for every wool piece, they’re worth their weight in gold for heavier coats. Fabric Type and Coat Weight determine whether you need them—padded hangers prevent shoulder dimples during Storage Duration, keeping wool coats smooth.
Conclusion
A stitch in time saves nine," and nowhere does that ring truer than with wool care. Now that you know how to get wrinkles out of wool without damaging delicate fibers, you’ve mastered the balance between effective pressing and fabric preservation.
Those four steps—proper temperature, protective barriers, steam application, and patient drying—will keep your garments looking sharp for years. Store them correctly after each ironing session, and you’ll spend less time fighting stubborn creases next season.
- https://www.reddit.com/r/onebag/comments/kqkprq/getting_wrinkles_out_of_merino/
- https://www.stalbertgazette.com/local-news/the-science-of-wrinkles-1287177
- https://steam-one.com/en/blogs/blog/how-to-remove-wrinkles-from-a-wool-sweater
- https://michaeltailors.com/effective-methods-to-remove-wrinkles-from-your-suit-simple-tips-for-a-sharp-look/
- https://www.alandavid.com/blog/how-to-de-wrinkle-your-suit-at-home-in-3-steps/

