This site is supported by our readers. We may earn a commission, at no cost to you, if you purchase through links.
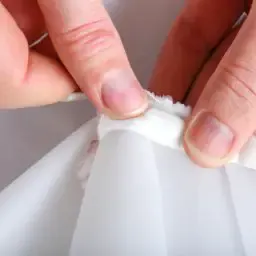
Tulle is a delicate and lightweight fabric that is commonly used in wedding dresses, ball gowns, and other formal wear. Hemming a tulle dress may seem like a daunting task, but with the right tools and techniques, you can achieve a flawless result.
In this guide, we will walk you through the process of hemming a tulle dress, from measuring and cutting to finishing the hem.
Table Of Contents
Tools You’ll Need

Step 1: Measure and Mark
First, you will need to measure the length of your dress and decide on the desired length. Use a measuring tape to measure from the waistline seam to the bottom of the dress. If you want your dress to be shorter, make sure to leave some extra length for the hem.
Once you have decided on the length, use a seam gauge to mark the hemline all the way around the dress.
Step 2: Cut the Tulle

Step 3: Prepare the Hem
To prepare the hem, you have a few options. One popular choice is to use fusible tape or adhesive.
To use fusible tape, place the tape along the bottom edge of the dress and press it with a hot iron. Make sure to follow the manufacturer’s instructions for the length of time to press.
Another option is to hand baste the hem using a small pair of scissors and string. Simply fold the hem up to the desired length, and then use the string to create a temporary hemline.
If you prefer machine sewing, use a serger blade to finish the edge of the tulle.
Step 4: Pin the Hem

Step 5: Sew the Hem
To sew the hem, you have a few options. You can use a sewing machine, hand sewing needle, or a combination of both.
If you are using a sewing machine, use a zigzag stitch or a rolled hem. Make sure to use a fresh needle and adjust the tension settings as needed.
If you prefer hand sewing, use a small and sharp needle to make invisible stitches. Start at the center front of the dress and work your way around, making sure to keep the stitches even and tight.
Step 6: Finishing Touches

Trim any excess fabric or jagged edges to create a clean and polished look.
Conclusion
Hemming a tulle dress may seem like a difficult task, but with the right tools and techniques, you can achieve a flawless result. Follow these steps to create a beautiful and perfectly hemmed tulle dress that you’ll be proud to wear.
Frequently Asked Questions (FAQs)
Can I hem tulle without using fusible tape or adhesive?
Yes, you can hem tulle using a hand sewing needle and thread, or by using a serger blade to finish the edge.
How do I prevent the tulle from fraying?
Use a serger blade, or finish the edge with fusible tape or adhesive.
Can I use a regular pair of scissors to cut tulle?
It is best to use a rotary cutter or sharp pair of shears to get a clean cut.
How do I know how much extra length to leave for the hem?
Measure the length of the dress, and then decide on the desired length. Leave some extra length for the hem, depending on how much you want to shorten the dress.
Can I hem multiple layers of tulle at once?
It is best to hem each layer of tulle separately to ensure a clean and polished look.


