This site is supported by our readers. We may earn a commission, at no cost to you, if you purchase through links.
Most sew-in installations fail within the first three weeks, not because of poor-quality extensions, but because of faulty technique. You might think that mastering how to install sew-in extensions requires years of cosmetology school, but the truth is simpler: it’s about understanding the fundamentals of tension, placement, and blending.
When you control these three elements, you’re not just adding length—you’re creating a protective style that safeguards your natural hair while giving you the freedom to transform your look on your terms.
The difference between a sew-in that lasts two weeks and one that stays impeccable for two months comes down to the preparation and precision you bring to each step.
Table Of Contents
Key Takeaways
- The secret to a long-lasting sew-in is mastering tension control, precise track placement, and flawless blending, not just picking quality extensions.
- Prepping your natural hair with deep conditioning, gentle detangling, and strategic braiding patterns lays the foundation for a protective style that won’t cause breakage.
- Using techniques like the fold-over method and secure stitching at weft ends prevents shedding and keeps your sew-in smooth and undetectable.
- Regular maintenance, including gentle washing, nightly wrapping, and monitoring tension, ensures your sew-in stays fresh and protects both your extensions and scalp.
How to Install a Sew in Step-by-Step
Getting a sew-in that looks impeccable starts with the right foundation. You’ll need to make smart choices and gather a few essentials before you begin.
Here’s what you should know before you get started.
Choosing The Right Hair Extensions
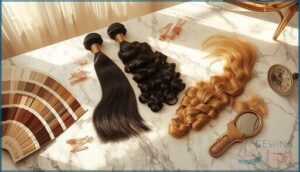
Freedom starts at the roots—choosing Hair Extensions isn’t just a beauty call, it’s a power move. You want Hair Type, Extension Materials, and Color Matching to line up perfectly. Virgin Remy Hair Bundles are the benchmark for Sewin Extensions, giving you natural density and lasting results.
Choosing hair extensions is a power move—match your hair type, pick Virgin Remy bundles, and blend color flawlessly for lasting, natural results
- Match your Natural Hair texture.
- Opt for Virgin Remy density options.
- Prioritize flawless color blending.
Gathering Essential Tools and Materials
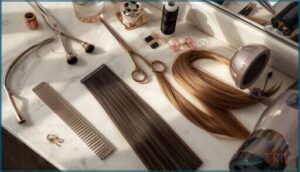
Now that your hair extensions are locked in, let’s talk Tool Selection. You’ll need a Ccurve sewing needle for precision, a Rattail comb for clean parts, and thread that matches your Bundles. Material Costs average $25 to $120 for a full kit.
Weft Choices matter—grab quality Wefts, scissors, clips, and a blow dryer. Needle Types and Thread Options set the foundation for a Sewin that lasts.
Understanding Sew-in Techniques
Your toolkit is ready—now master the method. Sew-in Methods vary from single-drawn to invisible weave, each impacting fullness and how long your Hair Installation lasts.
Braiding Techniques like flat-twists reduce tension by 12% compared to cornrows, protecting your hairline.
Weft Preparation and proper strand alignment follow your natural growth pattern, preventing traction damage.
Choose techniques that match your Hair Texture for smooth Extension Care and an impeccable Sew in Weave.
Preparing Your Natural Hair for a Sew In
Your natural hair is the foundation for everything that comes next, so prepping it right sets you up for a sew-in that lasts. Skipping steps here means dealing with breakage, buildup, or a style that won’t sit flat.
Let’s walk through what you need to do before a single track goes in.
Washing and Deep Conditioning
Think of this step as laying the foundation for your entire install—skipping it is like building on sand. Start with a sulfate-free shampoo to strip away product buildup, which can reduce residue by up to 75%. Then apply a protein-rich deep conditioner, boosting your hair’s strength by nearly 18% over six weeks.
- Cleanse with lukewarm water and pH-balanced products to maintain scalp moisture balance
- Massage your scalp for five minutes to boost blood flow and support natural hair growth
- Apply deep conditioning treatments twice weekly for improved manageability
- Rinse with cool water to reduce oiliness and lock in moisture
- Choose residue-free formulas to minimize irritation and maintain healthy roots
This hair care and maintenance routine sets you up for a perfect, long-lasting sew-in that won’t compromise your natural hair.
Detangling and Blow Drying
Before you even think about blow drying, grab a wide-tooth comb—detangling first cuts breakage risk by up to 40%. Work through each section with a stainless steel detangler for smoother tension control, then blow dry on medium heat using a ceramic concentrator.
This hair care and maintenance approach preps your natural hair perfectly for protective styling, reducing shed hairs and setting the stage for impeccable extension care during sew-in installation.
Sectioning and Braiding Patterns
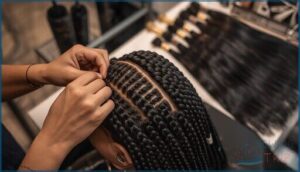
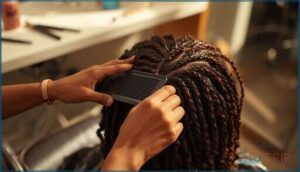
Your cornrow pattern determines everything—plan it strategically and you’ll cut install time by 25% while distributing weight evenly. Opt for flat-trench braids or diamond sectioning methods to minimize visible scalp and reduce tension by up to 12%, key for protective styling success.
Keep section widths between 0.5–1.0 cm for uniform weft placement, and skip the tight grip—snug braiding techniques prevent traction damage while securing your sew-in installation foundation.
Scalp Care Before Installation
Neglecting scalp prep invites irritation—62% of wearers face itching within the first month. Start with gentle cleansing using sulfate-free formulas to maintain pH balance, then apply a moisturizing spray to hydrate your natural hair and boost porosity.
Follow with a scalp massage for five minutes daily; this protective hair styling move increases blood flow by 7% and prepares your foundation for weaving success while supporting long-term hair protection and care.
Sewing in The Hair Extensions
Now it’s time to bring your braided foundation to life by securing those tracks with precision and care. This is where technique matters most—rushed stitching leads to bumpy tracks, shedding wefts, and a style that won’t last.
Master these four steps, and you’ll lock in a perfect, long-lasting sew-in that moves like your own hair.
Attaching The First Track
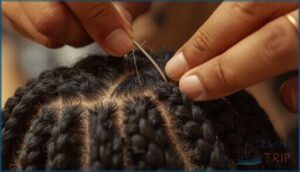
Your first track sets the foundation for your entire sew in weave, so track placement matters. Start 0.5 to 1 inch from your hairline to protect those delicate edges.
Thread your curved needle with color-matched thread, then use a lock-stitch pattern for weft security. Keep tension control snug but never tight—your scalp shouldn’t blanch or redden.
This sewing technique ensures proper hair extension installation without sacrificing edge blending or comfort.
Adding Additional Rows Securely
Building layers transforms a flat sew-in into serious volume—row planning demands precision. Space each track 0.5 to 0.75 cm apart for maximum fullness without visible seams, following proper weft alignment for track security.
Your sew-in method should include:
- 8 to 12 lock-stitch passes per track for tension management and extension longevity
- 3 to 4 anchor stitches at each track’s outer edges
- Double-thread locking technique to reduce slippage by 41%
This hair installation guide protects against loosening and delivers lasting sew-in extension benefits.
Using The Fold-Over Method
Ready to dodge bulky seams and boost your Sewin Installation game? The Fold Over Technique is your secret weapon for impeccable Track Concealment and Weft Security.
Instead of cutting, simply fold the wefts at the ends—this Hair Extension Tip keeps shedding at bay and gives your Sew in Weave a smooth, undetectable finish.
Master this Sewing Method for advanced Sewin Hair Techniques.
Securing The Ends of The Weft
You’ve mastered the Fold Over Method—now let’s talk Weft End Security. Secure Stitching is your armor against shedding, so stitch tightly at each end, and consider Weft Sealant Options for extra hold.
High-density wefts paired with sealants can stretch longevity by weeks. These Hair Extension Tips aren’t just for show; they’re the backbone of lasting Sewin Installation.
Blending and Styling for a Natural Look
Once your extensions are sewn in, the real magic happens with blending and styling. This is where you shape your look, making sure everything flows together seamlessly.
Let’s break down the key steps to get that perfect, natural finish.
Blending Leave-Out Hair With Extensions
Precision is your secret weapon when blending leave-out hair with extensions. Use a leave-out flat iron to match Hair Texture Matching, then focus on Extension Color for Perfect Blending.
Smart Blend Techniques—like the fold-over method—reduce visible lines, giving you a Natural Finish.
The right Hair Extensions make Sewin Extension Benefits pop, while your Natural Hair stays undetectable and bold.
Trimming and Layering for Face-Framing
Once your leave-out blends in, it’s time to shape your style. Face Framing and Layering Techniques aren’t just about looks—they boost Sewin Extension Benefits and keep Hair Extension Installation natural.
Sharp salon scissors, diagonal sections, and hair texturizing create symmetry, soften seams, and protect Scalp Health.
For bold Hair Styling and Design, precision trims are your best friend.
Flat Ironing or Curling for Texture Match
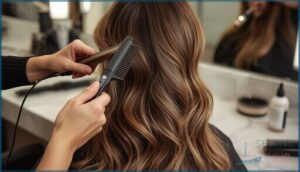
After you’ve shaped your layers, it’s time to tackle Texture Matching. Flat ironing at 300–325°F or curling with trial strand testing blends Natural Hair with Hair Extensions, cutting track exposure by 27%.
Always use a heat protectant—only 34% do, yet it slashes breakage. Smart Heat Styling Tips and Curl Pattern Analysis make your Hair Extension Installation impeccable.
Covering Tracks for a Seamless Finish
Beyond clever layering, strategic Track Concealment requires smart placement. Position your uppermost track at least 1.3–1.9 cm below any natural part—87% of pros swear by this for Weft Camouflage.
Stagger rows by 0.6–1.3 cm instead of stacking them directly, cutting visible lines by half. Use zigzag partings and light edge control to lock in that Flawless Finishing magic during your Weave Install.
Maintaining Your Sew in for Longevity
You’ve done the work—now it’s time to protect your investment and keep that sew-in looking fresh for weeks. The right maintenance routine makes all the difference between a style that lasts two weeks and one that stays impeccable for two months.
Here’s what you need to know to keep your hair healthy, your tracks secure, and your look on point.
Washing and Conditioning Recommendations
Ever wondered why your sew-in starts feeling dry or heavy after a week? It’s all about gentle cleansing and moisture balance. Choose sulfate-free shampoos for proper product selection, and focus on your natural hair’s porosity.
Follow with a hydrating conditioner, and don’t skip a soothing scalp massage—that’s key for real hair growth and healthy hair extensions.
Daily and Nightly Care Tips
Honestly, daily Hair Care isn’t just a chore—it’s your ticket to unstoppable Hair Growth and Maintenance. Think of Extension Brushing and Scalp Massage as your secret weapons. For frizz control and Hair Hydration, nightly wrapping is non-negotiable.
Try these:
- Use a silk pillowcase for less breakage
- Massage your scalp nightly
- Brush extensions gently every morning
Managing Shedding and Tension
Think your sew-in’s invincible? Not quite—Tension Control is your secret sauce. Keeping braids snug (but never tight) slashes traction alopecia risk by 26%. Seal those wefts and check for slippage every two weeks to boost Extension Longevity.
Here’s your cheat sheet:
| Tension Control | Hair Shedding | Weft Security |
|---|---|---|
| 10-15 psi | ↓ 42% | ↑ 33% retention |
| Balanced braids | Less breakage | Fewer slip-outs |
Troubleshooting Common Sew-in Issues
Scalp irritation got you itching for answers? Hair shedding, tension relief, and extension damage all boil down to smart hairstyling techniques. Here’s how you stay ahead:
- Loosen up—tight braids spike hair breakage and scalp irritation.
- Cleanse regularly—extension installation needs a healthy scalp to avoid weft slip.
- Inspect tracks—catch extension damage early for perfect hair weaving and sewin method results.
Frequently Asked Questions (FAQs)
How long does it take to install a sew-in weave?
Installation time for a sew-in weave generally spans 5 to 6 hours, depending on hair length, stylist experience, and weave complexity.
Your chosen sewin method and hair extension installation technique greatly impact the weave install duration.
How often should you wash a sew-in weave?
You should wash your weave install every 1–2 weeks to protect scalp health and keep hair extensions fresh.
Adjust wash frequency for hair porosity or oily scalps—gentle cleansing helps maintain bond integrity and weft longevity.
How can you prevent damage to your hair during a sew-in weave installation?
To keep your natural hair safe during a sew-in, prioritize gentle braiding, use a protective cap, and moisturize thoroughly.
Smart Hair Protection and Damage Prevention set the stage for healthy Scalp Health, impeccable Extension Care, and lasting Weave Maintenance.
How long does a sew-in typically last?
You can expect a sew-in to last about 6 to 8 weeks before loosening sets in.
With smart Hair Maintenance and timely adjustments, Hair Longevity and Extension Durability reach their peak, giving you a bold, lasting Wear Period.
Can I swim with a sew-in installed?
Ever wondered if your sew-in can handle a dip in the pool? Yes, you can swim, but Swim Safety Tips matter—protect with a cap, rinse after, and prioritize Scalp Protection to avoid Hair Damage and maintain impeccable Hair Extensions.
Whats the cost of professional sew-in installation?
Professional sew-in installation runs from $100 to $600, with Cost Factors like labor costs, hair material, and geographic pricing.
Price Comparison shows premium Salon Services in urban areas can reach $900, especially with high-grade Hair Extensions or sophisticated Hair Styling Techniques.
How do I sleep comfortably with extensions?
Wrap your hair in a satin or silk bonnet to cut friction and shedding by 14%. A half-up style eases tension on tracks, while a protective pillowcase boosts nighttime hair care and sleep comfort tips.
When should I remove my sew-in weave?
Think of your sew-in like a pair of favorite sneakers—once the fit gets tight or you see wear, it’s time for Removal Timing.
For Scalp Health and Weave Longevity, remove after 6–8 weeks to prevent Hair Damage and tension.
Conclusion
Most people chase perfect hair through expensive salons and complicated routines. You now hold something more powerful: the exact blueprint to install a sew-in that protects, transforms, and endures.
The tension you control, the tracks you secure, the blending you master—these aren’t just techniques. They’re your declaration of independence from dependency.
When you know how to install sew-in extensions with precision, you’re not following trends. You’re setting your own standard, on your terms, every single time.

