This site is supported by our readers. We may earn a commission, at no cost to you, if you purchase through links.
The process is straightforward once you understand the basic techniques, and you’ll finish with a wearable project that builds your confidence for more complex knitting ahead.
Table Of Contents
Key Takeaways
- Worsted or bulky yarn with wooden or bamboo needles (7-10mm) makes learning mittens easier because thicker materials show mistakes clearly and finish faster than thin yarns.
- Master gauge by knitting a 4×4 inch swatch first—needle size changes stitch density by 5-10%, so skipping this step often means mittens won’t fit right.
- Learn to increase and decrease stitches gradually around the thumb gusset, then decrease smoothly toward the fingertips to create mittens that actually fit a real hand.
- Most beginner mittens take 10-20 hours to complete, and dropped stitches or uneven tension can be fixed with practice and a crochet hook rather than starting over.
Essential Materials for Knitting Mittens
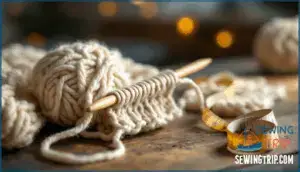
Before you cast on your first stitch, you’ll need to gather a few simple supplies. The right materials make learning easier and help your mittens turn out warm and wearable.
Here’s what you should have on hand to get started.
Choosing The Right Yarn Weight and Fiber
When you’re picking yarn for your first pair of mittens, the weight and fiber you choose can make the difference between a smooth project and a frustrating one. Medium to heavy yarn weights work best because they’re easier to control and show your stitches clearly.
Here’s what to keep in mind when choosing yarn:
- Yarn weight: Worsted or bulky weight lets you see mistakes quickly and finish faster
- Fiber properties: Wool blends offer warmth and forgiveness for uneven tension
- Seasonal yarns: Natural fibers like merino regulate temperature better than synthetics
Start with a simple fiber blend before exploring dyeing techniques or specialty yarn types.
Selecting Suitable Knitting Needles
Your needle choice matters just as much as your yarn—wooden or bamboo needles with a diameter between 7 and 10 mm give you the best grip while you’re still learning the basics. Straight needles work fine for flat mittens, but circular needles let you knit seamlessly in the round once you’re ready.
| Needle Material | Needle Size | Best For |
|---|---|---|
| Bamboo | 7-8 mm | Beginners needing extra grip |
| Wood | 8-10 mm | Warm feel, prevents slipping |
| Metal | 9-10 mm | Faster knitting, smooth stitches |
| Ergonomic | 7-9 mm | Reducing hand strain |
| Circular | 8 mm | Knitting mittens without seams |
Choose needle length based on comfort—shorter needles give better control when you’re starting out.
Additional Tools and Supplies Needed
Beyond yarn and needles, a handful of small tools will save you from frustration and help you finish your mittens with confidence. Stitch markers track your thumb gusset placement, while yarn needles weave in loose ends. Keep scissors handy for trimming tails, and measuring tape guarantees proper sizing.
Blocking mats give your finished mittens a professional shape, making beginner knitting techniques easier to master.
Preparing to Knit Mittens
Before you cast on your first stitch, you’ll need to get comfortable with two foundational skills that set you up for success.
Starting a knitting project means learning how to get yarn onto your needles and making sure your mittens will actually fit.
Let’s walk through the slip knot, casting on, and figuring out the right size for your hands.
Making a Slip Knot and Casting on Stitches
Every mitten starts with one simple loop—the slip knot—and once you’ve got that down, you’re just a few cast-on stitches away from having yarn ready to work. The slipknot basics are straightforward: make a loop, pull the yarn through, and tighten. Casting-on methods like the long-tail cast-on give you the foundation row.
Here’s what to focus on:
- Tension control: Keep loops snug but not tight—they should slide easily on your needle
- Counting stitches: Mark every tenth stitch to avoid recounting
- Avoiding twists: Line up your cast-on stitches neatly before starting row one
Master these beginner knitting techniques, and you’ll build confidence fast.
Understanding Gauge and Sizing
Gauge importance can’t be overstated—it’s the blueprint that determines whether your knitting project actually fits. Before starting any mitten sizing work, knit a 4×4 inch swatch to count stitches and rows per inch. Needle size changes stitch density, and fiber effects like wool’s stretch versus cotton’s stability shift measurements by 5–10%. It’s important to remember that needle material affects gauge, potentially causing significant variations in your finished project.
Use this quick reference to adjust gauge and match your knitting instructions:
| Needle Change | Gauge Impact | Mitten Width Change |
|---|---|---|
| +0.25 mm | -1 stitch/inch | +3–4 inches |
| -0.25 mm | +1 stitch/inch | -3–4 inches |
| No change | Match pattern | Perfect fit |
Block your swatch first—beginner knitting techniques improve when you see how yarn behaves after washing. This knitting tutorial step prevents surprises later.
Mastering Basic Knitting Techniques
Before you can knit your first pair of mittens, you need to get comfortable with a few essential techniques. These skills form the foundation for every project you’ll tackle.
Let’s walk through the core stitches and moves that’ll turn your yarn into cozy handwear.
Creating Knit and Purl Stitches
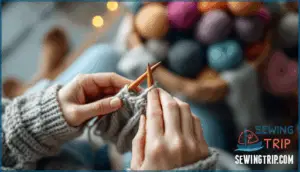
Think of knit and purl stitches as the two building blocks that give your mittens their shape and texture—once you nail these moves, you’ll be able to create everything from smooth stockinette to cozy ribbed cuffs. The knit stitch pulls yarn through from back to front, while the purl stitch works front to back.
Practice these basic knitting techniques for beginners on swatches first. Keep your tension control steady—not too tight or loose—so your stitch patterns stay even throughout your project.
Increasing and Decreasing Stitches
Shaping your mitten to fit a real hand—complete with a thumb that sticks out—means you’ll need to learn how to add and remove stitches as you go. Increasing and decreasing stitches are key knitting techniques for mitten shaping.
The invisible decrease keeps your stitch patterns smooth, while decorative increases add subtle texture. Gusset placement matters most near the thumb—increase gradually for a natural fit, then decrease smoothly toward the fingertips.
Beginner knitting gets easier once you practice these moves on swatches first.
Fixing Common Beginner Mistakes
Dropped a stitch, spotted a hole, or noticed your rows look wonky? Don’t panic—most knitting mistakes are easier to fix than you think. Dropped stitches can be picked up with a crochet hook. Uneven tension and laddering loops improve with practice. Yarn splitting happens less with blunt needles. Edge curling is normal for stockinette—blocking helps.
Keep going—fixing knitting mistakes builds your skills faster than perfect rows ever could.
Mistakes teach faster than perfection—keep knitting, and your skills will grow with every row
Step-by-Step Guide to Knitting Mittens
Now that you’ve got the basics down, it’s time to put your skills to work on your first pair of mittens. We’ll walk through each section of the mitten—from the ribbed cuff at the bottom to the rounded fingertip at the top.
Here’s how to build your mittens one step at a time.
Knitting The Cuff and Wrist
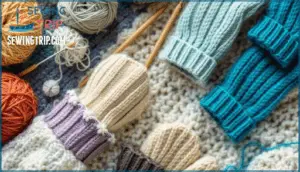
The cuff is where your mittens come to life—it’s the stretchy, snug foundation that keeps cold air out and warmth locked in. Ribbing techniques create that elastic grip, and they’re easier than you think.
- Cast on an even number of stitches using your chosen needles and yarn.
- Work in K1, P1 ribbing (knit one stitch, purl one stitch) for decorative edges.
- Continue this cuff pattern for 2-3 inches to shape the wrist properly.
- Experiment with colorwork cuffs by switching yarn colors mid-row for personality.
Shaping The Thumb Gusset
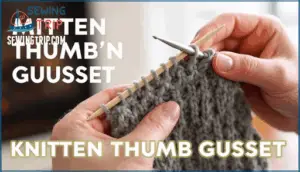
Your thumb needs room to move, and that’s exactly what a gusset gives it—a perfectly shaped pocket built right into the mitten. Here’s how to create one: mark your gusset placement with a stitch marker, then increase one stitch on each side every other row.
Watch your gusset stitch count grow gradually—most patterns need 10-15 increases total. These knitting techniques build that triangular thumb space naturally, no complicated knitting instructions required.
Working The Hand and Finger Area
Once the thumb stitches sit safely on a holder, you’ll continue knitting straight up the hand until you reach the fingertips. Here’s how to finish strong:
- Keep knitting in the round until your mitten length reaches the top of your pinky finger
- Start your decrease rounds by knitting two stitches together at four evenly spaced points
- Continue these decrease rounds every other row, watching your palm width shrink gradually
- When only 8-10 stitches remain, cut your yarn and weave the tail through them to close the top
Your finger shaping creates that classic rounded mitten tip.
Tips for Successful Beginner Mittens
You’ve learned the basics, and now it’s time to polish your skills. Here are three practical tips that’ll help you knit mittens that actually fit and look good.
These strategies will save you from headaches and keep your first project on track.
Maintaining Even Tension
Keeping your stitches the same size throughout your mittens can feel like patting your head and rubbing your belly at the same time, but it’s a skill that improves with every row you knit. Pay attention to how tightly you grip your yarn—this affects stitch consistency more than anything else. Your hands will develop muscle memory as you practice basic knitting techniques for beginners.
| Tension Factor | Quick Fix |
|---|---|
| Tight stitches | Relax your grip on the yarn |
| Loose stitches | Grasp yarn closer to needles |
| Uneven rows | Check your needle size matches yarn choice |
Blocking effects can smooth out minor differences later in your knitting tutorial journey.
Troubleshooting Common Issues
Even tension won’t prevent every hiccup. Dropped stitches happen when loops slip off your needles, leaving ladder-like gaps in your fabric. Use a crochet hook to catch and reinsert them right away. Here’s how to spot and fix common knitting mistakes:
- Dropped stitch: Look for vertical gaps, then hook the stitch back through each ladder rung from bottom to top.
- Twisted stitches: Check that reinserted stitches face the right direction to maintain smooth texture.
- Extra stitches: Count every few rows to catch accidental increases before they distort your mitten shape.
- Hole prevention: Tighten yarn firmly when picking up thumb gusset stitches, or add extra stitches at the base and decrease immediately.
Edge curling affects most stockinette mittens, but blocking on flat surfaces or mitten blockers fixes over 90% of cases. Yarn damage and pilling show up after repeated wear, especially in thumb areas—snip pills gently without cutting the fabric underneath. You can prevent knitting errors by taking frequent breaks.
Exploring Simple Pattern Variations
After mastering basic mittens, try adding visual interest without overwhelming your new skills. Texture variations let you alternate knit and purl stitches to create ribbing or seed stitch patterns that grip better in cold weather. Simple colorwork techniques like horizontal stripes require only knitting a stitch with new yarn. Cable knitting and mitten embellishments come later—focus first on beginner patterns that build confidence.
| Beginner Knitting Pattern | Technique Used | Difficulty Level |
|---|---|---|
| Striped mittens | Switching colors | Easy |
| Ribbed cuff extension | Knit/purl alternating | Easy |
| Seed stitch panels | Texture variations | Moderate |
| Simple thumb stripe | Colorwork on gusset | Moderate |
These knitting project ideas help you practice stitch patterns while creating wearable results.
Frequently Asked Questions (FAQs)
How do I create a thumb gusset using M1 increases?
To create a thumb gusset, place stitch markers around your increase zone.
Work M1 increases every other round between markers. The M1L and M1R variations prevent holes by twisting the lifted strand, shaping the gusset smoothly for proper thumb placement.
How do I finish the top of the mitten and create a symmetrical look?
Picture your mitten tapering to a smooth point, like a perfectly rounded hill. To achieve symmetrical mitten top shaping, work paired decreases—knit two together on one side, slip-slip-knit on the other. Continue decreasing until six to eight stitches remain, then cut your yarn and thread it through these final stitches.
Pull tight to close the mitten tip, securing your work before weaving ends through the wrong side. Blocking mittens afterward evens out your knitting techniques and creates a polished finish.
How do I knit two mittens the same size?
Track your stitch count and row numbers carefully for identical mitten size. Write down each measurement—cuff length, thumb placement, and total rows.
Use the same yarn tension throughout both mittens.
Block finished mittens together to match dimensions precisely.
Can I knit mittens on circular needles?
Yes, you can knit mittens on circular needles. Circular needles work well for joint-free knitting in the round, making them ideal for beginner knitting projects. Choose the right needle length based on your mitten size for comfortable project suitability.
How do I add a decorative cuff pattern?
Decorative cuff patterns transform your mittens from simple to striking. Try colorwork techniques like stripes or Fair Isle designs, cable patterns for texture, or textured stitches such as ribbing and twisted knits. Beaded cuffs add sparkle—thread beads onto yarn before knitting.
These cuff embellishments work best with knitting patterns specifically designed for beginners, keeping your project manageable while building your knitting techniques and skills.
Whats the best way to seam mittens together?
The mattress stitch creates invisible seams for mittens. Thread yarn through the loops along each edge using a tapestry needle, working side-to-side rather than top-to-bottom. This technique hides the seam inside the fabric.
Block your finished mittens to even out stitches and set the seams permanently into place.
How long does it take to knit mittens?
Mitten timelines vary based on skill level, yarn thickness, needle size, and pattern complexity. Most beginners finish a pair in 10–20 hours across several weeks. Thicker yarn and larger needles speed things up.
Your first pair takes longer than subsequent projects as you build confidence with knitting fundamentals.
Conclusion
Picture your first mitten as a seed—small, imperfect, but full of promise. With every stitch, you’re planting skills that will grow with practice.
Learning how to knit mittens isn’t just about warmth; it’s about tending to your own growth, one row at a time. Each finished pair is proof that patience and care yield something real.
The journey begins with yarn and needles, but it’s your hands that shape comfort for yourself and others.

