This site is supported by our readers. We may earn a commission, at no cost to you, if you purchase through links.
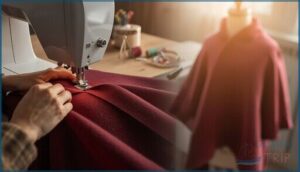
Your grandmother’s poncho sat in a closet for decades—then suddenly reappeared on runways from Paris to New York, commanding four-figure price tags. The truth is, you don’t need a trust fund or a fashion degree to create this adaptable layering piece.
A poncho cape wraps you in instant style while offering the kind of movement and comfort that fitted jackets never could. The construction is remarkably straightforward: a strategic neck opening, clean-finished edges, and fabric that drapes like it knows exactly what it’s doing.
With basic sewing skills and an afternoon to spare, you’ll transform flat yardage into a statement piece that works over everything from jeans to evening wear.
Table Of Contents
Key Takeaways
- You don’t need advanced skills or expensive materials—just basic sewing knowledge, an afternoon, and the right fabric (fleece for beginners, wool for structure, or knits for drape) transforms flat yardage into a statement piece that works over any outfit.
- Accurate measurements matter more than fancy techniques—start with your arm span for width, choose your desired length from waist to ankle, and mark a symmetrical neck opening using your neck circumference divided by 6.28 for the radius.
- Construction is straightforward with minimal seams—finish raw edges first to prevent fraying, stitch shoulder seams with topstitch reinforcement, then add a double-turn hem or facing at the neckline using stretch-capable stitches for knits.
- Customization elevates a basic poncho into something uniquely yours—add functional patch pockets at elbow height, create fringe or beaded edges for visual interest, and use seam binding or bias tape to achieve that polished, professional finish.
Essential Materials for a Poncho Cape
Before you cut a single stitch, you need to gather the right materials—this isn’t the time to wing it with scraps from your closet. The fabric you choose will determine how your poncho drapes, how warm it keeps you, and honestly, whether you’ll actually wear it.
Wool, fleece, and cotton blends are all solid options, and you can find beginner-friendly sewing tips that walk you through working with each fabric type.
Let’s break down the essentials so you can shop smart and start sewing with confidence.
Understanding how to use your machine’s accessories effectively can save you hours of frustration and help you tackle projects you might’ve thought were too advanced.
Choosing The Best Fabric Types
Fabric selection transforms your poncho from a simple drape into a statement piece—so don’t settle for boring basics. The textile properties you choose determine warmth, movement, and how your cape performs in real life.
Focus on perfecting garment construction techniques that work with your chosen fabric’s weight and stretch to ensure clean seams and professional finishing.
Fleece fabric offers quick wins for beginners, while wool coating around 425-475 GSM creates structure without bulk.
- Fleece: Lightweight polyester warmth that dries fast and won’t break your budget
- Wool: Natural insulation trapping air—absorbs 30% moisture while keeping you cozy
- Cotton blends: Breathable ease for transitional seasons with machine-wash freedom
- Cashmere: Luxury warmth at featherweight—perfect drape for elegant capes
- Linen: Cool, strong fiber that gets softer with every adventure
If you want to explore natural fibers, wool, cashmere, and alpaca are all highlighted among the best fabrics for ponchos.
Tools and Notions Needed
Once you’ve chosen your fabric, assembling the right tools makes construction seamless. Your sewing machine and sharp fabric cutters—think 8-inch fabric shears or a 45 mm rotary cutter paired with a cutting mat—deliver clean edges. Grab a flexible measuring tape for body dimensions, sewing clips for bulky seams, and an iron to press crisp lines that transform homemade into haute. For a complete overview of essential supplies, review this guide on .
Recommended Supplies for Beginners
With your tools prepped, smart fabric selection and beginner kits round out your sewing supplies. Start here:
- Medium-weight wovens like wool blends, flannel, or boiled wool—they drape beautifully and forgive rookie wobbles at the neckline
- Stable fleece or ponte knits for stretch without the wrestling match
- All-purpose polyester thread that moves with seams
- Seam ripper—your best friend when excellence takes practice
These DIY essentials transform measuring tape and scissors into crafting basics that deliver.
Measuring and Cutting Your Poncho Cape
Getting your measurements right from the start means you won’t waste fabric or end up with a poncho that’s too short, too tight, or just plain awkward. You’ll need to decide on your finished length, mark that essential neck opening without making it too small or too large, and—if you’re feeling adventurous—draft a pattern that gives your cape the exact silhouette you’re after.
If you’re planning to use a knit fabric for your poncho, mastering stretch-friendly sewing techniques will help you avoid puckered seams and keep that cozy drape intact.
Here’s how to tackle each step with confidence.
Determining Poncho Size and Length
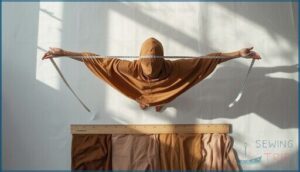
Your poncho measurements start with arm span—stretch your arms wide, wrist to wrist, and that’s your minimum width for proper drape. Poncho making demands you match length to lifestyle: waist-length for mobility, ankle length for drama.
Measure from neck base down to your chosen hemline—knee-length keeps you agile, while longer silhouettes create sculptural triangles at the sides. Body proportions drive size calculations in garment construction.
Marking and Cutting The Neck Opening
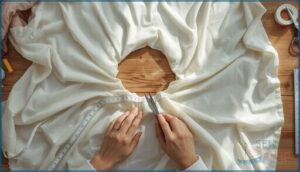
Precision Marking starts with centering your chalk line—fold your poncho fabric, locate the exact midpoint, then draft a gentle neck curve using the formula: divide your neck circumference by 6.28 for the radius. Mark symmetrically with a washable fabric marker, add a ½-inch seam allowance, then cut with sharp scissors in one smooth motion. Test the head hole opening before stitching—Fabric Notching prevents shifting during construction.
- Align chalk marks at center front for balance
- Use flexible measuring tape to verify curve depth
- Pin pattern pieces to prevent fabric shifting
- Cut with continuous, controlled scissor strokes
- Check symmetry by refolding before final trimming
Creating Patterns for Different Cape Styles
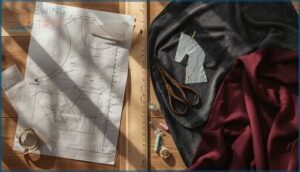
Pattern Drafting unlocks limitless Cape Silhouettes—sketch a classic rectangle for structured drape, or draft a quarter-circle for fluid movement. Neckline Designs vary from tight ovals to relaxed scoops, while Hem Treatments add swing or definition. Match your Poncho Pattern to your Fabric Selection—wovens hold crisp edges, knits flow freely.
| Style | Pattern Shape | Best For |
|---|---|---|
| Classic Poncho | Rectangle | Fleece Poncho, beginners |
| Circle Cape | Quarter-circle | Drama, expert Sewing Patterns |
| Hooded Variant | Rectangle + hood piece | Cold weather, DIY Poncho projects |
Follow this Sewing Tutorial approach: draft on paper first, test-fit your mockup, then adjust before cutting final yardage.
Once your pattern is finalized, learn how to clean nylon properly so your finished garment stays fresh and wrinkle-free between wears.
Sewing The Poncho Cape Together
Once you’ve got your fabric cut and your neckline marked, it’s time to bring your poncho cape to life with just a handful of key seams. This is where the shape transforms from flat yardage into something you can actually throw on and wear—no complicated fitting or finicky darts required.
You’ll start by finishing the raw edges, then move through the main construction steps that hold everything together, with an optional hood or cowl if you want that extra cozy factor.
Preparing Fabric Edges and Seams
Before you stitch a single seam, you’ll protect your poncho’s edges from unraveling—fray prevention is your foundation. For woven fabrics, run a quick zigzag along raw edges to secure them without adding bulk.
Knit fabrics need gentler handling, so use a stretch stitch or serged finish to maintain elasticity.
Curved necklines demand staystitching to prevent distortion, especially along bias-cut areas where fabric stretches most.
Stitching The Main Body and Neckline
Align your four fabric layers and stitch the shoulder seams first—press them open, then topstitch 0.25 inches on each side for strength in this high-stress zone.
For the neckline, fold a narrow double-turn hem or attach your facing right sides together, then understitch close to the seam so facings stay invisible.
On knit or fleece poncho projects, switch to a zigzag or twin needle for stretch-capable seams that won’t pop when you pull the garment overhead.
Attaching a Cowl or Hood (Optional)
Want that extra layer of warmth draped around your face? Cowl construction and hood attachment transform a basic poncho into serious cold-weather armor—but neckline shaping demands precision to prevent fabric stretching during your sewing project.
- Build your cowl neck by folding fleece right sides together, then stitch the long edge into a tube using zigzag sewing techniques.
- Mark quarter points on both cowl and poncho neckline for even distribution.
- Insert the cowl through the neck opening, aligning right sides together.
- Pin densely around curves to maintain alignment during stitching.
- Reinforce stress points with multiple passes for seam reinforcement that won’t split.
Customizing and Finishing Touches
Once your poncho cape is stitched together, it’s time to make it truly yours—this is where function meets personal flair.
You can add practical pockets, play with decorative edges, or finish seams for that professional-grade drape and longevity.
The details you choose here will transform your basic silhouette into something that reflects your style and meets your needs.
Adding Pockets or Embellishments
Pocket placement transforms your sewing project from basic to functional—position external patch pockets about two inches below your bent elbow for easy access.
For embellishment techniques that break the mold, trace beadwork designs along existing stitching or scatter charms across the yoke.
Reinforce stress points with multiple topstitch rows and fusible interfacing around pocket openings to prevent sagging, ensuring your DIY clothing withstands real-world wear.
Creating Fringe or Decorative Edges
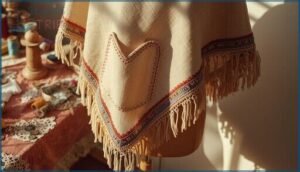
Edge embellishments push your fleece poncho beyond ordinary sewing projects—cut fabric fringe about three inches deep, spaced half an inch apart along the hem for maximum swing.
Yarn tassels bring texture: wrap strands around a book, fold in half, then pull through edge loops with a crochet hook.
Beaded accents and decorative trims add weight that improves drape while broadcasting your refusal to settle for basic.
Using Seam Binding for a Polished Look
Seam binding elevates your poncho from homemade to couture-level garment construction—rayon binding flattens bulky edges on fleece without distorting curves, while bias tape applications wrap necklines and hemlines in one continuous sweep.
Pin the narrower fold topside so your machine catches the wider layer beneath, then understitch close to prevent creep.
Polished hemlines signal serious sewing tutorials mastery, not beginner luck.
Tips for Caring for Your Poncho Cape
You’ve put real work into sewing your poncho cape—now let’s make sure it stays in great shape for years to come.
The way you wash, store, and maintain your garment will directly affect how the fabric drapes and how long those seams hold up.
Here’s what you need to know to keep your handmade piece looking sharp and ready to wear.
Washing and Drying Recommendations
Your poncho’s longevity depends on reading those laundry symbols. Dots indicate temperature, and wool care demands cool cycles around 30°C with mild detergent to prevent fabric shrinkage and fiber protection. Skip the dryer for wool; lay it flat instead.
Fleece fabric and cotton thrive with gentle, cold washes and low-heat drying methods. These sewing tips keep your fleece poncho looking sharp while honoring the textile crafts tradition.
Storing to Maintain Shape
Once your poncho is clean and dry, store it properly to preserve its drape and silhouette. Hanging stretches knits over time—fold yours flat instead, using breathable containers or cotton bags to prevent moisture buildup.
Here’s how to protect your creation:
- Fold flat rather than hang—gravity distorts shoulder lines and hems
- Control humidity between 30–50% to block mold growth
- Reshape periodically by gently adjusting necklines and edges before storing
Repairing and Maintaining Seams
Even the most expertly constructed seams rebel over time—fleece frays, stitches pop, and stress points surrender under wear. Reinforce vulnerable necklines with zigzag stitches for fabric stretch, catching loose threads before they unravel.
Even expertly constructed seams eventually fray and pop under wear, so reinforce vulnerable necklines with zigzag stitches before loose threads unravel
Your sewing machine becomes your repair station—match thread selection to the original weight, then restitch using techniques from your earliest sewing tutorials. Preventive seam reinforcement beats emergency fixes every time.
Frequently Asked Questions (FAQs)
What is the best type of fabric for a poncho?
You want warmth without weight—fleece fabric delivers synthetic insulation that traps heat brilliantly.
Wool blends offer breathable materials plus fabric durability, while eco-friendly options like cotton keep things light for textile craft adventures.
Does the size of the fabric affect the size of the poncho?
Absolutely—fabric dimensions directly dictate poncho length, arm coverage, and drape behavior. Wider pieces increase side flow and sleeve reach, while longer yardage extends front-back drop, letting you tailor body proportions and silhouette to your garment construction vision.
Is it possible to make a poncho without sewing?
Skip the stitching altogether—fleece selection makes no sew methods a breeze.
Cut fringe techniques, tie mechanical fastening knots, or use adhesive bonding for DIY fashion.
Your fabric poncho is now a truly liberated crafting project.
How do you add fringe to the edges of a poncho?
Cut strips directly into your poncho fabric about half an inch wide and four inches deep, or sew on pre-made fringe trim for instant edge drama—both methods transform plain hems into statement-making DIY fashion pieces.
How can I make my poncho more durable?
Your poncho won’t just survive—it’ll outlast everything in your closet.
Choose abrasion-resistant fabrics like ripstop nylon, reinforce stress points with bar tacks, add water-repellent coatings, and strengthen seams at corners and closures.
Can I make a poncho without a sewing machine?
You don’t need a machine—no sew methods using fabric glue, fusible web, or hand stitching work beautifully. Yarn ponchos skip sewing projects entirely, while blanket stitch gives you control over every seam without bulky equipment.
How do I adjust the fit for children?
Children practically swim in adult-sized ponchos—so start with kid size charts to nail poncho length and neck opening.
Reduce waist-length coverage, add ease allowance for movement, and tighten fit adjustments using child-specific fabric measurements and sewing patterns.
Whats the best way to waterproof my poncho?
You’ll want a DWR spray or wash-in waterproof coating for fabric treatments—plus seam sealing along stitched lines.
Silicone-based repellent finishes work brilliantly on canvas, while fleece fabric responds best to fluorocarbon formulas.
Can I convert my poncho into a blanket?
Yes—you can repurpose your poncho into a blanket through fabric conversion. Trim the neck opening to create a full rectangular piece, then finish raw edges with binding.
This textile recycling transforms fleece fabric into cozy, upcycled crafts perfectly suited for blanket making.
How do I add armholes to my design?
Mark armhole placement 2–3 inches from your neck edge, then draft a smooth curve mirroring your body’s natural side seam.
Cut through both layers, finish edges with bias binding, and test mobility before final stitching.
Conclusion
You’ve just unlocked a skill most people think requires a fashion degree and years of apprenticeship—but really, learning how to make a poncho cape takes nothing more than clean cuts, honest seams, and an afternoon of focused work.
That draped silhouette hanging in your closet now carries your own construction details, your fabric choices, your finishing touches. Wear it everywhere, adjust the pattern as you evolve, and remember: the best garments always start with someone willing to just begin.
- https://fabworks.co.uk/blogs/fabworks-blog-all-you-need-to-sew/free-poncho-pattern
- http://www.logicandlaughter.com/2012/12/reversible-poncho-cape-tutorial.html
- https://www.indoorshannon.com/sew-a-simple-chic-cape-sew-along-and-tutorial/
- https://thesewingthingsblog.com/2016/01/diy-poncho-sewing-tutoria/
- https://www.instructables.com/Hemming-and-Seam-Finishing/

