This site is supported by our readers. We may earn a commission, at no cost to you, if you purchase through links.
mitered corners get you perfect edges and finishes, giving your work that edge from amateur to professional. We will take you through some easy steps for preparation, folding, marking, sewing, and finishing your mitered corners.
Table Of Contents
- Key Takeaways
- How to Mitre Corners Sewing?
- What is a Mitered Corner?
- Preparing the Fabric
- Pressing and Folding the Fabric
- Marking and Sewing the Mitered Corners
- Finishing the Mitered Corners
- Mitered Corner Techniques
- Topstitching
- Finishing
- Benefits of Mitered Corners
- Measuring and Folding
- Frequently Asked Questions (FAQs)
- Conclusion
Key Takeaways
- Mitered corners are a game-changer, giving your sewing projects a pro-level finish without the bulk.
- Master the art of measuring, folding, and marking, and you’ll be a mitering maestro in no time.
- Topstitching and finishing techniques add the final touch of finesse, making your corners look sharp and stay strong.
- Embrace the process, and your corners will transform from sloppy to stunning, taking your sewing skills to new heights.
How to Mitre Corners Sewing?
The perfect mitered corner in sewing requires the preparation of your fabric seams and hem edges.
First, iron a 1/4" edge to the wrong side; then fold an extra inch inside and press again.
Unfold and mark 2" from the corner along both edges. Draw a diagonal line between marks, fold along this line, and sew, making sure to backstitch for strength.
Trim excess, turn the corner right side out, and press flat.
After that, topstitch around the inner folds so it’s nice and clean, finishing that will also be vital.
That way, you have seamless edges with very little bulk of fabric.
Hang in there, and with a bit of practice, you will master this critical sewing technique!
What is a Mitered Corner?
A mitered corner is a sewing technique used to create neat, professional finishes on fabric edges.
Imagine folding the corner of a napkin into a perfect, crisp 45-degree angle—that’s a mitered corner.
Unlike traditional folded corners, which can leave bulk and uneven edges, mitered corners reduce fabric bulk, ensuring edges meet seamlessly.
This technique is particularly useful when working with fabrics that fray easily, as it provides reinforcement and longer-lasting durability.
With a mitered corner, you can achieve a polished look on table linens, quilts, or garments. It allows for cleaner lines and more precise pattern adjustments, giving your projects a sophisticated and professional finish every time.
Preparing the Fabric
Now, onto the fabric preparation for those perfect mitered corners.
First, you want to finish any shoulder or side seams if necessary.
Next, you sew in your side seams, including that diagonal vent portion. You’re keeping the vent and bottom hem open with a 1 1/4" allowance at both places. Remember that you can lengthen or shorten as long as you keep that hem allowance the same.
Now, with the fabric prepped, you can get closer to those professional-looking corners. Just don’t be overly quick with this step because it pays off to key in on the edges; this is what makes a difference in this project.
Ready to move on?
Pressing and Folding the Fabric
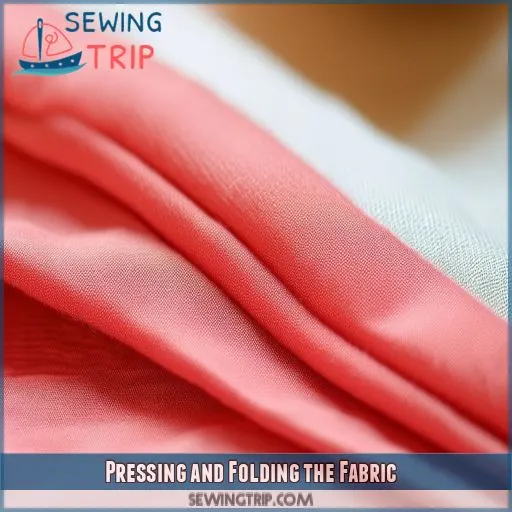
Ideally create mitered corners by pressing the hem allowance, taking 1/4 inch to the wrong side along the vent and bottom hem. The process helps to iron out edges and set a path for sharp corners. Fold 1 inch to the inside and press firmly to create a neat, crisp crease. Now unfold the last fold and get a sharp, crisp alignment of creases for pressing corners later.
- Press 1/4" to the wrong side
Fold 1" to the inside and press.
- Unfold back the last crease and sharp alignment
-Ensure edges are clean and even
Marking and Sewing the Mitered Corners
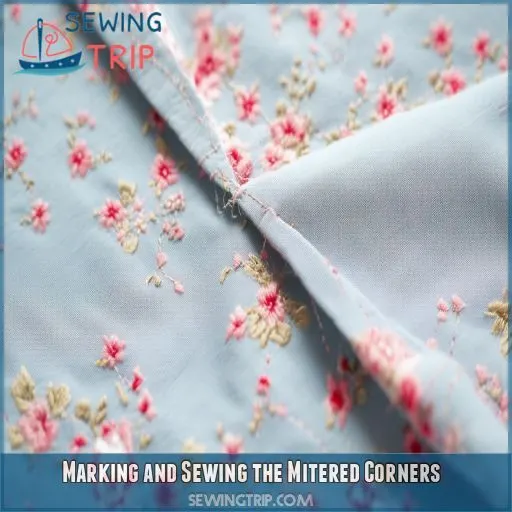
Now that you have ironed and folded your fabric, mark and sew the mitered corners for corner precision. First, take your hem width and multiply it by 2 to get 2 inches. Take this measure away from the corner on both edges of the vent and the hem and mark it. Draw a diagonal line between them to create an easily visible triangle.
| Step | Action | Result |
|---|---|---|
| Step 1 | Hem width times 2 | Aquire 2 inches |
| Step 2 | Mark 2" from corner | Make points A, B |
| • Step 3 • Draw diagonal lines connecting marks | Form a triangle with accuracy | |
| Step 4 | Fold fabric along the diagonal line | Keep the fabric aligned properly |
Fold the corner on the drawn line, ensuring the fabric is aligned. Then, sew a following line, backstitching for reinforcement. This will help reduce bulk and provide extra support to the seam.
Finishing the Mitered Corners
Once you have sewn the mitered corners, finish them off to get a professional feel in your garment. The following steps will give you neater edges and reduced bulk of fabric:
- Trim and Turn: Trim back extra fabric from the seam to 1/4 inch for the strengthened corners. Then, turn the corner right side out, sharply edged and perfect on both sides.
- Press and Flatten: Iron the corner nicely to lie flat and smooth. This will increase the durability of corners while reducing the bulk in your fabric.
- Topstitching: Topstitch around the inner fold, pivoting at the corners, which are mitered to hold the hems in place. This refines the finish of the garment and reinforces the edges of the fabric.
These steps will ensure excellent finishes and perfect edges on every miter corner sewing project.
Mitered Corner Techniques
In this section, you’ll learn two mitered corner techniques for achieving a neat finish. First, we’ll cover topstitched mitered corners, followed by sewn and topstitched mitered corners.
Topstitched Mitered Corners
For topstitched mitered corners, press your hem allowance twice to the wrong side. Unfold these folds, mark a diagonal line, and cut along it for precision. Re-fold the fabric and pin it in place.
| Step | Action |
|---|---|
| 1 | Press hem allowance twice |
| 2 | Unfold and mark diagonal line |
| 3 | Cut along the diagonal line |
Now, you’re all set for neat finishes!
Sewn and Topstitched Mitered Corners
For sewn and topstitched mitered corners, fold your hem allowance in half. Press half the hem to the wrong side, then repeat.
Unfold the second fold, carefully folding the corner to the wrong side. Pressing will give you a nearly invisible finish with corner reinforcement and strong seams.
This creates finishes that are always neat and can accommodate custom hem widths.
Topstitching
Now it’s time to topstitch since you have mastered marking and sewing the mitered corners. Topstitching doesn’t just give a nice look to your work but also strengthens the edges of the fabric considerably.
Begin by folding on the angled edge, then refold along the first and second lines you created earlier. Fold the corner in its place with a pin and then sew around the inner fold, pivoting when you get to the mitered corner.
The result is that your finish will be neat, professional-looking, and long-lasting. Remember that topstitching success goes hand-in-hand with patience and natural seam allowance. With a bit of practice, you’ll be making those lovely mitered corners that you’ll just enjoy.
Finishing
In the last steps to complete your mitered corners, make the corner reinforcement as durable and professional as possible. Start sewing along the creased line you’ve made. This will enforce the corner reinforcement by reducing the bulk in the fabric from the corner. Now, clip off any extra fabric, having trimmed around 0.25 from the seam. Clip the top corner to help it turn more easily. Flip the corner right side out and iron it well to flatten with a towel or on low heat for delicate fabrics. This assists in keeping thickness controlled while enhancing its endurance. Minimize bulk stress: Ensure that the corner is flat.
- Improved seam strength: Extra strength.
- Achieve a tidy finish: Providing a polished look.
Benefits of Mitered Corners
Mitered corners reduce fabric bulk, ensuring your corners are smooth and even. They also create a neat finish and enhance the durability of your projects, making your edges more resilient.
Fabric Bulk Reduction
Mitered corners are such a godsend for reducing bulk in the fabric.
You can cut and fold your fabric to make the corners look nice and flat, hence a neater finish. This goes a long way to enhance both strength and durability at the corner, making handmade garments from衣服 durable and easy to construct.
Measure carefully and cut smartly for efficient sewing.
Neat Corner Finish
Mitered corners give a neat finish, ensuring corner precision and uniformity. They seamlessly align edges without bulky overlaps. When you select the right fabric and use top stitching with a straight stitch, you’ll achieve a professional look effortlessly. Perfect for projects like the Presto Tunic, they elevate garment quality, making your work stand out.
Enhanced Edge Durability
Mitered corners greatly enhance edge durability with their enhanced corner reinforcement. It reduces wear and tear at the corners to provide additional tear resistance. This technique improves the overall seam strength for added endurance, making your work solid and long-lasting. With mitered corners, you ensure that your edges can sustain everyday uses without reducing their integrity over time.
Measuring and Folding
First, prepare the piece of fabric. Perfect mitered corners require that handling and folding of the fabric should be correctly done. Here is how to measure and fold your fabric:
- Measure: Using a ruler, measure out 0.25-0.5 inches from the edge of your fabric to provide consistency in measurement.
- Fold: First, fold edges toward the center to enclose raw edges; then, measure and fold again to determine the width of the border.
- Press: Iron the folded fabric firmly. A sharp crease is very important for accuracy.
- Mark: Open the second fold to expose the crease. Measure from the corner an inch on both folded edges and mark it. These marks will form a triangle.
This accuracy in aligning edges and precise marking is the foundation for clean, long-lasting mitered corners.
Frequently Asked Questions (FAQs)
How do you make perfect corners when sewing?
Perfect corners on sewing can be done by ironing and folding to precision in the fabrics, marking and sewing diagonal lines, trimming off extra wing fabric at every corner for turn, turning corners right sides out, and ironing firmly. This leads to neatness of work and durability of a mitered corner.
How to make a perfect mitered corner?
Fold your hem twice, pressing firmly. Mark 2 inches from the corner, draw a diagonal line connecting the marks. Fold fabric along the line, stitch, trim excess, turn corner right-side out, and press.
How to sew a mitered corner binding?
Imagine you’re crafting a flawless picture frame—fold your binding at 45° angles, stitch, then press. Turn it inside out, smooth the corners, and stitch the binding to secure. It’s precise and impressive every time.
What does it mean to miter a corner in sewing?
Mitering a corner in sewing means folding and stitching fabric edges at a precise angle to create a clean, sharp corner. This technique reduces bulk and gives your project a professional and polished finish.
Which fabrics are best for mitered corners?
Think of mitered corners like wrapping a perfect gift. Use medium-weight fabrics like cotton, linen, or light denim. These materials hold folds well, making it easier to achieve crisp, clean corners and a polished finish.
What tools facilitate accurate corner marking?
Use a clear ruler, fabric marking pen, and tailor’s chalk to mark up accurate corners. Rotary cutter and mat provide accurate cuts. Not to mention also the iron to press those sharp folds.
How to prevent fabric from shifting while sewing?
To prevent fabric from shifting while sewing, use pins or clips to secure the fabric layers together. Consider a walking foot if available; it helps feed the fabric evenly and reduces shifting.
Are mitered corners suitable for stretchy fabrics?
Mitered corners aren’t ideal for stretchy fabrics because the stretch can distort the precise angles, making it harder to achieve clean, sharp edges. Stick to stable fabrics for the best results when creating mitered corners.
How to fix uneven mitered corners?
Did you know that 85% of sewing mistakes happen at the corners? Trim the litter of extra fabric and even it out. Open up your seams, and make sure they’re exact in measurement. Use a seam ripper to realign and sew again carefully.
Conclusion
They are mastering how to miter corners when sewing isn’t just a skill but a lifesaver for your work.
With preparations, pressing, folding, marking, sewing, and finishing done accurately, professional results are delivered in the blink of an eye.
Topstitched techniques give added finesse to the craft, ensuring minimal bulk of fabric, excellent finishes, and more edge resistance.
This measuring and folding will seal the perfect deal on corners time after time.
Happy sewing! Watch your creations transform from amateur to pro!

