This site is supported by our readers. We may earn a commission, at no cost to you, if you purchase through links.
Start by scanning those mysterious symbols: cutting lines guide your scissors, notches help align pieces perfectly, and grainlines guarantee your fabric drapes just right.
Grab your measuring tape and check the size chart—pattern sizes aren’t like store-bought clothes! Pro tip: pattern measurements include design ease, so you’ll have room to move.
Break down the instructions step by step, and don’t stress about perfection. Every sewing master started exactly where you are now. Your first project is waiting to come to life.
Table Of Contents
Key Takeaways
- You’ll master pattern symbols like cutting lines, notches, and grainlines by treating them as your fabric navigation map, guiding you to precision in every garment you create.
- Don’t rely on standard clothing sizes; instead, measure yourself carefully and consult the pattern’s specific size chart to ensure a custom fit that celebrates your unique body shape.
- Learn to decode finished garment measurements, understanding that designers intentionally build in "design ease" to give you comfortable movement and creative room in your clothing.
- Strategically plan your fabric layout to minimize waste, using the pattern’s lay plan as a blueprint for efficient cutting and transforming every fabric scrap into a potential creative opportunity.
Sewing Pattern Symbols
Ever wondered why those mysterious markings on sewing patterns look like secret code?
Don’t worry—you’ll soon crack the symbols that’ll transform you from a confused beginner to a confident sewist who can navigate any pattern with ease.
Cutting Lines
Ever wondered why cutting lines are the secret sauce of sewing success?
These magical boundary markers on your pattern pieces are your roadmap to a perfectly constructed garment.
Think of cutting lines as your sewing GPS, guiding you exactly where to slice your fabric with precision.
They’re not just lines—they’re your blueprint for turning flat fabric into a stunning piece of wearable art. cutting lines are essential pattern navigators.
Grab your sharpest scissors and let’s decode these essential pattern navigators that transform raw materials into fashion magic.
Notches
Mastering notches is your secret weapon in pattern perfection! These tiny triangles and diamonds are more than mere marks – they’re your roadmap to precision sewing.
- Decode different notch types like a pro
- Align pattern pieces with confidence
- Transform confusing symbols into sewing magic
Match notches carefully, and watch your garment come together seamlessly, turning potential frustration into fabric finesse.
Grainline
Your pattern’s grainline isn’t just a random line—it’s your fabric’s roadmap to perfect draping.
This dotted guide shows the true direction of fabric threads, helping you align your pattern pieces for professional-looking results.
Respect the grainline, and your garment will thank you.
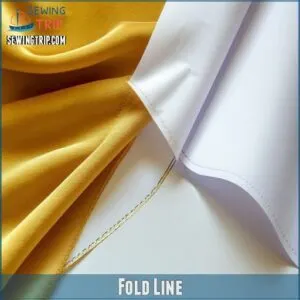
Fold Line
Pattern’s fold lines are your secret weapon for precision cutting.
These subtle guidelines tell you exactly where to fold fabric, creating mirror-image perfection for darts, pockets, and tricky garment details.
Mastering fold line placement is your ticket to professional-looking sewing projects.
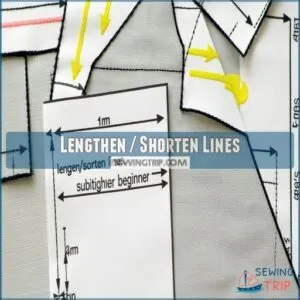
Lengthen / Shorten Lines
Ever wondered how to customize your sewing pattern’s fit? Lengthen/shorten lines are your secret weapon for perfect garment dimensions.
- Locate these magical lines on pattern pieces
- Adjust bodice or sleeve length effortlessly
- Create custom-fit clothing without advanced skills
- Mark new cutting lines with precision
- Expand pattern flexibility for your unique body
Sewing Pattern Size Guide
Ready to crack the code of sewing pattern sizes and kiss goodbye to frustrating, ill-fitting projects?
When you learn how to measure yourself accurately and understand pattern sizing charts, you’ll transform your sewing game and create garments that fit like they were made just for you.
Loose Fit Bodice
Breathing room in a loose-fit bodice is your secret weapon for comfort and style.
Sewing patterns with extra ease let you move freely, transforming fabric into a canvas of personal expression and relaxed elegance.
Understanding the perfect balance of wearing ease is key to finding a comfortable and visually appealing loose-fit bodice.
Tight Fit Bodice
When diving into tight fit bodices, you’ll need precise measurements that reveal your body’s unique contours, and remember to account for your ease allowance how to measure sewing for best comfort.
- Under bust measurement
- High bust measurement
- Waist measurement
- Full bust measurement
Master these, and you’ll nail that perfect fit!
Lower Body Garments
Your lower body sewing pattern’s success hinges on hip measurements.
From skirts to shorts, nailing the right fit means measuring your widest point.
Choosing a pattern that’ll make your legs look like a million bucks.
Close Fitting Garment
Close-fitting magic demands precision in your sewing journey.
Snag the perfect silhouette by crafting a muslin first, checking every curve and contour.
With careful pattern grading and strategic ease adjustments, you’ll transform fabric into a second skin that hugs your body’s unique landscape, celebrating your form with expert fitting tips.
Outwear Garment
After wrestling with fitted bodices, you’re ready to level up to outwear patterns.
Sizing becomes your trusty sidekick when crafting jackets and coats.
Outwear fabrics demand extra room for layering, so pattern measurements include generous breathing space.
Pro tip: check the finished garment measurements to nail the perfect, comfortable fit without looking like you’re swimming in fabric.
You can explore a variety of outwear sewing patterns available online to find the perfect fit for your project.
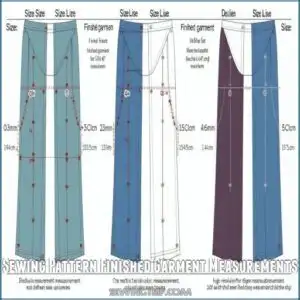
Sewing Pattern Finished Garment Measurements
When you’re sewing a new garment, understanding finished garment measurements is your secret weapon for creating clothes that fit perfectly.
These measurements tell you exactly how a pattern will look when sewn, helping you choose the right size.
And make smart adjustments before you cut a single piece of fabric.
Designed Garment
Ever wondered why your sewing pattern measurements seem like they’re playing hide and seek? Pattern designers sprinkle a magical ingredient called "design ease" to give your garment some breathing room. Here’s the scoop on why those numbers don’t match up:
- Fabric whispers its own style story
- Design lines dance with imagination
- Comfort trumps strict measurements
- Creative space matters more than numbers
The finished garment measurements intentionally stretch beyond the size chart, creating room for movement, personal flair, and that perfect fit. Designers strategically add extra space, transforming a flat pattern into a living, breathing piece of wearable art that moves with you, not against you.
Fabric Width
Reveal the fabric width magic.
A standard fabric width chart usually ranges from 32-60 inches, and you can find an all-encompassing fabric width chart to help you navigate different materials more efficiently.
Your sewing success hinges on understanding how wide your fabric really is.
Different materials offer unique widths, from slim cotton to generous denim.
Knowing this helps you strategically place pattern pieces and minimize waste, turning every inch into potential creativity.
Pattern Size
Want to nail your pattern size? Pattern sizing isn’t store-bought sizing – it’s a whole different ballgame!
- Measure your body accurately
- Check the design’s intended ease
- Understand the pattern’s fit guidelines
Size charts are your roadmap to sewing success.
Sewing Pattern Fabric Lay Plan
Master the art of fabric layout with your sewing pattern’s lay plan, which is like a treasure map guiding you.
You’ll strategically place pattern pieces to minimize fabric waste and maximize efficiency.
Save money, reduce fabric scraps, and set yourself up for sewing success.
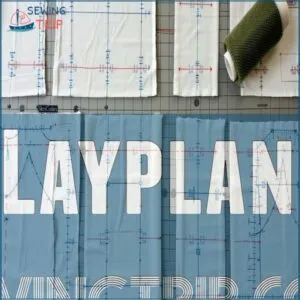
Layplan
The fabric-saving layplan is your secret weapon for maximizing every precious inch of material.
It strategically guides you in placing pattern pieces to minimize waste, showing exactly where to position each piece on your fabric.
With clear markings for grainline and cutting lines, you’ll master pattern placement like a pro, turning fabric efficiency into an art form.
Fabric Waste
Every sewist encounters fabric scraps – your creative playground for minimizing waste! Here’s how to transform those remnants into treasure:
By using a fabric layout planner, you can optimize your fabric usage and reduce waste with a well-planned fabric lay plan.
- Craft small accessories from pattern pieces
- Donate usable scraps to local crafters
- Create quilting squares or embellishments
- Compost natural fiber leftovers
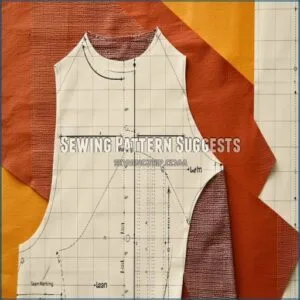
Sewing Pattern Suggests
Cutting through fabric waste isn’t just about saving scraps—it’s about smart sewing strategy.
Your pattern’s suggested yardage might feel like a rough guess, but it’s more of a starting point.
Pro tip: always snag a bit extra fabric than recommended. Weird quirks like pattern nap, print matching, or unexpected alterations can gobble up more material than you’d expect.
Skill level matters too—beginners might need more wiggle room for mistakes.
Think of those extra inches as your sewing safety net, giving you breathing room to experiment and craft your perfect garment without panic.
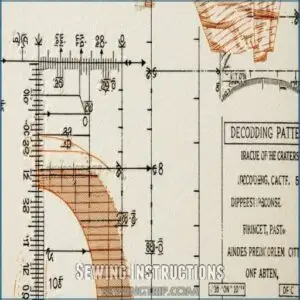
Sewing Instructions
Because sewing can feel like cracking a secret code, mastering pattern instructions is your ticket to crafting confidence!
- Gather your arsenal: printed instructions, pattern pieces, and a can-do attitude
- Study the pattern markings carefully, decoding each symbol’s hidden meaning
- Break down instructions step-by-step, treating each section like a mini-mission
When you first unfold those sewing pattern instructions, don’t panic! Seam allowances and stitch types might look intimidating, but they’re just road signs guiding your fabric journey.
Take a deep breath and remember: every expert started exactly where you’re now. Troubleshooting tips are your best friend – they’ll help you handle tricky spots and turn potential mishaps into proud moments of creative triumph. Your fabric, your rules, and these instructions are just the map to your handmade destination.
Frequently Asked Questions (FAQs)
How do you read the word sewing?
When you say "sewing," pronounce it as "soh-ing" with a smooth blend of the "s" and "ew" sounds.
It’s a craft that transforms fabric into beautiful, functional pieces.
You’ll love creating stitch by stitch.
How to understand sewing pattern sizes?
Understanding sewing pattern sizes is like decoding a treasure map.
Measure your body precisely, compare to the chart, and don’t panic if you’re between sizes.
Choose the size that fits your largest measurement, and you’ll sew success.
How to use the word "sew"?
You’ll "sew" by guiding your fabric under a needle, stitching pieces together with thread.
It’s like creating magic with cloth, transforming flat fabric into something beautiful and functional.
that tells your unique story.
What does 45 and 60 mean on a sewing pattern?
45 and 60 on a sewing pattern refer to fabric width.
45-inch fabric is standard for smaller projects.
while 60-inch fabric works better for wider garments like coats or dresses that need more material.
What is the difference between a woven and a knit fabric?
Ever wondered why fabrics behave differently?
Woven fabrics are made from interlaced threads at right angles.
Knit fabrics are created by looping yarns, giving them stretch and flexibility for comfort.
What is the difference between a pattern size and a finished garment measurement?
Pattern size tells you which size to cut.
Finished garment measurement shows the actual size of the completed clothing after sewing.
They’re different, so always check both to guarantee a perfect fit for your project.
How do I know how much fabric I need for a project?
When Sarah wanted to sew a vintage dress, she learned fabric requirements depend on pattern size, design variation, and fabric width.
Check the pattern envelope’s yardage chart.
Measure carefully, and always buy a little extra to avoid last-minute fabric panic.
How do I lay out my fabric to minimize waste?
Fold your fabric strategically, matching selvage edges carefully.
Use pattern layout diagrams as your guide.
Pin or weight pieces efficiently.
Align grainlines precisely to minimize waste and guarantee your garment hangs perfectly.
What are the different types of notions I might need for a project?
You’ll need essentials like zippers, buttons, elastic, thread, and interfacing.
Snaps, hooks, bias tape, and stabilizers can level up your sewing game.
Choose notions that match your fabric and project’s style for a professional finish.
How do I fix common sewing machine tension problems?
Tangled threads meet smooth stitches: adjust your machine’s tension by testing on scrap fabric.
Tweak the upper and bobbin thread settings, watching for balanced, even stitches that glide like silk across your project.
Conclusion
Unraveling the mystery of how to read sew is like holding a treasure map to your dream wardrobe.
You’ve learned the language of patterns, from cryptic symbols to measurement magic.
Trust your newfound skills and embrace each stitch as a step toward mastery.
Remember, every sewing legend started right where you’re now. With patience and practice, you’ll transform flat paper patterns into stunning garments that tell your unique story. Every sewing legend started where you are now. Stunning garments will be created with practice.


