This site is supported by our readers. We may earn a commission, at no cost to you, if you purchase through links.
 To learn how to sew a kick pleat, you’ll draft pattern extensions about 1.5 inches wide on both seam allowances, then carefully mark your seamlines and hemlines.
Start with medium-weight woven fabric that holds crisp folds, cut your pieces precisely, and sew the extensions before pressing sharp corners with an iron.
The secret lies in invisible stitching that secures the pleat fold without visible threads, plus strategic interfacing at stress points for durability.
Once you master the pressing techniques and proper seam finishing, you’ll transform any restrictive garment into one that moves gracefully with your every step.
Table Of Contents
Key Takeaways
- Draft your pattern with 1.5-inch extensions on seam allowances to create crisp , movement-friendly kick pleats.
- Choose medium-weight woven fabric and match your notions for structure and a smooth finish.
- Press sharply, use invisible stitching, and reinforce stress points with interfacing for a professional look.
- Pay attention to seam and edge finishing techniques so your pleat holds its shape and moves freely.
Materials Needed for Sewing a Kick Pleat
You’ll need a few essential tools and the right fabric to sew a kick pleat that stays sharp and moves well.
Gather everything ahead of time—nothing slows you down like missing your favorite pair of fabric scissors when you’re on a roll.
Essential Tools and Supplies
When you’re ready to sew a kick pleat, start with the basics: reliable Sewing Machines, sharp Fabric Cutters, steady Measuring Tools, and a sturdy Ironing Board.
Keep your favorite Sewing Notions—pins, chalk, and seam rippers—within arm’s reach. After all, even a smooth sewing journey starts with the right toolbox and a hint of patience!
Having the right sewing machine is essential for a successful project.
Recommended Fabrics and Notions
Pick sturdy yet flexible fabrics—think medium-weight wovens; they hold a crisp fold but move with you.
For notion selection, match thread colors closely to your fabric. Choose interfacing options that add structure without stiffness for flawless pleat sewing.
Don’t forget the right sewing tools; a good needle and sharp scissors make kick pleat sewing smoother. Mastery hides in the details!
When selecting fabrics, understanding medium weight fabrics is essential for achieving the desired texture and drape.
Optional Equipment for Professional Results
Serious about mastering kick pleat sewing techniques? Upgrade your sewing setup with these pro tools. A smooth operation beats frustration every time.
Here’s what levels up your pleat sewing game:
- Modern Sewing Machines with precision stitches
- Reliable Iron Press
- Adjustable Sewing Tables
- Rotary Fabric Cutters
- Steam Generators for crisp results
These boost control and finish. Having the right essential hand sewing tools is vital for achieving professional-looking results. With the right tools, you can ensure a smooth operation.
How to Draft a Kick Pleat Pattern
You’ll draft a kick pleat pattern by marking out new seam and hem lines, then adding precise extensions to your pattern piece.
Don’t worry if your lines aren’t perfect—everyone’s ruler slips now and then, but accuracy makes assembling the pleat much easier, and it is part of ensuring a good outcome.
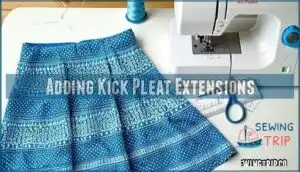
Adding Kick Pleat Extensions
Ever wondered how pros nail that perfect kick pleat? Extension techniques are your secret weapon.
To start, add parallel extensions—usually 1.5 inches wide—right on both seam allowances. This simple pattern modification creates room for movement and sharp lines.
With careful pleat construction, the right seam allowances, and smart fabric selection, sewing a kick pleat becomes smooth, not tricky.
Understanding the basics of skirt design patterns is essential for achieving a professional finish.
Marking Seamlines and Hemlines
A sharp kick pleat starts with accurate measuring.
Use your ruler and pencil to clearly mark each seam allowance and hemline on the wrong side of your fabric.
Consistent hemline marking helps guarantee your pleat sits just right—a detail that makes sewing a kick pleat feel more like art than guesswork.
Trust precise pattern drafting for pro-level results every time.
Using Commercial Vs. Self-Made Patterns
Once you’ve marked seamlines and hemlines, it’s time to weigh Pattern Selection.
Commercial patterns offer accuracy and Sewing Ease, but self-made patterns give you unmatched Design Flexibility.
To make the right call:
- Prioritize Fabric Choice for best fit.
- Double-check lines—Accuracy Matters!
- Don’t fear experimenting; mastering how to sew a kick pleat gets easier.
Step-by-Step Kick Pleat Sewing Instructions
You’ll sew a crisp, professional kick pleat by following each step in order, so don’t skip ahead even when you’re tempted.
With a little patience, you’ll see sharp corners and movement-friendly hems take shape before your eyes.
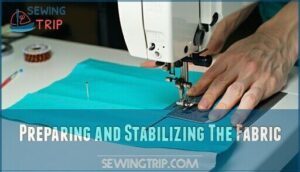
Preparing and Stabilizing The Fabric
Once your kick pleat pattern is set, lay your fabric flat, lining up the grain for smooth pleat sewing tips. Cut with care—Fabric Cutting matters! Fuse your interfacing or stabilizer to the wrong side as needed for structure.
A well-pressed, prepared base keeps pleats crisp. Proper fabric preparation methods are essential for achieving professional-looking results.
See below for a handy checklist:
| Task | Tip | Common Pitfall |
|---|---|---|
| Grain Alignment | Match grain lines | Twisted pleats |
| Fabric Preparation | Pre-wash, press | Shrinking post-sew |
| Interfacing Tips | Test on scrap first | Bubbling or stiffness |
Sewing Pleat Extensions and Hem Edges
Once your fabric stabilization is done, it’s time to sew those pleat extensions.
Align the edges, stitch with care, and finish raw bits using serged or zigzag stitches for a professional touch.
For all your pleat edge finishing, fold the hem allowance carefully under, and sew in place. Remember, smooth hems and neat stitching give your kick pleat real swagger! To achieve this professional finish, understanding the proper use of a sewing machine is essential.
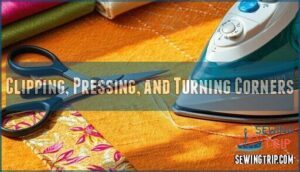
Clipping, Pressing, and Turning Corners
A clean finish starts with careful corner clipping—snip just enough to avoid any bulky seams.
Sharp corners start with precision—clip just enough to eliminate bulk without weakening your seams
Press those seams open, letting your iron do the heavy lifting for crisp lines.
When turning corners, slip in a point turner or even a pencil, you’ll get pro-level fold techniques and edge finishing that make sewing kick pleats and constructing a kick pleat skirt feel like magic.
Topstitching and Securing The Pleat
With your pleat folded just so, go along the seam and try edge stitching close to the fold—think of it as a subtle handshake for Pleat Security.
For a crisp finish, remember these Topstitch Tips:
- Stitch from the outside for neat results
- Anchor the top with off-angle stitches
- Press well after every step
That’s expert Seam Finishing!
Tips for a Crisp, Professional Kick Pleat
You want that kick pleat looking sharp and polished, not like it spent a week at the bottom of your laundry basket.
Use these expert tips to keep your pleat crisp, so your garment stands out for all the right reasons.
Pressing Techniques and Point Turners
Ever wrestled with stubborn corners? That’s when Seam Pressing and a trusty point turner shine.
Glide your tool gently into each pleat corner for Crisp Folding and Sharp Edges. A good iron—your sidekick—makes Fabric Smoothing easy, giving every sewing kick pleat skirt a just-tailored polish.
Want true mastery in how to sew pleats? It’s all about pressing and precision!
| Technique | Why It Matters |
|---|---|
| Seam Pressing | Locks in shape |
| Point Turning | Defines corners |
| Fabric Smoothing | Boosts sharpness |
Finishing Seams and Edges
Don’t let ragged edges sabotage your masterpiece.
Secure your seams with Seam Finishing or Edge Binding to lock out frays, then reinforce the kick pleat with Hem Sealing.
A sharp Fold Pressing turns messy fabric into crisp lines.
These tools free you from chaos, whether you’re sewing a pleat, starting a kick pleat tutorial, or mastering how to sew pleats.
Securing The Pleat Fold Invisibly
With crisp seam finishing and edge binding behind you, it’s time to master invisible stitching for that polished kick pleat look.
Invisible securing means no surprise threads peeking out.
Try these five moves:
- Tiny hand sewing tack at the pleat top.
- Delicate thread bars.
- Precise basting first.
- Careful pleat folding.
- Inspect for perfect finish.
To achieve a professional result, consider following proper seam allowance guidelines for a flawless kick pleat.
Sewing Kick Pleats With Linings
Someone new to sewing kick pleats with linings should remember the sewing order makes all the difference.
First, join the lining fabric to your main piece—leave room for the pleat depth.
Fuse interfacing at high-stress spots for structure.
Layered construction trims bulk, so follow your kick pleat sewing guide for smooth results.
Pleat sewing instructions help even newbies master this polished, refined look.
Understanding the importance of interfacing materials is essential for achieving a professional finish in sewing projects.
Kick Pleat Benefits and Design Variations
You’ll discover that kick pleats offer more than just stylish tailoring—they transform how your fitted garments move and feel.
These clever design features solve the age-old problem of restricted movement in pencil skirts and dresses with a polished, professional finish while maintaining that polished, professional look you want.
Enhanced Mobility and Comfort
Stepping into your garment feels like gaining Freedom Movement – your kick pleat transforms tight skirts into comfortable companions that bend with your Body Flex.
This kick pleat sewing guide shows how proper Garment Ease prevents fabric strain, while pleat sewing instructions guarantee seamless Seam Stretch.
Your kick pleat pattern sewing creates natural Fabric Flow, making sewing pleats for beginners worthwhile.
The kick pleat sewing method delivers mobility without compromising style.
Polished, Tailored Garment Finish
Beyond comfort, kick pleat sewing methods create that coveted custom silhouette professionals admire.
Your garment finishing transforms from homemade to high-end when you master these sewing techniques. Smart fabric selection paired with proper pleat sewing patterns gives you professional results every time.
The kick pleat pattern sewing approach guarantees your dress closes seamlessly when stationary, mimicking ready-to-wear quality that’ll fool even seasoned sewists, with a finish that embodies high-end style.
Placement Options for Skirts and Dresses
Your placement choice dramatically affects both your garment silhouette and walking comfort. Center back remains the classic go-to for pencil skirts, while side pleats work beautifully in A-line designs.
- Center Back – Perfect for fitted skirts needing stride room without disrupting front lines
- Side Pleats – Ideal for uniform skirts requiring balanced expansion and symmetrical movement
- Front Slits – Modern choice for statement pieces prioritizing contemporary style over tradition
- Dual Placement – Multiple pleats distribute stress evenly across hem details for durability
- Pattern Integration – Commercial pleat sewing patterns often specify preferred placement for your chosen design
When you sew kick pleat dress styles, consider how sewing kick pleat fabric behaves differently at various seam locations for best results. Understanding pattern alteration techniques is essential for achieving a perfect fit in your garments.
Creative Alternatives and Decorative Pleats
While kick pleats provide classic functionality, you can explore pleat variations that transform your garment into textile art.
Try accordion or sunburst pleats for dramatic movement, or add decorative stitches along pleat edges for pleat embellishments.
Fabric manipulation techniques like pintucks create subtle texture, while graduated pleats offer dynamic silhouettes.
These creative approaches elevate basic sewing kick pleat fabric into custom pleat sewing for clothes masterpieces.
Frequently Asked Questions (FAQs)
Can I add a kick pleat to a dress instead of just a skirt?
Like a secret weapon in your sewing arsenal, you can absolutely add kick pleats to dresses.
They work perfectly in fitted dresses, providing that same elegant movement and comfort you’d get in skirts.
How do I adjust the length of the kick pleat extensions?
Adjust your extension length by measuring from the hemline to your desired ending point, typically above the knee.
Cut the extension’s upper edge at a 45-degree angle from that measurement point.
Can you sew kick pleats on stretchy fabrics?
Stretchy fabrics work beautifully for kick pleats, but you’ll need interfacing to stabilize the seam area. The fabric’s natural stretch actually helps the pleat move gracefully while maintaining structure.
How wide should kick pleat extensions be?
You’ll want to make your extensions about 1½ inches wide for most garments.
This standard width gives you enough fabric to create the pleat while maintaining clean lines and proper proportions in your finished piece.
Whats the difference between kick pleats and box pleats?
Kick pleats create a single fold that opens from one seam, giving you walking room while maintaining a sleek silhouette.
Box pleats form two opposing folds that create a structured, boxy appearance with more fabric fullness.
Can kick pleats work on curved hemlines?
Ironically, curves seem to rebel against kick pleats, but you can absolutely make them work together.
The secret lies in adjusting your pleat extensions to follow the curved hemline’s shape.
You’ll need to redraft the pattern pieces to match the curve, ensuring smooth movement and professional results.
How do you fix puckered kick pleat seams?
Puckered seams usually mean you’re pulling the fabric while stitching.
Re-press your kick pleat with steam, then carefully restitch using your machine’s even feed foot to prevent fabric stretching during construction.
Conclusion
With the grace of a dancer’s final bow, mastering how to sew a kick pleat transforms your sewing skills forever.
You’ve learned the essential steps from drafting pattern extensions to securing invisible stitches that create movement without bulk.
Remember that crisp pressing and strategic interfacing make all the difference between amateur and professional results.
Practice these techniques on scraps first, then watch as your skirts and dresses gain elegant mobility.
Soon you’ll wonder how you ever created fitted garments without this game-changing technique.
- https://www.youtube.com/watch?v=Li9nzLxFiBU
- https://sewoverit.com/blogs/behind-the-seams/diy-kick-pleat
- https://theavidseamstress.com/joining-the-back-kick-pleat/
- https://www.threadsmagazine.com/2012/10/31/how-to-sew-a-basic-kick-pleat
- https://www.reddit.com/r/sewing/comments/s35f2n/whats_wrong_with_the_kick_pleat/


