This site is supported by our readers. We may earn a commission, at no cost to you, if you purchase through links.
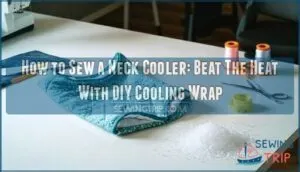
Cut a fabric strip about 36 inches long by 4 inches wide, then sew it into a tube with the seam on the inside.
Turn the tube right-side out, add polymer crystals through small openings, and seal the ends.
The crystals expand when soaked in water, creating an evaporation-based cooling system that’ll keep you comfortable for hours.
While the concept sounds simple, getting the crystal distribution just right and choosing the proper fabric makes all the difference between a soggy mess and cooling relief that lasts.
Table Of Contents
Key Takeaways
- You’ll need cotton fabric and polymer crystals – Choose 100% cotton in cool colors for breathability, and buy water-absorbing crystals from craft stores for the cooling effect.
- Create a 36-40 inch fabric tube with proper seams – Cut your fabric 4½ inches wide, sew it into a tube with ¼-inch seam allowances, and turn it right-side out for a professional finish.
- Distribute crystals evenly in compartments – Use only ⅛ to ¼ teaspoon per section, stitch across the center to create pockets, and massage the tube after soaking to prevent clumping.
- Soak for 30 minutes before each use – The crystals expand up to 100 times their size when hydrated and provide 3-5 hours of cooling through evaporation before needing reactivation.
Gather Materials and Tools
Before starting your cooling wrap project, you’ll need specific fabric choices and materials.
Select 100% cotton fabric in cool colors like navy or olive, as cotton provides the best breathability for hot weather comfort.
Purchase water-absorbing polymer crystals from craft stores, keeping these safety considerations in mind – store them away from children and pets since they expand dramatically when wet.
Gather your sewing essentials: sharp fabric scissors, matching thread, pins, and a fabric marker.
This cost analysis shows DIY projects save money compared to store-bought coolers.
Basic sewing tools and quality materials guarantee your homemade neck cooler works effectively and lasts through many hot summer days.
To guarantee precise fabric cuts, it’s best to use fabric scissors dedicated solely to fabric.
Creating The Fabric Tube
Now you’ll create the fabric tube that forms the backbone of your neck cooler.
This sturdy foundation determines your cooler’s comfort and cooling power for hours of relief.
This step involves cutting your cotton fabric to the right size and sewing it into a long, narrow tube that will hold the cooling crystals.
Note: Since there are only two sentences, further separation is not necessary.
Cutting The Fabric Strip
Before diving into the fabric strip, remove the selvedge edges that run along your cotton’s width.
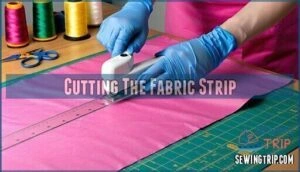
Cut your fabric strip 4½ inches wide by 40-45 inches long using sharp cutting tools like rotary cutters or fabric shears. Follow the fabric grain for straight cuts, ensuring your strip width stays consistent.
For precise fabric cutting, consider using a fabric rotary cutter. Make angle cuts at both ends for a polished finish.
This fabric preparation sets the foundation for your cooling wrap’s success.
Sewing The Tube
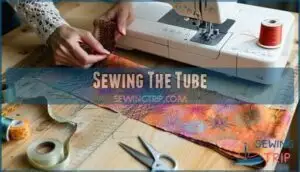
Now you’ll fold your fabric strip in half lengthwise with right sides together, creating the foundation for your sew neck cooler.
This fabric preparation step requires attention to fabric grain and precise seam allowance for maximum tube durability.
- Pin the fabric edges – Align raw edges carefully, maintaining consistent fabric grain direction throughout your sewing tutorial
- Sew with 1/4-inch seam allowance – Use a straight stitch type on your sewing machine for strong, durable seams
- Create angled ends – Cut fabric ends at 45-degree angles before sewing to reduce bulk in corners
- Reinforce stress points – Backstitch at tube ends to prevent unraveling during the fabric tube construction process
Turning and Pressing The Tube
The essential step of turning fabric requires patience and precision. Once you’ve sewn your tube, gently turn it right side out through the opening you left. Use a chopstick or blunt pencil to push out the corners, creating sharp points that give your neck cooler a professional finish.
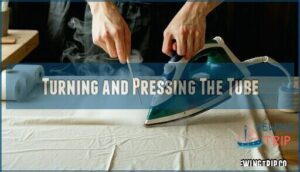
This corner shaping step makes all the difference in appearance. Next comes the pressing techniques that’ll set you up for success. Heat your iron to the cotton setting—proper iron temperature prevents fabric wrinkles and scorching.
Lay the tube flat with the seam alignment centered on one side. Press firmly along the seam, letting the steam work its magic to eliminate stubborn creases. This ironing stage isn’t just about looks.
Good seam pressing creates clean lines that’ll make the next steps of your sewing tutorial much easier. Take your time here—rushing through turning fabric and pressing often leads to wonky results that’ll haunt you later. A well-pressed tube is your foundation for a cooling wrap that works beautifully.
Adding Crystals to The Tube
Now you’ll add the cooling crystals that make your neck cooler work. This step requires careful measuring and even distribution to guarantee maximum cooling performance throughout the entire wrap.
Stitching Across The Center
With your tube ready, locate the center point and stitch straight across to create your first compartment.
This seam reinforcement prevents crystal containment issues and guarantees even distribution.
Use a double stitch for extra durability—your DIY neck cooler depends on secure pocket creation.
One should also consider consistent stitch tension to achieve professional results.
This sewing project step sets up perfect crystal containment zones using proper stitching techniques for your fabric neck cooler pattern, ensuring secure pocket creation.
Using a Funnel to Add Crystals
After you’ve marked your compartments, grab a funnel with a narrow spout—about half-inch diameter works best for your DIY neck cooler.
Measure precisely: each pocket needs only 1/8 to 1/4 teaspoon of Watersorb crystals.
Too much creates bulging and burst seams when hydrated.
Use steady hands for even distribution across sections. A small scoop or paper cone works if you lack a proper funnel.
This careful crystal measurement prevents spills and guarantees your neck cooler pattern maintains flexibility and comfort.
Finishing The Ends of The Neck Cooler
Now you’re ready to give your cooling wrap a polished, professional finish. Creating clean, durable ends prevents fraying and adds that "store-bought" look to your sewing project.
Start with angled cuts at each end of your tube. Cut at a 45-degree angle rather than straight across – this creates attractive pointed ends that won’t bulk up when folded. These decorative edges add visual appeal while serving a practical purpose.
For hemming options, fold each angled end inward about half an inch, then press with your iron. This creates a neat fold that hides raw edges. Pin in place to keep everything aligned during the final sewing step.
Your closure methods depend on preference. Some sewers add fabric ties by cutting two strips and securing them inside each hem. Others prefer a simple overlap design where the neck cooler wraps around naturally.
Focus on securing ties if you choose that route – reinforce the attachment points with extra stitching. To prevent fraying on the ties, consider using fray check products. Use quality sewing techniques like backstitching at stress points. Proper hem finishing and seam finishing guarantee your cooling wrap withstands repeated soaking and use while maintaining its shape and effectiveness.
How to Use The Neck Cooler
Now that you’ve finished making your neck cooler, it’s time to put it to work against the summer heat.
The simple activation process transforms those tiny crystals into your personal cooling system that’ll keep you comfortable for hours.
Soaking in Water
Before you use your cooling wrap, proper water soaking guarantees crystal activation for maximum effectiveness.
Submerge the entire wrap in cool water for at least 30 minutes—this activation time allows the polymer crystals to absorb water and expand up to 100 times their original size.
Water temperature should be cool but not ice-cold for ideal bead hydration. The crystals will gradually swell, creating a gel-like consistency that provides hours of cooling effect.
After the initial soak, gently squeeze excess water from the fabric while keeping the beads plump and hydrated. Remember to use cold water, as gentle care is needed to prevent damage.
Your wrap will maintain its cooling duration for 3-5 hours before needing regeneration through re-soaking frequency of every few hours during extended use.
Distributing Crystals
After soaking, you’ll notice the polymer crystals have expanded substantially in your fabric tube.
Now comes the hands-on part of this sewing project.
- Gently massage each pocket to break up any clumps and achieve even distribution throughout the cooling wrap
- Check for proper crystal quantity – each section should feel plump but not overstuffed to prevent sliminess
- Adjust pocket size by redistributing beads from fuller sections to guarantee balanced cooling effect
- Monitor bead expansion – crystals should look translucent and gel-like when fully hydrated
- Focus on crystals distribution along the entire length for consistent neck cooling during use
This simple redistribution step maximizes your neck cooler’s effectiveness and comfort.
Tying Around The Neck
Perfect timing makes all the difference when securing your DIY neck cooler.
Get the timing right, and your cooling wrap becomes your best hot-weather companion.
Wrap the fabric tube loosely around your neck, allowing comfortable movement without restricting blood flow.
The adjustable ties let you customize comfort levels—avoid pressure points by keeping the fit snug but breathable.
Alternative methods include tucking ends under clothing for hands-free cooling during active sewing projects, which can make a big difference in your overall experience with the DIY neck cooler.
Regenerating The Cooling Effect
Your neck cooler delivers roughly three hours of relief before needing a refresh.
The regeneration process involves simple water activation – just soak the entire wrap in lukewarm water for two hours.
During bead rehydration, crystals expand and restore their cooling longevity. After soaking, squeeze out excess moisture and store using proper drying methods between uses, which helps maintain the cooling effect.
Caring for The Neck Cooler
Your DIY neck cooler needs proper care to keep working effectively and last for years. Clean maintenance and correct storage will protect both the fabric and the water-absorbing crystals inside.
Drying and Storing
Proper care extends your cooling wrap’s life substantially.
Air dry your neck cooler flat on towels for complete bead shrinkage and mold prevention. Sunlight exposure helps crystals return to original size.
- Air dry flat – prevents uneven crystal distribution and fabric stretching
- Choose cool storage locations – dark, dry spaces preserve fabric and polymer integrity
- Ensure complete drying – eliminates moisture that causes mold and odors
- Fold for compact storage – maintains shape while saving space
Hand Washing
When your neck cooler needs freshening up, hand washing with mild soap keeps those water-absorbing crystals happy.
Use lukewarm water and gentle soap selection – nothing harsh that’ll break down the fabric or polymer beads. Work carefully around each pocket during stain removal, then rinse thoroughly to prevent soap buildup.
The drying process requires patience: lay flat on a towel for proper drying methods.
Washing frequency depends on use, but monthly cleaning works well. Smart storage tips include keeping it in a breathable container once completely dry.
Frequently Asked Questions (FAQs)
How do you use a neck cooler?
Cool as a cucumber, you’ll activate your neck cooler by soaking it in water for thirty minutes.
Once the beads expand, wrap it around your neck for hours of cooling relief during hot weather activities.
What is a cooling neck wrap?
A cooling neck wrap is a fabric tube filled with water-absorbing polymer beads that you soak in water.
It provides hours of evaporative cooling around your neck during hot weather activities.
How do you keep a neck wrap cool?
You activate the cooling effect by soaking your neck wrap in cold water for 30 minutes to 4 hours.
The water-absorbing polymer beads expand and slowly release moisture through evaporation, keeping you cool.
What is a DIY neck cooling scarf?
Need relief from summer heat?
A DIY neck cooling scarf is a fabric wrap filled with water-absorbing polymer beads that you soak in water to create hours of evaporative cooling around your neck.
What are cool icy neck wraps?
Icy neck wraps are fabric tubes filled with water-absorbing polymer beads that expand when soaked.
You’ll wrap them around your neck for evaporative cooling that lasts 3-5 hours during hot weather activities.
Where can I buy a neck cooler?
You’ll find neck coolers at sporting goods stores, outdoor retailers like REI, farm supply shops, and online marketplaces such as Amazon or eBay for convenient purchase options.
What are the beads in neck coolers?
The beads in neck coolers are water-absorbing polymer crystals, typically made from polyacrylamide.
These non-toxic beads expand up to 200 times their original size when soaked, storing water that slowly evaporates for cooling.
What is used in cooling neck wraps?
Cooling neck wraps contain water-absorbing polymer crystals or beads that expand when soaked.
These crystals slowly release moisture through evaporation, creating a cooling effect that lasts 3-5 hours during hot weather activities.
Do neck cooling tubes really work?
Research proves you’ll experience a 1-2°C core temperature drop when wearing neck coolers.
Studies show they improve comfort and endurance during heat exposure. They’re trusted by athletes, military personnel, and outdoor workers for effective heat stress prevention.
How to sew a neck binding?
Cut fabric 5" x 42", fold lengthwise right sides together. Sew long edge with 1/4" seam, turn right side out, press flat for neat binding.
Conclusion
Like a breath of cool air on a scorching day, your handmade neck cooler transforms simple materials into personal climate control.
Learning how to sew a neck cooler gives you the power to beat summer heat anywhere you go.
With proper crystal distribution and quality fabric, you’ve created a reusable cooling system that’ll serve you for years.
Simply soak, wrap, and enjoy hours of cooling relief that’s always ready when temperatures climb.

