This site is supported by our readers. We may earn a commission, at no cost to you, if you purchase through links.
That vintage band tee you love? It probably cost less than $5 to make. The markup on ready-made shirts is staggering, but you can break free from it by learning how to sew a t-shirt yourself.
Knit fabrics seem intimidating at first—they stretch, they wiggle, they refuse to behave like quilting cotton. But once you understand how they move and which stitches keep seams from popping, you’ll gain the ability to create a wardrobe that actually fits your body.
This guide walks you through every step, from choosing the right needle to attaching sleeves without tears, so you can stitch up custom tees that rival anything hanging in stores.
Table Of Contents
- Key Takeaways
- Why Sew Your Own T-Shirt?
- Essential Materials and Tools for T-Shirts
- Choosing and Creating a T-Shirt Pattern
- Preparing and Cutting Your Fabric
- Step-by-Step T-Shirt Sewing Tutorial
- Constructing The Neckline and Hems
- Tips for a Perfect Finish and Customization
- Frequently Asked Questions (FAQs)
- Conclusion
Key Takeaways
- Sewing your own t-shirt puts you in control of fit, fabric choice, and style while building practical skills like hand-eye coordination and problem-solving that only 27% of people feel confident with today.
- The right materials make everything easier—cotton jersey or knit fabrics with moderate stretch, ballpoint needles in size 9 or 10, and a basic sewing machine with stretch stitch options will get you professional results without needing expensive equipment.
- Flat construction techniques simplify sleeve attachment and eliminate tricky easing steps, while proper pressing after each seam transforms homemade into polished by preventing puckering and creating crisp, store-quality finishes.
- Pre-washing your fabric before cutting prevents shrinkage disasters and chemical issues, while adding 5/8 inch seam allowances on side seams gives you room to adjust the fit as you learn what works for your body.
Why Sew Your Own T-Shirt?
Sewing your own t-shirt puts you in control of fit, fabric, and style in ways store-bought options can’t match. It’s also one of the best entry points for learning garment construction since t-shirts use simple shapes and forgiving knit fabrics.
Let’s look at why making your own is worth the effort.
Benefits of Making a Custom T-Shirt
Creating custom clothing gives you unique expression through DIY clothing and T-shirt design that truly reflects your style. Making your own garments is eco-friendly, reducing waste from mass production.
You’ll enjoy cost savings compared to buying premium ready-made pieces while achieving a perfect fit custom-made to your body.
Developing clothing design skills can even lead to brand building opportunities if you decide to sell your creations. Custom T-shirts can also provide enhanced brand visibility for businesses.
Learning Basic Sewing Skills
Beyond saving money and reducing waste, sewing your first T-shirt builds valuable motor skills and hands-on technique mastery. Studies show that only 27% of people today feel confident using a sewing machine, making basic sewing education more important than ever. Sewing also provides a creative outlet for self-expression.
You’ll develop:
- Hand-eye coordination through precise fabric handling
- Problem-solving abilities as you troubleshoot stitches
- Economic independence through practical skill acquisition
This beginner sewing tutorial offers a solid foundation.
Creative Customization Options
Once you’ve mastered basic construction, DIY fashion truly takes off. You can transform plain knits through vinyl applications, fabric painting, or patchwork designs.
Embroidery techniques add texture, while pattern alterations let you create a fashionable t-shirt with draped necklines or colorblocking.
Adding variations to t-shirts through appliqué, heat transfer, or contrasting sleeves makes each garment uniquely yours—clothing alterations become creative expression.
Essential Materials and Tools for T-Shirts
Before you start sewing, you’ll need to gather the right materials and tools to set yourself up for success. Having quality fabric, the proper needles, and a few essential supplies will make the entire process smoother and more enjoyable.
Let’s walk through what you’ll need to create a comfortable, well-constructed t-shirt.
Recommended Fabrics for T-Shirts
Choosing the right fabric makes or breaks your t-shirt project. Cotton types like Pima offer softness and durability, while polyester blends resist wrinkles and add stretch. You’ll want knit fabric with moderate stretch for easier sewing.
The right fabric—cotton for softness, blends for stretch—makes or breaks your t-shirt project
Fabric weight affects drape and comfort—lighter works for summer, heavier feels substantial. Cotton excels for printing methods, and selecting fabric for t-shirts with sustainability impact means considering organic or recycled options.
Sewing Machine and Needle Types
Your sewing machine doesn’t need to be fancy, but using the right needle makes all the difference. A home machine with stretch stitch options works well for beginners, while a serger or coverstitch machine gives you professional-looking seams and hems. Choose ballpoint needles in size 9 or 10 to slide between knit fibers without damaging them.
- Ballpoint needles prevent runs and skipped stitches in stretchy fabrics
- Stretch or zigzag stitches maintain elasticity so seams won’t pop
- Sergers trim and finish edges simultaneously for clean, durable results
Pins, Clips, and Other Useful Supplies
A few smart sewing notions will save you headaches. Ball-point pins are your go-to for knits—they’re used in over 60% of T-shirt projects because their rounded tips won’t snag jersey fabric. Sewing clips work great on stretchy seams without leaving holes.
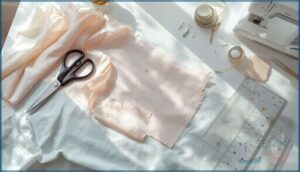
Keep sharp fabric scissors for cutting, thread cutters for trimming, a measuring tape for checking fit, and fabric markers for quick notations.
Choosing and Creating a T-Shirt Pattern
A good pattern is the foundation of any well-fitting t-shirt. You can download a free pattern online, trace one from a favorite shirt you already own, or adjust an existing pattern to match your personal style.
Each approach has its own advantages depending on your skill level and what you’re hoping to create.
Downloading Vs. Drafting Patterns
You’re standing at a crossroads: download a digital t-shirt pattern or draft your own from scratch. Downloaded pattern pieces offer instant access and digital storage convenience, usually costing $10-15 with graded sizing that boosts pattern accuracy.
Drafting a shirt pattern demands more time but delivers a custom fit based on your measurements.
Both pattern-making approaches have environmental impact considerations worth weighing.
Tracing an Existing T-Shirt
Got a t-shirt that fits like a dream? You can turn that existing shirt into your own sewing pattern with some tracing tools and attention to seam allowance.
Here’s how to nail pattern accuracy:
- Lay the shirt flat inside-out so seam lines show clearly for precise drafting techniques
- Trace only half of symmetrical pattern pieces to avoid fabric shift
- Mark seam lines, not cut edges, then add your allowances
Your fabric choice will influence how forgiving the tracing process is.
Adjusting Patterns for Fit and Style
Your pattern straight from the package won’t fit everyone perfectly. That’s where Bust Adjustments, Shoulder Slope tweaks, and Torso Length modifications come in.
Start by measuring yourself against the pattern pieces, then adjust your seam allowance accordingly. Common fitting adjustments include widening for Hip Adjustments or reshaping necklines in your tshirt design.
This pattern making step transforms generic into custom-fit.
Preparing and Cutting Your Fabric
Before you make your first cut, you need to prep your fabric the right way. Skipping this step can lead to a shirt that shrinks or twists after the first wash.
Let’s walk through how to get your fabric ready, lay out your pattern pieces correctly, and cut with confidence.
Pre-Washing and Ironing Fabric
Pre-washing your fabric is like giving it a test run before the big show. This essential step in preparing the fabric prevents nasty surprises like shrinkage prevention failures and dye bleeding disasters.
- Wash and dry your knit fabric exactly how you’ll care for the finished shirt
- Preshrinking eliminates chemical removal issues from factory sizing that can cause seam distortion
- Use your ironing board and proper ironing techniques to smooth wrinkles flat
- Cutting fabric becomes infinitely easier on a crisp, relaxed surface
Laying Out and Pinning Patterns
Now that your fabric is crisp and ready, it’s time to arrange your pattern pieces for maximum efficiency. Start with fabric preparation by spreading your material on a flat surface, matching the selvage edges together. Align the grainline marking on each piece parallel to the selvage—this ensures proper stretch behavior and fit.
Pin strategically using pinning techniques that keep everything secure: insert pins perpendicular to edges, spacing them closer on curves. Smart pattern layout minimizes waste while maintaining cutting accuracy.
Cutting Techniques for Knit Fabrics
Cutting fabric precisely makes all the difference between a shirt that fits and one that disappoints. Use sharp scissors or a rotary cutter for clean edges—knit fabric stretches and shifts easily, so cut through a single layer when possible.
Manual vs. automated cutting changes accuracy dramatically: hand-cutting introduces about 2.5% precision loss from fabric slipping.
Let your knit fabric relax overnight before cutting to prevent post-sewing distortion and reduce waste.
Adding Seam Allowances
Understanding seam allowances keeps your pattern pieces from becoming too small after sewing. Most t-shirt patterns include 3/8 inch (1 cm) allowances already marked, but if you traced your own shirt, add an extra half inch around each edge now.
Here’s what you need to know:
- Curved seams at necklines need narrower allowances—about 1/4 inch—to prevent puckering
- Pattern adjustments become easier with 5/8 inch allowances on side seams for fitting tweaks
- Waste reduction matters: precise allowance widths save fabric and reduce bulk
Industrial standards stick to 1 cm for speed and consistency.
Step-by-Step T-Shirt Sewing Tutorial
Now that your fabric is cut and ready, it’s time to start assembling your t-shirt.
This is where the pieces come together and your garment really takes shape. You’ll work through each construction step methodically, building from the shoulders down to create a shirt that fits just right.
Sewing Shoulder Seams
Start by aligning your front and back body pieces right-sides together—this is where seam stabilization matters most. Pin along the shoulder line, keeping the seam allowance accuracy at 5/8 inch for a proper fit. Use a straight stitch or zigzag for seam strength, then press toward the back following measurement standards.
| Technique | Why It Matters |
|---|---|
| Pin shoulder seams | Prevents fabric shift during stitching |
| Use stretch stitch | Maintains seam strength in knit fabrics |
| Press seams flat | Creates a professional, crisp finish |
| Trim allowance | Reduces bulk at the shoulder line |
This beginner tutorial ensures your sewing shoulder seams won’t stretch out over time when sewing a t-shirt.
Attaching Sleeves With Flat Construction
With your shoulders secure, attaching sleeves using flat construction simplifies sewing a t-shirt for beginners. This commercial efficiency technique eliminates the tricky easing of set-in sleeves, making knit fabric easier to handle.
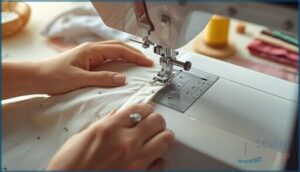
Lay the shirt flat, align each sleeve to the armhole with right sides together, then pin carefully. Stitch along the edge using a stretch stitch to prevent seam puckering on knit fabrics.
Sewing Side Seams
Once your sleeves are in place, sewing the side seams brings your t-shirt together. Pin the underarm through the hemline, matching edges carefully.
Use a stretch stitch with a 5/8 inch seam allowance to accommodate knit fabric. Common errors include sewing through pre-existing hems, which adds bulk.
Proper fabric preparation and machine settings—like a stretch needle and walking foot—prevent puckering while stitching side seams smoothly.
Pressing Seams for a Professional Finish
After each stitch, press your seams flat with an iron to eliminate puckering and keep fabric smooth. For knit fabric pressing, first press as sewn, then fold the seam allowance to one side. Use a lift-and-press motion instead of sliding the iron back and forth.
Seam pressing tools like a tailor’s clapper help create crisp, professional results that improve your garment construction quality.
Constructing The Neckline and Hems
Now that your t-shirt is taking shape, it’s time to tackle the finishing touches that make it wearable. The neckline and hems are what separate a homemade project from something you’d actually want to wear out of the house.
Let’s walk through the techniques that’ll give your shirt that polished, store-bought look.
Adding Neck Binding or Bands
Your neckband is the frame that sets off everything you’ve built so far. Start by measuring your neckline at the seamline, then cut your neckband to about 80-90% of that measurement to account for fabric stretch. This sizing creates that snug, professional fit you’re after.
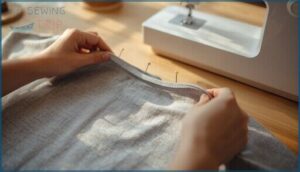
Pin the binding evenly around the neckline, stretching gently as you sew with a zigzag or stretch stitch for flexibility.
Hemming The Bottom and Sleeves
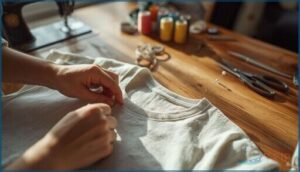
Hemming the bottom edge and sleeve hems gives your shirt that crisp, store-bought look. Fold the raw edges twice—about ¼ inch each time—to prevent fraying. Pin carefully to avoid puckering, then sew close to the top fold using a straight stitch.
For hemming the shirt sleeves, a twin needle creates those parallel lines you see on professional tees while maintaining stretch.
Stitch Types for Stretch Fabrics
You’ll need the right stitch types to keep your t-shirt seams from popping during wear. A zigzag stitch works beautifully on most knit fabric since it flexes with the material. Pair it with stretch needles and polyester thread types for best results.
If you have a serger, overlock stitches create professional edges. Twin needles deliver those clean parallel lines, while a stretch stitch manages high-movement areas perfectly.
Tips for a Perfect Finish and Customization
You’ve sewn your t-shirt together, but the final details make the difference between something homemade and something you’re proud to wear. This is where you’ll catch any mistakes, add your own personal touches, and make sure the fit is just right.
Let’s walk through the finishing steps that’ll take your t-shirt from done to actually polished.
Troubleshooting Common Sewing Mistakes
Even with careful attention, you’ll likely encounter a few hiccups when sewing a tshirt. Uneven stitches, skipped stitches, and thread tension issues are the most common beginner tutorial challenges, but they’re easily fixable with proper sewing techniques.
Check these sewing skills essentials:
- Adjust your machine’s tension settings if fabric puckers or gathers
- Switch to a ballpoint needle for knit fabrics to prevent skipped stitches
- Trim untrimmed threads and verify correct SPI for professional results
Troubleshooting common sewing mistakes becomes second nature with practice.
Adding Labels, Embroidery, or Decorative Touches
Once you’ve nailed your sewing techniques, personalize your custom clothing with labels or embroidery. Sew-in labels offer excellent label durability through frequent washes, while decorative threads and embroidery add visual interest—though embroidery costs generally run $10-$20 depending on stitch density.
Consider adding variations to tshirts through topstitching or contrasting neckbands. These clothing construction details transform basic clothing design tips into your signature style through thoughtful custom tailoring touches.
Final Fitting and Adjustments
After adding your personal touches, try on your shirt and check for any issues. Muslin fitting catches problems early—you’re looking at bust point alignment and grain alignment to eliminate drag lines. Pin adjustments at side seams before reinforcing with backstitching.
Remember that knits need about 5-8% negative ease for comfort. Fine-tune sleeve hems and finish the neckline, then reinforce critical seams for durability.
Frequently Asked Questions (FAQs)
What is the best fabric for a beginner to use when sewing a t-shirt?
Cotton jersey works beautifully for beginners—fabric stability and stretch recovery shine here. Instructor recommendations favor this choice thanks to manageable shrinkage rates, cost effectiveness, and forgiving knit fabrics that simplify fabric selection.
How do I ensure that the stitches catch properly when sewing a t-shirt?
Start with the right needle—ballpoint needles for knits prevent skipped stitches. Check your machine tension, stitch settings, and thread quality. Adjust presser foot pressure carefully.
Understanding stitch types and proper fabric handling makes all the difference.
How do I attach a neckline to a t-shirt?
Like fitting a puzzle piece, attaching the collar begins with measuring your neck opening.
Cut your neckband to 70–75% of the neckline construction for best stretch ratios and industrial techniques that prevent common error rates.
What is the best way to finish the edges of a t-shirt?
You’ll get professional results with a serger or zigzag stitch to prevent fraying.
Coverstitch details deliver retail-quality hems on sleeves and bottom edges.
Binding techniques at necklines reduce bulk while maintaining stretch and durability.
How do I fix a wavy neckline after sewing?
A wavy neckline feels like the end of the world, but steam pressing works wonders in over half of cases.
Restitching with elastic insertion, heat application, or top stitching toward the bodice restores smoothness beautifully.
Can I sew t-shirts without a serger machine?
You don’t need a serger to sew t-shirts. A standard sewing machine with zigzag stitch and ballpoint needles works beautifully on knit fabrics, delivering seam durability nearly equal to professional serged seams.
What tension settings work best for knit fabrics?
Imagine puckered seams declaring war on your fabric. Most knit fabrics thrive at tension settings around 3 to 4 on your sewing machine.
Test scraps first—needle size, thread selection, and stretch stitch compatibility all influence that perfect balance.
How do I prevent fabric from curling while cutting?
Knit stabilizers keep edges flat during fabric cutting. Sharp tools and a firm cutting surface reduce distortion.
Control fabric tension with pattern weights, and choose stable material selection like double-knits over lightweight jerseys when preparing the fabric.
Should I use twin needles for hemming t-shirts?
Twin needle benefits include professional-looking hems with built-in stretch. Double needle stitching boosts hem durability while saving time.
However, skipped stitches and tunneling are common technical issues requiring fusible tape or alternative solutions like zigzag stitches.
Conclusion
Practice makes perfect, and sewing your first t-shirt proves it. Each seam you stitch builds confidence with knit fabrics and stretch stitches. You’ve learned how to sew a t-shirt from shoulder seams to hemming, transforming flat fabric into something wearable.
Now you control the fit, the fabric choice, and every detail that matters. Your next tee won’t just hang in your closet—it’ll reflect your personal style and the skills you’ve earned through doing the work yourself.
- https://finance.yahoo.com/news/t-shirts-market-reach-usd-190800609.html
- https://www.printful.com/blog/t-shirt-industry-statistics
- https://www.imarcgroup.com/custom-t-shirt-printing-market
- https://www.uniformmarket.com/statistics/global-apparel-industry-statistics
- https://www.realthread.com/blog/how-much-cotton-in-a-tee


