This site is supported by our readers. We may earn a commission, at no cost to you, if you purchase through links.
You can work out, dance, swim, and sleep without worrying about edges lifting or caps shifting out of place. This technique isn’t just about avoiding glue; it’s about taking full control of your wig’s fit, comfort, and longevity.
When you learn how to sew a wig on your head properly, you’re investing in a method that protects your natural hair, saves money over time, and gives you the freedom to live without constantly checking your hairline in every reflective surface.
Table Of Contents
Key Takeaways
- Sewing a wig onto braided hair eliminates adhesive damage to your hairline and scalp while providing weeks of unshakeable security through workouts, swimming, and sleep without reapplication or edge lifting.
- The blanket stitch technique with a curved wig needle and matching thread creates secure attachment by following braid lines at half-inch intervals, maintaining firm but comfortable tension to prevent shifting without causing scalp pressure.
- Proper preparation requires cornrows or flat braids positioned flat against your scalp, strategic bobby pin placement to eliminate bumps, and alignment of the wig edge with your natural hairline before securing it through consistent stitching patterns.
- A sewn-in wig typically lasts two to six weeks before natural hair growth requires reinstallation, and maintaining it involves washing every 7-10 wears for human hair (10-12 for synthetic), daily brushing from ends upward, and safe removal by carefully cutting each stitch with rounded-tip scissors.
Why Sew a Wig on Your Head?
If you’ve ever dealt with a wig that shifts mid-conversation or slides back when you lean forward, you know how frustrating it can be. Sewing a wig onto your head solves that problem and brings some other perks you mightn’t expect.
Let’s look at why this method has become a go-to for anyone serious about keeping their wig secure and long-lasting.
Benefits of Sewing in a Wig
Sewing in a wig offers freedom from adhesives and a protective style that’s kinder to your scalp. This method delivers wig security without the harsh chemicals that can irritate sensitive skin, while also extending your wig’s lifespan through reduced wear and tear. One benefit of wigs is that they offer easy style changes. Here’s what makes sewing worth your time:
- Cost savings from reusing wigs multiple times without tape or glue
- Scalp health protection by avoiding adhesive damage and allowing breathability
- Customization options to adjust tension and positioning for your comfort
- Hairstyle adaptability with secure attachment for active lifestyles and workouts
Increased Security and Stability
A sewn-in wig stays put through workouts, windy days, and busy schedules in ways that clips and adhesives simply can’t match. Sewing techniques for wig installation create knot security and tension balance that keep your cap stable during movement. Positioning the wig on your head with proper braid reinforcement provides a comfortable wig fit without shifting or lifting.
| Security Factor | How It Works |
|---|---|
| Stitch Durability | Thread secures wig to braids for weeks of wear |
| Cap Stability | Even tension prevents sliding and movement |
| Braid Reinforcement | Multiple attachment points distribute pressure evenly |
Alternative to Wig Adhesives
If you’re tired of dealing with sticky residues or scalp sensitivity from adhesives, sewing offers adhesive-free benefits that protect your skin entirely. This alternative to wig adhesives eliminates exposure to harsh chemicals while maintaining a natural appearance and secure fit.
Steps for sewing in a wig create glueless longevity and increased security stability, giving you a comfortable wig fit through proper sewing techniques for wigs without irritation.
The rising demand is projected to increase the glueless wigs market to $1.3 billion by 2032.
Longer Wig Lifespan
When you skip the glue and opt for sewing, you’re investing in a wig that can last considerably longer with proper care. The sewing method protects delicate wig material through careful use, reducing damage from harsh adhesives and daily product usage.
Here’s how routine care extends your wig’s lifespan:
- Washing every 10 days maintains cleanliness without overwashing
- Daily brushing prevents tangling that weakens fibers
- Proper removal techniques preserve the cap structure
Wig maintenance and care become simpler when you’re not fighting residue buildup. Finishing touches and wig maintenance cleaning tips focus on the hair itself, not scrubbing away sticky remnants, giving you more time to perfect your style.
How to Prepare Your Hair for Wig Sewing
Getting your hair ready is the foundation for a wig that stays put and looks natural. The way you braid and secure your natural hair determines how flat the wig will sit and how comfortable it’ll feel throughout the day.
Let’s walk through the prep work that’ll set you up for success.
Braiding Your Hair for Wig Installation
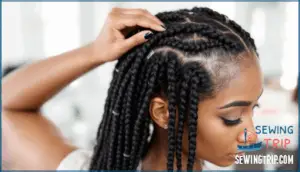
Braiding your hair flat against your scalp creates the smooth foundation you need for a wig that won’t shift or slide. You can use cornrows or flat braids running from front to back, working with your natural hair density to determine braid size.
Try different parting options and braid patterns based on where you’ll sew the wig, keeping braids tight but comfortable for scalp health.
Leaving Out Hair for a Natural Look
A thin strip of your natural hair left loose around your hairline can make the difference between a wig that screams "fake" and one that blends seamlessly with your own scalp.
This technique, called hairline blending, lets you style baby hairs along the wig perimeter for texture matching. You can customize your part, control density, and achieve a natural hairline when sewing a wig to your head, especially with a lace wig.
Securing Long Hair and Using Bobby Pins
If your braids stick out past the wig cap or create visible bumps, bobby pins become your secret weapon for a flat, polished foundation. Pin placement matters when securing a wig to your head—slide pins horizontally along each cornrow or flat braid, securing them flat against your scalp.
This technique eliminates braid visibility and keeps hair length under control, especially around your crown and nape. Comfort considerations are key, so avoid over-pinning, which can cause tension when you’re weaving the wig cap into place.
Prepping Tools and Materials
You’ll need a few essential supplies lined up before you start stitching—having the right tools within arm’s reach makes the installation smoother and prevents mid-project scrambles. Grab a curved wig needle and weave thread specifically designed for wig cap types, whether you’re working with lace or a standard cap.
Braiding your hair for wig installation with cornrows or flat braids creates the foundation, so secure those braid patterns before threading your needle for a neat attachment.
Step-by-Step Guide to Sewing a Wig
Now that your hair’s prepped and braided flat, it’s time to get that wig secured. The sewing process might feel tricky at first, but once you know where to place your stitches and how to work the needle, it’s actually pretty straightforward.
Let’s walk through each step so you can lock that wig in place with confidence.
Positioning The Wig on Your Head
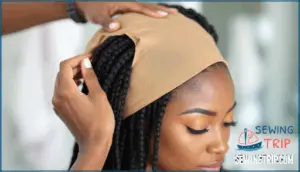
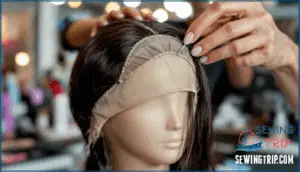
Once your hair is securely braided and pinned flat, it’s time to place the wig on your head like you’re putting on a comfortable cap. Start by holding the wig at the nape area, then gently slide the wig cap over your braids from front to back.
Check for wig symmetry by making sure both sides sit evenly across your natural hairline, and use clips for secure clipping while you prepare to sew.
Aligning The Wig With Your Hairline
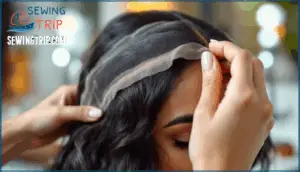
Getting the alignment right is like setting the foundation for a house—if it’s off, everything else will be too. Focus on these key areas for proper wig installation and a natural hairline:
- Hairline Placement: Position the wig edge where your natural hairline begins, making sure it matches your temple points.
- Edge Blending: Press the lace flat against your skin, checking for gaps or bunching.
- Parting Options: Decide where you want your part before sewing a wig to your head.
- Baby Hairs: Leave these loose for fluid blending when securing lace wigs.
- Template Use: Mark alignment points with clips for consistent placement during weaving.
Choosing The Right Needle and Thread
With your wig perfectly positioned, the next move is picking the right tools—and trust me, not just any needle and thread will do the job.
You’ll need a curved wig needle or weave needle, which glides through braids without snagging. Match your weave thread to your hair color for invisible stitches. Thread your needle with about 18 inches of thread, tie a secure knot, and you’re ready for weaving.
Sewing Techniques for Secure Attachment (Blanket Stitch, Stitch Tension)
Now that you’re threaded up and ready, the real magic happens with the right stitching technique—because a loose stitch means a shifted wig, and nobody wants that mid-day.
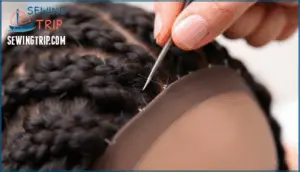
Use the blanket stitch for sewing a wig to your head, threading your curved wig needle through the braid and wig cap edge. Keep your stitch tension firm but not tight—stitches should hold without pulling. Space stitches evenly, about a half-inch apart, and knot securely after each pass for stability.
Sewing Along Braid Lines and Edges
The key is following your braid pattern like a roadmap—stitch where your braids sit flat, and trace the wig’s perimeter where it meets your scalp.
Work from ear to ear, weaving stitches through each braid line at consistent spacing—about half an inch apart—to anchor the cap securely.
Around your hairline, use tighter edge stitch types to prevent lifting, adjusting your needle selection and thread thickness based on braid angles for clean attachment.
Finishing Touches and Wig Styling
Once your wig is sewn in place, you’ll want to make sure it looks as natural as possible. A few simple techniques can hide the stitching, blend the hairline, and give you that relaxed, just-woke-up-like-this vibe.
Here’s how to put the final polish on your sewn-in wig.
Trimming and Adjusting The Wig
After your wig sits securely on your head, you’ll likely notice that the hairline needs some fine-tuning to look completely natural. Here’s how to adjust it:
- Trim baby hairs with scissors – Use thinning shears to create wispy, natural-looking edges along the hairline for realistic hairline customization.
- Adjust bang density – Thin out heavy bangs or layering techniques using a comb and scissors to reduce wig density where needed.
- Pluck the hairline – Remove excess hairs for a softer, more natural appearance when styling a wig.
Camouflaging Sewing Lines
Visible stitches can be a dead giveaway that your wig isn’t your natural hair, so covering those seams is worth a few extra minutes of attention. Match your weaving thread to your scalp tone or hair color for invisible thread color selection. Focus on strategic hair placement, parting the wig hair to drape over stitch lines naturally.
These blending techniques work whether you’re sewing a wig to your head with a weave needle for the first time or refining your approach to sewing a wig.
| Element | Method | Result |
|---|---|---|
| Thread Color | Match scalp or hair tone | Invisible stitches |
| Knot Placement | Position under braids | Hidden anchors |
| Stitch Density | Space evenly, not tight | Secure, undetectable |
| Hair Placement | Part over seams | Natural coverage |
Styling for a Natural Appearance
For a truly fluid finish, hairline plucking makes all the difference—most pros call it the secret sauce for blending a lace wig into your natural hair. Baby hairs trimmed around your edges soften the blend, while knot bleaching at the base mimics your actual scalp.
Root shading and an imperfect, slightly off-center part add realism that straight factory lines can’t touch. Tease those baby hairs with a toothbrush, then style the rest to frame your face naturally.
Using Clips, Combs, and Non-Heat Styling Methods
Clips and combs hold your wig steady while you’re sewing, but they’re also your go-to when you want to restyle without cranking up the heat. For synthetic styling, try flexirods, perm rods, or foam rollers—leave them in overnight for curls that won’t damage the fibers.
Adjustable straps inside the wig cap tighten the secure wig fit, while strategic comb selection and wig clip types anchor everything during wig installation.
Maintaining and Removing Your Sewn-in Wig
Your sewn-in wig won’t last forever, but good care can stretch its lifespan and keep it looking fresh.
Knowing when to wash it, how to brush it daily, and when it’s time for a break makes all the difference.
Let’s walk through the maintenance routine and safe removal process so you can protect both your wig and your natural hair.
Cleaning and Washing Tips
Keeping your sewn-in wig fresh isn’t rocket science, but washing frequency matters. For human hair wigs, aim for every 7–10 wears, while synthetic versions need cleaning every 10–12 wears. Use sulfate-free products formulated specifically for wig maintenance, and always work with cool water.
Air drying beats heat styling—give it 6–8 hours on a stand. Watch for signs like persistent odors, tangles, or that heavy, sticky feeling that screams "wash me now."
Overwashing risks stripping natural conditioning and fading color, so balance is everything in proper hair care.
Daily Maintenance and Brushing
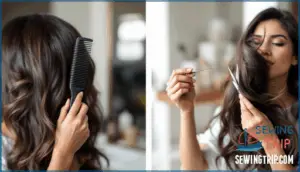
Treat your wig like you’d treat your own hair—daily brushing prevents matting and keeps the fibers looking their best.
- Start at the ends, working upward to avoid unnecessary tension and tangle prevention issues
- Use wide-tooth combs or loop brushes designed specifically for wig maintenance
- Apply leave-in conditioner sparingly when dealing with stubborn tangles
- Sleep on a satin pillowcase to reduce friction and protect your investment overnight
- Keep styling tools minimal—over-manipulation accelerates wear when washing a wig becomes more frequent
Signs It’s Time to Remove or Reinstall
Your scalp will tell you when something’s off—itching, tightness, or visible gaps along the hairline are clear signals that your wig needs attention. Check for stitch looseness by gently tugging the wig edges, and watch for scalp irritation or hair breakage where braids meet the cap.
Natural hair growth pushes the wig installation forward after 2-3 weeks, creating unnatural bulges that compromise your style and the wig lifespan itself.
Safely Removing The Sewn-in Wig
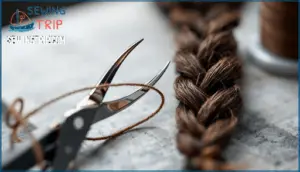
Once you’ve confirmed it’s time for removal, grab a pair of small scissors with rounded tips and work slowly—rushing this step can damage both your wig and your natural hair underneath.
Carefully cut each stitch, keeping your scissors flat against the wig cap to maintain stitch visibility and prevent breakage.
Gently lift the wig away from your braids, removing knots as you go, and inspect your natural hair for signs of hair breakage before starting your aftercare routine.
Proper Storage and Aftercare
With your wig safely removed and your natural hair freed from its braids, proper storage becomes your best defense against matting, tangling, and permanent damage to your investment. Place your wig on a mannequin head or wig stand to maintain its shape, then cover it with a satin cap to prevent dust buildup and odor removal concerns.
Maintaining a wig means storing it away from direct sunlight and heat, which preserves the lace repair integrity and keeps knot sealing intact. Follow these wig maintenance cleaning tips consistently, and you’ll extend your wig’s lifespan while protecting your hair maintenance routine.
Frequently Asked Questions (FAQs)
What kind of thread should I use to sew in my wig?
Choose strong polyester or nylon thread that matches your skin tone or wig cap color.
Use a Curved Wig Needle or weave needle for easier braiding, guaranteeing knot security and comfortable stitches without irritating skin sensitivity during sewing.
How do I hide the knots after sewing in my wig?
Blending beautifully begins with burying thread knots beneath the wig cap or braids during sewing. Push knots through lace using your needle, then trim excess thread close.
Camouflage visible stitches by gently teasing wig hair over the hairline and sewing lines with a toothbrush or rattail comb.
What size needle works best for sewing wigs?
A curved wig needle, usually size C1 or C2, works best for sewing wigs since it prevents hair breakage and minimizes stitch visibility.
Pair your weave needle with matching thread thickness for clean, secure stitches when you sew in your wig.
Should I sew my wig while wearing it or off my head?
You’ll want to sew your wig while wearing it for better security and stitch access.
Preparing to sew your wig on your head guarantees proper braid visibility and alignment, making wig installation smoother and more comfortable.
How often should I replace the thread used to sew in my wig?
Thread degradation happens gradually with wear, so replace it every 2-3 weeks to maintain stitch integrity and scalp health.
Hygiene practices matter too—fresher thread means better material quality when sewing a wig to your head using a Thread Curved Wig Needle for secure stitches.
Can you sew a wig without braiding?
Skipping the braid isn’t a total haircare disaster, but you’ll need alternative foundations. Use a wig cap for scalp protection and hair density control.
For sewing a wig to your head without braiding, try weaving techniques on cornrows or attach directly to mesh wig cap options during lace wigs application.
How long does a sewn-in wig last?
A sewn-in wig usually lasts two to six weeks, depending on hair growth, maintenance quality, and wig construction. Regular cleaning and proper care extend longevity, but natural hair growth will eventually require reinstallation for best comfort and security.
What thread color works best for wigs?
Match your thread color to the wig cap or the braid area beneath. Blending options work best for rooted wigs.
Synthetic thread suits synthetic hair, while cotton thread complements human hair wigs perfectly.
Can you sleep with a sewn-in wig?
Yes, you can sleep with a sewn-in wig, though wearing a satin cap helps protect both your natural hair and the wig.
This nighttime routine reduces friction, preserves Hair Health, and extends Wig Longevity while maintaining your sew in comfortably overnight.
Does sewing damage your natural hair?
Approximately 10% of all women suffer from traction alopecia, making stitch tightness critical when Braiding Your Hair for Wig Installation.
Proper braid tension protects hair follicles and scalp health, preventing hair breakage when you sew a wig to your head.
Conclusion
Once you master how to sew a wig on your head, you’ll never look back—it’s genuinely life-changing. This method doesn’t just hold your wig in place; it transforms how you experience wearing it daily.
You’re trading adhesive headaches for security that lasts weeks, protecting your scalp from harsh chemicals while gaining total control over fit and comfort. With practice, the process becomes second nature, and the freedom that follows is absolutely worth every stitch.
- http://mailto:hello?subject=SIA%20Question
- https://www.alliedmarketresearch.com/glueless-wigs-market-A144550
- https://www.luxluxehair.com/blogs/insights-blogs/lace-front-wig-vs-sew-in-wig-the-ultimate-hair-fashion-showdown
- https://scruffyhairco.com/wig-glue-vs-tape-which-is-right-for-you/
- https://www.sheshappyhair.com/blogs/hair-blog/glue-in-weaves-vs-sew-in-weaves

