This site is supported by our readers. We may earn a commission, at no cost to you, if you purchase through links.
Sewing your own bookmarks isn’t just practical; it’s ridiculously satisfying. You’ll transform leftover quilting cotton or felt into something actually useful, and the best part? You don’t need fancy skills or equipment. A straight stitch, some basic supplies, and you’re already ahead of every flimsy paper bookmark you’ve ever lost.
Whether you’re keeping one for yourself or making a batch for gifts, handmade fabric bookmarks hold up to real use and look better doing it.
Table Of Contents
Key Takeaways
- Sewing fabric bookmarks from quilting cotton or felt scraps takes about 20 minutes and requires only basic straight stitching skills, making it an accessible project that transforms leftover materials into durable, reusable alternatives to flimsy store-bought options.
- Using heavyweight fusible interfacing between fabric layers provides the structural backbone that prevents flopping and fraying, while a 1/4-inch seam allowance and topstitching create professional-looking edges that hold up to daily use.
- Upcycling fabric scraps into bookmarks prevents 2-5 ounces of textile waste per crafter annually, turning what would be trash into functional items through eco-friendly crafting practices.
- Personalization through ribbons, tassels, embroidery, or fabric stamps transforms simple bookmarks into memorable gifts or polished products for selling, with proper care like spot cleaning and flat storage extending their lifespan for years.
Essential Supplies for Sewing Fabric Bookmarks
You’re about to break free from guessing what you need and start gathering the right supplies with confidence. Before you cut your first piece of fabric, let’s make sure you’ve got everything lined up so you can sew without interruptions.
Here’s what you’ll need to create bookmarks that actually hold up to daily use.
Best Fabrics for Bookmarks
Quilting cotton tops the list for fabric selection—it’s stable, sews easily, and costs $4 to $25 per yard. You’ll find eco-friendly materials like organic cotton run higher at $10 to $25, but they skip harsh chemicals. Cotton choices include poplin, muslin, and broadcloth for sustainable textiles that hold up beautifully.
Top fabric picks for bookmarks:
- Quilting cotton – Best all-around choice; stable weave, widely available as scraps
- Felt (wool or synthetic) – No fraying, skip the hemming ($2–$35/yard)
- Organic cotton – Chemical-free, eco-friendly option for conscious crafters
- Cotton blends – Lower shrinkage (3.5–5%) than pure cotton
- Interfacing options – Pellon 911FF or Vlieseline H250 add structure without bulk
For a simple project, consider using sew easy techniques to create your own fabric bookmarks.
Must-Have Sewing Tools and Notions
You’ve got your fabric sorted—now let’s talk about the handful of tools that’ll make stitching these bookmarks a breeze.
Grab a basic sewing machine (or hand-sew if that’s your vibe), all-purpose thread in matching colors, sharp fabric cutters like rotary blades or scissors, a ruler for measuring tools accuracy, and an ironing board with an iron to press crisp seams.
Eco-Friendly Options and Fabric Scraps
Before you toss those tiny fabric scraps, consider this: bookmarks are the perfect excuse to raid your scrap bin and practice green crafting. Those leftover quilting cotton bits? They’re sustainable materials waiting to happen.
Upcycling scraps into bookmarks keeps textile waste out of landfills—crafters prevent roughly 2-5 ounces of fabric waste annually through projects like these. That’s eco sewing that actually has an impact while you stitch something useful. By adopting eco friendly practices, crafters can further reduce their environmental impact.
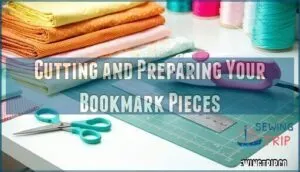
Cutting and Preparing Your Bookmark Pieces
Getting your fabric and interfacing cut to the right size is where the magic starts—and it’s easier than you think. You’ll measure, mark, and cut your pieces with precision so everything lines up beautifully when you start stitching.
Let’s break down exactly how to prep your materials so your bookmark comes together without a hitch.
Measuring and Marking Your Fabric
Grab your ruler and fabric pen—getting your measurements spot-on now means no wonky bookmarks later. Mark a rectangle 2.5 inches wide by 8 inches long, following the fabric grain so your bookmark hangs straight.
Use marking tools like washable pens or tailor’s chalk—they’ll disappear after sewing. Ruler techniques matter here: line up edges carefully for sewing accuracy that shows in your finished piece.
Cutting Fabric and Interfacing to Size
Sharp scissors are your best friend here—clean cuts through both fabric and interfacing mean edges that line up perfectly when you’re ready to sew. Fabric measurement matters—ragged edges from dull blades wreck your seams before you even start stitching.
Follow these accuracy tips for material selection that’ll make you look like a pro:
- Cut two fabric strips at 2.5" × 8"
- Cut one interfacing strip matching those dimensions
- Stack your cutting tools and ruler for precision
- Slice through cotton in one smooth motion
- Check interfacing types match your fabric weight
Using Interfacing for Structure
Interfacing isn’t just some extra layer—it’s the backbone that keeps your bookmark standing tall instead of flopping around like a sad piece of fabric. Heavyweight fusible interfacing transforms flimsy cotton into something with real structure techniques behind it. Iron it onto your fabric’s wrong side, and you’ll feel that instant fabric stability—that’s reinforcement methods at work, giving you sewing interfacing results that scream "I know what I’m doing."
| Interfacing Types | Best For | Your Win |
|---|---|---|
| Fusible woven | Quilting cotton | Crisp, professional edges |
| Fusible non-woven | Most cotton fabrics | Easy beginner success |
| Heavyweight stabilizer | Thick or loose weaves | Maximum bookmark durability |
Prepping Edges and Preventing Fraying
Fraying edges can turn your crisp bookmark into a fuzzy mess faster than you can say "thread disaster"—but a few smart moves before you sew will lock those fibers down for good.
Edge finishing starts with sharp scissors for clean cuts—ragged edges invite fraying. Fray prevention gets easier when you apply interfacing right to the fabric edge, creating instant fabric stabilizing power.
Seam sealing happens naturally once you stitch with a tight 1/4" allowance, and thread control means backtacking at each end to lock everything tight.
Step-by-Step Instructions to Sew Bookmarks
Now that your fabric pieces are cut and ready, it’s time to bring your bookmark to life.
The following steps will walk you through layering, stitching, and finishing your project with confidence. Let’s get your hands moving and create something you’ll be proud to use or gift.
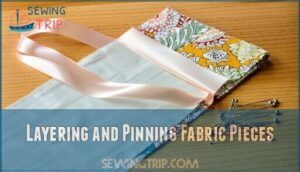
Layering and Pinning Fabric Pieces
Think of layering your fabric pieces like building a bookmark sandwich—get the order right, and everything else falls into place smoothly. Place your interfaced fabric faceup, add your ribbon or tassel at the top, then lay the second fabric piece facedown.
Pin along curved edges and straight sides to prevent slippage—proper fabric alignment now saves you from wonky seams later. Those pins are your safety net!
Straight Stitching and Seam Allowances
Once your fabric sandwich is pinned securely, it’s time to stitch—and that humble 1/4 inch seam allowance is the difference between a bookmark that looks handmade and one that looks homemade (in the best way).
Here’s how to nail your straight stitch:
- Seam allowance width: Keep that consistent 1/4 inch from the edge—your straight stitch guide (often marked on your presser foot) is your best friend here.
- Stitch length: Set to medium (around 2.5) for a balanced, sturdy seam without puckering.
- Pivoting corners: Stop with the needle down, lift the foot, turn your fabric smoothly, then continue stitching.
Remember to leave that 1-inch opening along one side—you’ll need it for turning your bookmark right-side out!
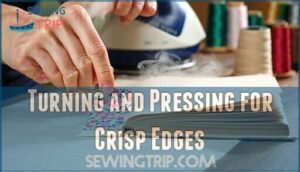
Turning and Pressing for Crisp Edges
The magic moment—when you flip that stitched rectangle inside-out through that tiny opening—can make or break your bookmark’s polished look. Use a chopstick or point turner to gently coax out those corners without stressing your seam allowance.
Then press with a hot iron, rolling the edges between your fingers first for razor-sharp edge finishing. Your fabric choice matters here—cotton crisps beautifully with steam.
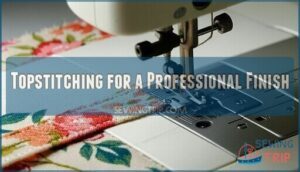
Topstitching for a Professional Finish
Now that your bookmark looks crisp, a single row of topstitching around the perimeter locks everything in place and gives you that store-bought edge. Keep consistent spacing—about 1/8 inch from the edge works like a charm.
This edge stitching prevents puckering while securing layers permanently. Slow down at corners for decorative topstitching that screams confidence, not beginner jitters.
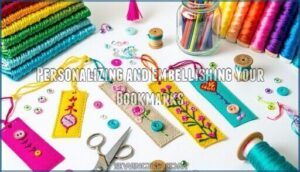
Personalizing and Embellishing Your Bookmarks
Now that your bookmark is sewn and ready, it’s time to make it uniquely yours. Adding a personal touch transforms a simple fabric strip into something special—whether it’s a gift for a friend or a treat for yourself.
Here’s how to take your bookmark from basic to beautiful with a few fun embellishments.
Adding Ribbons, Tassels, or Charms
Before you stitch a single seam, toss a ribbon or charm into the fold — it’s the simplest way to turn a plain bookmark into something people actually want to keep. Here’s how to lock down your embellishments:
- Ribbon attachment methods: Fold it in half, trap it between fabric layers before sewing, or hand-stitch it to the top after turning
- Tassel material options: Try embroidery floss, silk cord, or leather strips for texture
- Charm placement ideas: Dangle lightweight charms from ribbons to avoid bookmark weight balance issues
- Securing embellishments: Backstitch twice at stress points so nothing pulls loose during use
Appliqué and Simple Embroidery Ideas
If ribbons aren’t enough, appliqué techniques and embroidery stitches can transform your bookmarks into tiny works of art. Backstitch and running stitch dominate 92% of beginner patterns—perfect for names or simple shapes.
Try floral motifs or geometric designs using fusible interfacing for stability, then secure edges with blanket stitch. Stick and stitch templates simplify pattern transfer, while fabric consumption stays minimal: a 25cm × 15cm appliqué piece needs roughly 0.09kg per dozen bookmarks with wastage.
Using Fabric Markers or Stamps
For those who want impact without a single stitch, fabric markers and stamps let you add bold designs, names, or doodles in seconds flat. Marker permanence depends on ink types—always heat-set for washability. Stamping techniques shine with design transfer and color blending:
- Soft fabric stamps grip cotton beautifully without bleeding
- Layered stencils create depth through gradient shading
- Heat-reactive markers shift hues when pressed, adding surprise
Test scraps first to nail your technique.
Creative Designs for Kids and Gifts
Kids light up for silly shapes and favorite characters, so lean into dinosaurs, rockets, unicorns, or even hand-traced self-portraits that turn their bookmark into a mini trophy.
Add Character Appliqués from scrap felt or Felt Animals with googly eyes.
Try Holiday Themes, Storybook Scenes, or Names in puffy paint—gifts that feel made just for them.
Tips for Finishing and Caring for Fabric Bookmarks
You’ve put in the work, and now it’s time to make your bookmark last. A few finishing touches will keep it looking sharp and ready to use—or gift—for years to come.
Here’s how to wrap up your project with confidence and care.
Trimming Threads and Sealing Seams
Once your bookmark’s all sewn and turned right-side out, a quick thread trim and a little seam-sealing action will take it from homemade to handmade-with-love in under a minute.
Snip loose threads close to your invisible stitching, then run a tiny bead of fray prevention liquid along raw edges if you skipped seam reinforcement.
Press corners flat—think corner mitering precision—and toss thread disposal scraps guilt-free. You’re nearly done!
Attaching Tassels With Craft Supplies
A fluffy embroidery floss tassel or a silky ribbon loop can turn your bookmark from basic to boutique—and it only takes a hand-stitch or a dab of hot glue to lock it in place.
Try tassel knotting through your top seam before you closing it, or thread beaded accents onto thin cord selection for extra flair.
Charm integration works magic too—just loop a jump ring through fabric and squeeze. Secure fastening means no mid-chapter casualties!
Care Instructions for Handmade Bookmarks
Your handmade bookmark deserves TLC—spot cleaning with mild detergent keeps fabric fresh without warping the structure. For stain removal, test white vinegar on hidden edges first. Minor fraying? Repair techniques like fabric glue or quick re-stitching work wonders.
Store flat in a cool, dry spot away from sunlight to prevent fading. Fabric protection starts with clean hands and dry pages. These longevity tips and smart storage methods extend your bookmark’s life for years.
Packaging Ideas for Gifting or Selling
Transform your lovingly stitched bookmark into a gift that feels like unwrapping a tiny treasure—the right packaging turns a simple craft into something truly memorable. Try these display options:
- Tuck bookmarks into cellophane sleeves with custom tags sharing fabric details
- Bundle three together with twine and a handwritten note for gift wrapping charm
- Use small kraft boxes for bulk packaging when selling at craft fairs
- Attach pricing strategy cards showing care instructions and your maker story
Frequently Asked Questions (FAQs)
Can I use a different type of interfacing for the bookmarks?
Like choosing the right foundation for a house, you can absolutely swap interfacing types. Weight matters most—lightweight fusible vs. sew-in both work, but testing interfacing on scraps ensures bookmark durability matches your fabric choice before committing.
How do I choose the right fabric for my bookmarks?
Cotton quilting fabric is your best friend here—it’s sturdy, easy to work with, and comes in endless patterns.
Pick medium-weight fabric with tight weaving so your bookmarks hold their shape.
Fiber content matters too: 100% cotton won’t stretch or pill like polyester blends might.
Can I add embroidery or decorative stitches to the bookmarks?
Embroidery designs transform plain bookmarks into heirloom pieces—yet simpler is often stronger. Absolutely! Hand embroidery or machine decorative stitches add personality.
Use stabilizer usage underneath delicate fabrics, choose contrasting thread choices, and experiment with stitch types like satin or running stitches before assembling your bookmark.
Is it possible to machine wash the bookmarks?
Yes, you can machine wash them—but fabric choice and interfacing impact durability. Cotton with heavyweight interfacing holds up best.
Remove tassels first, use cold water, and air dry to prevent fraying and preserve shape.
Can I use a different material instead of yarn for the tassel?
Absolutely—ribbon, embroidery floss, decorative cord, or even tiny charms work beautifully. Bead embellishments strung on thread add a polished touch, while metallic or satin ribbon options bring instant elegance. Mix textures to match your bookmark’s personality and style.
How do I fix a sewing mistake on my bookmark?
Don’t panic—mistakes happen! For wonky stitches, grab a seam ripper and carefully remove the bad section. If fabric tears, patch it from behind or start fresh with new pieces. Misaligned edges? Re-pin and re-sew slowly for better alignment.
Can I make bookmarks without a sewing machine?
Who says you need fancy equipment to craft something beautiful? Hand-sewing bookmarks works wonderfully—just use a backstitch for bookmark durability.
Try iron-on adhesive or glue alternatives for no-sew fabric versions that still look polished and hold up well.
How do I add elastic or corner holders?
Stitch elastic directly to the bookmark’s back edge before assembling layers—fabric choice and sewing techniques matter for holder durability.
For corner shapes, fold elastic into a triangle, securing elastic placement with a zigzag stitch for strength.
Can I wash fabric bookmarks in the machine?
Machine washing? Sure, if you’re testing your bookmark’s survival skills. Stick to gentle cycles with cold water temperature and mild detergent choice.
Air-dry flat after colorfastness testing to prevent bleeding—skipping this invites chaos.
Conclusion
Think of your fabric scraps as dormant potential—they’re not trash, they’re bookmarks waiting to happen. Now that you know how to sew bookmarks from start to finish, you’ve got a project that’s actually useful, endlessly customizable, and perfect for gift-giving or keeping your own pages safe.
Grab those leftover cottons, fire up your machine, and start stitching. Your books deserve better than dog-eared corners, and your hands deserve the satisfaction of making something that lasts.
- https://sewcanshe.com/2017-5-19-journaling-bookmark-and-pencil-holder-free-sewing-tutorial/
- https://upcyclemystuff.com/scrap-fabric-bookmarks-from-teeny-tiny-trimmings/
- https://undergroundcrafter.com/2020/05/22/fabric-bookmark/
- https://www.theinsightpartners.com/reports/bookmarks-market
- http://mailto:hello?subject=SIA%20Question

