This site is supported by our readers. We may earn a commission, at no cost to you, if you purchase through links.
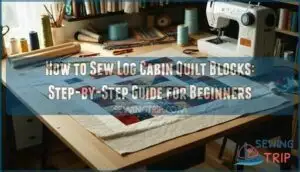
Cut fabric strips in coordinating light and dark colors—measure twice, cut once saves headaches later. Sew your first strip to one edge of the center square, then press the seam flat.
Here’s where the magic happens: rotate your block clockwise and add the next strip, continuing this spiral pattern. Each "log" builds outward, creating that classic cabin-like appearance.
Keep your seams consistent and press after each addition—this isn’t the time to rush. Smart fabric organization makes the whole process smoother, and you’ll discover some sneaky tricks that transform ordinary strips into showstopping patterns.
Table Of Contents
- Key Takeaways
- Log Cabin Quilt Block Instructions
- Layout
- Another Quick Piecing Option
- Amish Inspired Log Cabin Quilt
- What is a Log Cabin Quilt?
- Is a Log Cabin Quilt Block Good for a Beginner?
- Are There Different Variations of a Log Cabin Quilt Block?
- How to Construct The Traditional Quilt Block Step by Step Guide
- Quilting Tools and Supplies to Make a Quilt Block
- Frequently Asked Questions (FAQs)
- Conclusion
Key Takeaways
- Start with proper fabric organization – You’ll save time and avoid mistakes by cutting strips in coordinating light and dark colors, measuring twice before cutting, and organizing by size and value.
- Master the spiral building technique – You’ll create authentic log cabin blocks by placing your center square right-side up, sewing the first strip to one edge, then rotating clockwise and adding each new strip in a spiral pattern.
- Press seams after every addition – You’ll achieve professional-looking blocks by pressing each seam flat immediately after sewing, which prevents bulk and keeps your block square and crisp.
- Use consistent ¼" seam allowances – You’ll ensure uniform block sizing by maintaining scant ¼" seams throughout construction and trimming blocks square with a ruler and rotary cutter when finished.
Log Cabin Quilt Block Instructions
You’re about to learn exactly how to sew a classic log cabin quilt block, starting with simple fabric strips and working your way around the center square.
Don’t worry if your seams aren’t perfect—quilting is like pizza, a little unevenness just adds character!
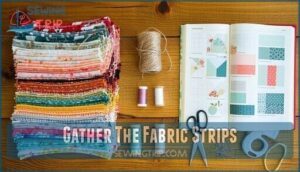
Gather The Fabric Strips
Grab your favorite stack of fabric strips—think of them as puzzle pieces waiting to shine.
For smart Fabric Selection, pick colors with clear contrast.
Strip Cutting matters, so measure twice, cut once.
Log Preparation keeps things smooth, so organize by size and color.
You’ll thank yourself later for good Fabric Organization when sewing log cabin quilt block patterns.
Effective fabric strip management is key to a successful project.
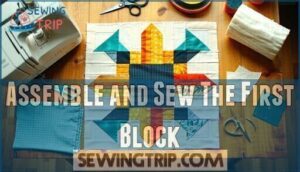
Assemble and Sew The First Block
Start by laying your center square right side up, then stitch your first log to one edge—think of it as building a tiny wooden cabin, one plank at a time.
Rotate the block, add the next log, and keep pressing seams flat.
Use your best Sewing Tips for accuracy, and enjoy this Block Assembly adventure in Quilting Basics.
Understanding traditional log cabin designs can also inspire your quilting projects.
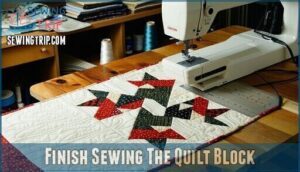
Finish Sewing The Quilt Block
With your block assembled, it’s time for Block Trimming.
Use a ruler and rotary cutter to square up the edges, keeping that 1/4" Seam Allowance crisp.
Double-check your Fabric Organization so nothing’s wonky.
Press each seam flat—think of it as smoothing out life’s wrinkles.
These Finishing Techniques guarantee your log cabin quilt shines among quilt block patterns and sewing techniques.
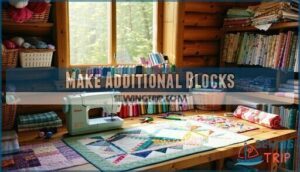
Make Additional Blocks
Once you’ve finished your first log cabin block, you’ll probably want to keep going—quilting is like eating chips, you can’t stop at one!
Making additional quilting blocks lets you experiment with Block Variations, Fabric Choices, and Quilt Patterns. Here’s how you can keep your quilt block construction rolling:
- Try different block sizes to see which fits your quilt best.
- Mix in scrap fabric for a patchwork effect—old shirts or leftover pieces work wonders.
- Play with bold or subtle color combos for eye-catching quilt block patterns.
- Test out new sewing techniques, like embroidery or applique, to add flair.
Every block adds personality, so let your creativity loose!
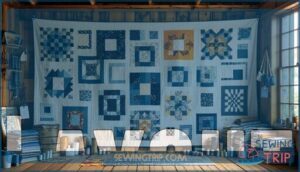
Layout
Once you’ve pieced your first log cabin block, it’s time to play with layout—think of it as arranging puzzle pieces, but with fabric!
Block Placement is where your quilt starts to show its personality. Lay out your blocks on a flat surface or a design wall, mixing and matching Color Schemes and Fabric Choices until the look feels just right.
Try arranging blocks with all the dark sides together for a bold diamond effect, or alternate lights and darks for a classic barn raising pattern.
The magic of log cabin quilt layouts is how simple shifts can create dramatic new Quilt Patterns. Trust your eye and experiment with Design Principles like symmetry and contrast.
Remember, quilt block construction and piecing are only half the fun—the real joy is watching your log cabin design come alive!
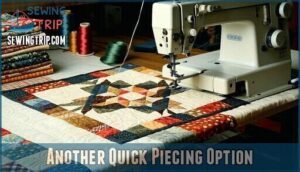
Another Quick Piecing Option
Ready to speed things up? If you’re itching to make quick blocks for your log cabin quilt, strip piecing is your ticket.
Grab those long fabric strips—think of it as Chain Piecing for the modern quilter. Here’s how you can combine Scrap Management with Fabric Efficiency and a dash of Speed Sewing.
- Lay out your strips, alternating light and dark fabrics for that classic log cabin block look.
- Sew strips together, matching edges as you go—quilting tutorials call this “strip piecing.”
- Use a ¼ inch piecing foot for accurate seams.
- Press seam allowances toward the darker fabric for crisp lines.
- Slice your sewn strips into segments that fit your sewing patterns.
It’s fast, fun, and perfect for using up scraps!
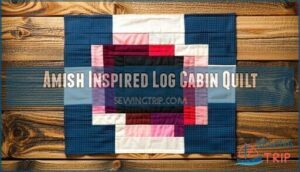
Amish Inspired Log Cabin Quilt
If you’re itching to sew log cabin blocks with a little extra flair, Amish Designs are a great place to start.
These quilts are famous for their bold color schemes and striking contrasts—think deep jewel tones with solid black backgrounds. It’s like painting with fabric!
You’ll want to focus on two main things:
- Fabric Choices: Pick rich, saturated colors and solid fabrics. Skip the prints and let those colors shine.
- Block Arrangements: Try layouts like Barn Raising or Sunshine and Shadow to create eye-catching quilt patterns.
Amish-inspired log cabin quilt projects celebrate symmetry and simplicity, but don’t be afraid to add your personal touch. Follow quilting tutorials, experiment with block variations, and enjoy the creative freedom of log cabin sewing!
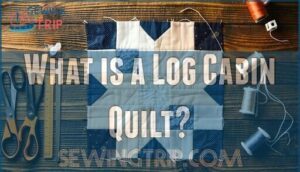
What is a Log Cabin Quilt?
Every log cabin quilt tells a story, mixing Quilt History with hands-on Quilting Basics.
The log cabin block starts with a center square, then you sew strips—called logs—around it, building a layered design.
Traditionally, one side uses light fabrics, the other dark, symbolizing day and night.
Fabric Selection is key; pick colors that pop!
Log Cabin Origins trace back to the Civil War, but this block design still shines today.
Log cabin sewing is like stacking bricks—each strip adds strength and style, and is a great example of Quilting Basics in action, with a focus on Fabric Selection.
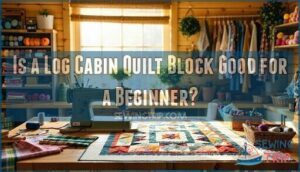
Is a Log Cabin Quilt Block Good for a Beginner?
Absolutely, the log cabin quilt is perfect for beginner sewing projects.
This classic pattern offers exceptional skill development through simple supplies and straightforward construction techniques.
- Simple Supplies: You’ll only need basic quilting for beginners tools like a rotary cutter, ruler, and sewing machine
- Quick Project: Each block takes just minutes to complete, giving you instant satisfaction and momentum
- Design Flexibility: Experiment with fabric scraps to create stunning log cabin quilts in countless arrangements
- Skill Development: Master essential techniques like quarter-inch seams and fabric pressing through repetitive, forgiving practice
The forgiving nature of log cabin quilts means mistakes become learning opportunities rather than frustrations.
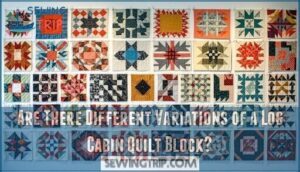
Are There Different Variations of a Log Cabin Quilt Block?
You’ll discover numerous exciting log cabin block pattern variations that’ll transform your quilt design.
The Courthouse Steps variation places strips on opposite sides rather than spiraling around, creating an architectural stepped appearance.
Try the intricate Pineapple Variation, which features diagonal corner strips radiating from the center like a starburst.
For traditional appeal, explore Amish Square designs that emphasize bold, contrasting colors.
Modern Interpretations break conventional rules with asymmetrical strip widths and contemporary color palettes.
Scrappy Cabins offer perfect stash-busting opportunities using varied fabrics within each log cabin blocks.
You can experiment with different fabric values, creating stunning visual effects through strategic light and dark placement.
Color choices dramatically impact your log cabin quilt’s final appearance.
Warm versus cool colors create striking contrasts, while gradual color shifts produce subtle, sophisticated looks.
Block arrangements also matter—rotate finished blocks to form diamonds, zigzags, or traditional barn-raising patterns.
These log cabin design variations guarantee your quilt reflects your personal style while maintaining the pattern’s timeless appeal.
How to Construct The Traditional Quilt Block Step by Step Guide
Building your first log cabin block transforms fabric strips into quilting magic. Start with your center square placed right-side up, then work systematically around each side.
- Cut fabric strips along the fabric grain to prevent stretching and maintain block stability
- Maintain a consistent seam allowance of scant ¼" throughout assembly for accurate sizing
- Practice proper seam pressing after each strip addition to reduce bulk and keep blocks flat
- Use block trimming techniques to guarantee uniform dimensions before final assembly
Begin quilt block piecing by sewing your first strip to the center square’s right edge. Trim excess fabric, then rotate counterclockwise and add the next strip to the bottom. Continue this spiral pattern, alternating between light and dark fabrics for contrast.
Seam pressing outward after each addition keeps your log cabin quilt block crisp and professional-looking. This methodical quilt block assembly approach works perfectly for scrap utilization, letting you transform leftover fabrics into stunning quilt blocks that’ll make your grandmother proud.
The process involves sewing logs around a center shape.
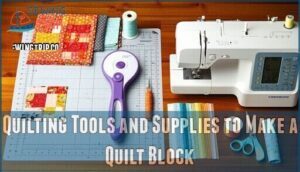
Quilting Tools and Supplies to Make a Quilt Block
Getting your hands on the right tools will make or break your Log Cabin Quilt Block project.
You’ll need essential cutting equipment, precise measuring tools, and reliable sewing supplies to create professional-looking blocks that won’t leave you pulling your hair out.
Here’s what you need to get started:
| Cutting Tools | Measuring Equipment | Sewing Essentials |
|---|---|---|
| Rotary cutter (45mm) | Acrylic ruler (6"x24") | Sewing machine |
| Self-healing mat | Square quilting ruler | 1/4" presser foot |
| Fabric scissors | Measuring tape | Seam ripper |
A rotary cutter paired with an acrylic ruler gives you razor-sharp precision when cutting fabric strips.
Your self-healing mat protects your table while providing those handy grid lines for accuracy.
Don’t forget a quality seam ripper – trust me, even seasoned quilters need this lifesaver when mistakes happen.
These tools are also useful for functional quilting projects like potholders.
Your sewing machine should handle 100% cotton quilting fabric like a champ, and that 1/4" presser foot guarantees consistent seam allowances throughout your Log Cabin Quilt Block construction.
Frequently Asked Questions (FAQs)
Is a log cabin quilt difficult?
Like learning to ride a bike, log cabin quilts aren’t difficult once you’ve got the basics down.
You’ll start with simple straight-line sewing and build confidence as you add each "log" around your center square.
How wide are the strips for a log cabin quilt?
Log cabin strips typically measure 5 to 5 inches wide, with 5 inches being most common for traditional blocks. You’ll cut varying lengths but keep width consistent for uniform results.
How to build a log cabin step by step?
Following tradition like your grandmother’s recipe, start with your center square as the hearth.
Sew strips counterclockwise around it, pressing each seam outward.
You’ll add logs in pairs, alternating light and dark sides for that classic contrast effect.
How do I fix warped log cabin blocks?
Warped blocks need steam pressing and blocking.
Press each seam flat, then use a damp pressing cloth with your iron’s steam setting.
Square up blocks with a quilting ruler, trimming edges evenly to restore proper dimensions.
What batting works best for log cabin quilts?
For log cabin quilts, cotton batting delivers the best results.
It’s lightweight, stable, and won’t shift during quilting.
The thin profile won’t overpower your intricate piecing work, while still providing warmth and structure for long-lasting comfort.
How to calculate yardage for log cabin quilts?
Most quilters need 30% more fabric than they initially calculate for log cabin blocks.
You’ll calculate yardage by multiplying your finished block size by total blocks needed, then add seam allowances and waste margins for accurate purchasing.
Can I machine quilt log cabin patterns?
Yes, you can absolutely machine quilt log cabin patterns.
The geometric design works beautifully with straight-line quilting, following seam lines, or creating diagonal grids.
You’ll love how the structured blocks showcase both simple and decorative machine quilting techniques perfectly.
How to prevent fabric bleeding in washing?
Nearly 90% of fabric bleeding happens in the first wash cycle.
You’ll master this by testing fabrics first with a damp white cloth.
Pre-wash questionable fabrics separately, use cold water, and add color catchers to trap loose dyes effectively.
Conclusion
Amazingly, quilters typically complete their first log cabin block in under 30 minutes, making it one of the fastest traditional patterns to master.
Now that you’ve learned how to sew log cabin blocks step-by-step, you’re ready to create stunning quilts with endless design possibilities.
Remember to keep your seams consistent, press after each strip addition, and organize your fabrics by value, as this classic technique will become second nature with practice.
With practice, this will open doors to countless creative variations.

