This site is supported by our readers. We may earn a commission, at no cost to you, if you purchase through links.
You’ll choose fabrics that breathe, draft patterns that flatter your unique shape, and construct garments that feel as good as they look. The best part? Once you nail the basic technique, you can whip up a pair in an afternoon and customize every detail from pocket placement to hem width.
Get ready to transform a few yards of fabric into your new favorite pants.
Table Of Contents
Key Takeaways
- Fabric choice determines your pants’ comfort and drape—stretchy knits with 25% recovery prevent bagging, while lightweight wovens like linen boost airflow by 35% compared to heavier materials.
- Adding 2.5 inches of ease to waist and hip measurements creates that relaxed silhouette without clinging, and widening each leg by 2 inches at the outer seam delivers the classic wide-leg look.
- Sharp cutting tools and precise grain line alignment prevent twisted, ill-fitting pants—even one degree off ruins the drape no matter how much you press.
- Proper pressing transforms homemade pants from amateur to professional in under five minutes, while washing at 30–40°C prevents the 10% shrinkage that happens with hot water on cotton and linen.
Choose The Best Fabric for Loose Pants
Your fabric choice sets the foundation for pants that move with you and feel right all day. You’ll want material that drapes beautifully without clinging or bunching at the wrong spots.
Let’s break down your best options for creating loose pants that actually work.
Selecting Stretchy Knits for Comfort
Stretchy knits are your ticket to pants that move with you, not against you. Look for fabrics like ponte knit or jersey with at least 25% stretch—they bounce back without bagging out.
Test breathability by holding fabric to your cheek; cooler-feeling knits wick moisture better. When selecting stretch fabrics, prioritize recovery over pure elasticity.
Knit fabric choices shape your comfort metrics, so grab samples before committing yardage. Understanding fabric stretch recovery is vital for peak comfort.
Opting for Lightweight Woven Fabrics
If knits aren’t your vibe, lightweight woven fabrics bring a totally different energy to your loose pants project. Linen steals the show with its open weave—airflow jumps and heat retention drops by up to 35% compared to heavier materials.
Here’s your fabric selection playbook for breathability factors and sustainable materials:
- Cotton voile drapes beautifully and stays soft against skin
- Rayon absorbs 50% more moisture than cotton for enhanced comfort
- Bamboo blends offer eco-friendly choices with moisture-wicking magic
When choosing fabrics, consider the benefits of lightest fabrics. This sewing guide champions textile innovation—your beginner’s guide to sewing techniques starts with smart fabric picks that honor both comfort and the planet.
Considering Polyester and Linen Options
Polyester and linen might seem like opposites, but each brings its own superpower to your loose pants—one laughs at wrinkles while the other breathes like a dream.
Polyester dominates activewear for durability tests—it resists abrasion and keeps shape through countless washes. Linen’s weave patterns create breathability factors that absorb moisture without clinging.
For sewing with knit fabric alternatives, this fabric comparison guides your garment construction techniques. Your beginners guide starts with texture analysis that matches your lifestyle.
Draft or Adjust Your Pants Pattern
Getting your pattern right is where the magic happens. You can add ease to an existing pattern, tweak proportions for a baggier silhouette, or draft something totally custom from scratch.
Each method gets you closer to pants that fit your body and your vision.
Adding Ease for a Relaxed Fit
You’ll want to add about 2.5 inches of ease to your waist and hip measurements if you’re after that breezy, relaxed silhouette that won’t cling or pull. This ease allowance gives you room to move freely and lets the fabric drape naturally—key comfort factors in garment construction techniques.
Mark these fit adjustments directly on your pattern before cutting, and you’ll nail that wide leg pants look without wrestling with pant fitting later.
Modifying Existing Patterns for Looseness
Pattern alterations give you total creative control without starting from scratch. Grab your favorite commercial sewing patterns and start by increasing seam allowances to 1 inch on both front and back pieces—this extra room lets you test fit modifications without wasting fabric or redrafting.
Key pattern alterations for a relaxed fit:
- Widen each leg by 2 inches at the outer seam from hip to hem using parallel lines for that classic wide-leg silhouette
- Adjust crotch depth by adding 1.25–2.5 cm between waist and crotch point to eliminate pulling and boost comfort
- Add 3/8 inch to center front at the waist to accommodate different body shapes and improve drape
- Trace your original pattern first so you can experiment freely without losing your base template
- Test changes on muslin before cutting your final fabric—baste, fit, trim, repeat until it’s perfect
These garment construction tweaks transform any standard pant fitting into your signature loose style.
Creating a Custom Paper Pattern
Building your own pattern from scratch might sound wild, but it’s the supreme freedom move when you want pants that actually fit your vision and your body. Start with your measurements—waist, hip, inseam, rise—then draft your block creation directly onto pattern paper using basic drafting techniques and a long ruler.
| Measurement | How to Take It | Why It Matters |
|---|---|---|
| Waist | Measure natural waistline snugly | Sets top anchor for rise calculation |
| Hip | Widest part around seat | Determines leg width and grading methods |
| Inseam | Inner leg from crotch to ankle | Controls pant length and proportion |
| Rise | Waist to seat while seated | Ensures comfortable fit without pulling |
| Outseam | Waist to floor along outer leg | Helps finalize hem placement |
These measurement tips transform DIY garment construction into a custom fit you’ll never get from store-bought sewing patterns and tutorials.
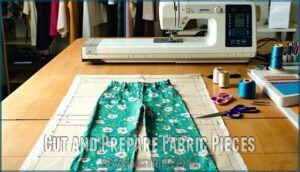
Cut and Prepare Fabric Pieces
Now that your pattern’s ready, it’s time to get your fabric prepped and cut. You’ll need the right tools and techniques to keep everything aligned and accurate.
Let’s walk through the essentials that’ll make cutting your wide-leg pants smooth and stress-free.
Essential Tools for Accurate Cutting
Sharp fabric shears are your best friend here—dull blades will chew through your fabric like a toddler attacking construction paper, leaving you with frayed edges and a whole lot of frustration.
Here’s what you need for clean, accurate cuts:
- Cutting mats protect your surfaces and guide your rotary cutters
- Rotary cutters slice through multiple layers fast
- Sewing scissors manage detail work and notches
- Rulers keep your lines straight and measurements spot-on
- Trimmers clean up threads and edges
These sewing tips set you up for success before your sewing machine even hums to life.
Marking and Pinning With Glass Head Pins and Clips
Once you’ve cut your pieces, pinning and marking become your insurance policy against wonky seams and mismatched notches. Glass head pins won’t melt under your iron, and fabric clips grip slippery knits without leaving holes.
| Tool | Best For | Sewing Tips |
|---|---|---|
| Glass head pins | Wovens and pin placement precision | Won’t melt during pressing |
| Fabric clips | Stretchy knits and clip usage on edges | Prevents pin holes in delicate fabric |
| Chalk markers | Fabric marking on dark colors | Brushes off clean after stitching |
| Water-soluble pens | Light fabrics needing seam accuracy | Disappears with a damp cloth |
| Tailor’s tacks | Notion selection for slippery materials | Traditional method for sewing patterns and instructions |
Your beginner’s sewing guide starts here—smart marking means fewer do-overs.
Cutting Techniques for Wide Leg Styles
Wide leg silhouettes demand respect for the grain line—cut even one degree off, and your relaxed drape turns into a twisted mess that no amount of pressing will fix. Use sharp cutting tools and pin your wide leg patterns every four inches along the seam allowance.
Follow your sewing patterns and instructions precisely—pattern accuracy means garment construction that moves with you, not against you.
Sew and Assemble Loose Pants
Now that your fabric pieces are ready, it’s time to bring your loose pants to life. You’ll stitch seams, secure the waistband, and add those final touches that make your pants uniquely yours.
Let’s break down each step so you can sew with confidence.
Stitching Side and Inseams in Order
Pinning your fabric pieces together is just the warm-up—now you’re ready to bring those legs to life with strong, clean seams. Here’s your construction roadmap:
- Align side seam edges right sides together, matching seam allowances perfectly
- Stitch side seams using your sewing machine with appropriate stitch length for fabric tension
- Press seams flat for professional side seam alignment
- Pin inseam construction from ankle to crotch in one continuous line
- Sew inseams and finish with seam finishing techniques to prevent fraying
Creating a Foldover Waistband With Elastic or Drawstring
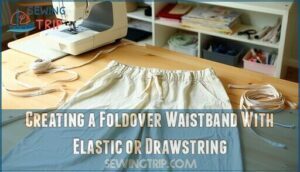
Your waistband is where comfort meets control—it’s the elastic hug or drawstring grip that’ll make these pants your new go-to bottoms. Fold your waist edge down to create a casing, press it crisp, then leave a small opening for threading.
| Waistband Styles | Elastic Options | Drawstring Methods |
|---|---|---|
| Foldover casing | 1-inch non-roll elastic | Flat cotton cord |
| Exposed elastic band | Braided elastic | Round drawstring |
| Double-fold edge | Knit elastic | Woven ribbon tie |
| Tunnel casing | Wide plush elastic | Adjustable cord lock |
| Pull-on stretch | Buttonhole elastic | Double-tied closure |
Stitch close to the bottom fold, backstitching at openings, then thread your elastic or drawstring through—you’re building freedom into every wear.
Adding Pockets and Finishing Wide Hems
Pockets aren’t just practical—they’re your pants’ secret weapon for stashing keys, phone, or that rogue lip balm, and wide hems anchor the whole silhouette with a polished, structured finish. Stitch side-seam pockets during construction or patch them on later, then fold and press your wide hems with fabric binding or a clean double-fold edge.
- Pin pockets at hip level before stitching side seams for smooth pocket construction
- Press hem allowances twice for crisp, professional hem finishing on wide leg pants
- Topstitch close to the folded edge to secure hems and prevent flipping
- Match thread to fabric for invisible stitches or contrast for bold detailing
Style and Care for Your DIY Loose Pants
You’ve sewn your loose pants—now it’s time to make them work in your wardrobe and keep them looking sharp. Styling them right brings out their relaxed vibe, while proper care ensures they last through countless wears.
Here’s how to finish, style, and maintain your handmade pants like a pro.
Pairing With Flowy Tops or Cropped Jackets
Once you’ve stitched your loose pants to excellence, the real fun starts—building outfits that show off that relaxed silhouette without looking like you just rolled out of bed. Balance is your best friend here. Pair your wide-leg pants with fitted, flowy tops or cropped jackets to create that casual chic vibe that’s all over fashion trends right now.
| Top Style | Why It Works |
|---|---|
| Tucked-in tee or bodysuit | Creates definition at your waist for summer outfits |
| Cropped denim jacket | Adds structure without overwhelming your DIY clothing |
| Fitted knit top | Shows off your silhouette in sewing wide-leg pants |
| Flowy blouse (half-tucked) | Balances volume while keeping it breezy |
These layering tips turn your sewing tutorials into wardrobe essentials. Mix textures and proportions to nail that effortlessly cool look that makes people ask, "Where’d you get those?" Your fashion sewing projects deserve styling that’s as bold as your decision to sew for beginners.
Pressing and Finishing for Professional Results
A crisp press with your iron transforms home-sewn pants from "I made these" to "Wait, you made those?"—and it takes less than five minutes if you know where to focus. These ironing techniques and garment finishes make your sewing for beginners project look runway-ready:
- Press seams flat immediately after stitching—seam finishing locks in professional lines
- Use fabric steaming on your finished hems to eliminate puckers
- Focus heat on waistband casing for sharp, clean edges
- Apply professional hemming pressure to wide leg panels for drape
- Press from wrong side to protect fabric surface and boost sewing confidence
Washing and Maintaining Handmade Pants
Proper laundry tips keep your DIY fashion looking sharp and extend its life. Cotton and linen pants need a gentle cycle at 30–40°C—fabric shrinkage can reach 10% on that first wash, so skip the hot water. Polyester tolerates regular cycles fine, but wash after 1–2 wears.
Hand washing delicate fabrics with mild detergent choice preserves softness and fit. Always check care labels, air dry when possible, and avoid bleach—your sewing for beginners project deserves longevity.
Frequently Asked Questions (FAQs)
Can loose-fitting pants be made with stiffer fabrics?
Stiffer fabrics don’t bend the rules of drape—they break them. Yes, you can use canvas or denim, but expect structure over flow.
Fabric selection matters: pre-wash to soften, add generous ease to your loose fit patterns, and use wide leg pants designs with minimal gathering. These stiff fabric hacks transform rigid textiles into wearable DIY fashion.
How can I add more ease to an existing pants pattern?
Slash your pattern along the side seam or center, then spread it to introduce extra width. This classic pattern alterations technique lets you control ease calculations and fit adjustments precisely.
You’re modifying the garment to suit your style, making sewing wide leg pants truly yours.
What are the advantages of using elastic or drawstrings for adjustability?
Elastic waistbands and drawstring closures give you total control over fit—they expand with your body throughout the day and don’t require precise measurements.
You’ll skip complicated zippers and button plackets, making these flexible seams perfect for beginners sewing guide projects.
When should I install pockets when sewing loose-fitting pants?
Sewing Order matters more than you think—installing pockets before you stitch side seams saves you from wrestling with bulk. You’ll want to attach your pockets to the front or back fabric pieces while everything’s flat.
Once you’ve secured your pocket placement, then sew your side seams and inseams. That’s the sequence that keeps your wide leg pants looking sharp.
What type of thread works best for loose pants?
Pick all-purpose polyester thread for synthetic fibers or cotton thread for natural fabrics—both manage stretchy knits and woven materials beautifully.
Match your thread types to your fabric’s stretch level, especially around the elastic waistband, so seams move freely without snapping during wear.
How do I determine the right inseam length?
Measure from your crotch seam down to where you want the hem—ankles, floor, or mid-calf. Try on similar pants or use a Sewing Machine manual’s Pant Length chart.
Adjust for Body Proportion, Leg Shape, and your Waistband height. Learn to sew with proper Inseam Measurement and Fit Adjustment techniques using Sewing Patterns. Sewing Education helps perfect this skill.
Can I convert tight pants into loose ones?
Like trying to squeeze into a pair of jeans you’ve outgrown, converting tight pants into loose ones through pants alteration and seam letting rarely works. Fabric relaxation and waist expansion can’t add the width you need for true garment refitting without compromising structure and fit.
What seam finishes prevent fraying on raw edges?
Your sewing machine’s zigzag stitch locks down raw edges fast. French seams hide fraying completely. Bias binding wraps edges clean.
Overlock finishes from online sewing courses seal woven fabric beautifully.
Fray checking liquid works instantly.
How much fabric do I need for my size?
You’ll want 2–4 yards depending on your measurements—most online sewing schools, patterns, and tutorials include fabric requirements and size charts. A yardage calculator helps match your sizing guides to fabric measurement needs.
Learn to sew with confidence using your sewing machine and online sewing education resources.
Conclusion
You’ve officially broken free from the tyranny of ill-fitting, mass-produced trousers that treat every body like a carbon copy.
Now that you know how to sew loose pants, you control the fit, fabric, and feel of every pair you make. No more settling for baggy waistbands or stiff hems—just clothes that move when you move.
Grab your machine, pick a pattern, and start stitching the wardrobe you actually want to wear. Your next favorite pants are waiting.
- https://megaapparel.com/blog/types-of-fabric-for-pants-and-trousers/
- https://www.youtube.com/watch?v=Wc7TlTR7_AA
- https://www.reddit.com/r/sewhelp/comments/gawa4b/i_thought_i_picked_the_right_size_pants_came_out/
- https://lovetosewpodcast.com/episodes/episode-184-pants-sewing-and-fitting/
- https://blog.fabrics-store.com/2023/05/21/how-to-take-in-your-pants/

