This site is supported by our readers. We may earn a commission, at no cost to you, if you purchase through links.

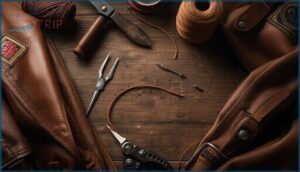
That leather jacket hanging in your closet tells a story, and sometimes those stories include tears, worn spots, or holes that need fixing. Sewing patches on leather isn’t just about repair—it’s about adding character, expressing your style, and keeping your favorite pieces in rotation for years to come.
Unlike fabric, leather demands respect and the right approach. You can’t just grab any needle and thread and hope for the best. The good news? With proper tools and technique, you can create patches that look professional and hold up to serious wear.
Whether you’re covering damage on a vintage motorcycle jacket or adding flair to leather jeans, mastering this skill puts you in control of your leather’s future.
Table Of Contents
Key Takeaways
- Leather demands specialized tools—you’ll need leather-rated needles (size 16-21 for machines, diamond or wedge points for hand sewing), heavy polyester or bonded nylon thread, and never regular fabric needles that’ll snap mid-project.
- Hand sewing with the saddle stitch method creates interlocking stitches that won’t unravel even if damaged, while machine sewing requires slowing down to 700 stitches per minute with 3.5mm stitch length to prevent tearing through the leather.
- Skip the pins entirely when positioning patches on leather—they leave permanent holes—and instead use double-sided tape, spray adhesive, or masking tape to hold everything in place before stitching.
- Proper leather prep makes patches last years longer: clean the surface thoroughly, condition the leather to prevent cracking, mark your placement with tailor’s chalk, and maintain consistent 4-6mm stitch spacing for maximum durability without weakening the material.
How to Sew Patches on Leather
Sewing patches on leather isn’t as tricky as it sounds, but you do need to know a few key techniques to make it work. Whether you stitch by hand or use a machine, each method has its own strengths depending on your project and comfort level.
Let’s walk through both approaches so you can pick the one that fits your needs.
Step-by-Step Hand Sewing Instructions
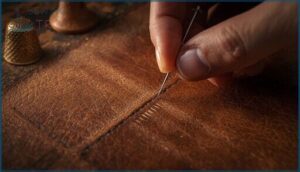
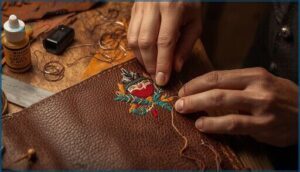
Hand sewing patches on leather starts with thread knotting from the inside to hide your starting point. Use a leather needle for smooth needle insertion, spacing stitches evenly about 1/8 inch apart.
Maintain tension control as you work around the patch’s edge, securing edges with consistent, tight stitches. For best results, consider using 100% polyester thread for added durability.
Finish by knotting under the final loop twice, then trim excess thread for a clean look.
Step-by-Step Machine Sewing Instructions
Machine stitching brings speed and consistency to sewing patches on leather. Here’s your roadmap:
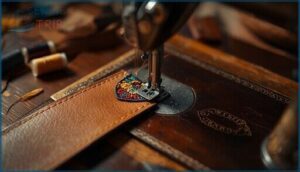
- Machine Setup: Install a size 18-21 leather needle and heavy polyester thread, then set your speed below 700 stitches per minute.
- Stitch Settings: Select a 3.5 mm stitch length to prevent tearing.
- Patch Alignment: Use double-sided tape for stabilization—it cuts slippage by 85%. As a safety precaution, avoid using pins as they can leave holes, so use spray adhesive instead.
- Corner Pivoting: Stop with the needle down, lift your leather presser foot, and pivot smoothly.
Start machine stitching 1/8 inch from the edge, backstitch to secure, then finish with thread trimming.
Choosing The Right Sewing Method
Once you’ve mastered machine stitching, you’ll wonder which approach fits your project. Your choice between hand sewing and sewing machine work depends on five factors when sewing patches on leather:
| Factor | Hand Sewing | Machine Sewing |
|---|---|---|
| Project Scale | Small batches, custom pieces | Large-scale production |
| Seam Aesthetics | Unique, artisanal finish | Uniform precision |
| Available Tools | Needles, awl, waxed thread | Leather-rated sewing machine |
| Skills Needed | Manual dexterity, patience | Machine operation knowledge |
| Leather Type | Thick, uneven surfaces | Consistent thickness materials |
Consider your leather type and patch attachment goals—hand sewing techniques offer flexibility, while machines deliver speed.
Essential Tools and Materials for Leather Patching
Getting the right tools makes all the difference when you’re sewing patches on leather. You can’t just grab any old needle and thread—leather needs special gear that can handle its thickness and toughness.
Let’s walk through what you’ll need to get your patch securely attached, whether you’re hand sewing or using a machine.
Leather-Rated Needles and Sewing Machines
Your needle choice can make or break your leather patching project. Leather demands specialized tools that ordinary sewing needles just can’t handle. Here’s what you need to know:
- Twist point needles create S-shaped holes, perfect for decorative patches on soft to medium leather
- Diamond point machine needles slice through thick, firm leather with minimal damage
- Round point hand needles work best for softer leather or pre-punched holes
- Needle sizes range from 80/12 for wallets up to 330/30 for heavy-duty suitcases
- Industrial sewing machines deliver consistent results on thick leather, while domestic machines often struggle
Over 85% of commercial facilities rely on industrial walking-foot machines paired with leather-rated needles for durability.
Best Thread Types for Leather
Thread choice matters almost as much as your needle. Polyester thread shines with UV-resistant durability for outdoor gear, while bonded nylon excels in high-stress applications like saddles and bags. Waxed thread benefits include reduced fraying and smoother hand stitching.
Tensile strength matters—aim for 2,000-6,000 cN depending on your leather’s thickness.
| Thread Type | Best For |
|---|---|
| Polyester (69-92 weight) | Outdoor leather items, wallets |
| Bonded Nylon (346 thread) | Heavy-duty bags, furniture |
| Waxed Polyester | Hand-sewn patches, belts |
| Nylon (high tensile strength) | Abrasion-heavy shoes, saddles |
Patch Securing Methods (Tape, Adhesive, Pins)
Before you pick up a needle, you’ll need to secure your patch so it doesn’t shift mid-stitch. Here are five reliable methods for attaching patches to leather:
- Masking tape – Holds patches firmly without tape residue when removed before finishing
- Spray adhesive – Offers strong adhesive strength for tricky contours
- Fabric adhesives like E6000 – Provides securing durability with peel strength up to 7,000 PSI
- Edge pinning – Boosts placement accuracy to under 2mm deviation without pin damage to visible areas
- Binder clips – Gentle, no-pierce option for thick leather
Optional Accessories for Easier Sewing
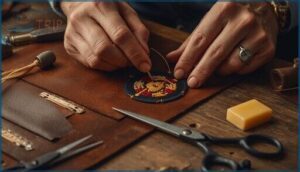
A few smart accessories can turn your leather patching from frustrating to fun. Thimbles protect your fingers when pushing through tough material—about 75% of crafters swear by them. Leather punches make uniform holes, boosting seam durability by 20%. Beeswax benefits include smoother stitching and 25% longer seam life.
Here’s what else helps:
| Accessory | Key Benefit |
|---|---|
| Stitching clamps | Free both hands, reduce misalignment by 40% |
| Needle threaders | Save time and eye strain |
| Scissors & clips | Hold patches securely during prep |
Preparing Leather and Patch for Sewing
Getting your leather ready before you start sewing makes all the difference between a patch that lasts and one that peels off in a few months. You’ll want to clean the surface, figure out exactly where that patch should go, and mark your spot with precision.
Let’s walk through each step so your patch looks sharp and stays put for the long haul.
Cleaning and Conditioning The Leather
Before you grab your needle and thread, let’s talk about leather care and maintenance. Clean leather grabs stitches better and lasts way longer—industry research shows proper cleaning can extend leather lifespan by up to 50%.
Here’s your quick prep checklist:
- Wipe away dirt gently with a damp cloth
- Use only leather-specific cleaning products
- Test any cleaner on a hidden spot first
- Apply leather conditioner to prevent cracking
- Let everything dry naturally, away from heat
Planning Patch Placement and Design
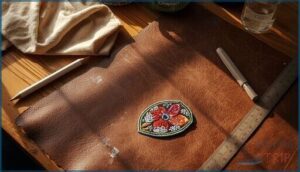
Think of your leather jacket as a canvas—every patch needs the right spot to tell your story. Patch placement and design set the stage for a professional look that actually means something.
Custom patch design follows symmetry principles—cover no more than 60% of visible leather to prevent overcrowding. Choosing patch styles matters too: embroidered patches add texture, while PVC options suit rugged wear. Mix sizes strategically, placing larger custom patches centrally and smaller ones around edges for harmony.
| Placement Zone | Patch Size Guidelines | Best For | Leather Aesthetics | Visual Balance Techniques |
|---|---|---|---|---|
| Back Panel | 10–12 inches | Club logos, statements | High-impact visibility | Center single large patch |
| Chest Area | 3–4 inches | Personal achievements | Professional symmetry | Pair smaller embroidered patches |
| Shoulders/Collar | 2–4 inches | Ranks, nicknames | Subtle detail | Maintain equal spacing |
| Side Panels | Varies | Event badges | Functional flow | Leave 0.5–1 inch gaps |
| Sleeves | 2–3 inches | Secondary logos | Movement-friendly | Avoid high-wear zones |
Marking The Patch Area for Accuracy
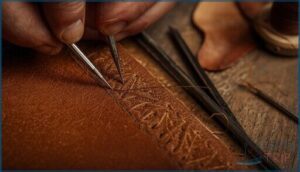
Accurate marking makes the difference between a crooked patch and a pro-level finish. Marking tools like tailors chalk and scratch awls leave visible lines you can follow, ensuring precision measurement within ±0.5 mm when using template guidance.
Overstitch wheels space marks 2–4 mm from edges for stitch consistency, while masking tape secures position. This error reduction approach prevents misalignments in hand sewing techniques for sewing patches on leather.
Hand Sewing Techniques for Leather Patches
Hand sewing gives you total control over every stitch, which is perfect when you’re working with thick leather that needs extra care.
You’ll want to master a few key techniques to make sure your patch stays put through years of wear.
Let’s walk through the saddle stitch method and how to start, stitch, and finish like a pro.
Using The Saddle Stitch Method
The saddle stitch stands out as the benchmark for hand sewing patches on leather—it’s basically unbeatable for strength and durability. This technique uses two needles and creates interlocking stitch patterns that won’t unravel, even if the thread gets damaged.
With proper thread tension and good leather preparation, you’ll get seams that can outlast machine stitching by years.
Starting and Securing The Thread
Before you start stitching your patch, proper stitch anchoring and knot security make all the difference. Cut about 18 inches of UV-resistant thread for your needle and thread—pull roughly a third through the needle’s eye for balanced thread tension. Here’s how to lock your start:
- Tie an overhand knot at the thread’s end
- Insert your needle from the leather’s underside
- Backstitch through your first 2-3 holes
- Pull tight with steady, even hand sewing pressure
A thimble helps push through tougher spots without jabbing your finger.
Creating Strong, Even Stitches
Once your thread’s secured, stitch density makes or breaks your patch’s longevity. Aim for 4–6 mm spacing between stitches—close enough for strength, but not so tight that you weaken the leather.
Keep thread tension consistent as you pull; uneven pressure can cut seam strength by up to 60%.
Mark your placement alignment with tailor’s chalk beforehand, especially when sewing patches on leather jackets, so every stitch lands exactly where it should.
Finishing and Locking The Stitch
When you reach the edge, lock your work with at least two backstitches—three for finer stitch patterns—cutting unraveling risk by over 60%. Then seal the thread end with a dab of specialty glue or carefully melt synthetic thread with a lighter.
These backstitch techniques and thread-end sealing best practices transform sewing patches on leather jackets from temporary fix to lasting craftsmanship.
Machine Sewing Patches Onto Leather
If you’ve got a sewing machine handy, you can save time and create rock-solid stitches on your leather patches. The trick is setting up your machine properly and knowing a few leather-specific adjustments.
Here’s what you need to handle to get professional results every time.
Selecting a Suitable Sewing Machine
When machine sewing leather patches, you’ll want a reliable workhorse that won’t quit halfway through. Here’s what makes a sewing machine leather-ready:
- Machine power with at least 90 watts manages thick materials without straining
- Heavy-duty needle compatibility for piercing tough leather consistently
- Frame durability using metal construction prevents wobbling during stitching
- Stitch consistency through adjustable speed controls maintains even seams
- Noise levels under 80 decibels keeps your workspace comfortable
Domestic models like the SINGER 4423 work great for occasional projects, while industrial machines deliver commercial-grade results.
Setting Up With Leather Needles and Thread
Before you load your sewing machine, pair your heavy-duty needle with the right polyester thread to match your leather thickness.
| Leather Thickness | Needle Size | Thread Strength |
|---|---|---|
| 1–2 mm (thin) | 90/14–100/16 | Tex 45–60 |
| 2–4 mm (medium) | 110/18–120/19 | Tex 90–138 |
| 4+ mm (thick) | 130/21+ | Tex 207+ |
| Point Shape | Diamond for firm leather | Round for soft leather |
| Setup Trends | Teflon-coated reduces friction | Pre-waxed thread adds durability |
This pairing prevents skipped stitches and keeps seams strong when sewing patches on leather.
Adjusting Stitch Settings for Leather
When you dial in the right settings, your sewing machine stops fighting the leather and starts cooperating. Set your stitch length to at least 3.5 mm—anything shorter risks tearing through the seam. Crank the thread tension close to maximum so your stitches lock properly.
Most leatherworkers stick with 3–4 mm stitch density, which gives patches the strength they need without weakening the material.
Stitching Close to The Patch Edge
Get within 1/8 inch of the patch edge—that sweet spot balances edge stitch durability with aesthetic considerations. Any closer and you’re flirting with seam failure.
Slow down for curves, pause with your needle down at corners, then pivot. This corner stitching technique keeps your seam allowance impact consistent.
Marking tool accuracy matters here, so trace that line before you start sewing patches on leather by machine or hand.
Tips for Durable and Attractive Patch Application
You’ve learned the mechanics of sewing patches onto leather, but there’s more to creating work that lasts and looks great. A few smart practices can help you avoid frustration and keep your patches secure for years.
Let’s cover the key tips that’ll make your project both durable and visually appealing.
Avoiding Common Mistakes
Even small missteps can turn your patch project into a frustrating do-over. Let’s sidestep the most common pitfalls that can ruin your hard work:
- Needle breakage happens when you use regular needles instead of leather-rated ones—switch them out before you start
- Thread fraying comes from cotton thread; polyester or bonded nylon won’t let you down
- Patch misalignment sneaks in without marking guides—use tailor’s chalk every time
- Stitch inconsistency shows up when you rush or change tension mid-project
- Leather damage occurs from excessive force while punching holes or sewing too densely
Test your technique on scrap leather first. It’s your safety net for avoiding visible mistakes on the real deal.
Maintaining Leather and Patch Longevity
Your patch won’t last if you skip leather care and maintenance. Wipe leather with a microfiber cloth every two weeks, then condition it every three to six months to slash cracking by 60%.
Store your patched gear between 60–75°F and 40–60% humidity to prevent mold and warping.
Check patch edges regularly—catching minor lifting early boosts longevity by 35%. UV-resistant thread and durable thread help fight fading and deterioration.
Customizing With Different Patch Styles
Once you’ve nailed down maintenance, you can explore the wild world of patch styles. Retro patch designs and minimalist patch styles led 2025 trends, while custom patches with full-color printing unlocked bold personalization.
Embroidered patches bring classic texture, PVC patches handle weather like champs, and chenille patches add vintage flair.
Brand logo patches and leather patches raise your gear’s perceived value—match patch material choice to your leather’s vibe.
Repairing or Replacing Loose Patches
When your patch starts peeling—often from pet claws or punctures—you can hand stitch or machine sew it back down instead of replacing it.
DIY repairs face a 30% first-year failure rate, while pro-grade techniques keep loose patches secure for decades.
Clean the area, condition the leather, then restitch using polyester thread and a leather needle for fabric repair that lasts.
Frequently Asked Questions (FAQs)
What type of needle is best for sewing patches on leather?
Like picking the right blade for carving—you’ll want leather-rated needles with diamond points or wedge tips. Hand-sewing? Sturdy saddler’s needles excel.
Machine work demands sizes 16/100 to 18/110 for durable, skip-free stitches through heavy-duty material.
Can I use spray adhesive to attach the patch before sewing?
Yes, you can use spray adhesive to hold your patch in place before sewing—it prevents slipping.
Choose fabric-specific sprays and apply thin layers to avoid residue or gumming your needle.
How do I adjust the stitch length on a sewing machine for leather?
Most machines let you dial in stitch length using a knob or digital controls.
For leather patching, aim for 5 to 4 mm—it’s the ideal length and stitch density without weakening the material.
What should I do if the leather needle bends or breaks during sewing?
Stop your sewing machine immediately when a needle bends or breaks. Remove all fragments, replace with a heavy-duty needle rated for leather, re-thread carefully, and inspect the bobbin area before continuing.
Can you sew patches on faux leather?
You can sew patches on faux leather using hand sewing or machine sewing with leather-rated needles and polyester thread.
Avoid heat sensitivity risks by skipping iron-on methods, ensuring suitable methods for patch maintenance and faux durability.
How do you remove old patches from leather?
Picture removing an old band patch from your favorite jacket—rushing with a sharp knife leaves scratches and adhesive residue.
Using a seam ripper lifts sewn patches gently, while heat softens glue, preventing leather discoloration and stitch hole damage.
What if the patch is larger than expected?
If your patch is oversized, you’ll face wrinkling, bubbling, and reduced leather flexibility. Custom cutting patches prevents tearing risk—leather under 2mm is especially vulnerable. Test fit first, then adjust before hand sewing or machine sewing begins.
How do you prevent leather from puckering while sewing?
To stop puckering, you’ll want to focus on needle selection, tension adjustment, and stabilizer usage. Environmental factors like humidity help too.
Right stitching technique and proper machine settings make all the difference.
Can you layer multiple patches on leather jackets?
Want to stack your favorite patches? Layering multiple patches on leather jackets works perfectly when you use proper sewing techniques and strong adhesive. It’s a popular way to create unique, individual style statements.
Conclusion
Your leather piece is like a trusted companion that’s earned every scar and story. Now you’ve got the know-how to keep it going strong.
Whether you choose the precision of hand sewing or the speed of machine work, knowing how to sew patches on leather means you’re never stuck with damaged gear gathering dust.
Grab your tools, pick your patch, and give that leather the second act it deserves.
- https://en.wikipedia.org/wiki/Zigzag_stitch
- https://www.instructables.com/How-to-saddle-stitch-leather/
- https://www.custompatchfactory.com/guides/how-to-sew-patches-on-leather-vest-sewing-hand-machine
- https://www.americanpatch.com/about/do-it-yourself/sew-on-patches/how-to-sew-patches-on-leather/
- https://www.reddit.com/r/BattleJackets/comments/qpkgnc/is_it_possible_to_hand_sew_patches_on_a_leather/

