This site is supported by our readers. We may earn a commission, at no cost to you, if you purchase through links.
Whether you’re adding curves to a dress, creating comfortable panels for maternity wear, or giving an old top new life, ruching delivers both function and style. The method works across fabrics and body types, which is why fashion designers rely on it to balance silhouettes and improve movement.
Learning how to sew ruching opens up endless design possibilities for your wardrobe.
Table Of Contents
Key Takeaways
- Ruching uses elastic and your sewing machine to gather fabric into soft ripples and folds, transforming basic garments into fitted, flattering pieces that work across different body types and fabrics.
- Lightweight fabrics between 70–150 g/m² with at least 20% elasticity gather smoothly without bulk, while heavier fabrics resist gathering and create awkward bunching instead of elegant folds.
- Proper preparation—marking guidelines every 1 to 2 inches, stretching elastic to about 1.5 times its resting length while sewing, and reinforcing both ends with multiple stitches—prevents uneven gathers and ensures durability.
- Strategic ruching placement like waist ruching creates a defined look, vertical lines elongate your frame, and side placement adds dimension, so position ruching based on your body type and the flattering effect you want.
What is Ruching in Sewing?
Ruching is one of those techniques that looks complicated but isn’t once you understand the basics. It adds texture and shape to your garments in ways that transform simple fabric into something special.
Ruching transforms simple fabric into dimensional elegance by gathering and pleating material into flattering textures and shapes
Before you start gathering and stitching, you need to know what ruching actually is and how it differs from similar techniques.
Definition and Purpose of Ruching
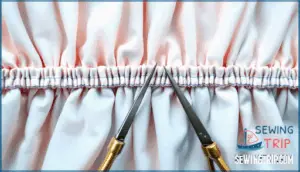
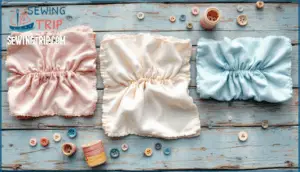
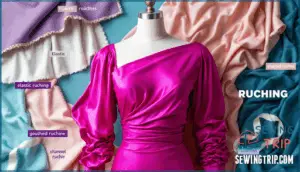
Ruching is a fabric manipulation technique that gathers or pleats material to create ripples and folds. This sewing technique adds dimensional texture and visual interest to garments. The term comes from French, meaning "to gather, ruffle, or pleat," and dates back to the 16th century when it signified sophistication in European fashion.
Ruching offers several functional benefits in modern applications:
- Accentuates curves by creating flattering gathers that enhance body shape
- Adds stretch when elastic is incorporated into the design
- Conceals problem areas while emphasizing preferred features through strategic placement
- Transforms fit by introducing volume and texture to both casual and formal pieces
- Creates visual impact with gathered sections generally ranging from 1 to 3 inches in width
This adaptable technique works across fabric types, including lace, chiffon, and jersey knit. Ruching can also bolster natural curves without adding bulk to the silhouette. The design impact is measurable—surveys show 68% of shoppers find ruched garments more figure-flattering than non-gathered alternatives.
Common Uses for Ruching in Garments
You’ll see ruching everywhere once you start looking for it. Dresses and formalwear lead the pack—87% of designer collections at major fashion weeks now include at least one ruched design. Bodices and waistline areas use this technique to create fitted silhouettes, while skirt panels add movement.
In activewear and swimsuits, ruching functions double duty by flattering curves and improving stretch. Maternity wear relies heavily on ruched panels for comfort as bodies change. Even adaptive clothing uses ruching at closures for easier dressing.
These dresses are known for their slimming and elegant appearance.
Ruching Vs. Shirring: Key Differences
People often mix up ruching and shirring, but they’re different sewing techniques. Ruching uses regular thread to create decorative gathers without stretch—it’s all about visual impact and texture. Shirring relies on elastic thread in the bobbin to produce stretchy gathered rows, giving you both function and fit.
Historically, ruching meant luxury in Victorian fashion because it ate up extra fabric. Shirring came later as a practical way to add elasticity.
For fabric choice, ruching works on nearly anything while shirring prefers lightweight materials. The application differences are clear: ruching adds drama and volume, shirring provides comfortable stretch.
Essential Tools and Materials for Ruching
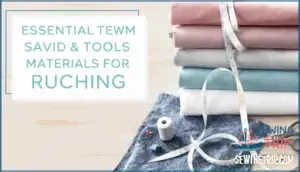
Getting your ruching right starts with having the right supplies on hand. You’ll need fabric that gathers well and elastic that suits your project.
Let’s look at what works best for each part of the process.
Choosing The Right Fabrics
Your fabric choice can make or break your ruching project. Lightweight stretch fabric like jersey knit or soft linen works best because it gathers smoothly without adding bulk. Here’s what to think about:
- Weight Considerations: Fabrics between 70–150 g/m² create natural folds without stiffness
- Stretch Percentage: Aim for at least 20% elasticity so your ruching fabric moves with you
- Texture Effects: Matte jersey produces casual gathers while shiny materials catch light beautifully
- Sustainable Options: Organic cotton blends offer eco-friendly durability for everyday wear
Heavier fabrics resist gathering and create awkward bunching instead of elegant folds.
Types of Elastic for Ruching
The right elastic makes all the difference when using elastic for gathering. Braided elastic is your most flexible option, with widths from 1/8 to 3 inches. It works best in casings rather than sewn through.
Knitted elastic maintains its width when stretched and accepts direct stitching beautifully on lightweight fabrics. Woven elastic resists rolling and provides firm support for structured garments. Clear elastic offers invisible reinforcement for sheer materials.
Specialty elastics like elastic thread create shirred effects, while buttonhole elastic allows adjustable fits.
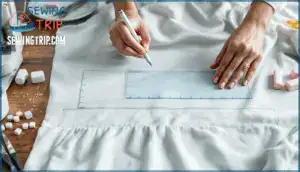
Marking and Measuring The Ruching Area
Before you start adding ruching to garments, you need to map out your ruching zone accuracy. Precision here prevents wonky gathers and fitting disasters.
- Mark top and bottom boundaries with chalk or washable pen to outline where gathers belong
- Measure the length of your ruching area, then calculate fabric excess needed by adding 25–50% extra material
- Check circumference measurement by pre-gathering and matching against your body or pattern
- Select marking tools wisely using dressmaker’s tracing paper for dark fabrics or notches for tactile guides
Length reduction happens fast when gathering fabric, so double-check your math before cutting.
How to Sew Ruching With Elastic
Sewing ruching with elastic transforms flat fabric into textured gathers that stretch and move with you. The process involves pinning elastic to your fabric and stitching it down while stretching the elastic to create even gathers.
Here’s how to create professional-looking ruching from start to finish.
Preparing and Marking Your Fabric
Before you sew a single stitch, proper fabric preparation sets the stage for clean, even gathers. Pre-wash and press your fabric to prevent later distortion—think of it as building on a solid foundation.
Use water-soluble pencils or tailor’s chalk as marking tools to create temporary lines on the wrong side. Mark the start and end points of your ruching placement, then add guidelines every 1 to 2 inches for consistent measuring. This approach aids symmetrical gathering and reduces errors by about 25 percent compared to unmarked fabric manipulation methods.
Attaching and Securing The Elastic
Once your markings are clear, pin the elastic at the start and end points with at least half an inch extending beyond each pin. Select your elastic width—1/4 inch for delicate gathers, 1/2 inch for bolder effects.
Decide between casing vs. direct attachment based on your fabric weight. For direct elastic insertion, a zigzag stitch provides tension control and stretch.
Box-stitch both ends as reinforcement methods to prevent failure during wear.
Sewing The Ruching and Adjusting Gathers
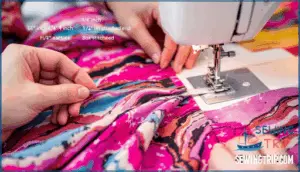
Set your machine to a stitch length between 3.5 and 4 mm to prevent thread breakage while sewing techniques for ruching. Stretch the elastic to about 1.5 times its resting length as you sew, maintaining steady elastic tension for uniform gathers.
Lower your tension settings by 30–40% and reduce presser foot pressure by 25% to help the fabric feed smoothly.
After sewing ruching, adjust gather density by redistributing the fabric evenly along the elastic every 1.5–2 cm, then secure with seam reinforcement backstitching at both ends.
Finalizing and Finishing The Ruched Area
Once your gathers look even, it’s time to lock them in with seam reinforcement. Backstitch at both ends to boost durability by about 25%. Set your stitch length between 2.0 and 2.5 mm, then add a second line of stitching 3–5 mm from the first for extra strength.
Press lightly with steam using pressing techniques that won’t flatten your work. Trim the seam allowance to 0.6–0.8 cm and finish edges with a serger or zigzag stitch for stabilizing fabric and preventing frays.
Run quick quality checks to confirm even spacing and stretch recovery.
Alternative Ruching Techniques
Elastic isn’t the only way to create ruching in your sewing projects. You can also use basting stitches for more control over your gathers or try elastic thread for stretchy shirred fabric.
Here are three alternative methods that give you different looks and textures.
Gathering Fabric With Basting Stitches
Basting stitches offer another way to create gathers without elastic. You’ll set your stitch length between 4.0 mm and 6.0 mm and lower your thread tension to 2–4 for easier pulling. Sew two parallel rows about 1/8″ apart within your seam allowance, leaving long thread tails. Pull the bobbin threads from both ends to gather the fabric evenly.
This sewing tutorial method works especially well when adding gathers to fabric of varying weights, since you can adjust the gathering row methods to match your material.
Creating Ruching With Elastic Thread (Shirring)
Elastic thread shirring creates stretchy gathers by loading elastic thread into your bobbin while using standard thread in the needle. Wind the elastic by hand onto the bobbin and adjust bobbin tension until you see consistent gathers forming.
Set your sewing machine to a longer stitch length around 3.5–4 and sew parallel rows spaced 1/4″ to 1″ apart. Fabric gather density increases with each shirring row spacing you add.
Steam pressing gathers afterward helps set the texture and gives your work a polished finish.
Hand Stitching Ruching With Smocking Stitches
Smocking stitches create ruching through decorative hand embroidery that gathers and stabilizes fabric pleats. Mark a grid on lightweight cotton or silk, then thread rows with temporary stitches.
Cable stitch forms firm elastic rows, while honeycomb stitch produces flexible texture. Keep consistent tension control across each row to prevent distortion.
Remove temporary threads when finished to reveal stable gathers with built-in elasticity and three-dimensional surface detail.
Design Ideas for Adding Ruching to Clothing
Ruching opens up a world of possibilities for transforming ordinary garments into eye-catching pieces. You can add texture and dimension to almost any part of your clothing.
Here are some creative ways to use ruching in your sewing projects.
Ruching on Sleeves, Skirts, and Bodices
Ruching fabric transforms each part of your garment differently. For sleeves, you’ll usually lengthen patterns by several inches and space placement lines one inch apart to create soft gathers from hem to shoulder.
Skirt ruching patterns often add four inches to the length and work beautifully with vertical panels from waist to hem.
When you sew ruching on a bodice, expect to use 1.5 to 2.5 times the width of your original fabric for the most flattering shape. To achieve the most flattering ruched bodice, you’ll need 1.5 to 2.5 times your original fabric width, and exploring specialty fabric construction techniques helps ensure your seams and finishes match that extra fabric’s properties perfectly.
Your elastic width impact varies too—half-inch clear elastic gives you more stability than quarter-inch for wider ruched areas.
Decorative and Functional Ruching Placement
Where should you position ruching for the best results? Body contouring placements like waistline ruching narrow your torso visually, while vertical panels elongate your silhouette.
For comfort and fit, elastic-backed ruching along stretch zones improves adaptability across two sizes.
Adding texture to clothing through diagonal or crosshatch ruching creates visual interest and reflects light differently.
When embellishing garments with ruching, consider fabric weight and bias grain alignment for smoother draping in your garment construction techniques.
Tips for Flattering and Stylish Ruched Details
With the right ruching placement, you’ll create a silhouette that works for your body type and feels confident. Waist ruching draws the eye inward for a defined look. Vertical or diagonal lines create length and a slimming effect. Side placement adds dimension to athletic frames. Consider your fabric choice too—jersey and spandex work with elastic ruching beautifully for adjustable, form-fitting results.
- Waist ruching emphasizes your smallest point while softening hips and thighs
- Vertical lines elongate petite frames and create a visual illusion of height
- Asymmetrical ruching balances different body shapes by adding texture strategically
Frequently Asked Questions (FAQs)
What stitch to use for ruching?
For ruching, a straight stitch works best for securing elastic to fabric. A zigzag stitch offers stretch and flexibility when you need more give. If you’re using elastic thread, try a stretch stitch to prevent breaking. A serger stitch creates clean, professional finishes on edges.
Adjust your stitch length to match your fabric weight and elastic width for best results.
What is the difference between shirring and ruching?
The key difference lies in the elastic used. Ruching employs regular elastic threaded through channels to create gathered bunches. Shirring uses elastic thread woven directly into your fabric during sewing, producing fine, uniform gathers across the entire area.
Ruching offers bold texture and dramatic volume. Shirring creates subtle, delicate gathering perfect for fitted silhouettes.
How do you sew gathers on fabric?
Gathering seems simple yet creates complexity in fabric control. You sew gathers by using basting stitches with longer stitch lengths and looser tension settings. Pull threads to bunch fabric evenly.
Alternatively, use elastic sewn in parallel lines through fabric for ruching. Both techniques manipulate fabric through gathering stitches or elastic, creating decorative texture across various fabric types.
How do you sew ruching with string?
You can create ruching with string by laying parallel strands across your fabric area and tightening them to gather the material. Select sturdy string that won’t break under tension.
Space your string lines evenly, secure both ends firmly with knots or stitching, then pull gradually to create uniform gathers. This string ruching variation offers flexibility in gather depth and spacing.
How do you prevent ruching from unraveling?
Like a fortress needs strong walls, your ruching needs secure foundations. Reinforce elastic at both ends with multiple stitches using a short stitch length. Backstitch when securing elastic.
Choose stable fabrics like jersey or linen. Finish seam edges to prevent fraying and unraveling over time.
Can ruching be used with non-stretch fabrics?
Yes, ruching works on non-stretch fabrics. You’ll need to adjust your approach with design adaptations and lining options to manage fabric drape and control ruching volume.
Use sturdy elastic and secure seam finishes to prevent unraveling. The technique requires planning since these fabrics won’t naturally stretch like jersey does.
What tools simplify the ruching process?
A ruching foot on your sewing machine streamlines the process by keeping elastic evenly as you sew. Pair it with an elastic guide to keep tension consistent.
A bodkin tool threads elastic through casings effortlessly. Use a fabric marker to map your ruching lines precisely.
A point turner helps flip and adjust gathers smoothly during your sewing project.
How to fix uneven or crooked ruching?
When ruching turns out uneven or crooked, check your marking accuracy first. Uneven stitch length or inconsistent elastic tension often causes this. Use a seam ripper to carefully remove stitches, then reposition elastic and adjust tension evenly.
For future projects, measure precisely and maintain consistent stitch length throughout.
Can ruching be added after a garment is sewn?
It sounds counterintuitive, but retrofitting ruching after construction is tricky. Seam accessibility becomes your real obstacle since you can’t easily access fabric layers already stitched together.
Design limitations mean placement options shrink considerably. Your best bet is unraveling seams where you want ruching, adding elastic, then resewing—practically dismantling sections.
For existing garments, clothing alterations specialists can sometimes manage this through strategic seam work, though it’s labor-intensive and costly.
How do you prevent elastic from rolling or twisting while sewing?
Pin elastic at both ends before sewing to lock it in place. Choose appropriate elastic width for your fabric and stitch selection to prevent rolling.
Keep even tension control while sewing. Use a stabilization technique like a zigzag stitch to anchor elastic firmly and prevent twisting during stitching.
Conclusion
You’ve got ruching all sewn up now. The beauty of how to sew ruching lies in its simplicity—elastic and your machine transform flat fabric into dimensional elegance.
Whether you’re customizing a dress or updating basics, you’re no longer limited to store-bought options. Start with one small project to build confidence. Soon you’ll see ruching opportunities everywhere in your wardrobe and won’t hesitate to add that flattering detail yourself.

