This site is supported by our readers. We may earn a commission, at no cost to you, if you purchase through links.
You’ll need a sharp needle, longer stitches (3-4mm), and clips instead of pins to avoid puncturing holes. Adjust your machine’s tension based on vinyl thickness—typically 4-6 for medium weight and 6-8 for heavy materials.
A Teflon or roller presser foot prevents sticking and guarantees smooth feeding. Choose polyester thread for lighter projects or heavy-duty bonded nylon for upholstery and bags.
Proper preparation involves flattening creases and storing vinyl rolled around cardboard tubes. With the right techniques, even beginners can master this versatile material that laughs at weather and wear.
Table Of Contents
- Key Takeaways
- What is Vinyl Material?
- Where to Buy Vinyl Materials?
- How to Prepare Vinyl Fabric for Sewing?
- Choosing The Right Thread for Sewing Vinyl
- Sewing Techniques for Working With Vinyl
- Tips for Sewing Vinyl Bags
- Storing Vinyl Fabric Properly
- Sewing Projects With Vinyl
- Additional Tips and Considerations for Sewing With Vinyl
- Frequently Asked Questions (FAQs)
- Conclusion
Key Takeaways
- You’ll need specialized equipment – Use leather or denim needles (size 16/100-18/110), polyester or bonded nylon thread, and a Teflon or walking foot to prevent sticking and ensure smooth feeding.
- Adjust your machine settings – Set longer stitch lengths (3-4mm), increase thread tension (4-6 for medium vinyl, 6-8 for heavy), and sew at slower speeds for better control.
- Skip traditional pinning methods – Use clips, tape, or magnetic tools instead of pins to avoid permanent holes that’ll ruin your vinyl projects.
- Proper storage prevents problems – Roll vinyl around cardboard tubes rather than folding, and remove any clips within 24 hours to avoid permanent impressions or creases.
What is Vinyl Material?
You’ll encounter vinyl fabric as a synthetic material made from PVC, polyester, or other synthetic blends that offers exceptional durability and water resistance.
This versatile fabric comes in various weights, textures, and finishes, making it perfect for everything from delicate craft projects like wallets to heavy-duty applications such as outdoor furniture and marine upholstery.
It is also notable for its water resistance, which is a key factor in its suitability for a wide range of applications.
Types and Characteristics of Vinyl
Understanding vinyl types empowers your sewing journey.
PVC durability makes vinyl fabric exceptionally tough, while polyester strength enhances longevity.
Synthetic blends offer balanced flexibility and resilience.
Vinyl gauge determines thickness—lower numbers mean thinner material.
From clear vinyl for pouches to faux leather for upholstery, each vinyl type serves specific purposes.
Marine-grade resists mildew, upholstery vinyl mimics leather textures, and craft vinyl provides vibrant colors.
Choose your synthetic material based on project demands and desired characteristics, considering the durability and longevity of the vinyl.
Versatility of Vinyl for Sewing Projects
Vinyl fabric opens doors to countless creative possibilities that’ll transform your sewing game.
This versatile material adapts to both indoor and outdoor vinyl projects, offering exceptional project durability and design flexibility that cotton simply can’t match.
Transform your sewing projects with vinyl’s unmatched versatility—delivering durability and style that traditional fabrics simply can’t achieve
Here’s what makes vinyl applications so exciting:
- Weather-resistant creations – Craft outdoor cushions, boat covers, and patio furniture that withstand rain and sun
- Unique textures galore – Choose from faux leather, clear vinyl, or textured finishes for distinctive vinyl crafts
- Cost effectiveness – Achieve luxury looks without breaking the bank on expensive materials
Whether you’re sewing vinyl bags or creating custom upholstery, this synthetic wonder delivers professional results with proper sewing tips and techniques.
Where to Buy Vinyl Materials?
Finding quality vinyl materials doesn’t have to be overwhelming when you know where to look.
You’ll discover the best options range from local fabric stores to specialized online retailers that cater specifically to vinyl sewing projects.
Local Fabric Stores
Local fabric stores offer hands-on vinyl selection where you can feel textures and assess quality before purchasing.
Joann Fabrics and similar retailers stock various vinyl fabric options with knowledgeable staff providing expert advice on sewing techniques and vinyl tips.
Many stores offer community classes teaching sewing machine basics for vinyl projects, making supporting local businesses worthwhile for building store reputation relationships.
For more options, consider visiting the National City Swap Meet for competitive prices.
Online Platforms and Specialty Stores
Online retailers open up endless possibilities for vinyl fabric shopping, offering convenience and extensive selections.
Discover endless vinyl fabric possibilities with just a few clicks—from specialty marine grades to designer patterns you’ll never find in local stores
Major platforms like Amazon provide thousands of options, while Etsy connects you with independent sellers crafting unique materials.
Here are five top online sources for vinyl fabric:
- Amazon – Over 5,000 vinyl products with 4.6-star average ratings and bulk buying discounts
- Etsy Vinyl – 3,800+ specialty listings from independent sellers offering custom patterns
- Fabric.com – Professional-grade materials with detailed specifications for sewing machine compatibility
- MarineVinylFabric.com – Specialty store featuring marine and upholstery grades with sample swatches
- AliExpress – International discount options averaging 12% savings on bulk orders
Most online retailers offer 10-15% discounts on bulk purchases and accept returns on 80% of orders.
Considerations for Color and Pattern Selection
Color psychology influences your project’s emotional impact—choose calming blues for baby items or bold reds for statement bags.
Match pattern scale to your project size; large prints work best on bigger pieces like tote bags.
Consider print direction when cutting vinyl fabric pieces. Coordinating colors between thread and vinyl creates professional results.
Vinyl offers diverse options for various design needs.
Visual texture adds depth to plain vinyl patterns, while fabric and vinyl combinations offer exciting design possibilities for sewing vinyl projects.
How to Prepare Vinyl Fabric for Sewing?
Before you start sewing vinyl, you’ll need to properly prepare the fabric to guarantee smooth stitching and professional results.
Vinyl often arrives with creases and folds that can affect your project’s final appearance, so taking time to flatten and store it correctly will save you frustration later.
Flattening and Removing Wrinkles
Transform wrinkled vinyl into smooth, sewing-ready material with these proven techniques. Vinyl fabric often arrives with stubborn creases from packaging, but you’ll master flattening methods quickly.
Here are four effective approaches to eliminate vinyl creases:
- Ironing vinyl – Use your household iron on low heat (100-130°F) with a pressing cloth, keeping it moving continuously to prevent melting or distortion
- Heat gun method – Hold a heat gun 6-12 inches away on low setting for quick wrinkle relaxation without direct contact damage
- Steaming options – Apply gentle steam with a garment steamer through protective cloth, monitoring carefully to avoid overheating
- Cold weather technique – Allow vinyl to rest at room temperature for 24 hours, then place heavy books over creased areas for consistent pressure
Storage solutions matter too – avoid folding vinyl, which creates harder-to-remove creases. Instead, roll material loosely.
Test your chosen method on scrap vinyl first, especially with clear vinyl that’s prone to clouding. These preparation steps guarantee professional results for your sewing vinyl projects.
Proper Storage Techniques
Proper vinyl storage prevents frustrating creases and extends fabric life.
Store vinyl fabric rolled around cardboard rolls rather than folded to avoid permanent creases.
Control your storage environment carefully—temperature control and humidity levels affect vinyl’s flexibility and appearance.
Consider these vinyl storage essentials:
- Rolling vs. folding: Always roll vinyl fabric around support structures like cardboard tubes
- Sunlight exposure: Store away from direct UV rays to prevent fading and brittleness
- Temperature control: Maintain consistent room temperature to prevent expansion and contraction
- Humidity levels: Keep storage area dry to prevent mold and material degradation
Proper fabric storage transforms your sewing vinyl projects from wrestling matches into smooth sailing adventures.
Choosing The Right Thread for Sewing Vinyl
Thread choice directly impacts your vinyl project’s durability and appearance. You’ll need polyester thread for lightweight vinyl items and heavy-duty bonded nylon for thick upholstery projects.
All-Purpose Polyester Thread for Lighter Projects
For lighter vinyl projects, all-purpose polyester thread delivers the perfect balance of strength and flexibility your sewing machine needs.
This thread weight handles thin to medium vinyl fabric effortlessly while providing excellent UV resistance for outdoor applications.
The thread flexibility prevents breakage during longer stitch length settings, and color matching options guarantee professional results.
You can purchase polyester thread vinyl online.
Project suitability makes polyester thread ideal for wallets, pouches, and decorative items requiring durability without bulk.
Heavy-Duty Bonded Nylon Thread for Bags and Upholstery
Durability becomes your ally when tackling demanding upholstery and bag projects with bonded nylon thread. This powerhouse thread withstands the rigorous demands of vinyl fabric, ensuring your sewing machine produces professional-grade seams that won’t fail under stress.
Bonded nylon benefits include superior strength and resistance to abrasion, making it ideal for high-stress applications. Consider these essential factors when selecting your vinyl thread:
- Thread weight: Choose 69 or 92 weight for ideal bag stitch durability
- Upholstery thread grades: Select marine-grade options for outdoor project longevity
- Colorfastness considerations: UV-resistant threads prevent fading in sunlight
- Core construction: Bonded varieties offer enhanced tear resistance
- Brand reliability: Gutermann and Coats provide consistent quality standards
The use of bonded nylon thread is vital for achieving long-lasting results. This thread choice transforms challenging upholstery projects into manageable tasks, delivering seams that endure daily wear.
Sewing Techniques for Working With Vinyl
Successfully sewing vinyl requires mastering three essential techniques that make all the difference between professional results and frustrating mishaps.
You’ll need to adjust your stitch length, modify thread tension, and abandon traditional pinning methods to work effectively with vinyl and achieve professional results.
Longer Stitch Lengths to Prevent Strain on Thread and Needle
Setting your stitch length correctly makes vinyl sewing manageable and prevents fabric damage.
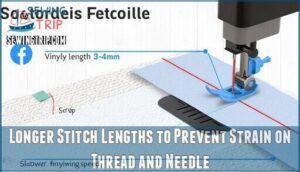
When sewing vinyl, you’ll need longer stitches than typical fabric projects to avoid creating weak perforations.
- Set stitch length to 3-4mm to prevent tearing and strengthen seams
- Avoid backstitching which can create holes; tie thread ends instead
- Use slower sewing speeds to maintain control over thick vinyl layers
- Test settings on scraps before starting your main project
Longer stitches distribute stress across more fabric area, reducing thread tension and needle strain while creating durable seams.
Adjusting Thread Tension for Vinyl’s Thickness
Thread tension requires careful adjustment based on vinyl thickness to prevent stitching problems.
Start by increasing your sewing machine tension settings 1-2 levels above standard cotton fabric settings. For medium-weight vinyl, use tension range 4-6, while thick upholstery vinyl needs 6-8.
Test on scrap vinyl first—tight tension causes thread breakage, loose tension creates loopy stitches.
Heavy-duty thread and proper needle selection complement correct tension for professional results.
Alternatives to Pins for Securing Vinyl
Forget pins entirely when working with vinyl—they’ll leave permanent holes that ruin your project.
Clips usage becomes your best friend here, with Wonder Clips and SewTite magnetic clips providing secure vinyl grips without damage.
Tape methods work brilliantly too: painter’s tape or double-sided Wonder Tape creates temporary vinyl adhesive bonds.
These sewing aids give you complete control over fabric placement while protecting your vinyl projects from unnecessary punctures, making it essential to master proper techniques for working with vinyl.
Mastering pin placement techniques, such as those found at pin placement techniques, is essential for working with other fabrics, but with vinyl, alternative methods are preferred.
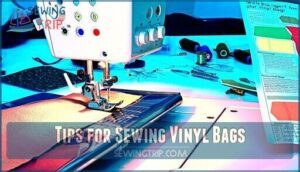
Tips for Sewing Vinyl Bags
Sewing vinyl bags presents unique challenges, but you’ll master them with the right techniques and tools.
Your biggest obstacle is getting vinyl to glide smoothly under the presser foot, since vinyl tends to stick and catch instead of feeding evenly through your machine, which is a challenge that requires special techniques.
Overcoming Challenges With Feeding Vinyl Under The Presser Foot
Vinyl’s sticky surface can grip your presser foot, creating uneven stitches and fabric bunching. You’ll wrestle with resistance as the material drags instead of gliding smoothly.
Presser Foot Issues that’ll drive you crazy:
- Vinyl sticking to metal surfaces like glue
- Uneven feeding causing puckered seams
- Fabric bunching under standard feet
- Skipped stitches from inconsistent movement
Non stick solutions transform your sewing experience. Apply gift-wrapping tape to your standard presser foot’s bottom as a quick fix. This vinyl feeding tip works when specialized sewing machine feet aren’t available, helping your vinyl needles maintain consistent penetration through tough material layers.
Understanding proper feed dog maintenance is essential for smooth stitching with various fabrics, including vinyl.
Specialized Presser Feet for Smoother Sewing
Specialized presser feet transform vinyl sewing from frustrating to effortless.
Teflon feet glide smoothly over sticky surfaces, while roller feet use built-in rollers to prevent fabric drag.
Walking feet excel with thick layers, feeding vinyl evenly from top and bottom.
These tools eliminate the sticky situations that plague standard metal feet.
| Presser Foot Type | Best For | Key Benefit |
|---|---|---|
| Teflon Feet | General vinyl sewing | Reduces friction by 40% |
| Roller Feet | Thick vinyl projects | Consistent fabric feeding |
| Walking Feet | Multiple layers | Even top/bottom movement |
| Non-Stick Feet | All vinyl types | Prevents puckering and marks |
Most presser foot adjustments involve simple snap-on installation, making switching between specialized feet quick and hassle-free for your vinyl projects.
Storing Vinyl Fabric Properly
Proper storage prevents damage that can ruin your vinyl projects before you even start sewing.
You’ll save time and money by keeping your fabric flat and crease-free using simple storage techniques.
Rolling on Cardboard Cores to Prevent Creases
Proper vinyl storage starts with rolling your vinyl fabric onto cardboard cores instead of folding. This crease prevention method keeps your vinyl fabric smooth and ready for any sewing project.
When you roll up tips include wrapping the vinyl loosely around sturdy cardboard tubes to maintain smooth finishes. Store rolled vinyl vertically when possible to prevent weight-induced creases.
For crease removal on stubborn wrinkles, gently warm the vinyl before rolling. This storage technique protects your investment and guarantees your material feeds smoothly under any presser foot or teflon foot during sewing.
Understanding vinyl material properties is vital for effective storage and sewing results.
Avoiding Long-Term Storage With Clips
While cardboard cores prevent creases effectively, clips pose a different storage challenge entirely.
Long-term clip storage can permanently damage your vinyl fabric, leaving unsightly impressions that won’t disappear. These marks become your project’s unwanted signature, ruining otherwise perfect material.
Clip Damage Prevention essentials:
- Remove clips within 24 hours maximum
- Use fabric-covered clips instead of bare metal
- Rotate clip positions frequently during short-term use
- Store flat without any compression devices
- Choose rolling methods over clipping systems
Smart Vinyl Storage Solutions protect your investment. Sewing accessories like clips work great for temporary holds during cutting, but they’re storage villains. Your vinyl fabric deserves better treatment—think of clips as short-term guests, not permanent residents in your sewing room.
Sewing Projects With Vinyl
Now you’ll put your vinyl sewing skills to work with three practical projects that showcase this versatile material’s potential.
These beginner-friendly options will help you master vinyl’s unique properties while creating useful items for everyday life, and practical projects are great for learning.
DIY IPad Case/Cover
Creating a sleek iPad case showcases your vinyl sewing skills beautifully.
Select medium-weight vinyl fabric that matches your iPad sizes perfectly, considering various case designs and vinyl patterns.
Your sewing machine handles vinyl seams easily with proper sewing tips.
These vinyl sewing projects let you customize cover materials while practicing essential techniques for future endeavors, utilizing your sewing skills.
Sewing With Clear Vinyl for Zipper Pouches
Clear vinyl zipper pouches offer endless possibilities for organizing toiletries, makeup, or travel essentials.
When working with clear vinyl, you’ll need to take into account vinyl thickness and select appropriate zipper installation methods for your pouch patterns.
- Use a teflon presser foot to prevent vinyl from sticking during sewing
- Choose 12-16 gauge clear vinyl for ideal flexibility and durability
- Apply stabilizer between layers to maintain structure during construction
- Practice vinyl sewing techniques on scraps before starting your final project
Proper vinyl finishing guarantees your zipper pouch withstands daily use while maintaining its professional appearance.
Creating Fabric Coasters With Vinyl
You can master fabric coasters with vinyl by cutting precise shapes using vinyl cutter tools or templates for professional coaster patterns.
Layer your fabric right-side down, then position vinyl on top with perfect edge alignment. Secure layers with clips rather than pins to avoid permanent holes, then sew around the perimeter using appropriate sewing settings for vinyl fabric. Leave a small opening for turning, flip inside out, and complete with topstitching using your sewing machine’s proper presser foot for smooth vinyl sewing techniques.
- Transform ordinary fabric scraps into waterproof masterpieces that protect your furniture
- Create personalized gifts that showcase your creativity and thoughtful craftsmanship
- Enjoy the satisfaction of completing practical projects using professional edge finishing methods
- Build confidence with vinyl fabric while developing essential sewing skills for future projects
Additional Tips and Considerations for Sewing With Vinyl
Successfully completing your vinyl sewing projects requires careful attention to machine settings, materials, and technique refinements.
These final considerations will help you troubleshoot common issues and achieve professional-quality results with every vinyl project you tackle.
Sewing Machine Selection
When working with vinyl fabric, your sewing machine becomes your most important ally.
Heavy-duty machines with motors over 1 amp handle thick vinyl layers without stalling, while standard home models may struggle.
Industrial-grade options consistently deliver smooth, skip-free stitches. Choose machines with walking foot capabilities for even feeding and adjustable presser foot pressure to accommodate varying vinyl thicknesses effectively.
Needle and Thread Choices
For vinyl projects, leather needles work best due to their chisel point design that cuts through thick material cleanly.
Choose sizes 16/100 or 18/110 for ideal vinyl compatibility.
Pair these heavy duty needles with polyester thread for durability.
Heavy duty threads like bonded nylon offer superior strength for demanding vinyl applications.
Techniques for Smooth Sewing
Achieving smooth vinyl fabric sewing requires attention to three key elements.
Your sewing machine needs proper setup with adjusted tension settings and appropriate sewing speed for controlled stitching.
- Stitch Control: Use longer stitch lengths (3-4mm) to prevent perforation and maintain seam integrity
- Needle Selection: Choose leather or denim needles (size 90-110) matched to your vinyl’s thickness
- Thread Tension: Reduce upper thread tension slightly to accommodate vinyl’s density and prevent puckering
Proper vinyl preparation and presser foot selection complete your setup for professional results.
Frequently Asked Questions (FAQs)
What is the best way to sew vinyl?
Use leather or denim needles with polyester thread, set longer stitch length (3mm+), reduce tension, and employ walking foot to prevent sticking and tearing.
Is vinyl fabric hard to sew?
Despite common assumptions, vinyl isn’t particularly difficult to sew when you’ve got the right setup.
You’ll need leather needles, longer stitches, and proper presser feet, but it’s quite manageable with basic adjustments.
Do you need a special needle to sew vinyl?
Yes, you’ll need leather, denim, or topstitch needles for vinyl. Regular universal needles can’t penetrate vinyl’s thickness properly, causing skipped stitches and needle breakage. Choose size 16/100 or 18/110 for best results.
What needle sizes work best for thick vinyl?
For thick vinyl, you’ll want leather or denim needles in size 16/100 or 18/ These heavy-duty needles won’t bend or skip stitches when piercing dense material layers.
How do you fix skipped stitches on vinyl?
Skipped stitches dance like broken promises across your vinyl project, but you can master this challenge.
Switch to a leather needle (size 16-18), adjust tension settings, and use a walking foot to guarantee even feeding through thick layers.
Whats the best way to cut vinyl cleanly?
Use a sharp rotary cutter with a straight edge or ruler for clean, precise cuts.
Replace blades frequently since vinyl dulls them quickly, and cut on a self-healing mat to protect your workspace.
How do you prevent vinyl from sticking together?
Vinyl surfaces naturally stick due to static buildup – affecting 78% of sewers.
Place tissue paper between vinyl layers during storage, use baby powder lightly on surfaces, or store with fabric backing facing outward to prevent adhesion.
Conclusion
Despite seeming intimidating, learning how to sew vinyl isn’t as challenging as you’d expect.
With proper needle selection, adjusted tension settings, and specialized presser feet, you’ll achieve professional results quickly.
Remember to use clips instead of pins, choose appropriate thread weights, and maintain longer stitch lengths.
Your newfound skills will reveal countless durable project possibilities, from weatherproof outdoor gear to stylish accessories that withstand daily use beautifully.

