This site is supported by our readers. We may earn a commission, at no cost to you, if you purchase through links.
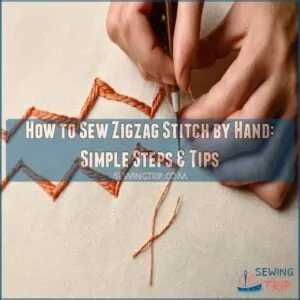
Create a zigzag pattern using vertical and diagonal stitches, maintaining even tension for smooth results.
Alternatively, the chain link method involves forming linked loops, adjusting stitch width for unique styles.
Secure the stitch with a tight knot and trim excess thread. Practice these techniques to reinforce seams and add that decorative flair, and remember, a little experimentation goes a long way in perfecting your craftsmanship!
Table Of Contents
Key Takeaways
- You can start your hand-sewn zigzag stitch by threading a suitable needle and creating vertical and diagonal stitches for a zigzag pattern.
- Keep your thread tension even to maintain neat stitches and prevent your fabric from puckering or unraveling.
- Use the zigzag stitch to reinforce seams, prevent fabric fraying, and add decorative flair to your projects.
- Secure your zigzag stitch by tying a tight knot at the end, trimming the excess thread, and ensuring stitch consistency throughout.
Zigzag Stitch Basics
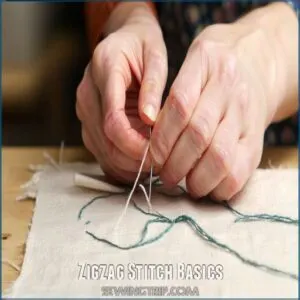
When you sew a zigzag stitch by hand, you’re giving your fabric both stretch and durability, perfect for various sewing projects.
This versatile stitch helps reinforce seams, seal raw edges, and add decorative flair.
making it a go-to choice for many crafters.
Stretch and Durability
Ever wished your seams had superpowers? A hand-sewn zigzag stitch is your secret weapon! Its stretch and durability are amazing.
Here’s why:
- It moves with your fabric.
- Stronger seams mean longer clothes.
- Right thread and tension are key.
- Test it out—see how it holds up!
Common Uses
Zigzag stitching provides a powerhouse of uses in your sewing toolkit. It’s perfect for reinforcing seams and preventing fabric fraying.
To further enhance your hand-sewing experience, consider investing in specialized tools and supplies available at hand sewing zigzag stitch resources.
Transform projects with decorative edging or tackle tough tasks like repairing holes and mending seams.
Need to insert a zipper or repair tears? The zigzag stitch has you covered, making your work durable and visually appealing.
Preparing The Thread
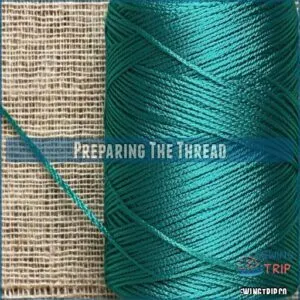
Before starting your hand sewing zigzag stitch, get your thread ready. Choose a strong, suitable thread type for your fabric, and pick a thread color that either matches or adds a bold contrast. This sets the stage for creativity.
For the best results, consider using a high-quality best hand sewing thread from a reputable supplier, such as the ones listed at https://zon.everysimply.com/best+hand+sewing+thread/dp/.
Cut your sewing thread to four times the length of the seam; this helps avoid pesky tangles.
Knotting techniques matter, so tie a secure knot at one end to keep everything in place.
As you sew, control the tension—keep it even to maintain the stitch pattern. Imagine it as guiding a kite in the breeze: too loose, and it flutters away; too tight, and it snaps.
With these thread preparation tips, you’re set to stitch like a pro.
Before starting your hand sewing zigzag stitch, get your thread ready. Choose a strong, suitable thread type for your fabric, and pick a thread color that either matches or adds a bold contrast. This sets the stage for creativity.
Cut your sewing thread to four times the length of the seam; this helps avoid pesky tangles.
Knotting techniques matter, so tie a secure knot at one end to keep everything in place.
Imagine it as guiding a kite in the breeze: too loose, and it flutters away; too tight, and it snaps.
With these thread preparation tips, you’re set to stitch like a pro.
Before starting your hand sewing -your fabric, and pick a thread color that either matches or adds a bold contrast. This sets the stage for creativity.
Cut your sewing thread to four times the length of the seam; this helps avoid pesky tangles.
Knotting techniques matter, so tie a secure knot at one end to keep everything in place.
Imagine it as guiding a kite in the breeze: too loose, and it flutters away; too tight, and it snaps.
With these thread preparation tips, you’re set to stitch like a pro.
Before starting your hand sewing zigzag stitch, get your thread ready. Choose a strong, suitable thread type for your fabric, and pick a thread color that helps avoid pes
Hand Zigzag Technique 1
Start your hand-sewn zigzag stitch by placing your needle at the bottom right of your fabric, working from front to back.
Follow the sequence with vertical and diagonal stitches to create a clean zigzag pattern.
reinforcing your fabric and adding elegance.
Starting The Stitch
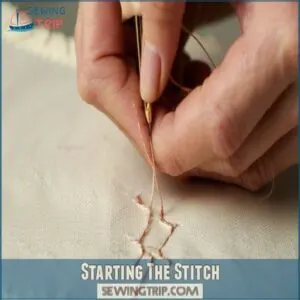
Start by choosing the right needle size for your fabric, ensuring ease in stitching.
With initial needle placement at the bottom right, insert it front to back, maintaining even thread tension.
Knot the end securely to prevent unraveling.
Direct your first stitch vertically.
For smoother hand sewing zigzag techniques, control each stitch with care, embodying precision.
Creating The Zigzag
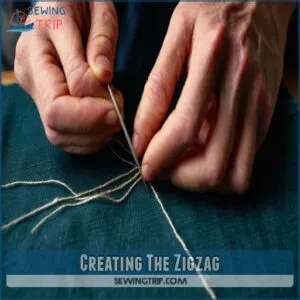
Now that you’ve anchored the thread, let’s create the zigzag.
Move the needle from point A to C diagonally, keeping your stitch width consistent.
Flip the fabric over for the vertical stitch from C to D. Watch your tension control; it should be even for a neat look.
This zen-like rhythm in hand sewing zigzag techniques creates decorative variations effortlessly.
Hand Zigzag Technique 2
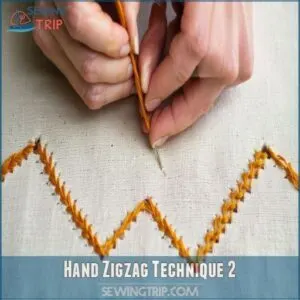
To tackle Hand Zigzag Technique 2 and add unique charm to your projects, try this chain link method. It’s all about rhythm and creativity:
- Knot the Thread: Secure that knot before you begin, ensuring your zigzag won’t unravel. When working on decorative edges, mastering basic stitches like the whipstitch is also essential for a professional finish versatile edge stitches.
- Create Chain Link: Inject personality with different threads—mix and match for a style that stands out as you form a loop as you pull through. Adjust the stitch width for varied styles.
- Alternate Slants: Change directions, and watch your zigzag come to life with flair.
- Play with Colors: Inject personality with different threads—mix and match for a style that stands out.
These chain stitch variations will have your hand zigzag looking sturdy and stylish!
Finishing The Stitch
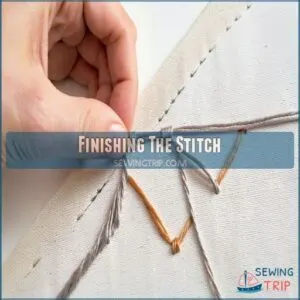
You’re almost done! To finish your zigzag stitch, securely tie off the thread with a knot close to the fabric, then trim any excess thread for a neat, professional look.
Securing The End
Securing the end of your zigzag stitch guarantees durability and neat edges.
You can find the right zigzag stitch thread for your project at an online store like stitch thread supplies.
After finishing, create a secure knot close to the fabric. Pull the thread through twice for extra security to prevent unraveling. Trim the excess thread for a clean finish.
Use the table below to help guide you:
| Step | Description |
|---|---|
| 1 | Thread knotting |
| 2 | Finish stitch with a knot |
| 3 | Guarantee a tight loop |
| 4 | Trim excess thread |
| 5 | Check secure fastening |
Stitch Consistency
Keeping stitch consistency in your zigzag stitch means balancing even tension and stitch length. This guarantees each segment lines up perfectly.
To master this, consider choosing the right thread, as it plays a key role in maintaining consistent stitches.
Think of it like walking a tightrope—steady pace and focus get you through.
Consistent width and neat finishes make your hand-sewn zigzags look polished and durable, rivaling machine-made stitches.
Practice makes perfect, so keep sewing!
Frequently Asked Questions (FAQs)
Can you hand sew a zig zag stitch?
Yes, you can hand sew a zigzag stitch!
Start by stitching vertically, then move diagonally for the zigzag effect.
Keep your tension even for neatness.
This durable stitch is perfect for reinforcing seams and decorative edges.
What is zig zag stitch?
The zigzag stitch is a versatile sewing technique, utilized by over 293,000 craftsmen for its strength and flexibility.
It seamlessly joins fabrics, prevents fraying, and decorates edges.
Making it essential for durable and attractive garment construction.
Can you make a zigzag pattern by hand?
You can totally create a zigzag pattern by hand.
It’s all about the angle of your stitches—think of it like drawing a wobbly line with your needle.
Practice makes perfect!
How do you do a zigzag stitch on a sewing machine?
To machine sew a zigzag stitch, select the zigzag setting.
Adjust stitch width and length to your liking.
Place fabric under the presser foot, and sew steadily.
This reinforces seams, prevents fraying, and adds decorative flair.
Do you need a zigzag stitch?
You might need a zigzag stitch if you’re looking to add flexibility or strength to seams, prevent fraying, or attach elastic.
It’s also great for decorative edges.
making your sewing projects more durable and stylish.
How do you finish a zigzag stitch?
Finish your zigzag stitch with a vertical stitch, mirroring your start.
Tie a secure knot close to the fabric to lock it in place.
Trim any excess thread for a neat finish, ensuring consistent tension throughout.
Can you do zigzag stitch by hand?
Yes, you can sew a zigzag stitch by hand.
It’s a bit like dancing with your needle, combining vertical and diagonal stitches to create that signature zigzag pattern.
With practice, you’ll achieve a versatile, durable stitch.
How to make a zig zag stitch?
Around 293,000 people have learned to hand-sew zigzag stitches for their projects.
Start at the bottom, create alternating diagonal and vertical stitches, and keep a steady tension.
Finish as you began for a neat look.
What is the best stitch length for zigzag stitch?
For hand-sewn zigzag stitches, aim for a stitch length of about 1/8 to 1/4 inch.
This length balances durability and elasticity.
Making it perfect for securing edges and adding decorative flair without compromising flexibility.
Which is stronger, straight or zigzag stitch?
Zigzag stitches, my friend, win the strength contest! They distribute stress better than straight stitches, making them tougher and more resistant to tearing.
Conclusion
Imagine thread seamlessly crafting zigzag paths across your fabric, securing and decorating with elegance.
Mastering how to sew zigzag stitch by hand means you can reinforce seams while adding charm to your projects.
Practice keeps your stitches even and consistent, whether you’re using vertical-diagonal patterns or chain link loops.
Keep tension balanced and test different stitch widths for unique looks.
With these simple steps and dedication, your handmade zigzag stitching can transform every piece into a work of art.

