This site is supported by our readers. We may earn a commission, at no cost to you, if you purchase through links.
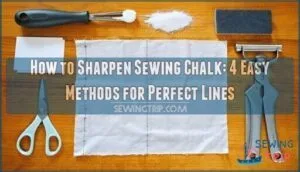 You can sharpen sewing chalk using four simple methods.
A vegetable peeler works best—just run it along the chalk’s edges with gentle pressure to create sharp lines.
The bonus? You’ll collect fine chalk dust to refill puffer dispensers later.
Sandpaper produces mixed-texture dust with moderate effort, while blade shaving creates very fine powder that’s easy to gather.
Even paper scissors work in a pinch (never use your good tailor shears).
Test your chosen method on scrap fabric first to verify clean, erasable marks.
Each technique offers different dust textures and sharpening precision depending on your fabric needs.
Table Of Contents
Key Takeaways
- You can sharpen sewing chalk using four simple methods: vegetable peeler, sandpaper, blade shaving, or paper scissors—each creating different dust textures for various fabric needs.
- A vegetable peeler works best for precision, giving you sharp edges and collecting fine chalk dust that you can save to refill puffer dispensers later.
- Always test your sharpening method on scrap fabric first to ensure you’ll get clean, erasable marks without damaging your actual project.
- Different fabrics need different chalk types—clay-based works for cotton and linen, wax-based suits heavy fabrics like denim, and talc is gentle on delicate materials like silk.
Using a Vegetable Peeler for Sharpening
You can easily sharpen sewing chalk using a common kitchen vegetable peeler for quick, precise results.
This method creates sharp edges perfect for accurate fabric marking while collecting useful chalk dust for later use.
Benefits of Using a Vegetable Peeler
A vegetable peeler transforms your chalk sharpening experience into a precision operation.
Transform everyday kitchen tools into precision sewing instruments with smart sharpening techniques
This common kitchen tool delivers professional-level edge refining without specialized sharpening tools.
- Superior control: You’ll achieve consistent chalk maintenance with gentle pressure and smooth peeler techniques
- Cost-effective solution: Skip expensive chalk sharpener purchases while maintaining sharp, precise edges
- Versatile application: Works effectively on rectangular and triangular chalk shapes for various DIY sharpening needs
The peeler’s blade design creates clean, pointed tips that enhance your marking accuracy across different fabric types.
Replenishing The ‘puffer’ With Chalk Dust
Once you’ve created those sharp edges, don’t waste the chalk dust—collect it to refill your puffer or chalk dispenser. This dust collection method maximizes chalk reuse and extends your marking tool’s life.
Here’s how different refill methods compare:
| Method | Dust Quality | Refill Ease |
|---|---|---|
| Vegetable Peeler | Fine, consistent | Simple collection |
| Sandpaper | Mixed texture | Moderate effort |
| Blade Shaving | Very fine | Easy gathering |
Proper use of embroidery tools supplies is essential for achieving professional results. Your tailor’s chalk becomes a renewable resource through proper dust collection.
Protecting Chalk With Cardboard
Proper chalk storage using cardboard boxes prevents costly breakage and extends your sewing tool’s lifespan substantially.
When you sharpen sewing chalk with a vegetable peeler, you’ll create valuable dust that shouldn’t go to waste.
Smart chalk preservation starts with simple cardboard storage solutions that protect against chips and damage.
- Breakage Prevention: Cardboard boxes cushion chalk pieces and prevent edge damage during storage
- Dust Protection: Collect sharpening residue in containers to refill your chalk holder later
- Chalk Preservation: Organized cardboard storage keeps your chalk sharpener and tools accessible while maintaining quality
Tailor’s Chalk and Accessories
When you invest in a dedicated chalk holder and sharpener set, you’re getting more than just basic marking tools.
These accessories typically include one piece of chalk, a comfortable grip design for better control, and built-in sharpening features that keep your hands clean while delivering precise, professional results.
Included Accessories and Features
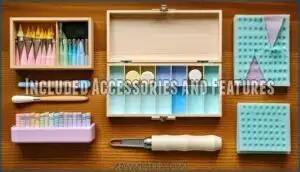
Most tailor’s chalk sets feature extensive accessories that transform your marking game.
You’ll discover Chalk Holders with universal compatibility for rectangular, triangular, and square sticks, while magnetic designs offer quick replacement.
Sharpener Tools include dedicated blade angles and dust-collecting trays for mess-free maintenance.
Storage Boxes with segmented compartments prevent breakage during transport.
| Accessory Type | Key Features |
|---|---|
| Chalk Cases | Protective sleeves, foam inserts |
| Edge Guides | Precise blade angles, dual slots |
| Chalk Refills | Multiple colors, pre-scored lines |
| Holders | Ergonomic grips, retractable designs |
| Maintenance | Replacement blades, cleaning tools |
These sewing tool maintenance essentials guarantee your chalk sharpener performs consistently while extending chalk holder lifespan.
For ideal results, it’s vital to understand the importance of basic sewing supplies in maintaining your equipment.
Benefits of Using a Tailor’s Chalk Holder and Sharpener
Using a chalk sharpener offers distinct advantages for serious sewers. This specialized tool keeps your hands clean while providing a comfortable grip that eliminates the mess of traditional sharpening techniques.
You’ll maintain precise markings without the frustration of crumbling chalk or uneven edges. The sharpener prevents breakage during the process, which prolongs your chalk’s lifespan substantially compared to knife methods.
Many designs include collection chambers for chalk dust reuse, making them environmentally smart choices. A tailor chalk holder can also be useful.
Professional tailors chalk responds better to dedicated sharpeners than improvised tools, delivering consistent results that enhance your sewing precision across different fabric types.
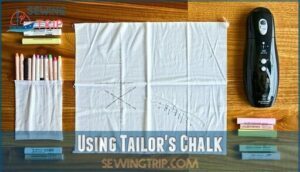
Using Tailor’s Chalk
You’ll use tailor’s chalk for marking fabric accurately during alterations and sewing projects, creating temporary guide lines that brush or wash away when you’re finished.
The key is choosing the right chalk type and color for your specific fabric to guarantee clear, visible markings without damaging the material, which involves selecting the appropriate tool to ensure accurate results.
Ideal Uses and Applications of Tailor’s Chalk
Sharp tailor’s chalk transforms your fabric marking from guesswork into precision work. You’ll find it indispensable for marking hemlines, creating alteration guidance points, and establishing cutting precision on garments.
Professional results depend on accurate temporary markings that won’t damage delicate fabrics or leave permanent stains. Whether you’re shortening sleeves or marking pleat lines, sewing chalk provides the control you need.
Test your sharpening techniques on scrap fabric first to confirm clean, precise markings. Sharp tailors chalk creates fine lines that disappear when brushed away, giving you the confidence to mark expensive materials without fear.
For temporary fabric markings, disappearing pens are also commonly used.
Choosing The Right Chalk for Different Fabrics
Different fabrics demand specific chalk types for ideal fabric marking results.
Testing chalk composition on fabric scraps prevents marking disasters and guarantees proper erasability testing.
- Clay-based chalk works best on cotton and linen, offering excellent color considerations for marking visibility
- Wax-based tailors chalk suits heavy fabrics like denim and canvas with superior fabric compatibility
- Talc chalk provides gentle sewing chalk application for delicate silks and chiffons without damage
Smart chalk selection matches your fabric’s personality perfectly. Some tailors prefer white chalk, especially when working with professional darker textiles.
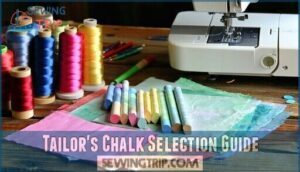
Tailor’s Chalk Selection Guide
Before you start sharpening your chalk, you’ll need to pick the right type for your specific project.
Testing your chalk on a fabric scrap first prevents costly mistakes and guarantees clean, removable marks on your actual garment, which ensures clean results.
Importance of Testing on Scrap Fabric
Never skip this step.
Testing your sewing chalk on scrap fabric first saves headaches later.
This compatibility assurance prevents damage to your main project while checking erasability and colorfastness.
You’ll discover how well the chalk shows up on different textures and whether it washes out cleanly.
A quick marking visibility test reveals if you need different chalk sharpening methods for better precision.
Smart sewers always do fabric testing before committing to their final piece.
Available Colors, Materials, and Styles
Tailor’s chalk comes in five major colors that’ll make or break your marking game.
White works best on dark fabrics, while yellow and pink tackle both light and dark materials.
Blue offers precision but can leave permanent marks on certain fabrics.
Traditional clay-based chalk provides smooth application, while wax chalk alternatives resist smudging on slippery fabrics.
Material durability varies between compressed kaolin clay, talc, and soapstone variants.
Style preferences include triangular chalk for sharp lines, rectangular blocks for bold marking, and square shapes for general use.
Chalk erasability depends on fabric compatibility, so chalk color impact matters more than you’d think.
You can also find a variety of shades to suit specific needs, considering the importance of fabric compatibility and chalk color.
Expert Guidance on Chalk Selection
Professional guidance transforms chalk selection from guesswork into precision. Expert recommendations consider chalk composition and fabric compatibility to guarantee marking precision.
They’ll assess your project’s specific needs, from delicate silks requiring powder-based options to heavy denim needing clay formulations. Color considerations matter too—experts help match visibility requirements with fabric tones.
Sewing tools professionals evaluate edge retention rates and dust generation patterns. This expert guidance prevents costly mistakes while optimizing your precise markings for professional results.
Proper thread selection is vital, as understanding thread weight systems affects the overall quality of the sewn product.
Frequently Asked Questions (FAQs)
How do you sharpen a tailor’s chalk?
Coincidentally, you’ll find sharpening chalk mirrors sharpening pencils perfectly.
Hold chalk in your non-dominant hand, use a razor blade or sandpaper to gently shave edges.
Create pointed tips for precise fabric marking and professional results.
How do you sharpen a chalk line?
You’ll sharpen a chalk line reel by replacing the chalk powder inside.
Open the reel case, remove old chalk, clean interior debris, refill with fresh marking chalk powder, and reassemble tightly, which involves a complete process to ensure the reel is properly maintained.
Do you still make tailor’s chalk?
Yes, you can still buy tailor’s chalk today.
It’s widely available at fabric stores, online retailers, and sewing supply shops in various forms including traditional rectangular blocks, triangular pieces, and modern chalk pencils for precise marking work.
Is tailor’s chalk a good sewing tool?
Tailor’s chalk is absolutely essential for accurate fabric marking.
You’ll get crisp, erasable lines that guide your cutting and stitching perfectly.
It’s affordable, comes in multiple colors, and works on various fabric types, making your sewing projects more precise.
What is a tailor chalk used for?
You’ll use chalk to mark fabric for cutting, alterations, and hemlines. It creates temporary guidelines that brush or wash away easily, ensuring precise tailoring work.
Is tailor’s chalk better than sidewalk chalk?
Before telegraph wires carried news, you’d choose tailor’s chalk over sidewalk chalk for sewing.
Tailor’s chalk offers superior precision, creates finer lines, and removes easily from fabric without damage.
Unlike sidewalk chalk’s rough texture, tailor’s chalk is preferred for its qualities that make it ideal for sewing.
How to make tailors chalk work better?
Sharpen your chalk regularly with sandpaper or a utility knife to create precise, fine lines.
Test on fabric scraps first, apply light pressure when marking, and store chalk properly to prevent chipping and maintain effectiveness, using techniques such as store chalk properly to ensure precise lines are consistently produced.
How do I clean the chalk dust from my vegetable peeler?
Like dust settling after a storm, chalk residue clings to your peeler’s surface.
Simply rinse it under running water or wipe with a damp cloth—the chalk dissolves easily, restoring your tool’s sharpness for future use.
Can I use sandpaper to sharpen tailor’s chalk?
Yes, sandpaper works perfectly for sharpening tailor’s chalk.
Fine-grit sandpaper (400-600 grit) gives you precise control and minimizes crumbling.
It’s actually one of the most recommended methods by experts for professional results.
How often should I sharpen my chalk?
Your chalk will become dull faster than butter melting on hot toast.
You’ll need to sharpen it every few marking sessions or when lines start looking fuzzy and imprecise instead of crisp and clean.
Conclusion
Sharpening sewing chalk is like keeping your pencil sharp—it makes all the difference in your work quality.
You’ve now learned how to sharpen sewing chalk using four reliable methods, each offering unique advantages for different projects.
Whether you choose a vegetable peeler for collecting dust, sandpaper for texture variety, blade shaving for fine powder, or scissors for quick touch-ups, you’ll achieve cleaner marks and better fabric visibility.
Test each method on scraps first to find your preferred technique, and remember that better fabric visibility is key to improving your work.
- https://www.wawak.com/Cutting-Measuring/Marking-Chalk-Pens/Chalk/jems-assorted-clay-tailors-chalk-36box/?sku=CK150AS
- https://www.moodfabrics.com/notions/marking-tools/chalk
- https://www.sailrite.com/How-to-Pick-the-Best-Marking-Pencil
- https://carmelindustries.com/blogs/all-blogs/the-wide-world-of-tailor-s-chalk
- https://www.reddit.com/r/sewhelp/comments/1fsduu6/sewing_chalk/


