This site is supported by our readers. We may earn a commission, at no cost to you, if you purchase through links.
 You finish sewing a garment, try it on, and something’s off. The side seams twist. The shoulders pucker. The hem refuses to hang straight. Nine times out of ten, the culprit isn’t your stitching—it’s an untrued pattern.
Pattern truing means checking that seams meant to connect actually match in length and curve. Skip this step, and you’re setting yourself up for wonky results no matter how carefully you sew. A few minutes spent measuring and adjusting pattern pieces before you cut saves hours of frustration later.
Once you know how to true a sewing pattern, you’ll spot problems before they reach your fabric and create garments that fit and drape the way they should.
Table Of Contents
Key Takeaways
- Pattern truing means checking that seams meant to connect actually match in length and curve before you cut fabric, preventing twisted garments, puckering, and misaligned seams that waste time and material.
- Most commercial patterns contain errors—seam misalignment can be off by half an inch, and pattern grading errors affect 4 out of 5 commercial patterns—making truing essential for professional results.
- The truing process involves measuring stitching lines (not cutting lines), overlapping seam allowances with transparent paper to check alignment, and redistributing excess length evenly along seams rather than forcing it into one spot.
- Smoothing pattern lines by redrawing curves with French curves and ensuring symmetry by folding pieces along center grainlines prevents the awkward dips, sharp points, and distortion that show up in finished garments.
Why Truing a Sewing Pattern is Essential
Truing your pattern isn’t just a nice-to-have step—it’s the difference between a garment that fits beautifully and one that puckers, twists, or hangs oddly.
Pattern truing transforms a garment from one that puckers and twists into one that fits beautifully
When seams don’t match up correctly, you’ll spend more time fixing mistakes than you’d’ve spent checking your pattern in the first place.
Let’s look at why this simple step matters so much for your sewing success.
Importance of Accurate Seam Matching
When you stitch two pattern pieces together, accurate seam matching is the difference between a garment that hangs beautifully and one that twists or puckers at the seams. Seam length consistency means both edges you’re joining measure exactly the same. Without this, you’ll end up forcing fabric together, which compromises garment structure integrity.
Truing sewing patterns before you cut saves fabric and frustration later.
Impact on Garment Fit and Finish
A well-trued pattern doesn’t just prevent those frustrating seam mismatches—it’s what gives your finished garment that professional drape and polished look you’re after. When seam alignment is off, fabric drape suffers and your garment can twist or hang unevenly.
Proper truing sewing patterns guarantees garment symmetry and consistent fit across all sizes. Correcting pattern errors before cutting means smoothing pattern lines translates directly into that professional finish—no wrestling with fabric during construction.
Common Problems From Untrued Patterns
Skipping pattern truing isn’t worth the headache. Seam misalignment causes those annoying assembly errors—commercial patterns can be off by half an inch along side seams. Sizing errors mean garments that don’t fit right, and stitch distortion from unaligned seams shows up as puckering in over 40% of tightly woven fabrics. Poor markings leave you guessing during construction, while aesthetic flaws like uneven hems ruin your finished piece. One of the most frequent issues is untrimmed threads, which should be addressed during final production.
Here’s what happens when you skip truing sewing patterns:
- Sleeve caps won’t fit armholes — pattern grading errors affect 4 out of 5 commercial patterns, making proper truing seams necessary before cutting
- Visible puckering after washing — untrued seam allowances cause fabric distortion in nearly a third of home-sewn garments
- Asymmetrical hems and uneven sides — correcting pattern errors prevents these flaws that show up in 15% of finished projects
- Shoulder seams that don’t match — length variations average a quarter-inch between front and back pieces without pattern adjustments
- Twisted garments that hang wrong — poor markings and skipped smooth flow checks lead to construction mistakes in over a third of projects
Tools and Materials Needed for Pattern Truing
You’ll need a handful of basic supplies to check your patterns and make adjustments. Most of these tools are already in your sewing kit, so gathering them won’t take long.
Here’s what to have on hand before you start truing your patterns.
Measuring Tools and Rulers
You can’t true a pattern without a good ruler, and not just any ruler will do. You’ll need a clear, gridded ruler for checking sewing patterns—18 to 24 inches works best. The grid helps you measure seam lengths fast and spot any wonky angles. For curves, flexible curves bend to match your pattern’s shape, making smooth lines. Here’s what matters:
| Tool Type | Best For | Why It Matters |
|---|---|---|
| Clear Grid Ruler | Straight seams, measurement | Accuracy matters—grids show alignment instantly |
| Flexible Curve | Curved seams, armholes | Matches pattern curves for truing sewing patterns |
| Digital Caliper | Tiny details, notches | Precision for specialized rulers needs |
| French Curve Set | Hip curves, necklines | Creates smooth transitions between points |
Digital measurement tools can help, but most sewers stick with tried-and-true clear rulers.
Pattern Paper and Transparent Supplies
Transparent paper turns pattern matching from guesswork into something you can actually see. Swedish tracing paper works well—it’s durable and holds smooth lines without tearing.
Pattern paper with grids saves time when checking sewing patterns. Look for transparency grades that let you overlay pieces easily.
Store rolled or flat to prevent creases that mess up pattern alteration work.
Marking Tools and Set Squares
A sharp pencil and a good set square are the difference between a pattern that sews up cleanly and one that fights you at every seam. Use a clear acrylic set square to check right angle corners and seam angles when truing sewing patterns.
Types of markers matter—mechanical pencils stay sharp longer, while specialized marking tools like awls create precise punch marks.
Wipe tools clean regularly for maintaining tool accuracy during truing seams techniques.
Step-by-Step Guide to Truing Sewing Patterns
Truing a pattern isn’t complicated, but it does require a clear process. You’ll need to measure each seam, compare matching edges, and make adjustments where the numbers don’t line up.
Here’s how to work through the essential steps so your pattern pieces fit together perfectly.
Measuring and Comparing Seam Lengths
The tape measure in your hand is your first line of defense against a garment that simply won’t come together at the seams. Start by measuring each stitching line on your sewing patterns—not the cutting line—to check seam length accuracy.
- Measure from notch to notch or seam end to seam end
- Compare corresponding seams that will be sewn together
- Record discrepancies in a notebook or digital measurement tools
- Mark any matching seam points that don’t align
Write down what you find. Those numbers tell you where adjusting seam length becomes necessary.
Matching Pattern Pieces for Seam Alignment
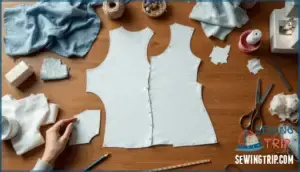
Once you’ve measured your seams, lay those pattern pieces edge-to-edge like puzzle pieces waiting to click into place. Align matching notches first—they’re your roadmap to seam alignment.
Check that your pivot point matching lines up at corners and curves. Make sure the grainline alignment runs parallel between pieces.
You’re looking for a smooth flow where stitching lines meet perfectly, making for consistent seam allowance throughout. This visual check catches what numbers alone might miss.
Overlapping Seam Allowances for Accuracy
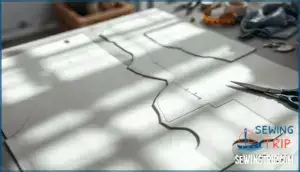
To nail this check, you’ll need to physically overlap the seam allowances and see if the actual stitching lines match up perfectly. Using transparent paper makes truing sewing patterns easier—you’ll spot pattern design flaws like divots or misaligned corners instantly.
Overlap measurement tips for seam allowance precision:
- Pin matching notches together, then fold back seam allowances to reveal true stitching lines
- Check for smooth curves—any odd divots mean your pattern alteration techniques need work
- Verify accurate corner alignments meet at exact right angles without gaps
- Test complex curves by flexing the overlapped pieces gently to catch hidden mismatches
Recording and Analyzing Measurements
Writing down what you find isn’t busywork—it’s how you catch the sneaky discrepancies that’ll haunt you three seams later. Create a simple chart noting which seams match and where tolerance levels exceed a quarter-inch.
This data accuracy becomes your roadmap for adjustment strategies during pattern modifications. Compare measurements against your pattern fitting goals, then prioritize fixes based on statistical analysis—tackle the biggest gaps first for efficient pattern alteration techniques.
Techniques for Smoothing and Adjusting Pattern Lines
Once you’ve matched your seam lengths, you’ll need to smooth out any awkward bumps or angles in your pattern lines. This step guarantees your pieces flow naturally into each other without creating weird puckers or pointy spots.
Here’s how to polish those seams until they’re just right.
Identifying and Correcting Sharp Points or Dips
When your pattern lines meet up in jagged peaks or odd dips instead of flowing smoothly, you’ve found spots that need fixing. These pointed seams are pattern design errors that show up after alterations.
Grab your pattern paper and redraw the line to create a smooth blend. Blend the lines by connecting the good sections on either side, removing the dip or peak completely. This curve correction keeps your seams from puckering when sewn.
Redrawing Curves for Smooth Transitions
After blending away those trouble spots, you’ll need to actually redraw your curves so they flow like a natural line from start to finish. Curve blending tools help create smooth designs without pattern errors.
Use these techniques for pattern correction:
- Trace French curves along armhole adjustments for natural shoulder shapes
- Draw gradual arcs for collar shaping instead of abrupt angles
- Blend hemline smoothing sections so they connect seamlessly
- Check truing seams against your body’s actual curves
This ensures your truing sewing patterns match how fabric drapes.
Ensuring Balance and Symmetry in Pattern Pieces
Your pattern curves might look perfect, but if the left side doesn’t mirror the right, you’ll spot the wonky fit the second you try it on.
Fold your pattern pieces along the center grainlines to check symmetry techniques. View them up to the light for visual assessment.
If one armhole dips lower than the other, trace the better side and flip it for balanced alterations. This mirroring patterns step creates a truly symmetrical pattern design.
Distributing Excess Seam Length Evenly
If you’ve got a half-inch difference between two seams that should match, cramming all that extra length into one spot will give you a bubble or pucker that no amount of ironing can fix. Instead, divide that excess into smaller sections along the seam. Mark your pattern pieces every few inches, then adjust each section by a little bit.
This even distribution method keeps your seam matching methods smooth and prevents distortion. Balanced adjustments create consistent seam allowance and a smooth blending between pattern pieces.
Troubleshooting and Correcting Pattern Issues
Even the best pattern truing can’t catch every issue until you start working with the pieces. You might notice odd divots along curves, pointy hemlines after alterations, or seams that just won’t lie flat.
Let’s walk through the most common pattern problems and how to fix them before you cut your fabric.
Recognizing and Fixing Mismatched Seams
Mismatched seams are like puzzle pieces that almost fit—they look fine at first glance, but the moment you try to sew them together, you know something’s off. Seam length discrepancies show up when identifying mismatched points during truing sewing patterns.
Measure both pieces, mark the difference, then adjust by redistributing the excess or adding length where needed. Correcting seam curves and balancing seam allowances creates a smooth blend.
This seam matching method prevents future errors in pattern truing and finishing.
Avoiding Puckering and Distortion
Puckering happens when tension settings, stitching parameters, or fabric grainlines aren’t working together—over 40% of sewing defects in lightweight fabrics trace back to excessive thread tension alone. One common cause is incorrect tension settings, leading to uneven seams.
Creating smooth transitions in patterns starts with consistent seam allowance preparation and precise trimming, which cuts distortion by up to 30%. Remedial techniques like distributing excess along curves and adjusting your machine’s tension minimize seam puckering during truing and pattern truing and finishing, avoiding garment distortion before you even cut your fabric.
Adjusting for Stretch Fabrics and Elastic
Stretch fabrics throw a curveball into the truing process because they behave differently than woven materials—they pull, recover, and distort in ways that can make your carefully measured seams look perfect on paper but wonky on the body.
When truing stretch fabrics, you need to account for:
- Negative Ease and Stretch Percentage: Measure your fabric recovery to determine how much less width you need compared to body measurements
- Elastic Tension and Stabilizing Seams: Control elastic application by stretching it consistently while truing shoulder or waistband seams
- Fabric Recovery Zones: Test how your material bounces back after stretching to avoid distortion when creating smooth transitions in patterns
Ensuring Proper Fit After Pattern Modifications
Most home sewists don’t realize that 60% of patterns need additional refinements after major alterations—that’s where muslin fitting becomes your safety net. Test your trued pattern in muslin to catch fit issues before cutting final fabric.
During fit assessment, check ease recalculation against body measurements and validate seam lengths match your adjustments.
Document finalization means marking every change on your pattern for future reference, reducing rework by 39% on repeat projects.
Frequently Asked Questions (FAQs)
How do you true patterns with curved seams?
Curved seams need careful attention during pattern truing. Use French curves to measure and match these lines accurately.
Check that notches align properly, making sure both pattern pieces create a smooth blend when joined without sharp dips or awkward points.
Can pattern truing fix sizing issues or grading?
Truing concerns seam alignment, not sizing issues. It won’t fix pattern scaling or grading problems.
For true fit adjustments, you’ll need dedicated alterations beyond truing—like lengthening, shortening, or adjusting width at specific points.
Whats the difference between truing and pattern drafting?
Drafting vs. Truing involves different skill levels and goals. Pattern making creates a design from scratch, requiring extensive knowledge of garment construction.
Truing simply corrects existing pattern pieces to guarantee matching seam lengths and smooth flows after alterations.
Should you true commercial patterns before cutting fabric?
Most commercial patterns benefit from a quick truing check, especially around Fit Discrepancies or after pattern adjustment methods. This Time Investment catches errors before cutting Fabric, saving material.
Your Skill Level and Fabric Choice determine how thorough you need to be.
How do you true patterns for garments with linings?
Does the lining need the same pattern adjustment methods as your fashion fabric? True both separately using identical fitting garments and sewing techniques.
Match corresponding seams—lining seam allowance, facing integration, and understitching impact garment fitting, especially when bagging the lining with interfacing considerations.
Conclusion
Truing a pattern is like tuning an instrument before a performance—skip it, and everything sounds off no matter how well you play. Now that you know how to true a sewing pattern, you can spot mismatched seams, smooth awkward curves, and fix problems while they’re still on paper.
Your garments will hang better, fit cleaner, and look more polished. Check your patterns before cutting, and you’ll spend less time unpicking seams and more time wearing clothes that actually work.
- https://blog.fabrics-store.com/2025/01/21/checking-blending-and-truing-your-sewing-patterns-part-1/
- http://www.inthefolds.com/blog/2016/6/6/how-to-draft-princess-panels
- https://www.youtube.com/watch?v=oMTiWLvJKHw
- https://www.intouch-quality.com/blog/top-6-most-common-garment-defects
- https://www.nushoeinspectandcorrect.com/garment-quality-issues/


