This site is supported by our readers. We may earn a commission, at no cost to you, if you purchase through links.
 Your first sewing pattern looks like a cryptic treasure map covered in arrows, triangles, and mysterious dotted lines. Those strange symbols aren’t there to confuse you—they’re a universal language that pattern makers use to communicate exactly how each piece should be cut, aligned, and sewn together.
A single misread grainline can leave your garment twisting awkwardly, while overlooked notches mean seams that don’t match up. Once you crack the code behind these markings, you’ll cut fabric with confidence and watch flat pieces transform into perfectly fitted garments.
The symbols follow consistent rules across most patterns, making them easier to master than you might expect.
Table Of Contents
Key Takeaways
- Pattern markings are a universal language that guides cutting, alignment, and assembly—understanding symbols like grainlines, notches, darts, and seam allowances prevents fitting problems and ensures pieces match correctly.
- Grainlines must run parallel to the selvage edge for proper drape, foldlines create symmetry by placing pattern edges on folded fabric, and notches serve as precise matching points between pieces.
- Different pattern companies use varying symbol styles (triangle notches vs. short lines, regional differences between American, European, and Japanese designers), so always check the pattern’s legend before starting.
- Accurate marking transfer using the right tools for your fabric type (tailor’s tacks for delicates, chalk for medium-weight fabrics, soap for heavy materials) is essential before cutting, as mistakes compound during construction.
What Do Sewing Pattern Markings Mean?
When you look at a sewing pattern, you’ll notice all kinds of marks and symbols scattered across the pieces. These markings are your roadmap—they tell you exactly how to cut, where to sew, and how to assemble everything correctly.
Sewing pattern markings are your roadmap, telling you exactly where to cut, sew, and assemble every piece correctly
Here’s what each of these symbols means so you can follow any pattern with confidence.
Common Pattern Symbols Explained
Think of sewing pattern symbols as the language that connects your paper pattern to your finished garment—they’re the instructions that tell you exactly where to cut, fold, and stitch. Without understanding these markings, you’d be sewing blind. Here’s what you need to know:
- Size lines show you exactly where to cut for your specific size, so you don’t accidentally cut too big or too small.
- Centre lines (front and back) help you align pattern pieces perfectly, keeping your garment balanced and symmetrical.
- Grainlines guide fabric placement parallel to the selvage, helping your garment drape and move the way it should.
- Foldlines tell you which edges belong on a fabric fold, saving material and creating fluid details.
- Notches are your matching points—small triangles or diamonds that connect two pieces together with precision.
Most commercial patterns include a symbol key explaining everything, but knowing these basics means you’re interpreting pattern symbols like a pro from day one.
Grainlines, Foldlines, and Notches
These three markings—grainlines, foldlines, and notches—are your foundation for cutting accurately and sewing pieces together the way the designer intended.
Grainlines show you fabric grain direction. Align them parallel to the selvage so your garment drapes properly and won’t skew or stretch unexpectedly.
Foldlines indicate where pattern edges belong on folded fabric. This creates symmetry and saves material—you’re basically doubling up one cut.
Notches are small triangles or diamonds marking where pieces connect. Match them exactly during sewing for seams that line up perfectly every time. These pattern symbols work together to guide your cutting techniques and guarantee pattern accuracy from start to finish.
Cutting Lines Vs. Seam Lines
Now here’s where most beginners get tripped up—your cutting line and your seam line aren’t the same thing, and knowing the difference keeps your finished pieces the right size. The cutting line is the solid outer edge where you’ll cut your fabric. Your seam line sits inside that, usually marked with a dotted line. The space between them is your seam allowance.
Most patterns include half-inch allowances, but check your pattern instructions first. Cutting line accuracy prevents fabric wastage and design alterations down the road. Respecting seam line precision guarantees your pieces fit together properly during sewing.
Darts, Pleats, and Gathering Marks
When you’ve got shaping to do—whether it’s creating curves with darts, adding texture with pleats, or gathering fabric for volume—your pattern tells you exactly where and how to make it happen. Darts appear as diamond or triangular shapes showing where to fold and stitch for fitted curves. Pleats and gathers use square markings with dots indicating fabric to pull inward.
Mark accuracy matters here because these design applications directly affect your garment’s fit and appearance. Transfer these sewing pattern markings carefully onto your fabric before cutting.
How to Identify Pattern Markings on Paper
When you open a pattern, you’ll see various markings printed on the paper—some solid lines, some dashed, and various symbols scattered across the pieces. These markings tell you exactly how to cut, where to sew, and how to match everything together.
Since different pattern companies use slightly different styles, it helps to know what you’re looking at so nothing gets confusing when you’re ready to build your garment.
Recognizing Markings From Different Designers
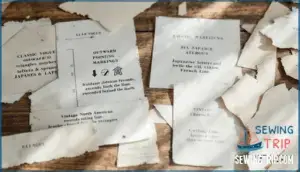
Each sewing pattern brand speaks its own visual language. Vogue, Butterick, Simplicity, and McCall’s use outward-pointing triangle notches, while many European designers prefer short lines instead. Vintage patterns from North American makers feature prominent triangles extending beyond the cutting line, whereas boutique variations often use single or double slashes for a cleaner look.
Digital patterns and modern brand evolution have shifted toward subtler marks. Japanese designers frequently employ letters and arrows with minimal notches, while French and Italian brands favor understated symbols and written guidance.
Understanding these regional and era-based differences helps you navigate unfamiliar sewing pattern markings with confidence, whether you’re working with classic vintage patterns or contemporary designs. Notches are essential for pattern alignment, and skipping notches can lead to mismatched pieces.
Decoding Pattern Markings for Beginners
Think of pattern markings as a map—they guide you through the entire garment-making process, and learning to read them is your first step toward confident sewing. Start with your pattern’s legend. Every designer includes a basic symbol guide explaining what each marking means. Don’t skip this—it’s your decoder for the entire project. Next, locate the size lines that match your measurements and highlight or circle them. This prevents cutting the wrong size.
Here are pattern reading tips to master the fundamentals:
- Check for notches and dots first. These symbol transfer tools help you match pieces accurately and prevent beginner mistakes like sewing sleeves backwards.
- Identify grain lines and fold markings. Position grain lines parallel to fabric selvage for proper drape and strength.
- Mark all symbols before cutting. Transfer darts, buttons, and construction points using chalk or tailor’s tacks—this sets you up for success.
A simple project walkthrough starts with understanding sewing pattern symbols before you cut fabric. Take time now to decode each marking, and your garment will come together smoothly.
How to Transfer Markings Onto Fabric
Now that you know what all those marks mean on your pattern, the next step is getting them onto your fabric. You’ll need the right tools and techniques to transfer these markings accurately so your construction goes smoothly.
Let’s look at your options for marking fabric and how to use them effectively.
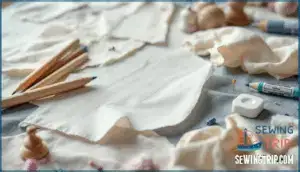
Tools for Transferring Markings (Chalk, Tailor’s Tacks, Pens)
The right tool for marking your fabric can make the difference between a garment that fits perfectly and one that doesn’t, so choosing wisely is worth your time. Tailor’s tacks offer excellent fabric compatibility and marking precision—they won’t disappear during construction.
Chalk and chalk pens provide good durability on most fabrics but may brush off easily. Marker pens deliver pen permanence for permanent pattern markings, though test them first on scrap fabric.
Each tool has tradeoffs, so match your choice to your fabric type and project needs.
Marking Techniques for Accuracy
Accuracy hinges on how deliberately you place each mark on your fabric—rush this step and you’ll pay for it later in the fitting room.
Start by securing your pattern pieces with pins or weights so they won’t shift while you work. Use chalk and chalk pens for quick marks on most fabrics, but switch to tailor’s tacks on delicate materials where chalk might damage fibers.
For accurate transfer methods, poke through pattern holes with a removable pen, then connect the dots on fabric. Press lightly to avoid impressions. Double-check each marking before moving forward—fabric marking isn’t forgiving once you’ve sewn.
Best Practices for Different Fabric Types
Different fabrics demand different marking strategies—what works on cotton canvas won’t cut it on silk charmeuse. Your choice of marking tool and technique depends on the fabric’s weight, finish, and how it will keep marks.
- Lightweight fabrics (silks, sheers) — Use tailor’s tacks or a mechanical pencil for delicate fibers; avoid chalk that can leave permanent stains on pattern markings.
- Medium-weight cottons and blends — Chalk pencils work well here; they’re visible and easy to brush away after stitching without affecting fabric grain direction.
- Heavy fabrics (denim, canvas) — Opt for tailor’s chalk or soap slivers; these cut through texture and stay visible through your stitching settings.
- Knits and stretchy fabrics — Use a removable pen or tailor’s tacks to avoid marks that shift with the fabric’s weaving pattern.
- Interfaced areas — Mark the interfacing side before fusing to your base fabric; this protects delicate fibers and keeps your stitch settings accurate during assembly.
Placing and Cutting Fabric With Pattern Markings
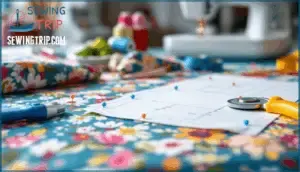
Once you’ve transferred your pattern markings onto fabric, the next step is placing your pattern pieces correctly and cutting them out. This is where grainlines, notches, and size lines come into play.
Let’s walk through how to align, match, and cut your fabric with precision.
Aligning Grainlines and Foldlines
When you lay your pattern piece on fabric, grainlines and foldlines work together like a compass and map to keep everything straight and symmetrical. Measure from the grainline mark to the selvage on both ends—equal distances mean you’ve nailed the fabric grain direction and avoided fabric distortion.
Place fold lines exactly on your fabric’s folded edge for foldline symmetry checks, making sure both halves mirror perfectly without bias cut impact.
Matching Notches and Placement Dots
Notches and placement dots are your best friends for lining up seams perfectly—they tell you exactly where one piece connects to another. Cut notches outward from the fabric edge so they’re easy to spot, then match them across pattern pieces for accurate alignment.
Placement dots guide you through fitting adjustments and design variations, especially in complex projects. Transfer these pattern markings carefully onto your fabric, and you’ll achieve professional results every time.
Cutting Around Size Lines and Seam Allowances
Once you’ve matched your notches and dots, you’ll want to cut along the right size line while keeping track of your seam allowance—it’s what gives your garment room to breathe and fit properly.
Here’s how to guarantee cutting accuracy:
- Identify your size line on the pattern and trace it clearly
- Add seam allowance if not included in pattern markings
- Blend sizes smoothly when grading between measurements
- Follow cutting lines precisely, not stitching lines
- Mark pattern symbols before removing the paper
This approach keeps your fabric pieces accurate and ready to sew.
Using Advanced Pattern Symbols for Accurate Sewing
Once you’ve mastered the basics, it’s time to work with pattern symbols that give you more control over fit and construction.
These sophisticated markings help you customize garments, position closures correctly, and tackle more complex designs.
Let’s look at the key symbols you’ll use to take your sewing skills to the next level.
Adjustment Lines for Lengthening/Shortening
Between those parallel double lines on your pattern lies the key to making any garment fit your exact proportions—whether you need extra length in the sleeves or a shorter hemline.
Cut your pattern apart along these lengthen/shorten lines, then spread the pieces to add length or overlap them to reduce it.
This simple pattern alteration gives you complete control over fitting adjustments and proportion changes without redrafting the entire design.
Button and Buttonhole Placement
Your pattern tells you exactly where to sew those buttonholes and attach buttons—no guessing, no uneven spacing, just clear marks that guarantee everything lines up perfectly. Look for button sewing setting symbols (usually circles or X marks) and buttonhole spots marked with straight lines showing horizontal alignment or vertical placement.
These spacing guidelines keep your closures professional, and the markings often indicate buttonhole types and where reinforcement techniques matter most.
Using Pattern and Fabric Keys
On every commercial pattern, understanding pattern markings becomes easier when you master Pattern Key Usage and Fabric Key Types. Pattern keys keep pieces right-side-up during cutting, while fabric keys distinguish between your main fabric, Interlining Keys, and Lining Keys—preventing mix-ups that waste time and material.
- Pattern Key symbols show orientation arrows or shading to indicate which side faces up
- Fabric Key indicators use different line styles or shading for shell, lining, and interfacing pieces
- Key Placement appears in pattern corners or along edges for quick reference while cutting
Specialized Markings for Complex Garments
As you tackle tailored jackets or eveningwear, Couture Pattern Symbols guide intricate construction. Multi-Directional Darts shape bodices with precision, while Layering Panel Symbols coordinate numbered pieces for linings and shells. Look for Fastener Placement icons—zipper teeth graphics or circled X’s—marking closure locations (https://www.textileschool.com/369/construction-marking-of-fabric/). Tucks and Gathers use dots and open squares, showing the highest point of fullness.
Digital Patterning now automates these markers, increasing accuracy by 28% in recent years, but mastering traditional Pattern Key and Fabric Key symbols remains essential. Solid lines on patterns often indicate essential construction details.
Frequently Asked Questions (FAQs)
What do pattern piece labels and numbers mean?
Think of each pattern piece as having its own address—the labels and numbers tell you exactly which piece you’re working with, what size to cut, and which version of the garment it belongs to.
How to read seam allowance width markings?
Seam allowance width appears as the space between cutting lines and stitching lines on pattern markings. Most patterns use 5/8" (5cm), but check your pattern’s key—some designers vary this.
Consistent seam width guarantees proper fit when grading seam allowances or altering allowances for different sewing pattern symbols.
What are zipper placement symbols and marks?
Zipper placement symbols act like a roadmap, guiding you to sew zippers precisely where they belong—usually shown as parallel lines or brackets marking zipper length, centering zippers along seam lines.
They also help distinguish zipper types, like invisible zippers, requiring a zipper foot for accurate buttonhole placement.
How to interpret pocket placement and stitching guides?
Pocket placement symbols on the pattern piece show exactly where to position and attach pockets. Stitching lines guide you through seam accuracy, while reinforcement methods guarantee durability at stress points across various pocket styles and design variations.
What do interfacing and lining pattern indicators mean?
Ironically, these hidden layers get their own spotlight. Interfacing placement marks show where to add stability, while lining construction indicators guide layering techniques.
Fabric keys distinguish these pieces from outer fabric, assuring proper pattern symbol interpretation and stabilizing seams accurately.
Conclusion
Many sewers believe pattern markings are optional guidelines—but every symbol has a structural purpose you can’t skip. Once you know how to understand sewing pattern markings, those cryptic dots and lines become your most reliable construction crew.
They tell you exactly where fabric bends, meets, and holds its shape. Master the language now, and you’ll eliminate guesswork from every project. Your patterns will speak clearly, your seams will align perfectly, and your garments will fit like they were designed specifically for you.
- http://www.pinterest.com/pin/285556432597694466/
- https://haberdasherbee.co.uk/blog/different-methods-of-marking-notches-on-sewing-patterns/
- https://study.com/academy/lesson/sewing-pattern-symbols-their-definition.html
- https://agfblog.com/2017/04/10/the-ultimate-guide-to-pattern-markings/
- https://thefoldline.com/blogs/pattern-series-get-ready-to-sew/a-beginner-s-guide-sewing-pattern-symbols-and-fabric-marking-tools

