This site is supported by our readers. We may earn a commission, at no cost to you, if you purchase through links.
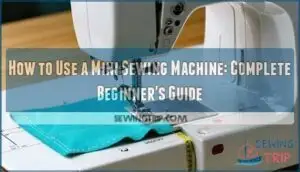
Thread your machine following the numbered guide, then load your bobbin and select a basic straight stitch. Place fabric under the presser foot, lower it, and start with slow, steady pressure on the foot pedal.
Guide fabric gently—don’t pull or push too hard. These compact powerhouses handle most lightweight fabrics beautifully, from cotton to polyester.
The key lies in maintaining consistent speed and letting the machine do the work while you simply steer. Master these fundamentals, and you’ll discover why seasoned sewers often keep one nearby for quick fixes and travel projects.
Table Of Contents
Key Takeaways
- Set up correctly from the start – Thread your machine following the numbered guide, load the bobbin, and select a basic straight stitch before placing fabric under the presser foot
- Master speed and fabric control – Use slow, steady pressure on the foot pedal while guiding fabric gently without pulling or pushing too hard
- Stick to lightweight materials – Your mini machine handles cotton and polyester beautifully, but avoid thick fabrics like heavy denim that’ll strain the motor
- Practice proper maintenance – Change needles every eight hours of sewing, clean lint from the bobbin area regularly, and troubleshoot issues like thread tension before they become bigger problems
Mini Sewing Machine Basics
Mini sewing machines are compact versions of traditional sewing machines designed for basic stitching tasks and small projects.
You’ll find these lightweight machines perfect for quick repairs, hemming, and simple crafting when you don’t need the full power of a standard sewing machine.
Definition and Purpose
A mini sewing machine is a compact, portable sewing tool designed for basic stitching tasks and quick repairs.
Perfect for quick fixes, simple crafts, and on-the-go sewing adventures without the bulk.
These lightweight machines handle essential sewing needs like hemming, mending, and simple crafts.
Unlike full-sized models, mini machines focus on core sewing basics rather than advanced features.
They’re perfect for beginners learning machine types and exploring fabric uses through hands-on portable sewing experiences.
Size and Weight
Typical portable machines weigh between 2-5 pounds, making them incredibly lightweight compared to full-sized models.
Compact designs measure roughly 12x6x8 inches, fitting easily on small tables or in travel bags.
These mini dimensions deliver impressive space savings for apartments, dorms, or craft rooms.
Weight limits usually cap around 15 pounds for carrying cases, ensuring true portability for your sewing adventures.
Suitable Sewing Tasks
Perfect your mini sewing machine skills with these versatile sewing tasks.
You’ll excel at mending clothes, hemming pants, and sewing patches onto garments.
These compact sewing tools handle crafting ideas like small decorations and basic quilting projects beautifully.
Your handheld sewing companion tackles lightweight fabrics with ease, making quick repairs and simple sewing projects achievable anywhere you need them, with a focus on basic quilting projects.
Distinction From Handheld Machines
While mini machines offer compact design and portable sewing convenience, they differ substantially from handheld sewing machines in stability and precision.
Handheld differences include limited control and awkward fabric positioning. Mini machine comparison reveals superior sewing precision through stable platforms and consistent stitch formation.
This compact sewing machine advantage makes detailed work manageable. When choosing a mini sewing machine, consider the portable sewing benefits for your projects.
Key differences that matter:
- Steady hands vs. steady machine – Your mini sewing machine stays put while handheld units wobble with every movement
Precision wins when your machine stands firm while handheld devices dance around unpredictably.
- Professional seams vs. wobbly stitches – Mini machines create straight, even lines that handheld devices struggle to match
- Both hands free for fabric – Guide material smoothly instead of wrestling with a shaky handheld device
- Real projects possible – Complete actual garments rather than emergency repairs only
Using a Mini Sewing Machine
Operating your mini sewing machine effectively starts with proper setup and understanding basic controls.
First, you’ll connect the power cord or insert batteries, then thread the machine according to your manual’s instructions.
Most models feature a simple on/off switch and speed control dial that lets you adjust sewing speed from slow to moderate—perfect for beginners who need precise control over their stitching.
When selecting fabric for your sewing projects, choose lightweight to medium-weight materials initially.
Cotton, linen, and thin denim work well, while heavy fabrics may strain the motor.
Your thread choices should match your fabric weight—lighter threads for delicate materials, heavier for sturdy fabrics.
Before starting any sewing tutorial or following a sewing guide, practice on scrap fabric to familiarize yourself with your machine’s rhythm.
Remember, these compact machines aren’t built for speed demons—they’re designed for accuracy and portability, making them ideal companions for quick repairs and creative sewing projects.
Machine Components Overview
Understanding your mini sewing machine’s components is essential before you start your first project. Each part serves a specific function that contributes to smooth, professional-looking stitches.
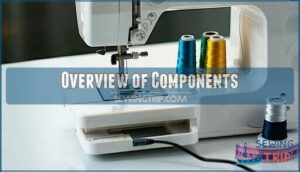
Overview of Components
Your mini sewing machine contains several key machine parts that work together seamlessly.
The sewing table provides a stable surface for your projects, while the power cord supplies electricity to drive the motor.
The foot pedal gives you precise speed control during operation.
Your sewing kit should include various needle types for different fabrics, and understanding these sewing accessories and sewing equipment components helps you maximize your machine’s potential effectively, by using the right tools for the task at hand.
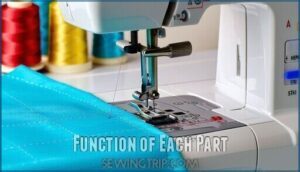
Function of Each Part
Understanding your mini sewing machine’s components empowers effective operation. The needle pierces fabric while the presser foot holds it steady.
Thread tension controls stitch quality—too tight creates puckering, too loose makes loose stitches. The bobbin function creates the lower thread loop, essential for proper stitch formation.
Machine controls include speed settings and stitch selection options. Part identification becomes second nature with practice.
Familiarizing yourself with a mini sewing machine buying guide can help you choose the right model for your specific needs.
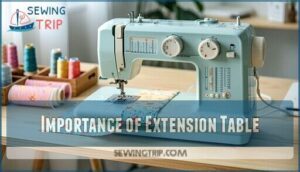
Importance of Extension Table
Extension tables transform your mini sewing machine workspace from cramped to comfortable.
This small attachment provides essential Table Stability and expanded Sewing Space for better Fabric Control.
Without it, you’ll wrestle with bunched material and uneven stitches.
The extension delivers essential Machine Support and Workspace Efficiency, letting you guide fabric smoothly.
Your portable sewing machine becomes substantially more manageable with this game-changing accessory.
For ideal results, consider investing in a table with space saving design to maximize your sewing area.
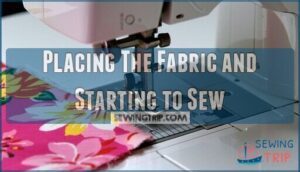
Placing The Fabric and Starting to Sew
Proper fabric alignment transforms your mini sewing machine from frustrating contraption into reliable companion. Thread tension and fabric guidance determine stitch quality, making sewing preparation essential for successful projects.
- Raise needle and presser foot – Turn handwheel toward you, then lift presser foot lever for clear fabric placement
- Position fabric under needle – Align material with needle plate markings for straight seams and consistent stitch control
- Lower presser foot firmly – Secure fabric in place to maintain proper thread tension and prevent shifting during sewing
- Begin stitching slowly – Press foot pedal gently or use power button while guiding fabric with light hand pressure
- Maintain steady fabric guidance – Keep fingers away from needle while allowing machine to feed material naturally through sewing process
To achieve professional results, understanding mini sewing basics is essential for any sewing project.
Operating and Maintaining Machine
Proper maintenance keeps your mini sewing machine running smoothly and extends its lifespan substantially.
You’ll need to learn basic upkeep tasks like needle changes, troubleshooting common issues, and regular cleaning to guarantee consistent stitching performance.
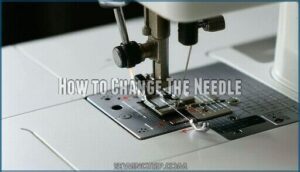
How to Change The Needle
Changing your mini sewing machine needle requires careful attention to avoid injury and guarantee proper function.
First, power off your sewing machine and raise the presser foot completely. Locate the needle clamp screw and loosen it counterclockwise using the provided screwdriver or your fingers.
Remove the old needle by pulling it straight down, then insert the new needle with the flat side facing away from you until it stops.
| Step | Action | Safety Tip |
|---|---|---|
| Remove Old Needle | Pull straight down after loosening clamp | Keep fingers clear of needle point |
| Insert New Needle | Push up until it stops, flat side back | Never force or bend the needle |
| Secure Needle | Tighten clamp screw firmly | Guarantee needle is fully seated before tightening |
Needle Types for Mini Machines
Your mini sewing machine accepts standard universal needles sized 11/75 for lightweight fabrics and 14/90 for medium-weight materials.
Needle sizes must match your fabric’s weight – think of it as finding the right key for each lock.
Ballpoint needles work best with knits, while denim needles handle thicker layers.
Refer to a detailed needle size guide for selecting the correct needle.
Replace needles every eight hours of sewing to maintain peak performance and prevent costly machine damage.
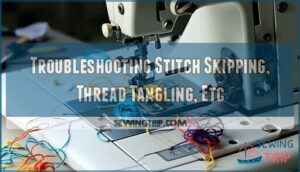
Troubleshooting Stitch Skipping, Thread Tangling, Etc
When your mini sewing machine acts up, don’t panic—most problems have simple fixes. Skipped stitches often mean you need a fresh needle or proper threading.
Thread tangles usually stem from incorrect bobbin placement or tension problems. These common hiccups become manageable once you know what to check. A key cause is when the upper thread doesn’t loop correctly around the bobbin.
- Replace dull or bent needles – Most skipped stitches disappear with a sharp, properly inserted needle
- Check upper thread path – Rethread completely if you’re getting tension problems or tangles
- Verify bobbin placement – Wrong-way bobbins cause thread bunching beneath your fabric
- Adjust tension settings – Start with manufacturer recommendations, then make small incremental changes
- Clean bobbin area – Lint buildup disrupts thread flow and causes needle breaks
Cleaning The Machine
Regular cleaning keeps your mini sewing machine running smoothly and extends its lifespan. After each sewing session, remove lint buildup from the bobbin area using a small brush or compressed air.
Wipe down external surfaces with a damp cloth to prevent dust accumulation. Clean the bobbin case thoroughly, removing thread fragments and debris.
Using the correct sewing machine brush can help reach difficult areas. Store your machine in a dust-free environment with proper ventilation to maintain its performance and ensure a long lifespan.
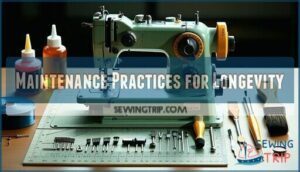
Maintenance Practices for Longevity
Beyond regular cleaning, consistent care keeps your mini sewing machine running smoothly for years.
Schedule monthly oiling mechanisms using machine oil on moving parts. Inspect belts for wear and replace when frayed. Store your machine covered in a dry location to prevent dust accumulation.
Check screws and connections quarterly, tightening loose parts. These simple maintenance steps prevent costly sewing machine repair while maximizing your machine’s practical application potential.
Implementing a preventive maintenance schedule can further extend the lifespan of your machine, ensuring consistent care and a longer lifespan with proper preventive maintenance.
Sewing Techniques and Safety
Once you’ve mastered the basics of operating your mini sewing machine, you’ll need to understand proper sewing techniques and safety practices to achieve professional results.
These fundamental skills will help you create secure seams while protecting yourself and maintaining your machine’s performance.
Locking a Seam
Securing your stitches prevents unraveling and guarantees professional results. Proper seam durability begins with backstitching technique at both start and finish points. Your mini sewing machine excels when you master these reinforcement stitching methods for lasting seams.
- Begin with backstitching – Stitch forward 3-4 stitches, then reverse over the same line
- Create secure knot tying – Pull both thread ends tight and tie a small knot close to fabric
- Apply reinforcement stitching – Add extra stitches at stress points like pocket corners
- Master securing threads – Trim excess thread leaving 1/4 inch tails after knotting
- Test seam durability – Gently tug the finished seam to verify your locking technique holds
These sewing techniques form the foundation of quality construction, transforming basic usage instructions into practical application that withstands wear and washing.
Feeding Fabric
After securing your seam, proper fabric feeding becomes your next focus.
Guide fabric steadily with your hands while the feed dog pulls material through automatically.
Maintain consistent fabric tension without forcing or pulling – let your mini sewing machine control the pace.
For layered fabrics, use the fabric guide to keep edges aligned.
Adjust stitch length settings based on material thickness to prevent bunching or uneven feeding patterns.
Finishing a Seam
Properly finished seams prevent fraying and guarantee your mini sewing machine projects last.
Start with seam reinforcement by backstitching at both ends. For edge finishing, use a zigzag stitch or pinking shears on raw edges.
Apply pressing techniques while seams are warm for crisp results. Corner finishing requires careful trimming before turning.
These sewing tips create professional-looking decorative seams every time, using techniques like seam reinforcement.
Safety and Usage Tips
Always disconnect power when changing needles or threading your small sewing machine.
Keep eye protection nearby and verify child supervision during machine usage.
Dispose of broken needles safely in a puncture-proof container.
Check cord safety regularly for frays or damage.
Remember to maintain good posture habits to prevent discomfort during long sewing sessions.
Respect fabric limits—mini machines struggle with thick materials like denim or multiple layers, which can damage internal components.
Ensure good posture and child supervision to create a safe sewing environment.
Handling Different Fabric Types
Different fabric types require specific adjustments on your mini sewing machine.
Light fabrics like cotton need standard needle selection and moderate stitch settings.
Heavy materials demand size 14-16 needles and slower fabric feed speeds.
Adjust tension settings based on fabric weight—looser for knits, tighter for wovens.
Test stitch patterns on scraps before starting your project to guarantee the best results.
Frequently Asked Questions (FAQs)
What is the use of a mini sewing machine?
Though you might think mini sewing machines are just toys, they’re actually powerful tools for quick repairs, hemming, crafting, and small projects, handling lightweight fabrics with surprising efficiency.
What can you sew on a mini sewing machine?
You can sew basic repairs like tears and seams, hem pants or skirts, attach buttons, create small crafts, and work on lightweight fabrics for simple projects.
Can mini sewing machines handle thick materials?
Like trying to thread a needle with rope, mini sewing machines struggle with thick materials.
They’re designed for lightweight to medium fabrics, so denim or multiple layers will likely exceed their motor power and cause jamming or poor stitching.
Whats the maximum fabric thickness for mini machines?
Most mini sewing machines handle fabrics up to 1/8 inch thick—think cotton shirts or lightweight canvas.
You’ll struggle with thick denim layers or heavy upholstery since these compact machines lack the power for serious thickness.
Do mini sewing machines work with embroidery thread?
Threading your needle becomes an art form when working with embroidery thread on mini machines.
Most mini sewing machines handle embroidery thread well, but you’ll need to adjust tension settings and use appropriate needle sizes for best results.
Can you sew buttonholes on mini machines?
Most mini sewing machines can’t create proper buttonholes automatically. You’ll need to manually stitch around pre-cut holes using zigzag stitches, which requires patience and practice to achieve clean results.
How long do mini sewing machine motors last?
Expect your mini sewing machine’s motor to last 3-5 years with regular use.
You’ll extend its lifespan by keeping it clean, avoiding fabric jams, and not overworking it with heavy materials like denim.
Conclusion
Despite what you might think, learning how to use a mini sewing machine doesn’t require professional training or years of practice.
These compact tools are designed for immediate use by beginners.
You’ve now gained the essential knowledge needed to operate your machine confidently.
Remember that mastering consistent speed control and proper fabric handling are your primary objectives.
Practice these fundamentals regularly, and you’ll quickly develop the skills necessary for successful sewing projects using your mini machine, which will help you achieve your goals with proper fabric handling.
- https://docs.google.com/forms/d/1GAQr3Kn1cURCVHUA82hAga1Wv8DCH0IuqDLRUrOpN7M/viewform?ts=63f4f653&entry.1515682415=https://www.merriam-webster.com/dictionary%2Fuse
- https://premium.britannica.com/mw-unabridged/?utm_source=mw&utm_medium=inline-def&utm_campaign=evergreen
- https://dictionary.cambridge.org/dictionary/english/adopt?topic=using-and-misusing
- https://www.thesaurus.com/browse/use
- https://idioms.thefreedictionary.com/avail+(oneself)+of

