This site is supported by our readers. We may earn a commission, at no cost to you, if you purchase through links.
Your embroidery machine hums along perfectly, but when you peel back the hoop, you’re staring at puckered fabric, distorted designs, or stitches that sink into the weave like quicksand. The culprit? Wrong stabilizer choice.
Stabilizer is the foundation that holds your fabric taut during stitching, preventing distortion and ensuring crisp results. Yet with tear-away, cut-away, wash-away, heat-away, and mesh options lining the shelves, picking the right one feels like decoding a foreign language.
Match your stabilizer to your fabric weight, design density, and final use, and you’ll transform frustrating embroidery sessions into clean, professional results every time.
Table Of Contents
Key Takeaways
- Stabilizer choice determines whether your embroidery puckers or stays crisp—match tear-away to stable wovens, cut-away to stretchy knits, and wash-away to delicate fabrics based on weight and design density.
- Dense designs with high stitch counts demand heavier stabilizer backing to prevent fabric distortion, while lighter patterns work with thinner support that won’t stiffen your finished piece.
- Proper application matters as much as selection—hoop with even tension, float bulky items on adhesive stabilizer, and use toppers on textured fabrics to keep stitches from sinking into the pile.
- Remove stabilizer correctly by tearing gently along stitch lines, trimming cut-away close with sharp scissors, or dissolving wash-away types in cool water to avoid damaging your embroidery.
Essential Types of Embroidery Stabilizers
You can’t master embroidery without understanding your stabilizer options first. Each type fulfills a specific purpose, from supporting stretchy knits to disappearing on delicate fabrics.
Choosing the wrong stabilizer can ruin even the best design, so investing in quality quilting and embroidery tools makes all the difference from your first stitch.
Here’s what you need to know about the five main categories and when to use each one.
Tear-Away Stabilizers
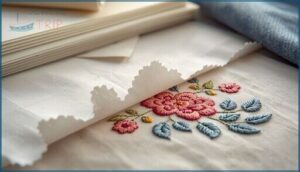
Tear-away stabilizers offer temporary embroidery support that you remove after stitching. You’ll tear away these backings along the fiber direction, leaving your woven fabrics like cotton or denim with a clean finish.
They come in light to heavy weights—stack multiple stabilizer layers for dense designs to prevent fabric distortion. When it’s time for stabilizer removal, tear gently from the edges to avoid snagging your work.
For more details about the differences between cut-away and tear-away stabilizers, check reputable embroidery resources.
Cut-Away Stabilizers
Unlike tear-aways, cutaway stabilizer stays behind your embroidery permanently, offering long-term support through countless washings. You’ll find stabilizer types ranging from lightweight soft-n-sheer to heavy-duty cut-away plus—each suited to specific fabric compatibility needs.
Here’s your quick reference for cutaway backings:
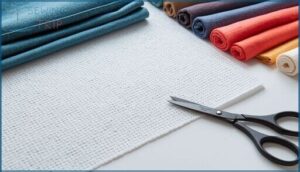
- Light mesh for t-shirts and moderate stitch counts
- Medium weight for sweatshirts and stretchy knits
- Heavy cut-away for dense designs on denim or fleece
- Fusible options providing adhesion methods before hooping
- No-show variants minimizing bulk on delicate projects
Trim close to your design, leaving just enough backing for stability without adding unnecessary stiffness. For more details on, consider how fabric type and design complexity impact your choice.
Wash-Away (Water-Soluble) Stabilizers
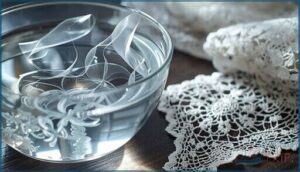
When your design needs support that disappears completely, water-soluble stabilizers offer the cleanest finish. These film backing options—made from polyvinyl alcohol polymers—dissolve in lukewarm water, leaving zero residue on towels, lace, or sheer fabrics. Dissolution rates vary with water temperature, usually taking minutes to hours for complete stabilizer removal.
| Type | Best For | Removal Method |
|---|---|---|
| Film | Freestanding lace, delicate fabrics | Lukewarm soak, gentle agitation |
| Fibrous mesh | Dense designs, towels | Rinse thoroughly, soft brush if needed |
| Watersoluble topping | Pile fabrics, preventing stitch sink | Cool water rinse after initial soak |
| Heavy weight | High stitch count, intricate motifs | Extended soak, multiple rinses |
Test dissolution on scraps first to gauge timing for your specific project and water temperature.
Heat-Away Stabilizers
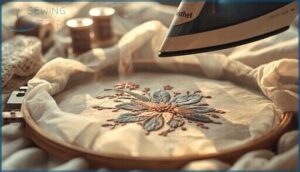
For fabrics that can’t be washed, heat-away stabilizers provide an alternative removal method. Apply controlled heat with a dry iron to release the clear film backing from your embroidery.
Understanding how embroidery machines handle different fabric types helps you choose the right stabilizer and heat setting for delicate materials.
These stabilizers work well on delicate knits and sheer fabrics where washaway stabilizer isn’t practical. Film thickness stays minimal to reduce show-through, while stabilizer adhesion holds firm during stitching but releases when heated to the target temperature range.
No-Show Mesh Stabilizers
The no-show mesh stabilizer delivers invisible support for light-colored fabrics where backing can peek through. This translucent mesh material keeps fabric drape soft while preventing puckering during stitching.
- Fusible stabilizer adhesives bond to fabric before embroidery to prevent shifting
- Lightweight 1.5 and 2.0 ounce options suit different design densities
- Diagonal mesh pattern stays hidden for a clean embroidery finish
- Works well as a no-show mesh cutaway for delicate knits and sheers
Choosing The Right Stabilizer for Fabric
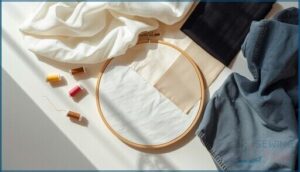
Your fabric choice dictates which stabilizer will give you the best results.
Stretchy knits need different support than crisp cottons, and delicate fabrics demand a lighter touch altogether.
Let’s break down the key fabric types and how to match them with the right stabilizer for clean, professional embroidery every time.
Stabilizers for Knits and Stretch Fabrics
Knit fabric support demands a different approach than woven materials. Your best bet for stretchy fabrics is a lightweight cut-away stabilizer—it stays put after embroidery and prevents fabric distortion without adding stiffness.
No-show mesh works beautifully on jerseys and interlocks, while medium-weight options handle dense designs. Match stabilizer thickness to your embroidery tension and stitch count for clean results every time.
Stabilizers for Woven and Non-Stretch Fabrics
Your woven fabric—cotton, denim, linen—needs stabilizer grain alignment perpendicular to the weave for fabric stretch control. Tear-away works best for most woven fabric support projects with low to medium stitch counts.
Switch to cut-away for dense stitch management when you’re working with heavy canvas or thick embroidery fabric stabilization needs. Match your stabilizer weight to both fabric thickness and design complexity for non-stretch embroidery that won’t pucker.
Stabilizers for Delicate and Sheer Fabrics
You’ll need ultra-light water-soluble film for chiffon and lace—it disappears completely after washing. Here’s what works for delicate embroidery:
- No-show mesh stabilizer at 12-30 gsm prevents visibility on sheer fabric tips
- Self-adhesive stabilizer stops slippery silk from shifting during hooping
- Wash-away toppers maintain fabric tension without residue
- 15-20 gsm weights balance embroidery support with drape
- Mesh underlays reduce strain while keeping stitches floating
Match stabilizer weights to your fabric’s delicacy for professional results.
Considering Embroidery Design Density
Dense designs pack more stitches per square inch, so your stabilizer choice shifts accordingly. Embroidery design density impact is real—high stitch density creates fabric stress that demands heavier backing to prevent puckering.
For design balance, test your pattern’s density on scrap fabric first. Stitch optimization means matching stabilizer strength to fill coverage: dense fills need cut-away support, while lighter outlines work with tear-away for embroidery stitch quality and thread tension control.
Matching Stabilizer Weight to Fabric and Design
Think of stabilizer weight as the foundation under a building—your fabric density and stitch density both determine how much support you need.
Light fabrics paired with minimal stitches use thin stabilizers, while heavy weaves with dense fills demand medium to heavy backing.
Material compatibility comes down to this: match stabilizer thickness to thread tension demands. Test on scraps first to confirm stitch balance and proper embroidery stabilizer selection for your fabric type.
Application Techniques and Best Practices
Selecting the right stabilizer is only half the battle—how you apply and remove it matters just as much.
Poor technique can lead to puckering, hoop burn, or visible residue that ruins an otherwise perfect design.
Let’s walk through the essential methods that’ll help you get clean, professional results every time.
Hooping and Securing Stabilizers
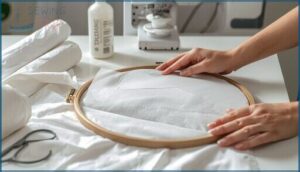
Getting your hoop tension right is the backbone of quality embroidery. You want the stabilizer placement taut—no slack—so fabric won’t shift mid-stitch. Clean hoop frames prevent slip, and a properly tightened screw locks in consistent tension.
Check fabric alignment before you start; skewed edges mean skewed designs. For securing methods like spray baste or light adhesive, use a gentle touch to keep everything stable without distortion.
Floating Vs. Hooping Methods
Hooping locks fabric in the hoop for a firm hold, while floating techniques position material on top of adhesive-backed stabilizer without direct hooping. Floating suits bulky items like towels or finished garments where traditional hooping isn’t practical.
- Floating speed: Skip the precision hoop alignment and tackle irregular shapes faster
- Alignment care: Visual guides on stabilizer adhesives prevent design drift
- Fabric tension: Sticky bases maintain embroidery alignment without crushing pile or seams
Using Toppers for Textured or Pile Fabrics
On velvet fabrics, toppers prevent stitches from sinking into the nap. They create a flat surface over textured materials, keeping your design visible and crisp.
Tear-away or wash-away topping works best—pair it with a cutaway stabilizer underneath for dense designs. Match the topper thickness to your fabric: too thick stiffens texture, too thin lets stitches vanish.
Removing and Trimming Stabilizers
After stitching, stabilizer removal methods matter just as much as your initial choice. Tear away tearaway stabilizer along stitch lines in small sections—this prevents fabric distortion.
For cut away stabilizer backing, trim close with sharp embroidery scissors, leaving a 1-2 mm margin. Wash-away types dissolve in cool water, while heat-away stabilizers peel off once cooled. Check for stabilizer residue and finish edges cleanly.
Common Stabilizer Mistakes to Avoid
Even seasoned embroiderers stumble with stabilizer selection and application. Poor hooping causes puckering—you need consistent, even tension across the hoop. Incorrect cutting or excess trimming weakens support, while stabilizer overuse creates stiff, bulky results.
Don’t use tear-away on knits or skip toppers on textured fabrics. Insufficient tension lets fabric shift mid-stitch. Master these embroidery stabilizer troubleshooting basics, and your embroidery stabilizer application techniques will transform your work.
Top Machine Embroidery Stabilizers to Try
Now that you know how to work with stabilizers, let’s look at some proven products that deliver consistent results.
These picks cover different stabilizer types and applications, from everyday projects to specialized techniques.
Each one brings something useful to your embroidery toolkit.
World Weidner No Show Polymesh Embroidery Stabilizer
When light-colored fabrics show every backing shadow, World Weidner No Show Polymesh comes to the rescue. This translucent 1.5-ounce nylon mesh stabilizer vanishes against pale knits and wovens, preventing fabric distortion without visible bulk.
You’ll get solid embroidery quality on jerseys and delicate textiles where stabilizer selection matters most. The sheer mesh construction minimizes show-through while supporting dense designs—perfect for professional-looking results on white T-shirts.
Superpunch Peel Stick Tear Away Embroidery Stabilizer
You won’t waste time pinning with Superpunch Peel Stick Tear Away. This adhesive tearaway stabilizer bonds fabric directly to the backing, speeding up your embroidery efficiency on small designs.
The self-adhesive properties hold woven cottons and lightweight knits firmly during stitching, then tear cleanly along perforations for easy stabilizer removal. It’s a practical machine embroidery stabilizer when basting isn’t worth the extra setup time.
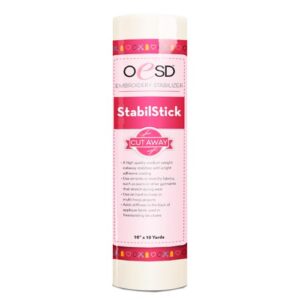
1. OESD StabilStick Cut Away Embroidery Stabilizer
When dense designs threaten to distort your knits, OESD StabilStick delivers the support you need. This medium-weight stabilizer features a light adhesive that holds fabric steady during stitching without leaving stiff residue.
The sticky backing makes hard-to-hoop garments manageable, while the cut-away structure prevents stretch fabrics from growing after wear. You’ll get clean stitch formation on everything from lightweight wovens to challenging multi-hoop projects. Just trim the excess after embroidering—the stabilizer stays behind to maintain your design’s shape permanently.
| Best For | Embroiderers working with knits, stretch fabrics, or stitch-heavy designs who need a permanent stabilizer that prevents distortion without making fabric stiff. |
|---|---|
| Primary Use | Machine embroidery stabilization |
| Application Method | Cut-away |
| Material Type | PolyMesh (1.5oz) |
| Size | 12″ x 10 yards |
| Washability | Machine washable |
| Best For | Light colored fabrics |
| Additional Features |
|
- Light adhesive backing holds fabric in place without slippage, making it easy to embroider hard-to-hoop items like finished garments
- Cut-away structure provides permanent support that prevents stretching and keeps dense designs looking crisp over time
- Works well as a fabric stiffener for freestanding applique projects, giving you more versatility beyond standard embroidery
- 10″ x 10 yard roll size may limit use on very large or multi-hoop projects that require wider stabilizer
- Adhesive strength might not hold extremely heavy or thick fabrics securely during stitching
- Higher price point compared to other stabilizer brands on the market
2. Sulky Tender Touch Iron On Backing
Scratchy embroidery backings can ruin a beautiful design, especially on baby clothes or sportswear.
Sulky Tender Touch solves that problem with an iron-on backing that covers finished stitches while staying soft against skin.
This lightweight 100% cotton stabilizer stretches with your garment, so it won’t stiffen delicate fabrics or restrict knit movement.
Just cut it to size, iron it onto the back of your embroidery, and you’re done.
It’s machine washable and perfect for lingerie, golf shirts, or any project where comfort matters as much as appearance.
| Best For | Anyone who embroiders baby clothes, sportswear, lingerie, or stretchy fabrics and wants to protect sensitive skin from scratchy stitches on the back. |
|---|---|
| Primary Use | Machine embroidery stabilization |
| Application Method | Tear-away with adhesive |
| Material Type | Polyester and cellulose |
| Size | 12″ roll |
| Washability | Removable |
| Best For | Intricate designs |
| Additional Features |
|
- Soft 100% cotton backing stretches with knits and won’t stiffen delicate fabrics
- Iron-on application makes it quick and easy to use—just cut, press, and you’re done
- Machine washable so it holds up through regular wear and cleaning
- You need to identify the glue side carefully before ironing or it won’t stick properly
- Can lift or peel if you don’t round sharp corners or cut it correctly
- Only comes in one color (June Berry), which might not match all fabric tones
3. HeatnBond Lite Iron-On Adhesive
If you’re bonding fabric appliqués before embroidering over them, HeatnBond Lite keeps everything exactly where you want it. This paper-backed iron-on adhesive fuses two layers together without adding bulk or gumming up your needle.
You’ll get a permanent bond that stays put through washing, and the 17-inch by 5.25-yard roll gives you plenty of material for multiple projects. Just press it on with medium heat, let it cool, then stitch right through.
It’s particularly useful for quilting and appliqué work where pinning would shift delicate pieces.
| Best For | Quilters and crafters who need a reliable way to hold appliqué pieces in place before stitching without adding bulk or dealing with pins. |
|---|---|
| Primary Use | Machine embroidery stabilization |
| Application Method | Cut-away with adhesive |
| Material Type | Adhesive stabilizer |
| Size | 10″ x 10 yards |
| Washability | Permanent |
| Best For | Stitch-heavy designs |
| Additional Features |
|
- Won’t gum up your sewing machine needle and stitches through cleanly
- Creates a permanent, washable bond that keeps fabric exactly where you placed it
- Large 17″ x 5.25-yard roll provides enough material for multiple quilting or appliqué projects
- Can dry out if you wait too long between applying and stitching around the edges
- Requires a heat source (iron) to activate, which adds an extra step to your workflow
- May have a limited shelf life if the roll isn’t stored in a cool, dry place
Frequently Asked Questions (FAQs)
How do I choose a stabilizer for machine embroidery?
Match your stabilizer to your fabric type first.
Stretchy knits need cut-away for stability, while stable wovens work with tear-away.
Delicate fabrics require wash-away options to avoid stiffening or visible residue.
What is embroidery stabilizer?
Embroidery stabilizer is a supportive material placed under or on top of fabric during stitching. It prevents distortion, puckering, and thread pull, keeping your design crisp and professional-looking through every wear and wash.
Can you use embroidery stabilizer if fabric is not machine washable?
Absolutely—non-washable fabrics still need stabilizers to prevent puckering and distortion.
Use cut-away or tear-away options that don’t require water removal. Skip wash-away types, and choose lightweight backing to avoid stiffness or surface impressions.
Why do we use stabilizer when embroidering on fabric?
Stabilizers prevent fabric from stretching, puckering, or distorting under the needle’s pressure. They support both the material and thread, keeping stitches clean and aligned.
Without them, your design won’t hold its original shape.
What are the different types of embroidery stabilizers?
Think of stabilizers as the invisible scaffolding behind your stitches. You’ll find five main types: tear-away, cut-away, wash-away, heat-away, and no-show mesh—each designed for specific fabrics and stitch densities.
How to remove embroidery stabilizer?
Removal depends on stabilizer type. Tear gently from edges toward stitches, cut close without nicking threads, or dissolve water-soluble types in lukewarm water. Always work slowly to protect your embroidery.
How to know what stabilizer to use for machine embroidery?
You’d think picking a stabilizer would be complicated, but it’s not. Match it to your fabric’s stretch and your design’s stitch density—knits need cut-away, wovens work with tear-away.
What to use as a stabilizer for embroidery?
Your best options include tear-away for stable wovens, cut-away for stretchy knits, wash-away for delicate fabrics, and heat-away for quick projects.
Match the stabilizer type to your fabric’s stretch and weight.
How many layers of stabilizer do I need for embroidery?
Most embroidery projects need one to two layers of stabilizer. You’ll use a single layer for lightweight fabrics with simple designs, but dense patterns or stretchy fabrics often require two layers for best results.
Should I use cut away or tear away stabilizer?
Which backing survives the finish line? Cut-away stabilizer stays permanently behind your stitches for long-term support on knits and stretchy fabrics, while tear-away works best for stable woven materials like cotton.
Conclusion
The theory that stabilizer is optional? Dead wrong. Every stitch you place pulls at fabric fibers, and without proper support, distortion is inevitable.
Your machine embroidery stabilizer guide now arms you with the knowledge to match tear-away, cut-away, or wash-away options to your fabric’s weight and weave. Stop guessing.
Hoop confidently, stitch cleanly, and watch puckering disappear. Master this foundation, and your embroidery transforms from frustrating trial-and-error into repeatable, professional results every single time.
- https://blog.sulky.com/stabilizer-basics-cut-away-tear-away-stabilizers/
- https://omlembroidery.com/cutaway-vs-tearaway-stabilizer-explained/
- https://www.hooptalent.com/vi/blogs/news/machine-embroidery-stabilizer-chart-the-ultimate-guide-for-perfect-fabric-support
- https://www.gunold.com/tips-training-shows/pro-tips/top-3-differences-in-cut-away-tear-away-embroidery-backing/
- https://www.kenssewingcenter.com/floriani-no-show-mesh-sheer-cutaway-stabilizer.html

