This site is supported by our readers. We may earn a commission, at no cost to you, if you purchase through links.
When you’re dealing with puckering fabric, check your hooping technique and stabilizer weight first. Loops appearing randomly? Your needle might be damaged or your tension needs adjustment.
Thread breaking constantly usually means you’re using the wrong needle size for your thread weight, or your machine needs cleaning. The secret is learning to read your machine’s signals – it’s actually trying to tell you what’s wrong through these symptoms.
Once you master these basics, fixing issues becomes second nature.
Table Of Contents
Key Takeaways
- Master the three main troubleshooting areas – You’ll solve most embroidery problems by checking tension settings, stabilizer selection, and needle condition first, as these cause the majority of issues, such as puckering, thread breaks, and looping.
- Match your materials properly – You need to pair needle size with thread weight, choose stabilizer type based on fabric characteristics, and ensure your hoop size fits your design to prevent alignment problems and fabric damage.
- Perfect your hooping technique – You’ll eliminate puckering and shifting by maintaining even pressure without stretching fabric, smoothing out wrinkles before tightening, and using the correct stabilizer weight for your design density.
- Maintain your machine regularly – You should clean lint buildup every 3-4 hours of stitching, oil according to manufacturer specifications, and replace damaged needles immediately to prevent costly repairs and ensure consistent stitch quality.
Puckering Issues
You’ve probably seen your fabric bubble and wrinkle around your embroidery design, creating that frustrating puckered look that ruins an otherwise perfect project.
This common issue typically stems from improper hooping technique, incorrect stabilizer selection, or fabric tension problems that you can fix with the right approach to achieve a better result and avoid the puckered look.
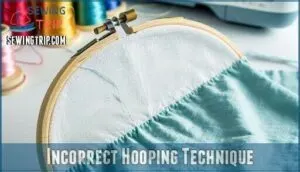
Incorrect Hooping Technique
Poor hooping technique is the silent sabotage behind fabric puckering in machine embroidery.
**Proper hooping technique is your first line of defense against embroidery disasters.
When you stretch or tug fabric during the hooping process, you’re setting yourself up for disaster. The fabric memory kicks in during stitching, causing unwanted wrinkles and bubbles around your design.
Master these fundamentals for crisp results:
- Choose the correct hoop size for your project dimensions
- Position fabric smoothly without pulling or stretching
- Secure the embroidery hoop with even pressure across all sides
Perfect hooping technique prevents fabric puckering before it starts.
Fabric Tension During Hooping
Getting fabric tension right during embroidery hooping determines whether you’ll create crisp designs or deal with puckering nightmares.
You need to balance three critical factors: fabric stretch, hoop types, and tension balance. Too tight creates fabric puckering, while too loose causes shifting during stitching.
| Fabric Weight | Hoop Tension | Result |
|---|---|---|
| Lightweight | Light pressure | Clean stitches |
| Medium weight | Moderate pressure | Balanced design |
| Heavy fabric | Firm pressure | Secure placement |
Master this balance, and you’ll prevent most hoop problems before they start.
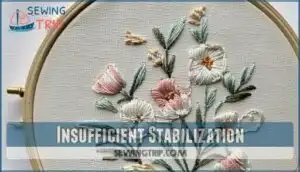
Insufficient Stabilization
When your fabric and stabilizer shift during stitching, you’re dealing with insufficient stabilization. This embroidery problem creates fabric puckering because your stabilizer can’t handle the stitch count or design complexity.
Match your stabilizer weight to fabric density – lightweight fabrics need lighter stabilizers, while heavy designs demand extra support. Your hooping method won’t fix inadequate stabilizer backing underneath.
You can also adjust thread tension adjustment to prevent puckering, and ensure that you have the right balance of support for your specific embroidery needs, considering the stitch count and design complexity.
Incorrect Stabilizer Type
Choosing the wrong stabilizer type creates embroidery problems even when you’ve used enough material.
Cut-away stabilizers work best for stretchy fabrics like knits, providing permanent support. Tear-away stabilizers suit stable materials like cotton and canvas. Water-soluble films handle delicate fabrics without leaving residue. Specialty stabilizers address unique needs like leather or fleece.
Your embroidery stabilizer choice directly impacts results. For the best results, consider using specialized stabilizer options.
Match your embroidery stabilizer type to fabric characteristics, not just personal preference, to prevent stabilizer issues.
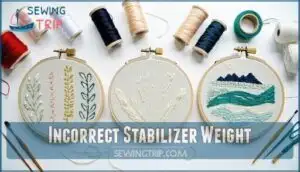
Incorrect Stabilizer Weight
Beyond stabilizer type, weight matters just as much for preventing puckering. Think of it like Goldilocks—too light won’t support your fabric, too heavy creates stiffness. Finding that "just right" weight eliminates embroidery problems before they start.
You can find a stabilizer weight guide online for specific projects.
- Match stabilizer weight to fabric thickness for proper support
- Consider design density when selecting appropriate stabilizer types
- Create test swatches on scrap material before final embroidery
Looping Problems
You’ll encounter looping problems when your embroidery machine creates loose thread loops on the fabric’s surface or underneath your design.
These loops typically signal tension imbalances between your top and bobbin threads, or indicate that your needle needs replacement, often due to imbalances.
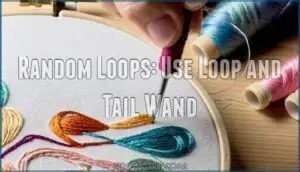
Random Loops: Use Loop and Tail Wand
Random embroidery loops don’t have to ruin your project. The loop and tail wand offers a simple solution for those pesky looping stitches that pop up unexpectedly.
Insert the wand’s sharp end through your design where the loop appears, then gently pull it to the opposite side. This wand technique eliminates embroidery loops and embroidery tails without damaging your work.
Many users find it helpful to purchase a loop tail for this purpose, as it provides an effective way to manage embroidery loops.
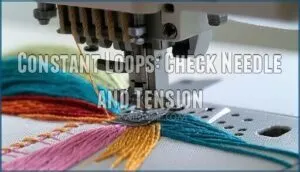
Constant Loops: Check Needle and Tension
When constant loops plague your embroidery, you’re dealing with persistent tension problems rather than random occurrences.
Start your embroidery machine troubleshooting by examining your needle type – a damaged or wrong-sized needle creates looping stitches and birds nesting.
Next, check your tension balance between upper and bobbin issues.
Poor thread quality compounds these problems.
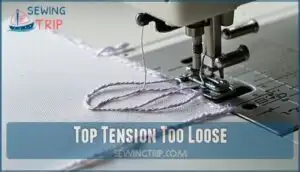
Top Tension Too Loose
When your top tension’s too loose, you’ll spot loops forming on your fabric’s underside. This embroidery tension adjustment issue creates thread imbalance that ruins designs.
Here’s how to fix tension problems:
- Turn your tension dial clockwise gradually
- Check the thread path for proper routing
- Run test stitching on scrap fabric
- Examine underside loops after each adjustment
- Balance with bobbin tension for smooth results
Adjusting tension requires patience, but proper embroidery machine tension guarantees professional-quality work.
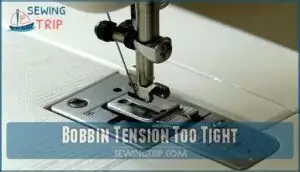
Bobbin Tension Too Tight
When your bobbin tension is too tight, you’ll see bobbin thread on your fabric’s surface or even holes in knits.
Grab a small screwdriver and locate the adjusting screw on your bobbin case. Make microscopic turns counterclockwise—we’re talking quarter-turns here.
Common symptoms include puckering and visible bottom thread. Test after each tiny adjustment to prevent overcorrection disasters.
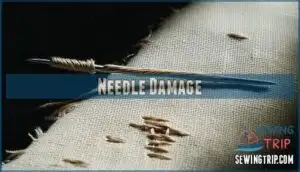
Needle Damage
When your embroidery needle develops burs or bends, it creates uneven spacing in fill stitches and causes needle breaking during operation.
Bent needles and burred needles snag threads, creating large needle holes in delicate fabrics.
Check your needle size matches your thread weight, and inspect for damage after stitching thick materials.
Replace damaged needles immediately—needle sharpening isn’t worth the hassle when needle issues compromise your entire project’s quality.
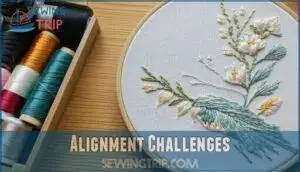
Alignment Challenges
When your embroidery design looks crooked or the elements don’t line up properly, you’re dealing with alignment challenges that can ruin even the most beautiful patterns.
These frustrating issues typically stem from stabilizer problems, fabric buckling, or improper hooping techniques that cause your design to shift during stitching.
Incorrect Stabilizer Choice
Picking the wrong stabilizer type can throw your entire project off track.
Cut-away stabilizers work best for stretchy fabrics, while tear-away stabilizers suit stable materials like cotton.
Water-soluble films help with delicate fabrics that might show through regular backing.
Specialty stabilizers handle unique situations like leather or foam.
Getting the stabilizer weight wrong creates alignment nightmares.
Your embroidery backing needs to match your fabric’s thickness and the design’s stitch density.
Match your embroidery stabilizer types to your project’s specific needs.
Stabilizer Buckling
When your stabilizer wrinkles or bubbles during hooping, you’re looking at stabilizer buckling that’ll throw off your entire design.
This embroidery backing distortion creates misaligned stitches and poor registration, regardless of correct stabilizer weight selection.
The fix? Perfect your hoop tension technique.
Smooth out every wrinkle before tightening, ensuring your stabilizer lies completely flat.
Consider your fabric type and design density when hooping—denser designs need extra care.
If tearing occurs during hooping, you’re pulling too hard.
Embroidery buckling problems disappear when you master gentle, even hooping pressure.
Fabric Buckling
Fabric buckling creates a domino effect that throws your entire design off track.
You’ll spot this when your fabric forms wrinkles or waves around the embroidery area.
Check your hoop tension first – too loose allows fabric movement, while too tight stretches the weave unnaturally.
Consider your fabric’s weight against your stabilizer choice, and remember that round hoops often distribute pressure more evenly than square ones, which can help prevent fabric buckling and its unwanted consequences.
Design Shifting
When your embroidery pattern moves around during stitching, you’re dealing with design shifting – a frustrating alignment issue that can ruin hours of work.
This pattern distortion happens when hoop tension isn’t adequate or your stabilizer choice is wrong.
Master your hooping technique first.
Secure fabric smoothly without stretching or pulling.
Use basting stitches to verify placement before starting your main design.
The right stabilizer prevents shifting – visit Stabilizer School for guidance on matching stabilizer to fabric type.
Check your software calibration and avoid improper design scaling.
These steps prevent embroidery alignment problems before they start, saving time and materials.
Elements Not in Correct Position
When design shifting leaves your elements scattered like puzzle pieces, you’re dealing with registration errors that stem from multiple factors.
Low hoop tension causes fabric stretch, while excessive tension damages material. Design scaling issues create alignment problems that throw off positioning.
Use basting stitches to verify placement before final stitching. Check your software calibration and install firmware updates to guarantee accurate design transfer.
These embroidery problems require systematic troubleshooting. Adjust needle size, stabilizer type, and hoop tension until elements align properly. Small tweaks prevent major design errors.
Machine Issues
Your machine can develop mechanical problems that affect embroidery quality, from unusual noises to thread breakage and needle damage.
These issues often stem from worn parts, improper maintenance, or incorrect settings that you can identify and fix with systematic troubleshooting.
Machine Making Noises
Beyond alignment problems, machine noise signals trouble brewing inside your embroidery setup. Listen carefully for grinding, rattling, or unusual vibrations that weren’t there before.
Identifying Sounds helps pinpoint the culprit:
- Lubrication Problems – squeaking or grinding indicates dry parts
- Internal Damage – irregular clicking suggests broken components
- Loose Parts – rattling means something’s come undone
- Motor Issues – electrical humming points to power problems
- Thread Path blockages create scraping sounds
Regular machine maintenance prevents most motor issues and keeps your embroidery machine troubleshooting minimal.
Thread Keeps Breaking
Dealing with constant thread breaks can make even the most patient embroiderer want to throw in the towel.
When your embroidery thread breaks repeatedly, it’s usually signaling problems with your setup or machine maintenance. Here’s your troubleshooting checklist:
- Check tension settings – Overly tight tension puts excessive stress on thread
- Verify thread path – Confirm proper threading through all guides and tension discs
- Match needle type to your thread weight and fabric combination
- Assess thread quality – Cheap threads often break due to inconsistent thickness
Regular machine maintenance prevents most embroidery problems before they start, saving you time and frustration.
Wrong Needle Ruining Fabric
Thread breakage pales compared to using the wrong needle on your embroidery fabric.
Needle Point Types matter tremendously – sharp needles work best for tightly woven materials, while ballpoint needles suit knits.
Fabric Weave Matters when selecting your embroidery needle. Follow a Needle Size Guide to match needle diameter with thread weight for proper Thread Compatibility.
Large or dull needles create visible holes and snag delicate fabrics.
Preventative Measures include checking needles before each project and replacing damaged ones immediately to avoid costly embroidery problems.
Bobbin Thread Constantly Breaking
Most embroidery enthusiasts face bobbin thread breaks at some point. Start by checking your bobbin case tension—it’s often the culprit behind constant breaks.
Here’s what to examine:
- Thread quality: Premium threads prevent frequent breaks
- Bobbin type compatibility: Wrong bobbins cause tension issues
- Lint buildup: Clean the bobbin area thoroughly
- Bobbin winding issues: Make certain of even, proper winding
Adjust your bobbin case tension carefully and inspect the spring condition for smooth embroidery machine troubleshooting.
Damaged Needles Causing Problems
Your embroidery machine’s performance hinges on needle condition more than you might realize. Damaged needles create spacing issues in fill stitches, cause thread breaks, and ruin fabric surfaces. When you notice irregular stitching or hear unusual sounds, your needle likely needs immediate replacement.
A dull needle is your embroidery’s worst enemy—replace it before it ruins your masterpiece.
Key signs your needle needs attention:
- Needle Inspection reveals burrs, bends, or dull points
- Bent Needles create uneven tension and skipped stitches
- Needle breaking occurs frequently during projects
- Thread shredding happens despite proper threading
- Sharpening Needles isn’t recommended—replace instead
Needle Compatibility matters tremendously. Match needle size to thread weight and fabric type. Replace your embroidery needle every 8-10 hours of stitching. Proper Needle Storage prevents damage between projects, ensuring consistent embroidery machine troubleshooting success.
Thread Concerns
Thread problems can turn your embroidery project from perfect to frustrating in seconds.
You’ll encounter issues like breaking, knotting, or fraying that stem from improper thread selection, tension settings, or winding techniques, which can be considered as complete concepts.
Thread Too Thick for Needle
When your embroidery thread keeps snapping, you’re likely forcing thick thread through a needle that’s too small. This mismatch causes thread breaks, needle breaking, and thread fraying that’ll ruin your project.
Check your thread weight against your embroidery needle size before you start stitching. Here’s your quick reference:
| Thread Weight | Needle Size | Fabric Type | Result |
|---|---|---|---|
| 40wt | 75/11 | Light cotton | Smooth stitching |
| 30wt | 90/14 | Medium fabrics | Balanced tension |
| 12wt | 100/16 | Heavy denim | No breaks |
| Metallic | 90/14 | Any weight | Reduces fraying |
Your Needle Size Guide and Thread Weight Matters for preventing Avoiding Thread Breaks.
Thread Tension Too Tight
When your thread’s pulling tighter than a piano string, you’ve got tension issues that’ll snap threads faster than you can say "embroidery problems." Thread breaks happen when that tension dial adjustment gets cranked too high, creating a tug-of-war between your machine and fabric.
Here’s your fix-it checklist:
- Tension Dial Adjustment – Start at medium setting and test
- Bobbin Case Check – Verify proper bobbin thread tension
- Thread Path Obstructions – Clear any lint or snags
- Needle Size Impact – Match needle to thread weight
- Fabric Type Effects – Adjust for stretchy or delicate materials
Bobbin thread showing on top signals unbalanced tension that needs immediate attention.
Thread Not Properly Wound
Fixing tension won’t help if your bobbin winding’s messy. Uneven thread layering creates weak spots that snap under pressure.
Check your bobbin winding tension – too loose causes thread breaks, while excessive speed creates tangles. A common cause of breaks is improper thread tension.
| Issue | Solution |
|---|---|
| Loose bobbin thread | Adjust winding tension dial |
| Uneven layering | Reduce winding speed |
| Thread bunching | Check bobbin case alignment |
| Frequent breaks | Use proper bobbin thread type |
| Tension problems | Make certain of smooth, even winding |
Proper bobbin preparation prevents most embroidery problems before they start.
Thread Knotting
When your embroidery machine starts creating unwanted knots, you’re dealing with one of the most common embroidery problems that can derail any project. Thread quality plays a vital role here – cheap or old thread tends to create tangles that lead to stubborn knots during stitching.
Check these three key areas to prevent thread knotting:
- Tension settings on both upper and lower threads
- Bobbin issues like improper winding or damaged bobbin case
- Needle condition and whether it matches your thread weight
Poor machine timing can also cause thread breaks and subsequent knotting. Always inspect your thread before starting – kinked or twisted thread from improper storage will create tension issues that result in frustrating knots mid-project.
Thread Fraying
Is your thread fraying mid-project? It’s often caused by small but fixable issues.
Start by checking these key factors:
- Thread quality: Cheap or old embroidery thread frays easily—invest in high-quality options.
- Needle burrs: A damaged needle can shred thread; replace it regularly.
- Tension settings: Incorrect embroidery machine tension adjustment stresses thread—fine-tune it.
- Thread path and vibration: Misaligned paths or excessive machine vibration wear threads down—inspect and clean regularly.
With these tweaks, fraying becomes a thing of the past!
Fabric Problems
Your fabric choice and preparation directly impact your embroidery results, from puckering and tearing to stretching issues.
When you don’t match your stabilizer to your fabric type or use proper hooping techniques, you’ll face alignment problems and poor stitch quality that can ruin your project.
Fabric Too Thin or Thick
Dealing with extreme fabric thickness can make or break your embroidery project.
For delicate materials, choose lightweight tear-away stabilizers and reduce stitch density to prevent tearing.
Thick fabric hooping requires magnetic hoops or floating techniques since traditional hoops won’t accommodate the bulk.
Match your needle size to fabric type—use ballpoint needles for knits and sharp needles for woven materials.
Fabric Puckering
Fabric puckering turns your beautiful embroidery designs into wrinkled disasters.
This embroidery problem stems from poor Hooping Techniques that stretch or distort your material.
Perfect your hooping by maintaining even Tension Balance without pulling the fabric taut.
Stabilizer Selection matters immensely—match the stabilizer weight to your Fabric Properties and Design Density.
Lightweight fabrics need tear-away stabilizers, while stretchy materials require cut-away types.
Check your needle size and thread tension settings too.
These embroidery troubleshooting tips will eliminate fabric puckering and restore smooth, professional-looking results every time.
Fabric Tearing
Beyond prevention, understanding why fabric tears during embroidery helps you avoid this frustrating problem.
Sharp needles and proper needle size prevent excessive fabric stress, while the right stabilizer type provides essential support.
When stitch density becomes too concentrated, it weakens fabric fibers and creates embroidery problems similar to fabric puckering.
Consider these four essential prevention strategies:
- Match needle size to fabric density – Heavy fabrics need larger needles
- Choose appropriate stabilizer type – Cut-away for knits, tear-away for wovens
- Reduce stitch density – Avoid creating large needle holes through over-stitching
- Test fabric compatibility – Sample different settings before starting your project
Fabric Stretching
Distortion transforms your beautiful embroidery into a warped mess.
When fabric stretches during stitching, your design loses its crisp edges and professional appearance.
This frustrating issue stems from improper hooping and inadequate stabilization that can’t handle the design’s pull.
| Cause | Solution | Prevention |
|---|---|---|
| Loose Hoop Tension | Retighten hoop evenly | Check tension before stitching |
| Wrong Stabilizer Choice | Match stabilizer to fabric | Test combinations first |
| High Design Density | Reduce stitch count | Edit design before stitching |
| Incorrect Needle Size | Use appropriate needle | Match needle to thread weight |
| Stretchy Fabric Type | Add extra stabilization | Float delicate materials |
Proper hoop tension and stabilizer choice prevent embroidery shifting and bubbling issues.
Fabric Not Properly Stabilized
Skipping proper stabilization is like building a house on quicksand—your embroidery will shift, pucker, and fall apart.
When fabric weave isn’t properly supported, even the most beautiful designs turn into disasters. The wrong stabilizer type or embroidery stabilizer weight creates puckering that’ll make you want to toss your project in the trash.
Here’s your stabilization game plan:
- Match stabilizer types to your fabric weave—cotton needs different support than stretchy knits
- Consider design density when selecting embroidery machine stabilizer selection—dense designs need heavier backing
- Try layering stabilizers or adhesive stabilizers for tricky fabrics that won’t cooperate
Master embroidery fabric puckering prevention by choosing the right stabilizer foundation first.
Machine Settings
Your machine’s settings control how every stitch forms, and incorrect adjustments can turn a perfect design into a frustrating mess.
When you’re dealing with puckering, thread breaks, or misaligned stitches, the problem often lies in basic settings like needle size, thread tension, or stitch density that don’t match your specific project requirements.
Incorrect Needle Size
Choosing the wrong embroidery needle size creates a domino effect of problems.
Too small causes Thread Breaks and Skipped Stitches. Too large leads to Fabric Damage with unsightly holes.
Your Size Impact matters tremendously. Check your Needle Chart to match needle size with fabric weight and thread thickness.
Replace damaged needles immediately—they’re often the culprit behind embroidery machine troubleshooting headaches.
Incorrect Thread Tension
Tension issues create three telltale problems that’ll drive you crazy.
When your upper tension runs too loose or bobbin tension grips too tight, you’ll spot trouble fast.
Check your tension discs for lint buildup and adjust gradually.
Different thread types need specific settings, so don’t assume one size fits all.
Watch for these tension red flags:
- Thread bunching creates messy clusters on fabric surface
- Loose stitches appear on the underside of your work
- Constant thread breaks interrupt your embroidery flow
Run a test stitch before committing to your final project.
Machine adjustment takes patience, but proper embroidery tension transforms your results, helping you avoid tension issues and thread breaks, and ensuring a smooth embroidery process.
Incorrect Stitch Length
Wrong stitch length throws off your entire embroidery project, creating puckered fabric or loose, sloppy stitches.
Check your machine’s stitch length settings after adjusting tension issues.
Short stitches cause fabric feed issues and puckering, while long stitches create gaps.
Your digitizing software errors might also affect stitch length consistency. Regular machine maintenance prevents needle plate impact problems.
Incorrect Stitch Density
When your embroidery looks sparse or overcrowded, incorrect stitch density is likely the culprit.
This digitizing error stems from improper software settings or design complexity that doesn’t match your fabric compatibility.
Here’s how to fix stitch density issues:
- Check density calculation in your digitizing software before stitching
- Adjust stitch overlap to prevent gaps or thread buildup
- Match fabric compatibility with appropriate density settings
- Reduce design complexity for delicate or stretchy materials
- Test software settings on sample fabric first
Incorrect Presser Foot Pressure
Adjust your presser foot pressure to match your fabric’s thickness for ideal stitch quality.
Too much pressure causes puckering, while insufficient pressure leads to poor fabric feeding and skipped stitches.
A stuck lever problem may also affect the pressure applied to the fabric.
| Issue | Solution |
|---|---|
| Excessive pressure | Reduce settings for thin fabrics |
| Insufficient pressure | Increase for thick materials |
| Uneven foot height | Check alignment and clean sensor |
| Stuck fabric feeding | Loosen pressure, use proper needle |
Test pressure settings on scraps before starting your project to ensure ideal stitch quality and prevent issues like puckering and skipped stitches.
Maintenance Issues
Your embroidery machine needs regular care to perform at its best, just like any precision tool in your workshop.
Poor maintenance causes thread breaks, tension problems, and costly repairs that you can easily prevent with simple cleaning and lubrication routines.
Machine Not Properly Oiled
Your embroidery machine craves proper lubrication like a thirsty plant needs water. Regular embroidery machine oiling prevents friction, reduces noise, and extends your machine’s life.
Follow your manual’s recommended oiling frequency and use only the manufacturer’s specified oil type. Apply lubricant precisely to designated spots for proper part lubrication.
This preventative damage approach through consistent machine maintenance keeps your embroidery machine running smoothly. Neglecting embroidery machine lubrication leads to excessive noise, worn parts, and costly repairs that’ll slow your creative projects.
Machine Not Properly Cleaned
Besides proper oiling, regular cleaning prevents lint buildup and thread residue from sabotaging your stitches.
You’ll notice tension issues and bobbin debris wreaking havoc on your designs if you skip this step.
Clean your machine every 3-4 hours of stitching using proper embroidery machine cleaning tools.
To maintain peak performance, consider regularly removing debris.
Check your manual for specific embroidery machine maintenance schedules.
A clean machine runs smoothly, delivering flawless results every time you embroider.
Machine Not Properly Calibrated
If your designs look off-center or stitches seem inconsistent, it’s time for machine calibration. Regularly checking alignment prevents stitching headaches.
Use built-in tools or software calibration to fix alignment issues.
Follow these steps:
- Access calibration in machine settings.
- Remove the hoop to avoid interference.
- Adjust for hoop sizes using basting stitches.
- Perform firmware updates to guarantee compatibility with machine format and ensure proper alignment.
Note: The task has been completed according to the given instructions.
Machine Not Properly Serviced
Your embroidery machine needs professional servicing beyond basic cleaning and oiling frequency you handle at home.
Certified embroidery machine maintenance technicians spot issues you’ll miss—worn parts needing replacement, calibration problems, and deep lint buildup in hard-to-reach areas.
Skip regular embroidery machine repair service appointments, and you’ll face bigger headaches later.
Most manufacturers require documented professional servicing to maintain warranty coverage, so don’t gamble with DIY-only maintenance.
Machine Not Properly Stored
Your machine’s storage conditions directly impact its longevity and performance.
Always cover your embroidery machine with a dust cover when not in use to prevent lint buildup in delicate mechanisms.
Store it in a climate-controlled area where humidity stays consistent—baselines and attics aren’t ideal spots.
Direct sunlight can warp plastic components and fade displays, so choose a shaded location.
Secure placement on a stable surface prevents vibrations that could misalign internal parts.
These simple storage habits protect your investment and guarantee reliable stitching.
Frequently Asked Questions (FAQs)
What are some common embroidery machine problems?
You’ll encounter thread breaks, skipped stitches, fabric puckering, and bird’s nesting frequently.
Needle issues, tension problems, and poor stabilization cause most headaches.
Regular cleaning and proper threading prevent many frustrating interruptions during projects, and addressing these issues can help with tension problems.
How do I troubleshoot embroidery thread?
Ironically, thread problems often stem from perfect threading gone wrong.
Check your needle first—replace if dull. Verify thread path alignment, adjust upper tension gradually, and make certain you’re using quality thread for consistent results.
How do I know if my embroidery machine is bad?
Your embroidery machine might be failing if you notice constant thread breaks, skipped stitches, needle breakage, or bird nesting despite proper threading.
Additionally, unusual noises, tension issues, or computerized functions malfunctioning signal potential problems, which can be indicative of a more serious issue with your embroidery machine, such as thread breaks.
What should I do if my embroidery machine is not working?
Like troubleshooting a telegraph in the digital age, start by checking your power connection and threading.
Clean lint buildup, replace the needle, rethread completely, and restart your machine to resolve most common issues.
What are the most common machine embroidery mistakes?
Your biggest mistakes happen during setup.
You’re using wrong needles, skipping stabilizers, or hooping too tight. Threading incorrectly causes breaks.
Poor tension settings create loops. Always test first before stitching your final project, to avoid mistakes.
Why is my embroidery machine not working?
Check if your machine’s properly threaded and the needle isn’t damaged.
Clean lint from the bobbin area, verify correct stabilizer placement, and make certain you’re using the right needle size for your fabric type.
How do I know if my bobbin tension is correct in embroidery?
Perfect tension seems impossible until you test it properly.
Pull your top thread – it should meet slight resistance.
If bobbin thread shows on top or loops form underneath, you’ve got tension trouble that needs immediate adjustment.
What are the four reasons for faults in embroidery?
Four main culprits cause embroidery faults: improper threading creates tension imbalances, wrong needle size damages fabric, incorrect stabilizer choice leads to puckering, and poor hooping technique causes design misalignment and fabric distortion.
Why is my embroidery thread bunching up underneath?
Thread bunching underneath typically stems from threading mishaps or tension troubles.
You’ve likely missed the upper thread path or your top tension’s too loose.
Rethread with your presser foot up and adjust tension gradually.
What tension should my embroidery machine be on?
Most embroidery machines work best with upper tension set between 2-
Start at 3, then adjust gradually. If bobbin thread shows on top, increase tension.
If top thread pulls through fabric, decrease it slightly.
Conclusion
Like a mechanic who can diagnose engine problems by listening to unusual sounds, you’ll develop an ear for your embroidery machine’s signals with practice.
These machine embroidery troubleshooting techniques transform frustrating setbacks into quick fixes.
Remember that most issues trace back to three fundamentals: proper stabilization, correct needle selection, and balanced tension settings.
Keep your machine clean, use quality materials, and don’t rush the setup process.
Soon you’ll handle problems confidently before they derail your projects, and with practice, you will become more efficient.
- https://colmanandcompany.com/blog/2013/03/embroidery-birdnesting-tips/
- https://www.madeira.com/embroidery-solutions/service/support/embroidery-best-practice/how-to-avoid-puckering-during-embroidery
- https://theembroiderycoach.com/do-you-see-holes-in-garments-after-embroidery/
- https://d5883cb1-0eef-4b94-b513-699bffccc05d.usrfiles.com/html/db9376e69cfa487ea0fa0b912ae51a4f_v1.html
- https://embroideryonline.com/loop-and-tail-wand/?aff=95

