This site is supported by our readers. We may earn a commission, at no cost to you, if you purchase through links.
Start with your machine’s default setting (usually 4-5) and test on fabric scraps. You’ll know it’s right when both threads meet evenly in the fabric’s center.
Too tight creates puckering and thread breaks; too loose makes loops on the fabric’s underside. Adjust incrementally – small changes make big differences.
Different fabrics need different settings: lightweight materials require looser tension, while heavy fabrics need tighter settings. Quality thread also affects tension requirements.
The secret lies in understanding how thread weight, fabric type, and needle size work together to create that perfect stitch balance.
Table Of Contents
Key Takeaways
- Start with your machine’s default setting (usually 4-5) and test on fabric scraps – you’ll save time and prevent project disasters by getting the tension right before you begin sewing.
- Adjust tension based on fabric weight – lightweight materials need looser settings (2-3), while heavy fabrics require tighter tension (4-6) for proper stitch formation.
- Make small, incremental adjustments – tiny changes create big differences in stitch quality, so move your tension dial gradually until threads meet evenly in the fabric’s center.
- Document your successful settings – keep a record of tension combinations that work for different fabric and thread types so you can replicate professional results consistently.
Thread Tension Basics
Thread tension controls how tightly your machine pulls the upper and lower threads to create balanced stitches.
Getting this balance right prevents puckering, loose loops, and thread breaks.
While ensuring your seams stay strong and look professional.
Definition of Thread Tension
Thread tension refers to how tightly your sewing machine pulls the upper and bobbin threads during stitching.
This thread tightness creates the foundation for seam strength by ensuring consistent control over thread flow.
Proper tension balance prevents thread breakage while forming stable stitches that lock together correctly within your fabric layers.
Understanding tension control helps you achieve ideal tension settings for professional-quality results.
Importance of Proper Tension
Proper tension balance prevents common sewing problems that can ruin your projects.
When your sewing machine maintains correct thread tension, you’ll achieve superior seam strength and consistent stitch quality across all fabric types.
Poor tension causes thread breakage, fabric damage, and weak seams that compromise project longevity, turning hours of careful work into frustrating failures.
Consistent results require understanding sewing machine tension basics, which is crucial for project longevity and avoiding frustrating failures.
Factors Affecting Thread Tension
When you’re dialing in tension settings, keep an eye on machine maintenance and thread quality—old lint or cheap thread can cause headaches fast.
Needle condition matters; a dull or bent tip throws everything off.
Don’t forget fabric properties and thread type, either.
Even humidity effects can sneak up on your stitches, making thread tension adjustment a moving target.
Tension Components
Your sewing machine’s tension system works through four key components that control how thread flows through your machine.
Understanding these parts helps you make precise adjustments for perfect stitches every time.
Bobbin Thread Tension Adjustment
A well-tuned bobbin brings even stitches and fewer headaches. Adjust sewing machine bobbin tension by tweaking the tension screw and watching the bobbin case spring.
Verify bobbin fill consistency—it matters more than you think. Some specialty bobbin threads need their own tension settings.
Don’t forget the finger hole option if your bobbin case has one for extra control. For precise adjustments, consider exploring bobbin tension products.
- Check bobbin case spring
- Try finger hole usage for tight seams
- Adjust tension screw for fine tuning
- Maintain bobbin fill consistency
Tension Discs and Regulator
Your sewing machine’s tension assembly works like a precision brake system.
The tension discs squeeze your thread while the tension regulator controls disc pressure through calibrated settings.
Higher dial numbers increase pressure adjustment, creating tighter thread control.
Regular disc cleaning prevents lint buildup that disrupts your thread path.
This tension control partnership guarantees consistent stitch formation across all fabric types.
To maintain peak performance, clean tension disks regularly, ensuring your machine operates with optimal performance.
Troubleshooting Tension
When your stitches look messy or threads keep breaking, tension problems are likely the culprit.
Don’t panic—most tension issues stem from simple fixes like incorrect threading or lint buildup that you can resolve in minutes.
Common Causes of Tension Issues
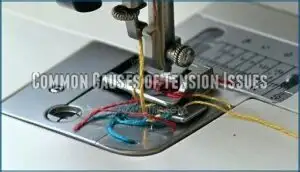
When problems strike your machine, incorrect threading tops the troubleshooting list, causing eighty percent of tension headaches.
Lint buildup clogs tension discs, while dull needles create thread breakage and skipped stitches.
Bobbin problems from improper insertion or damaged parts disrupt stitch formation, leading to looping stitches and frustrating thread tension issues.
Signs of Tension Imbalance
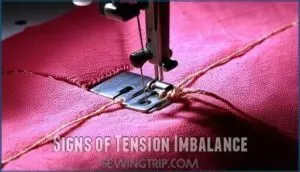
Recognizing tension imbalance early prevents frustrating sewing disasters. Your machine sends clear warning signals when thread tension goes wrong, affecting stitch quality dramatically.
Watch for these telltale signs of tension trouble:
- Thread Breakage – Upper thread snaps repeatedly during stitching, indicating excessive tension pulling the thread beyond its breaking point
- Loopy Stitches – Bobbin thread forms visible loops on the fabric’s top surface, showing insufficient upper thread tension
- Puckering Fabric – Material bunches or wrinkles along seam lines due to overly tight thread tension drawing fabric together
- Uneven Seams – Inconsistent stitch formation creates wobbly, irregular seam lines that compromise both appearance and durability
Skipped stitches often accompany these issues, creating weak spots in your seams that’ll fail under stress.
Rethreading and Cleaning Solutions
Before you start rethreading, lift your presser foot to release the tension disks completely. Follow your machine’s threading diagrams precisely—each guide matters for proper thread tension flow.
Clean lint removal from tension disks using a small brush, then check needle health by replacing dull or bent needles. It’s important to replace worn sewing equipment regularly.
Complete bobbins cleaning and regular machine oiling prevent most tension troubleshooting issues before they start, ensuring proper thread tension flow and maintaining needle health.
Fabric Specific Tension
Different fabrics require specific tension settings to achieve professional-quality stitches without puckering or thread breakage.
You’ll need to adjust your machine’s tension dial based on fabric weight, stretch, and thickness to guarantee threads interlock properly within the fabric layers, ensuring professional-quality stitches.
Lightweight Fabric Tension Settings
Delicate materials like chiffon and silk demand a gentle touch in regard to thread tension.
Set your tension dial to 2-3 for lightweight fabrics to prevent unwanted puckering. Use a fine needle size (70/10 or 80/12) and check your bobbin placement carefully.
Adjust your stitch length to 1.5-2.4mm while ensuring proper threading guides alignment. Your presser foot pressure should be minimal to avoid fabric distortion during tension adjustment.
High-quality thread can substantially improve stitch formation.
Thick Fabric Tension Settings
When working with thick fabrics like denim and canvas, you’ll need higher tension settings between 4-6.
Denim tension typically requires a 90/14 needle size with heavyweight threads for proper penetration.
Leather settings demand even more precision—increase presser pressure and use topstitch needles.
Test your tension adjustment on fabric scraps first, as thick fabrics can cause thread breakage if settings are too aggressive.
For sewing heavy fabrics, consider using a heavy-duty motor for best results.
Stretchy Fabric Tension Settings
Stretchy fabrics like lycra and spandex demand different tension settings than thick materials.
These fabrics require medium tension (2-3) to prevent puckering while maintaining stretch. Your thread tension must accommodate the fabric’s natural give without creating tight, inflexible seams.
- Lycra Tension: Set tension dial to 2-3 for ideal stretch retention
- Spandex Settings: Use ballpoint needles (70/10-80/12) to prevent snags
- Knit Fabrics: Choose stretch thread or polyester for flexibility
- Ballpoint Needles: Essential for penetrating fibers without damage
- Stretch Thread: Maintains seam integrity during fabric movement
Advanced Tension Techniques
When working with decorative stitches, specialty threads, or changing conditions, you’ll need precise adjustments for consistent results.
Try these advanced tension techniques to keep your stitches balanced, no matter what challenges you encounter.
Decorative Stitches and Tension
Most decorative stitches require looser tension settings because they consume more thread than standard straight stitches.
Reduce your tension to 2.0-3.5 when creating embroidery or zigzag patterns. Thread thickness affects tension more than fiber type, so adjust accordingly.
Consider essential supplies for stitching to guarantee the best results. Monitor humidity effects on tension balance, as environmental changes can shift your carefully calibrated settings unexpectedly, affecting overall tension balance.
Specialty Threads and Tension
Specialty threads transform your projects but demand precise tension adjustments.
Metallic Thread requires ultra-loose settings around 1.0 to prevent breakage, while Rayon Tension needs reduction from standard settings due to delicate fiber properties.
Fuzzy Threads and Elastic Threads each present unique challenges requiring individual testing.
Achieving the correct setting is essential, especially when considering metallic thread products.
Document successful combinations in your Tension Log for consistent results across future projects.
Environmental Factors and Tension
Environmental control plays a vital role in achieving consistent thread tension.
Your thread tension fights temperature, humidity, and static every step of the way.
Temperature fluctuations, humidity effects, and static electricity can dramatically alter thread behavior, causing unexpected tension variations that’ll frustrate even experienced sewers.
- Moisture levels above 60% cause thread expansion, creating drag through tension discs
- Thread brittleness from low humidity leads to frequent breakage during stitching
- Temperature impact makes threads stiffen in cold or loosen in heat
- Static electricity from dry conditions causes threads to cling and tangle
- Machine placement near vents or windows creates airflow that disrupts thread flow
Optimal Tension Settings
You’ll achieve consistent, professional stitches once you master the art of documenting and verifying your tension settings for each project.
Testing your adjustments on fabric scraps before starting guarantees your final piece meets your exact standards, ensuring you produce work that is of high quality and meets your exact standards.
Documenting Tension Settings
Track your successful combinations to build expertise over time.
You’ll save hours of guesswork when you document what works for each project type.
| Fabric Type | Thread Weight | Tension Setting | Needle Size | Notes |
|---|---|---|---|---|
| Cotton voile | 50wt polyester | 2.5 | 70/10 | Perfect for lightweight seams |
| Denim | 40wt cotton | 4.5 | 100/16 | Increase for topstitching |
| Jersey knit | 50wt polyester | 3.0 | 80/12 ballpoint | Use stretch stitch |
| Silk charmeuse | 60wt silk | 2.0 | 70/10 | Handle gently |
| Canvas | 30wt cotton | 5.0 | 110/18 | May need bobbin adjustment |
Create machine profiles for different setups and maintain a fabric library with your tested combinations.
Your tension documentation becomes a thread database that guarantees setting consistency across all projects.
This tension log transforms from simple notes into your personal best tension reference guide.
Thread Quality and Tension
Quality thread makes all the difference in achieving consistent thread tension.
Poor-quality threads with fiber defects create uneven drag through your machine’s tension discs, forcing constant adjustments.
Coarse or uneven thread thickness disrupts smooth texture flow, causing lint buildup that affects tension control.
Choose high-quality threads with consistent thread weight and uniform fiber quality for predictable results.
Verifying Tension With Test Swatches
Starting with a fabric scrap, test your thread tension before every project.
Use a swatch the same type and size as your actual fabric, matching fabric layers. Check stitch appearance — it should look balanced on both sides.
Make iterative adjustments, tweaking the tension dial until you reach stitch balance. This quick tension testing guarantees tension consistency and ideal tension every time.
Fabric puckering often indicates incorrect thread tension.
Frequently Asked Questions (FAQs)
What is perfect stitch tension?
Perfect tension means your thread’s locked dead center in the fabric, creating balanced stitches without puckering or loops.
You’ll see smooth, even seams where top and bobbin threads interlock properly within the material layers, resulting in a visually appealing and smooth finish.
How to tell if tension is too high or low?
Check your stitch quality: if the bobbin thread shows on top, your upper tension’s too tight. If upper thread loops underneath, it’s too loose. Adjust gradually.
Should thread tension be high or low for thick fabric?
Like threading a needle through armor, thick fabrics demand higher tension settings.
You’ll need tension between 4-6 to penetrate dense materials like denim effectively.
Higher settings guarantee your stitches won’t pucker or create loose, sloppy seams, ensuring a professional finish with dense materials.
What is the best tension setting for stretch fabric?
Set your tension between 2 and 3 for stretch fabric, using polyester thread and a ballpoint needle.
You’ll want stitches that move with the fabric.
Always test on scrap first—nobody wants spaghetti stitches on their sportswear!
How often should I adjust tension settings?
Think of adjusting tension settings like tuning a guitar—you’ll need to make changes each time you switch fabrics or threads.
Adjust when changing thread weight, fabric type, or needle size to maintain perfect stitch quality and ensure you’re always working with the right settings for your current project.
Can weather conditions affect my thread tension?
Yes, humidity changes can affect thread tension by altering thread moisture content.
High humidity makes threads expand slightly, creating tighter tension, while dry conditions cause shrinkage and looser tension, requiring minor adjustments.
What tension setting works for quilting layers?
For quilting layers, you’ll typically need slightly higher tension than single-layer sewing. Start with 5-5 on your tension dial, then test on scrap layers matching your quilt sandwich thickness.
How do I set tension for twin needle sewing?
Like two dancers following the same rhythm, twin needles need balanced tension to create parallel perfection.
Lower your upper tension to 3-4 and test on scraps first—you’ll prevent puckering while maintaining even stitches.
Conclusion
Mastering ideal thread tension settings isn’t rocket science, despite what your sewing machine’s manual suggests with its cryptic diagrams.
You’ve learned the fundamentals: start with default settings, test on scraps, and adjust incrementally.
Remember that fabric weight dictates tension needs, and quality thread makes all the difference.
Document your successful settings for future projects, and with practice, you’ll achieve that perfect stitch balance where threads lock beautifully between fabric layers, creating professional results every time.
- https://www.threadsmagazine.com/2008/11/02/understanding-thread-tension
- https://www.superiorthreads.com/education/tension-training
- https://www.youtube.com/watch?v=b4JDAkByMlQ
- https://www.tillyandthebuttons.com/2020/03/thread-tension-troubleshooting.html
- https://www.reddit.com/r/sewing/comments/10wv9xj/new_to_machine_sewing_how_does_tension_work/


