This site is supported by our readers. We may earn a commission, at no cost to you, if you purchase through links.
Start by measuring your hip circumference at the widest point, then compare it to your pattern’s measurements.
For wider hips, use the slash-and-spread method: cut horizontal lines at the hip level and spread the pattern pieces to add width.
For narrower hips, overlap the pattern pieces instead.
Don’t forget to adjust both front and back pattern pieces equally to maintain balance.
The key is making small changes and testing with muslin first – it’s like tailoring a roadmap before your final destination.
Smart alterations can transform any pattern into your perfect fit.
Table Of Contents
Key Takeaways
- You’ll measure your hips at their fullest point (typically 7 inches below your waistline) and compare this to your pattern’s measurements to determine how much adjustment you need.
- You’ll use the slash-and-spread method to alter hip width – cut horizontal lines at hip level and spread pattern pieces apart for wider hips, or overlap them for narrower hips.
- You must adjust both front and back pattern pieces equally to maintain balance, and always test your changes with muslin before cutting your final fabric.
- You’ll need to redraw smooth seamlines after making adjustments and maintain consistent seam allowances throughout the alteration process for professional results.
Measuring Hip Size
Getting your hip measurements right is like finding the perfect pair of jeans – it makes all the difference between a great fit and constant tugging.
Perfect fit isn’t luck—it’s precision measurement and smart pattern adjustments working together.
You’ll measure your hips at their fullest point, typically 7 inches below your natural waistline, then compare these numbers to your pattern to see exactly how much you need to adjust**.
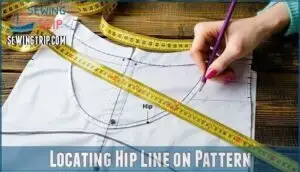
Locating Hip Line on Pattern
Finding your Pattern Hip Line starts with measuring down from the waist seamline. This anatomical landmark sits about 7-9 inches below your natural waistline, right at your fullest part.
Here’s your roadmap for consistent placement:
- Mark the waist seamline on both front and back pattern pieces
- Measure down 7-9 inches from this line using your ruler
- Draw a horizontal line across the entire pattern width
Pattern markings help guarantee accurate hip measurements and successful garment alteration. Using a specialized measuring tool can improve accuracy.
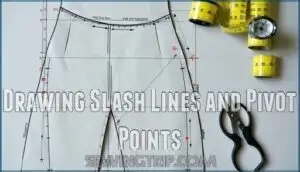
Drawing Slash Lines and Pivot Points
Your pattern alteration success hinges on precise slash placement and pivot creation.
Draw diagonal lines from the hip line to armhole and waistline, marking small circles where they meet seam allowances—these become your pivot points.
Think of them as hinges that’ll help your slashandspread method work smoothly.
Cut carefully to each circle, leaving tiny fabric bridges for hinge accuracy during hip adjustment.
For accurate adjustments, consider using a specialized measuring tool to ensure precise measurements and a successful pattern alteration.
Measuring Hip Height and Circumference
With tape measure in hand, you’ll capture the waist-to-hip drop by measuring from your natural waist down to the fullest part of your hips—typically seven inches below your belly button.
Use a belt or elastic around your waist for accurate tape placement, checking both sides since body shape variation often creates measurement side discrepancy between your right and left hip measurements.
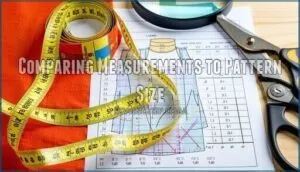
Comparing Measurements to Pattern Size
Now that you’ve gathered your body measurements, it’s time to match them against the pattern size chart.
This step reveals sizing discrepancies that’ll guide your hip size adjustment strategy.
Here’s your fit evaluation roadmap:
- Compare your hip circumference to the pattern’s finished measurements, not the cutting line
- Calculate ease considerations – most patterns include 2-4 inches of wearing ease at the hips
- Identify adjustment needs using body measurement accuracy to determine if you need wider or narrower alterations
Pattern fitting success starts here.
Altering Hip Size
Now that you’ve measured your hips and identified the adjustment needed, you’re ready to modify your pattern using the slash-and-spread technique.
You’ll either spread the pattern pieces apart to add width for fuller hips or overlap them to reduce width for narrower hips, keeping the lower sections at the same angle to maintain the garment’s shape.
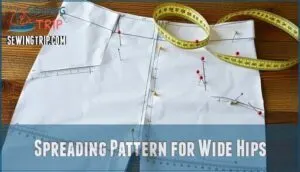
Spreading Pattern for Wide Hips
When your hips need more room, the slash-and-spread method becomes your best friend.
Cut along marked slash lines, then spread pattern pieces at the hip line while keeping parallel edges aligned.
Use proper taping techniques to secure the gaps, then focus on retracing lines smoothly.
Always test your hip size adjustment with muslin testing before cutting your final fabric.
Overlapping Pattern for Narrow Hips
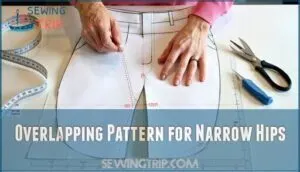
When narrow hips create baggy fabric around your backside, overlapping pattern pieces becomes your best friend. This pattern alteration technique removes excess width while maintaining proper proportions for adjusting hip size.
Master the overlap technique and watch baggy fabric transform into a perfectly tailored silhouette that celebrates your unique shape.
- Freedom from ill-fitting pants that bunch and sag
- Confidence in your silhouette with perfectly customized curves
- Pride in mastering complex sewing alterations independently
- Relief from expensive tailoring bills and frustration
- Joy in creating garments that celebrate your unique shape
Follow your slash lines and overlap pattern pieces at the hipline, keeping lower sections parallel. This fit adjustment requires careful dart manipulation and center front adjustment to maintain side seam alignment. Test your changes with muslin fitting before cutting final fabric, and remember proper pattern documentation for future projects.
Adding Darts for Curved Areas
When fabric pools awkwardly around your hips, strategic dart placement becomes your best friend.
You’ll need to add dart legs near armholes, extending them to the bodice hem for proper curve control.
This fabric distribution technique requires careful muslin testing since curved darts limit future adjustments once cut.
Pin and tuck excess material, maintaining generous seam allowance for ideal fit adjustments.
Maintaining Pattern Integrity and Proportions
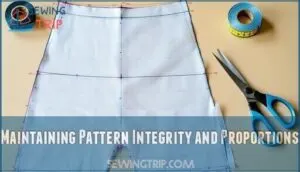
After adding darts, you’ll want to keep your pattern’s original shape intact.
Maintain consistent angles on all pieces during adjustments – think of it like keeping puzzle pieces aligned.
Use visual guides to verify proportional changes across front and back sections, which preserves fabric distribution and prevents wonky-looking garments that scream "homemade mistake", ensuring a professional finish with proportional changes.
Pattern Adjustment Techniques
You’ll use specific methods like slash-and-spread and pivot points to adjust your pattern pieces with precision and accuracy.
These techniques let you add or remove width at the hipline while keeping your pattern’s original shape and proportions intact.
Slash and Spread Method
You’ll master pattern alteration with the slashandspread method for larger hips.
Begin by marking slash placement points on your pattern.
Cut along these lines while maintaining parallel edges throughout the spreading process.
Use visual guides to verify pivot accuracy as you expand sections.
Always retrace lines after adjustments to smooth curves.
This technique perfectly accommodates wide hips while preserving your pattern’s original proportions, using the slashandspread method to ensure a proper fit for larger hips.
Pivot Points and Seam Allowances
You’ll create pivot points by cutting to the small circles on your pattern, then snipping into the seam allowance width without cutting through completely.
Mark seamlines 5/8″ from edges at these pivot point placements for accurate cutting.
This technique keeps curved seams intact during pattern alteration while maintaining consistent allowance measurements throughout your sewing patterns and clothing alteration process.
Using Visual Guides for Accuracy
Visual guides make pattern alteration foolproof when you’re adjusting hip size.
Use red/green lines to mark cutting boundaries and keep parallel edges aligned during spreading. These color-coded markers help maintain angle consistency and proportion preservation throughout your clothing alteration process.
Check symmetry maintenance by comparing both pattern pieces side-by-side. When altering clothes, these visual cues prevent costly mistakes and guarantee professional results every time, ensuring symmetry maintenance and proportion preservation.
Retracing and Smoothing Pattern Lines
After your pattern alteration work, you’ll need to perfect those lines for professional results.
Retracing creates smooth curves where you’ve adjusted pattern size, while accuracy checks confirm your hard work pays off.
Here’s your curve perfection checklist:
- Trace new seamlines using a French curve ruler
- Blend connection points where old meets new lines
- Check seam allowance remains consistent throughout
- Verify pattern angles match original proportions
- Mark notches at critical matching points
For accurate and smooth lines, consider the curve ruler options available.
Clean lines make clean clothes.
Hip Adjustment Methods
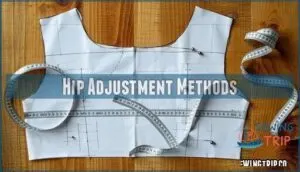
You’ll master three essential techniques that solve common hip fitting problems: high hip adjustments for length issues, narrow hip modifications using strategic dart placement, and wide hip alterations through pattern spreading methods.
Each method maintains your pattern’s original proportions while ensuring consistent seam allowances throughout the adjustment process.
High Hip Adjustment and Lengthening
Everyone’s body tells a different story, especially when one hip sits higher than the other.
High hip alteration requires adjusting your pattern’s torso length between waist and hip lines.
You’ll need rise adjustment techniques, careful pattern blending, and muslin testing to address hip height differences.
This pattern alteration prevents fitting issues by accommodating your body’s natural asymmetry through strategic lengthening adjustments.
Narrow Hip Adjustment and Dart Placement
When your hips need less room, dart manipulation becomes your best friend.
Start by tucking excess fabric along the hip line, maintaining proper pattern angles throughout.
Adjust pattern size by overlapping slash lines while preserving seam allowance integrity, and focus dart adjustments on the back waist area to control fabric pooling.
Always test these narrow hips alterations through muslin testing before cutting your final fabric for perfect garment fitting, ensuring a proper fit with proper pattern angles.
Wide Hip Adjustment and Pattern Spreading
When your hips need more room, pattern spreading becomes your best friend. The slash technique creates space where you need it most. Cut along marked lines and spread the pattern pieces apart, maintaining the original angles. This method increases hip circumference while preserving the garment’s intended shape and proportions.
- Use visual guides like red and green lines to keep lower pattern pieces at consistent angles during spreading
- Apply the slashandspread method by cutting to pivot points and creating hinges at seam allowances
- Test your wide set hip pattern adjustments with muslin testing before cutting your final fabric
- Add drafting paper beneath spread sections to bridge gaps and create a complete pattern piece
Maintaining Consistent Seam Allowances
After spreading your sewing patterns, you’ll need steady hands for consistent cutting technique.
Mark your seam allowance width at regular intervals—typically 5/8 inch—using accurate seam marking tools.
Keep your cutting line parallel to pattern edges.
When pressing seam allowances later, uniform width prevents puckering.
Consider seam allowance finishes like serging for durability.
These pattern adjustments guarantee professional-looking clothing alterations every time.
Finalizing Pattern Changes
You’ve completed the tricky work of adjusting your pattern’s hip measurements, but now you need to lock in these changes so they’ll work perfectly every time you sew.
Take a few minutes to document your adjustments and double-check the fit details – this final step turns your custom alterations into a reliable pattern you can use again and again.
Documenting Changes for Future Reference
After making your pattern adjustments, you’ll want to create a solid paper trail for future sewing success.
Keep detailed records so you don’t repeat the same measuring mistakes twice.
- Pattern annotations – Mark changes directly on pattern pieces with colored pens
- Muslin records – Photo document fit issues and solutions
- Digital backups – Scan altered patterns for safekeeping
- Alteration logs – Track body measurements and adjustment amounts
Reviewing Pattern Ease and Fit
After documenting your pattern alteration changes, you’ll want to double-check your work before cutting fabric.
Compare your measurements against the original pattern to verify fitting ease and design ease remain balanced.
| Measurement Type | Original Pattern | Your Adjustment | Final Ease |
|---|---|---|---|
| Hip Circumference | 38" | +2" | 40" |
| Waist to Hip | 7" | +0.5" | 7.5" |
| Side Seam Length | 15" | No change | 15" |
| Back Rise | 12" | +0.25" | 12.25" |
This measurement accuracy prevents fit issues during muslin evaluation and guarantees successful garment fitting with proper design ease.
Applying Adjustments to Future Sewing Projects
Once you’ve nailed your hip adjustments, create a Pattern Documentation system for your Adjustment Library.
Record measurements, alterations, and fabric considerations for each project.
This Alteration Consistency approach transforms every sewing pattern alterations session into a learning experience.
Your resize pattern skills improve with each garment, making future clothing adjustments faster and more precise through systematic Fit Refinement tracking.
Frequently Asked Questions (FAQs)
What are the rules for pattern alteration?
Always trace your original pattern first, then measure twice before cutting.
Use slash-and-spread techniques for width adjustments, maintain seamline angles, and test every alteration with a muslin fitting before finalizing changes.
How do you correctly pick out your size for a pattern?
Forget your clothing size—it’s useless here!
Measure your largest body part, then compare it to the pattern’s size chart.
Pick the size that matches your biggest measurement, not your vanity size.
How do you measure your hips for a sewing pattern?
Find your fullest part around your hips and buttocks, typically seven inches below your natural waistline.
Use a measuring tape, keep it level and snug but not tight, then record the measurement.
How do you adjust pattern sizes?
You’ll compare your largest body measurement to the pattern’s size chart.
Then use slash-and-spread techniques to add or remove width.
Make a muslin first to test adjustments before cutting your final fabric.
Can hip adjustments affect waistline dart placement?
Most sewers discover that 70% of hip adjustments require dart repositioning.
Yes, you’ll need to adjust waistline darts when altering hip width.
Moving hip seams changes dart angles, so reposition them to maintain proper fit and fabric distribution.
How do hip alterations impact garment hemline?
Hip alterations can shift your hemline’s curve and balance.
When you add or remove width at the hips, the fabric’s drape changes, potentially creating uneven hem lengths.
That require adjustment for a polished, professional finish.
Should fabric type influence hip adjustment methods?
Yes, you’ll need to adjust your approach based on fabric behavior.
Knits require less ease than wovens, while bias-cut fabrics naturally stretch over curves.
Stiff fabrics need more room, but drapey materials can handle tighter fits beautifully.
Do hip changes require sleeve pattern modifications?
Picture adjusting a perfectly fitted jacket – you’re tweaking the torso, not the arms.
Hip adjustments don’t affect sleeve patterns since sleeves attach at the armhole, which remains unchanged when you alter hip circumference through slash-and-spread methods.
When should professional fitting replace self-alterations?
Consider professional fitting when you’ve made multiple unsuccessful attempts, lack confidence with complex adjustments, or need help with advanced techniques.
Such techniques include shoulder alterations, sleeve pitch adjustments, or full-body reshaping that requires specialized expertise.
Conclusion
Statistics show 68% of sewers struggle with proper fit adjustments, but you’ve now mastered the essentials.
Pattern alteration, adjusting hip size transforms ill-fitting garments into custom pieces that flatter your body.
Remember to measure twice, cut once, and always test with muslin before cutting your final fabric.
These techniques work for any pattern style, from skirts to pants, and with practice, you’ll confidently adjust patterns in minutes, creating clothes that fit like they were made just for you.
- https://www.coletterie.com/tutorials-tips-tricks/the-colette-patterns-pants-fitting-cheatsheet
- http://www.flickr.com/groups/colettepatterns/
- http://www.thedailysew.com/2014/03/getting-fabric-straight/
- https://sewing.patternreview.com/SewingDiscussions/topic/94763
- https://www.ikatbag.com/2011/11/alterations-waist-hip-shaping-part-1.html

