This site is supported by our readers. We may earn a commission, at no cost to you, if you purchase through links.
Start by measuring yourself honestly—don’t suck in your stomach; accuracy matters. Noticing tight shoulders or gaping necklines? Adjust seamlines by slashing and spreading or overlapping the pattern pieces.
Length issues? Fold or extend at the provided adjustment lines; it’s like giving your pattern a hemline facelift. Bust too snug? Try a full bust adjustment (FBA), adding width without distorting the design.
Keep tools like a ruler, tape, and pins handy—they’re your pattern-altering besties. Tackle these tweaks step-by-step, and watch your sewing projects fit like a dream with a perfect fit.
Table Of Contents
Key Takeaways
- Measure your body accurately and compare it to the pattern to identify areas like bust, waist, and hips that need adjustments.
- Use simple techniques like slashing and spreading or overlapping pattern pieces to fix common issues like tight shoulders or gaping necklines.
- Start with muslin mockups to test and refine your alterations before cutting into your final fabric.
- Keep essential tools like a ruler, flexible measuring tape, and marking supplies handy to ensure precise adjustments.
Pattern Alteration Basics
When your sewing pattern doesn’t fit quite right, a few smart alterations can make all the difference.
By mastering basic techniques and using the right tools, you’ll achieve a seamless fit that feels custom-made.
Master simple techniques and tools to create perfectly tailored garments that feel uniquely yours.
Common Fitting Issues
Fitting problems, like draglines or unbalanced garments, often pop up due to posture, fabric considerations, or the "neutral" sizing of ready-to-wear patterns.
Common fit issues include tight busts, gaping waists, and strain at seams. Clothing alterations fix these, enhancing both comfort and style.
Taking accurate measurements guarantees a better starting point. Tackling garment fitting head-on makes for better results—and fewer abandoned projects, which is a key aspect of successful sewing.
Essential Tools and Materials
When tackling pattern alterations, the right tools make all the difference. A clear ruler guarantees accuracy, while flexible tape measures excel at tracing curves.
Use a fine mechanical pencil for precision and a quality eraser to avoid damaging pattern paper. Many sewers find that specialized alteration tools improve their results.
Keep marking tools, muslin fabric, and tracing supplies in mobile storage so everything’s ready when inspiration strikes, utilizing specialized alteration tools for better outcomes.
Importance of Proper Fit
A well-fitted garment isn’t just about looking good; it boosts garment confidence and feels amazing.
Boost your garment confidence with perfect fits that combine style, comfort, and the joy of custom-made clothing.
Proper pattern alteration guarantees your clothing conforms to your body, eliminates strain, and allows movement freedom.
Poor fitting issues, like pulling or sagging, can ruin aesthetic appeal.
Mastering sewing alterations makes every piece feel customized—transforming your efforts into clothing fit for comfort and style, giving you a sense of freedom.
Measuring and Adjusting
Getting accurate measurements is the foundation of successful pattern adjustments, so don’t skip this step.
With the right tools and a little patience, you’ll guarantee your garments fit like they were made just for you.
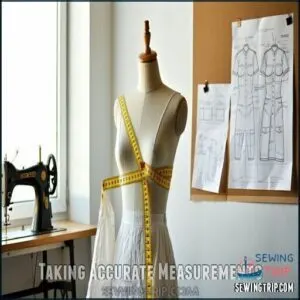
Taking Accurate Measurements
To get accurate measurements, grab proper tools like flexible tape and a mirror.
Update body measurements every six months or after big weight changes—digital records make this easy.
Focus on key points: chest, waist, hips, shoulders, and length.
A flexible measuring tool is essential for this process.
Match sewing measurements to pattern measurements, ensuring smooth pattern alignment.
Remember, balancing changes starts with sharp, consistent measuring!
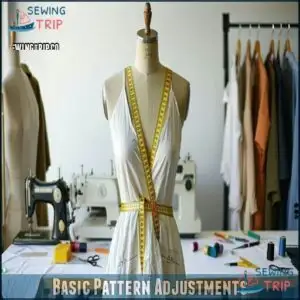
Basic Pattern Adjustments
After measuring, it’s time for basic pattern adjustments.
Use techniques like the Seam Method for Width Adjustments or the Slash Spread for a bust adjustment.
Blending sizes smooths shifts between hips, waist, or shoulders.
Length Adjustments often come first in sewing adjustments.
Pattern alteration is like patternmaking magic—small tweaks turn a "meh" fit into a masterpiece.
Length and Width Modifications
Length adjustments and width adjustments are the bread and butter of altering patterns.
Start with length changes, keeping grainline adjustments in mind for accuracy. For width adjustments, use the seam method or slash spread to guarantee Balancing Changes.
Ease allowance is important for garment fit, and can be found in more detail at Ease allowance.
Blending sizes is handy for bust, waist, or hips, and when combined with precise sewing adjustments, brings comfort and style to your creations.
Advanced Fitting Techniques
You’ll master advanced fitting techniques by tackling tricky adjustments like full bust changes, shoulder fixes, and curved seamline shaping.
These methods refine your skills, ensuring every garment fits and flatters perfectly, with advanced techniques that make all the difference.
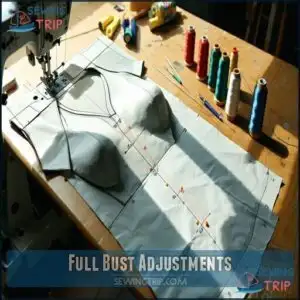
Full Bust Adjustments
Tailoring patterns for a perfect bust fit starts here! Full bust adjustments (FBAs) work wonders for larger cup sizes, solving neckline gaping and tight fronts.
Follow these steps:
- Add darts for control and shape—try Dart Manipulation for seamless results.
- Lengthen and widen the front bodice.
- Use Princess Seams to maintain a smooth look.
Choose patterns matching your cup size. Many sewists find success with specialized pattern designs.
Shoulder Modifications
Shoulder modifications can tackle sloping, square, broad, or round shoulders for a perfect sewing fit.
Adjusting patterns guarantees comfort and avoids armhole misfits.
Use the table below for clarity:
| Shoulder Variation | Adjustment Needed | Armhole Adjustments? | Tips for Success |
|---|---|---|---|
| Sloping Shoulders | Add height at shoulder | Yes | True up seams |
| Square Shoulders | Trim excess at shoulder | Yes | Smooth curved armholes |
| Broad Shoulders | Widen pattern edges | Slight | Repeat for front/back |
| Round Shoulders | Tilt shoulder seam forward | Possible | Maintain clean seams |
Accurate shoulder adjustments keep garments comfy and stylish!
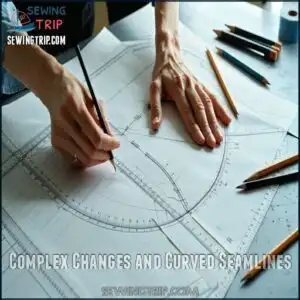
Complex Changes and Curved Seamlines
Tackling complex pattern changes? Start with an alteration sequence: address length, width, and those tricky curved seamlines.
Keep seamline smoothness in check and verify pattern flatness to avoid distortion.
Techniques like dart manipulation or slash and spread adjust fabric behavior gracefully.
Pattern alteration isn’t magic—it’s methodical patternmaking. Master these, and even complex adjustments feel intuitive!
Altering Garment Patterns
When you alter garment patterns, you’re shaping fabric to fit your unique proportions, ensuring comfort and style meet flawlessly.
By mastering adjustments like resizing shoulders or refining seams, you can transform off-the-shelf templates into perfectly customized creations, and this process allows for a unique fit.
Blouse Alterations
Getting the perfect blouse fit requires some savvy.
Whether you’re tackling chest adjustments or sleeve alterations, these tweaks make all the difference:
- Widen side seams to improve tightness.
- Adjust armhole fixes by lowering or deepening the curve.
Experimenting with neckline changes for comfort and style, and using bottom adjustments to bring in excess fabric at the hips, can also enhance the fit.
Using these adjustments, such as sleeve alterations, can make a significant difference in achieving the perfect blouse fit.
Bottom Alterations
Fixing bottom alterations means tackling areas like the waistband, crotch, rise, and hips.
A waistband issue often needs a nip for swaybacks or a stretch for comfort. Crotch adjustments help avoid awkward bunching.
Rise alterations address comfort in seated positions, while inseam length guarantees just-right hems.
Don’t forget hip adjustments—these fine-tune the pattern for smooth movement, ensuring a perfect fit!
Common Alteration Techniques
When tackling pattern alteration, focus on Seam Manipulation for smoother lines, precise Dart Placement for shaping, and Grainline Adjustments to maintain drape.
Ease Alteration corrects tightness or bagginess, ensuring comfort.
Test adjustments with a Muslin Fitting to refine waist adjustment or sleeve adjustment.
Accurate body measurements are essential for fit.
Mastering these patternmaking techniques, like bust adjustment tweaks, will elevate your sewing projects to pro-level perfection.
Mastering Pattern Alteration
Mastering pattern alteration lets you fix common fit issues while refining your sewing skills with precision.
With the right tools, techniques, and a bit of practice, you’ll create custom-fitted garments that look and feel amazing, which is the ultimate goal of refining your sewing skills.
Practice and Prototyping
Muslin mockups are your secret weapon for sewing success.
They help you test fit, tweak designs, and avoid costly fabric mistakes. Use muslin fitting to refine patterns through iterative fitting and design exploration.
Focus on practical fixes like seam finishes and fabric choice before final sewing. Perfecting adjustments in sewing muslin mockups guarantees polished results in your finished garment.
- **Test patterns with muslin mockups.
- **Check and refine seam finishes.
- **Explore design ideas fearlessly.
Workspace and Organization
How’s your workspace looking? Bright lighting is a must for precision, while mobile storage keeps tools like tracing wheels and measuring tapes handy.
Use project boxes to avoid mixing patterns. A clear documentation system tracks adjustments and notes.
Keep pattern-making paper, a mechanical pencil, and rulers within arm’s reach. Accurate measurements rely on flexible measuring tape.
Organized spaces transform sewing into a breeze! They make it easier to work with precision and ensure that you have all the necessary tools, like measuring tapes, handy.
Effective Alteration Guidelines
Getting organized is key, but knowing the rules makes clothing adjustments easier.
Start with precise measurements to pinpoint fitting issues. Focus on truing seams and blending sizes for smooth patterns.
Prototyping benefits you by spotting errors early. Build alteration confidence with small bust adjustments or basic pattern alterations before tackling complex fixes.
Practice turns frustration into mastery.
Frequently Asked Questions (FAQs)
What is a pattern alterations course?
A pattern alterations course teaches you how to modify sewing patterns for a perfect fit.
It covers techniques like adjusting bust, waist, and hips, ensuring your garments look custom-made and feel comfortable every time.
Why is pattern alteration important?
Think of ill-fitting clothes as a squeaky wheel—it nags you until fixed.
Adjusting patterns guarantees your garments fit right, feel comfy, and look awesome, boosting both confidence and wearability while sidestepping common sewing frustrations.
Why is alteration of garment patterns important?
Adjusting garment patterns lets you create clothes that fit your body perfectly, reducing awkward gaps, tight spots, or uneven lengths.
It boosts comfort and confidence, making every handmade piece wearable and uniquely yours.
How do you alter a pattern?
Transforming a pattern feels like sculpting fabric to fit your unique shape.
Start by taking accurate measurements, adjust seams or lengths using the "slash and spread" or "seam method,"
and always test with muslin first, to ensure a proper fit, which is a critical step in the process.
How do I make a muslin pattern alterations?
Start by sewing the muslin with large stitches, so adjustments are easier.
Identify fit problems, mark changes directly on the fabric, and transfer them to the pattern.
Repeat until it fits perfectly—practice makes perfect!
What tools do you need for simple alterations?
You’ll need a flexible measuring tape, clear ruler, French curve, sharp scissors, pattern paper, a tracing wheel, pencils, and a good eraser.
Staying organized with envelopes or project boxes helps too!
What are pattern alterations?
Think of pattern alterations as tailoring blueprints to fit your body like a glove.
It’s tweaking a sewing pattern’s dimensions—length, width, curves—so your outfit moves effortlessly, feels comfortable, and flatters beautifully, which is essentially making adjustments to create a perfect fit that flatters.
What is the method of pattern manipulation?
Pattern manipulation reshapes patterns by cutting, pivoting, or spreading sections to adjust fit or add design elements.
You’ll need tools like a French curve, ruler, and tape for accurate adjustments without distorting proportions.
How to adjust patterns to fit you perfectly?
To fit patterns perfectly, measure yourself accurately, compare to the pattern, and adjust areas like bust, waist, and hips.
Use tools like rulers and French curves, blending sizes smoothly for comfort and a custom fit.
What is the meaning of alteration techniques?
Alteration techniques are like sculpting fabric; they involve adjusting patterns to match your unique shape.
You’ll reshape seams, adjust lengths, and tweak widths, ensuring garments fit comfortably while highlighting your body’s natural contours.
Conclusion
Did you know that over 80% of ready-made patterns don’t fit perfectly without adjustments?
Mastering pattern alteration for common issues guarantees your projects fit like they’re custom-made. From tweaking bust fit to adjusting lengths, it’s all about precision and practice.
Keep essential tools handy, measure accurately, and use techniques like slashing or folding with confidence.
With patience and these tips, you’ll transform your patterns into perfectly fitting garments that highlight your sewing skills beautifully.


